Hello December! It is about that time of the year where I start to roam about the house looking for drafts. The colder and windier it is outside, the easier it is to find them, and with a 1905 built house, there are always plenty of holes.
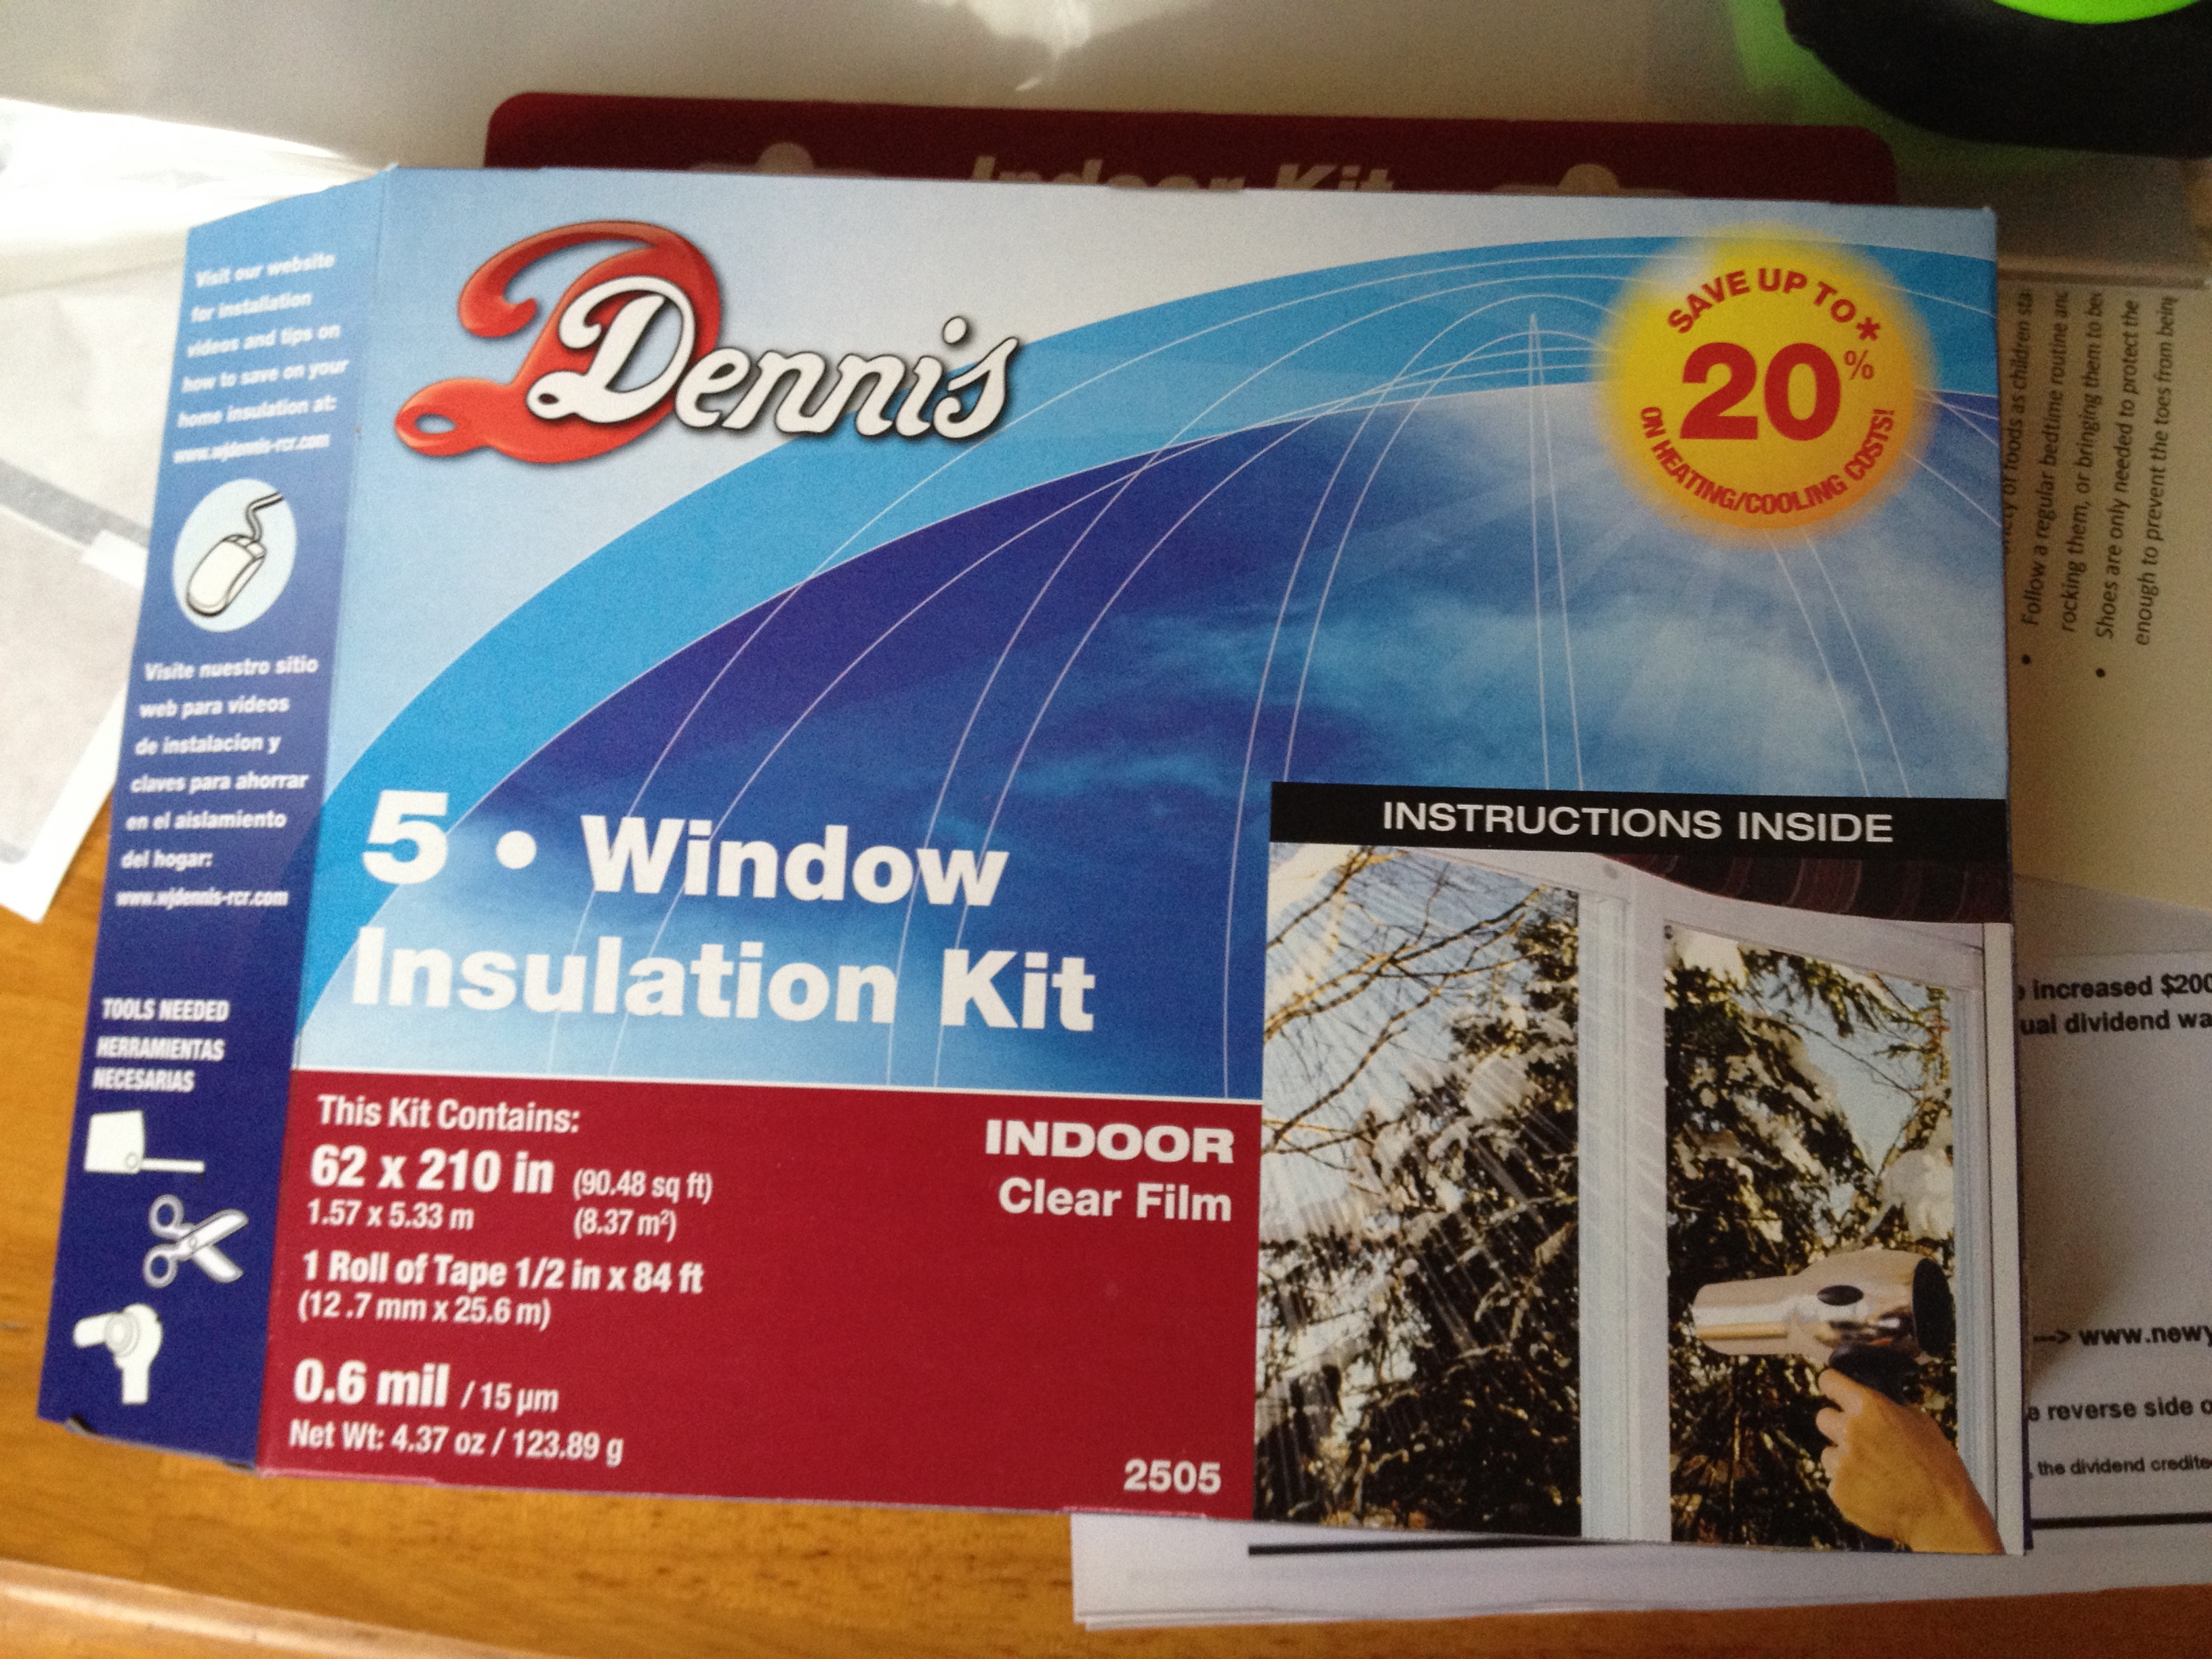
Today I sealed up our big living room picture window.
This window along with several others need to be refurbished. Until I find time or an experienced handyman, we’ll just have to make do with the ‘old school’ way of sealing up windows.
These kits are really easy to use. Just measure out your window size, add a couple of inches of margin/wiggle room and cut the plastic. Apply the double sided tape and then very carefully stick the plastic on.
In the above picture you can also see another project I just finished, planting a tree in our front yard. I planted a Japanese “Kousa” Dogwood in the front and a silver linden in the backyard.
The final optional step of plastic’ing up a window is to use a hair dryer to remove the wrinkles and ripples in the plastic.
Now you can enjoy a less drafty room!
Go Green!
You may be asking yourself why we don’t replace our leaky windows with a high efficiency thermal paned unit and the answer to that is that the dollars and cents don’t necessarily add up. Searching for the cost to replace vs repair old growth double sash wood windows turns up articles like this one (link).
Statistically, it is virtually impossible to recoup, in energy savings, the amount of money spent on replacing historic wood windows with new windows before the new windows need to be replaced.
Then there is the aesthetic concern. I love old houses, Shae ADORES old houses, so with any home improvement project that we tackle, preservation is always a factor that is considered.
Old House Lovers, Stop Reading Now
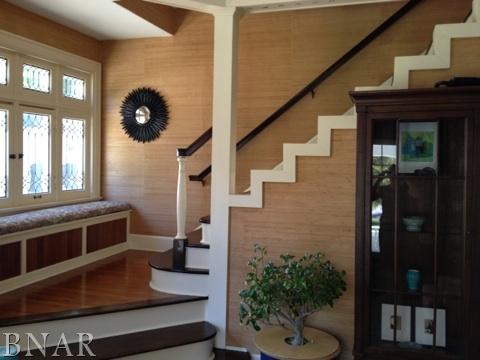
Living in an older neighborhood, we are no strangers to modern times trampling over history. For example, this house that is a part of our neighborhood was recently purchased for $300k. It was designed and built by a prominent architect around the turn of the century during the peak of his career.
Five months later, the house looks like this:
What happened? Did it burn? No. Was it a safety hazard? No. Was it dilapidated and beyond repair? No.
Here are some of the inside pictures taken from the realtors website.
So why on earth is this charming house being torn down? It was purchased by an individual so they could make themselves a private putting green and pretend they are putting for a green jacket.
Not every old house can be saved from idiocy, but by golly we will preserve ours for future generations.
I was very relieved to finish insulating the dormer/turret because it was a very labor intensive job. Not only were the rafter cavities oddly shaped, you also had to crawl through a narrow hole on your hands and knees, and then sit or lay in an uncomfortable position while you worked. With that said, I am satisfied with the end result.
The bathroom below feels noticeably warmer. It use to be one of the coldest rooms in the house and down right miserable to visit at 4 or 5 in the morning.
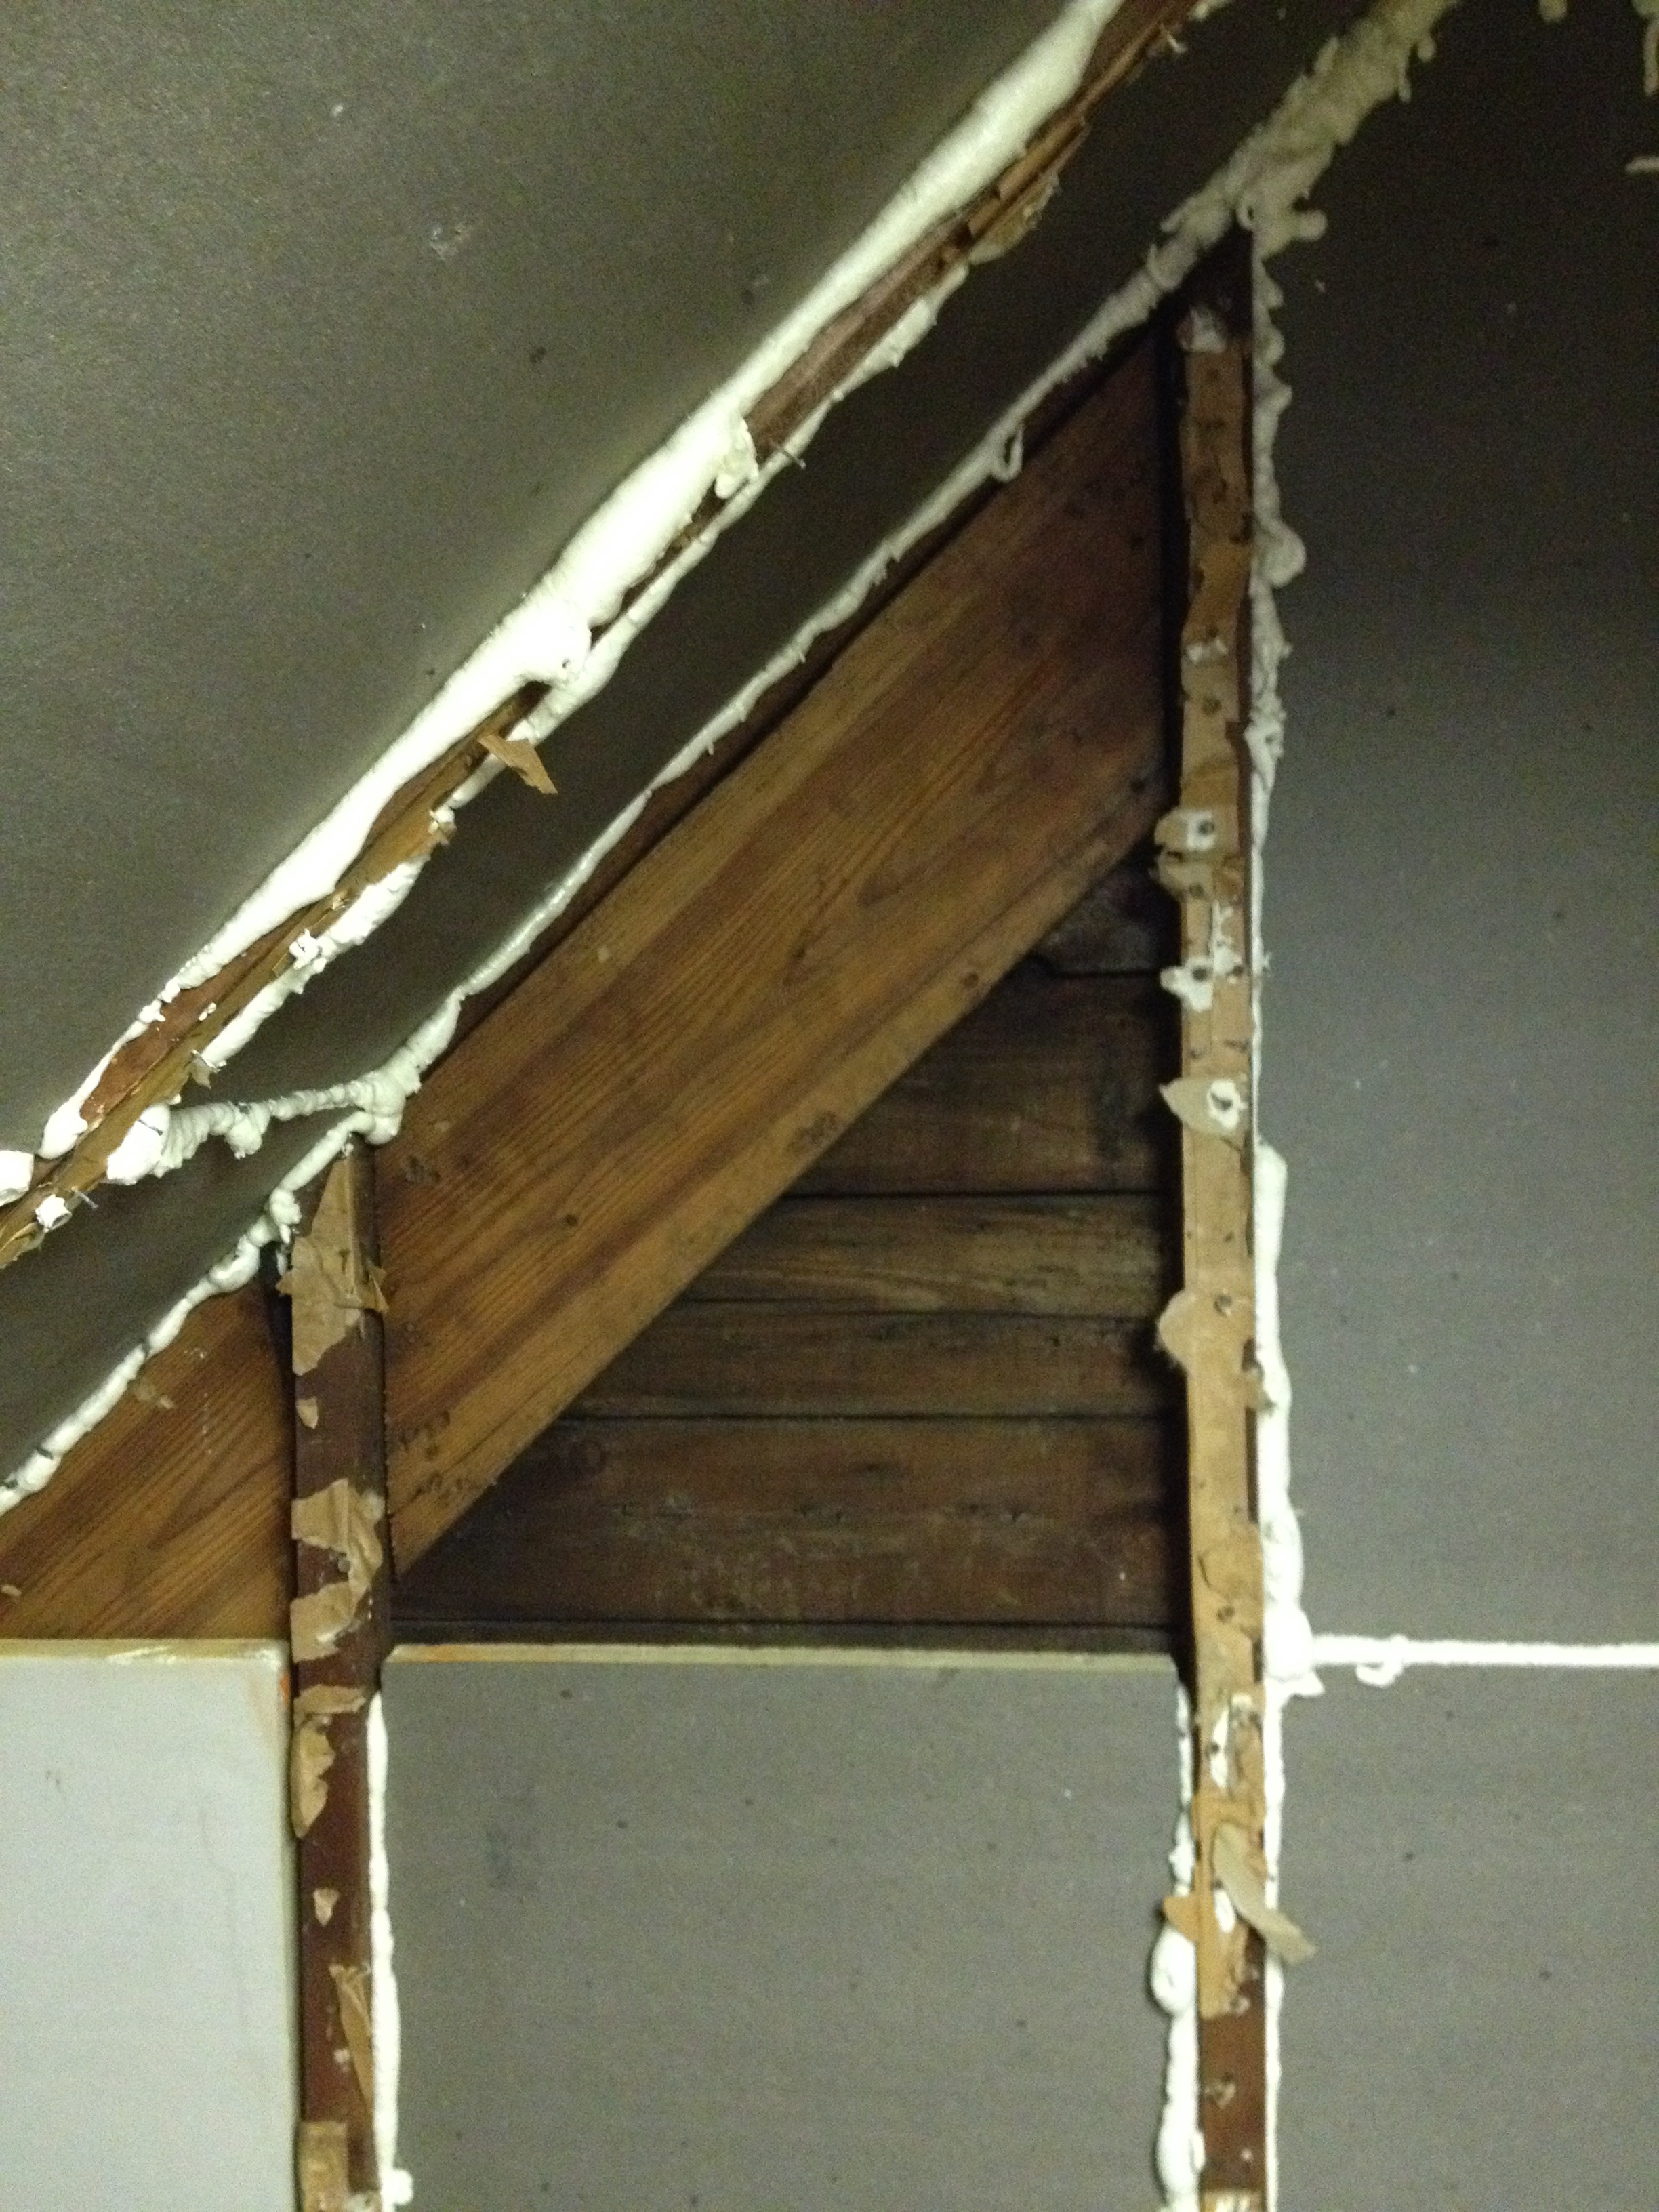
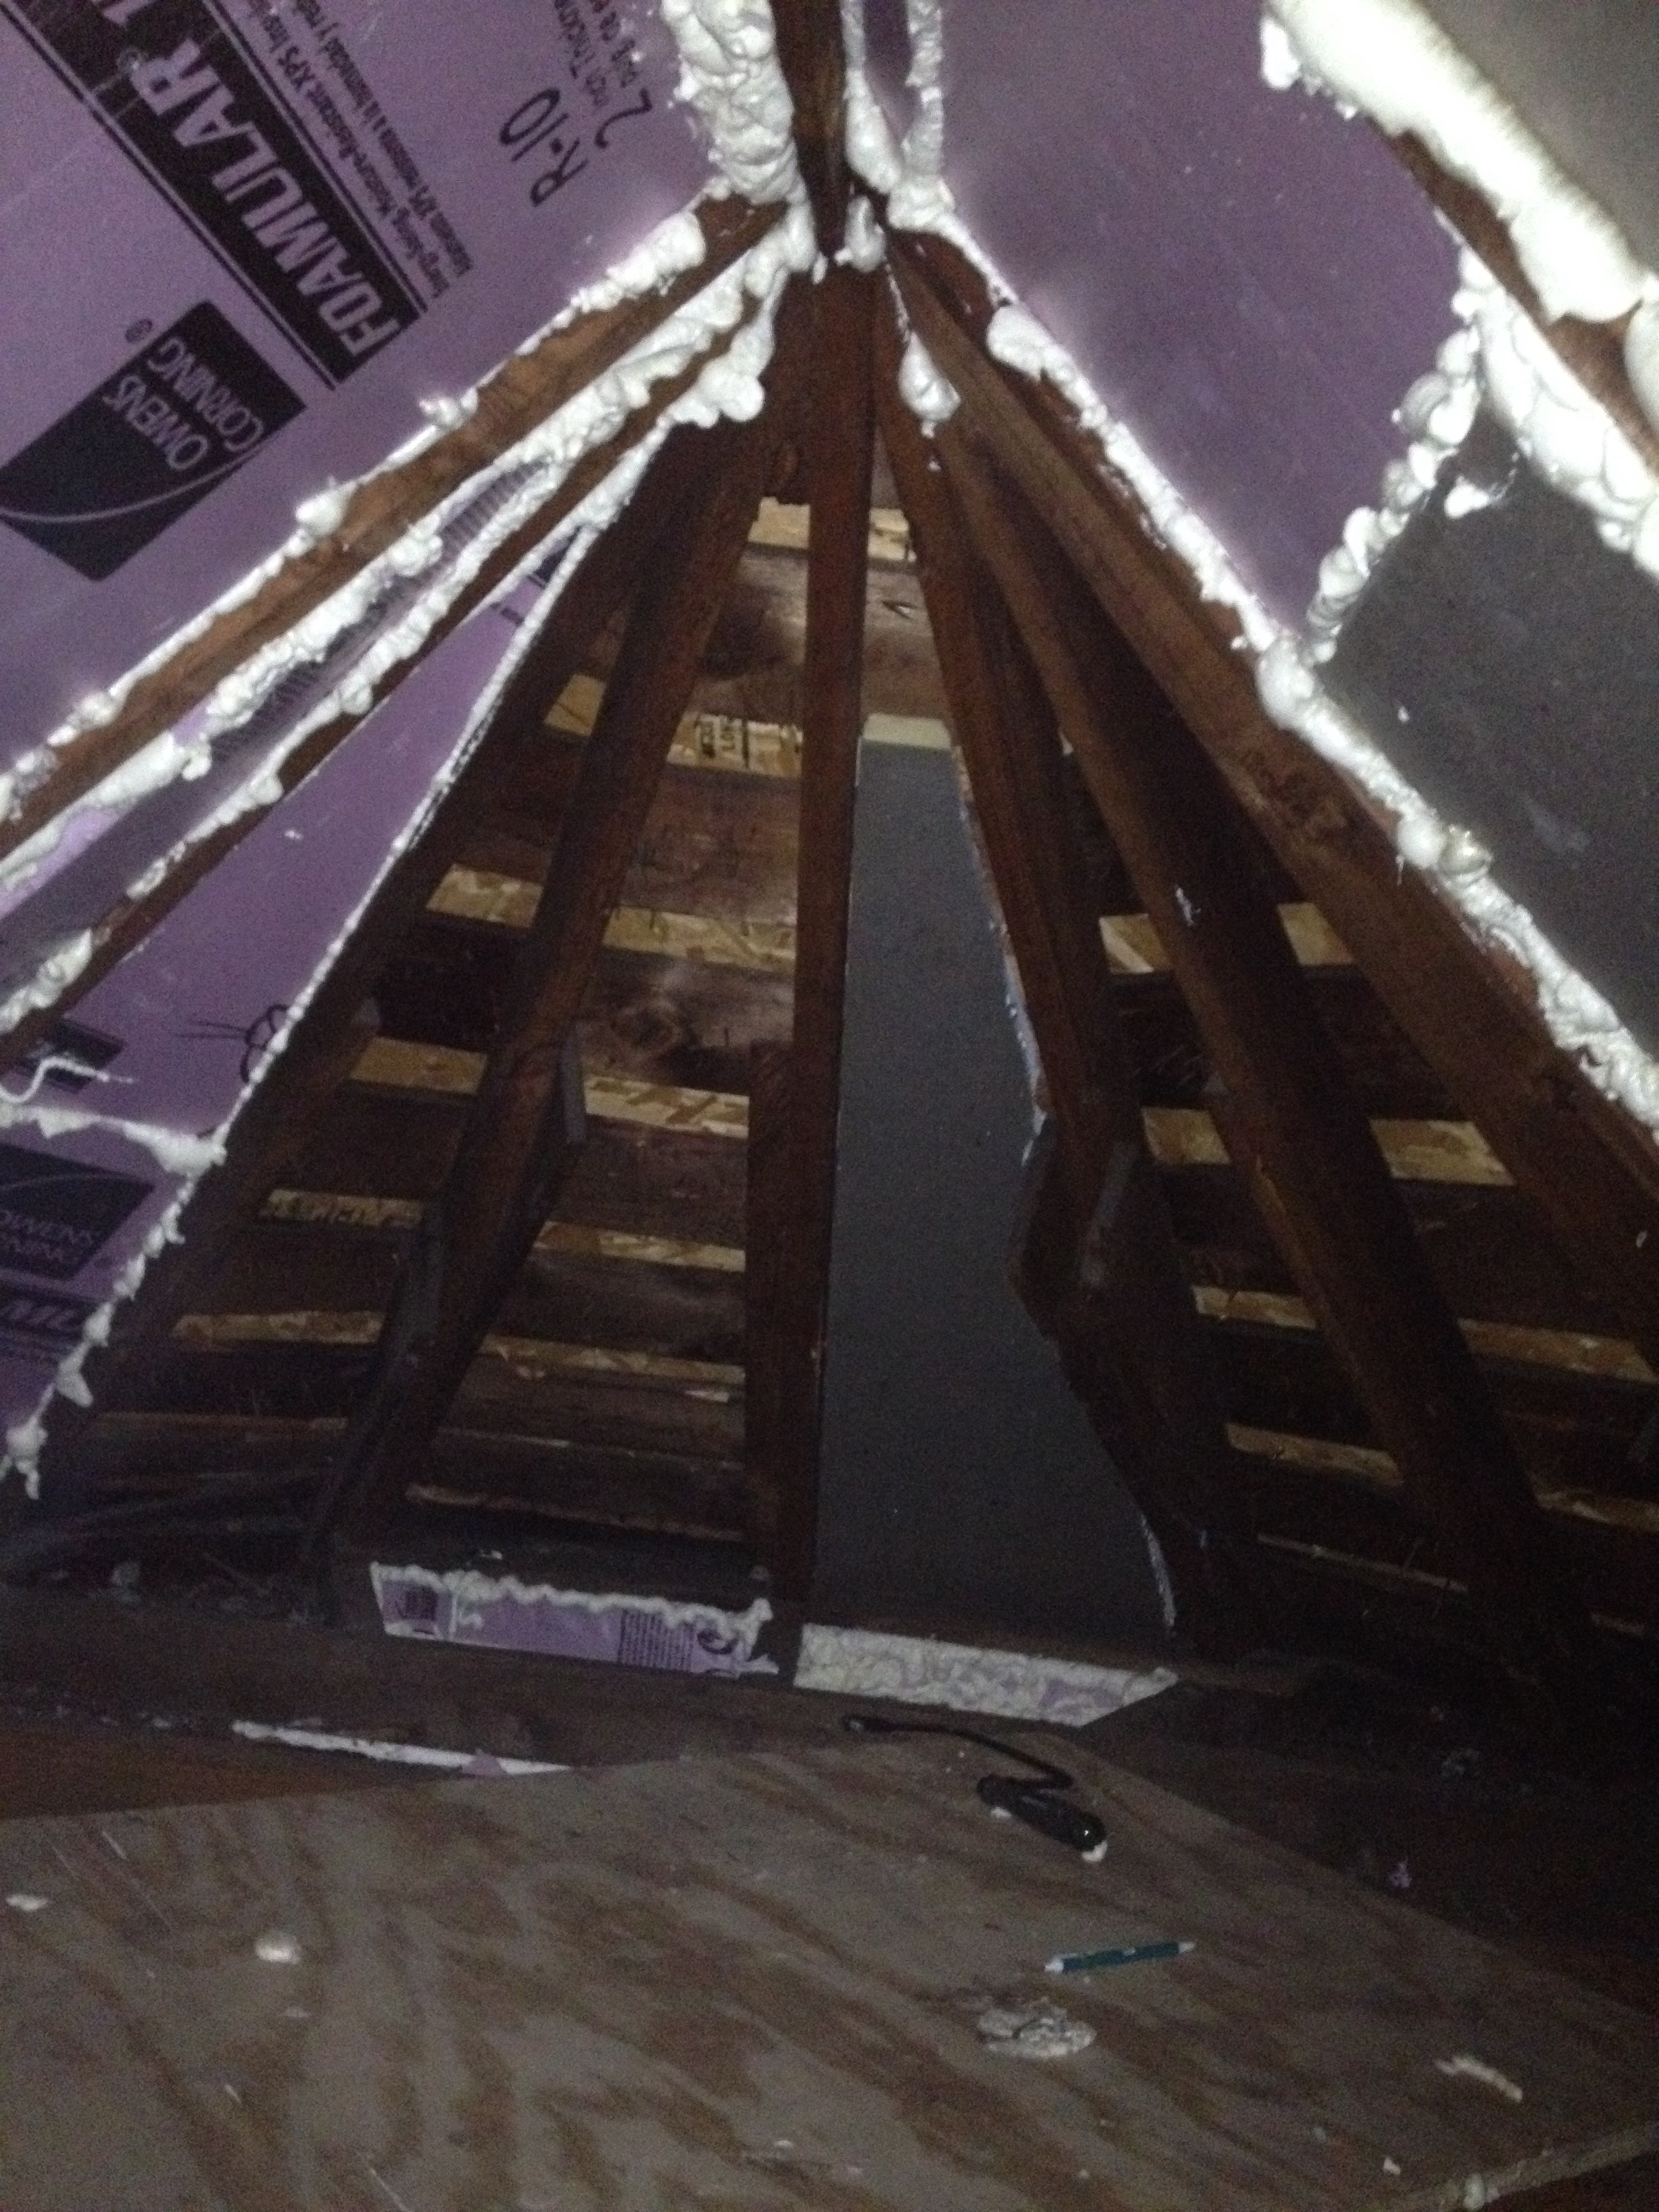
With the dormer finished and a pile of extra foam board I decided to expand the scope of the project and redo the insulation of the spare attic room (connected to the dormer). The previous wall/ceiling assembly was this:
Where the black line was the roof deck (plywood), the gray line below that were battens (1×6) for the original cedar shingles, then the brown 2x4s with the lavender being the old rock wool insulation. Finally the blue layer was some type of sheet rock shown in the picture below and covering all of that up was a flimsy panel veneer (pink layer – bottom).
After clearing away all of the old material I had a clean palette to work with.
Along the walls I insulated between the joists.
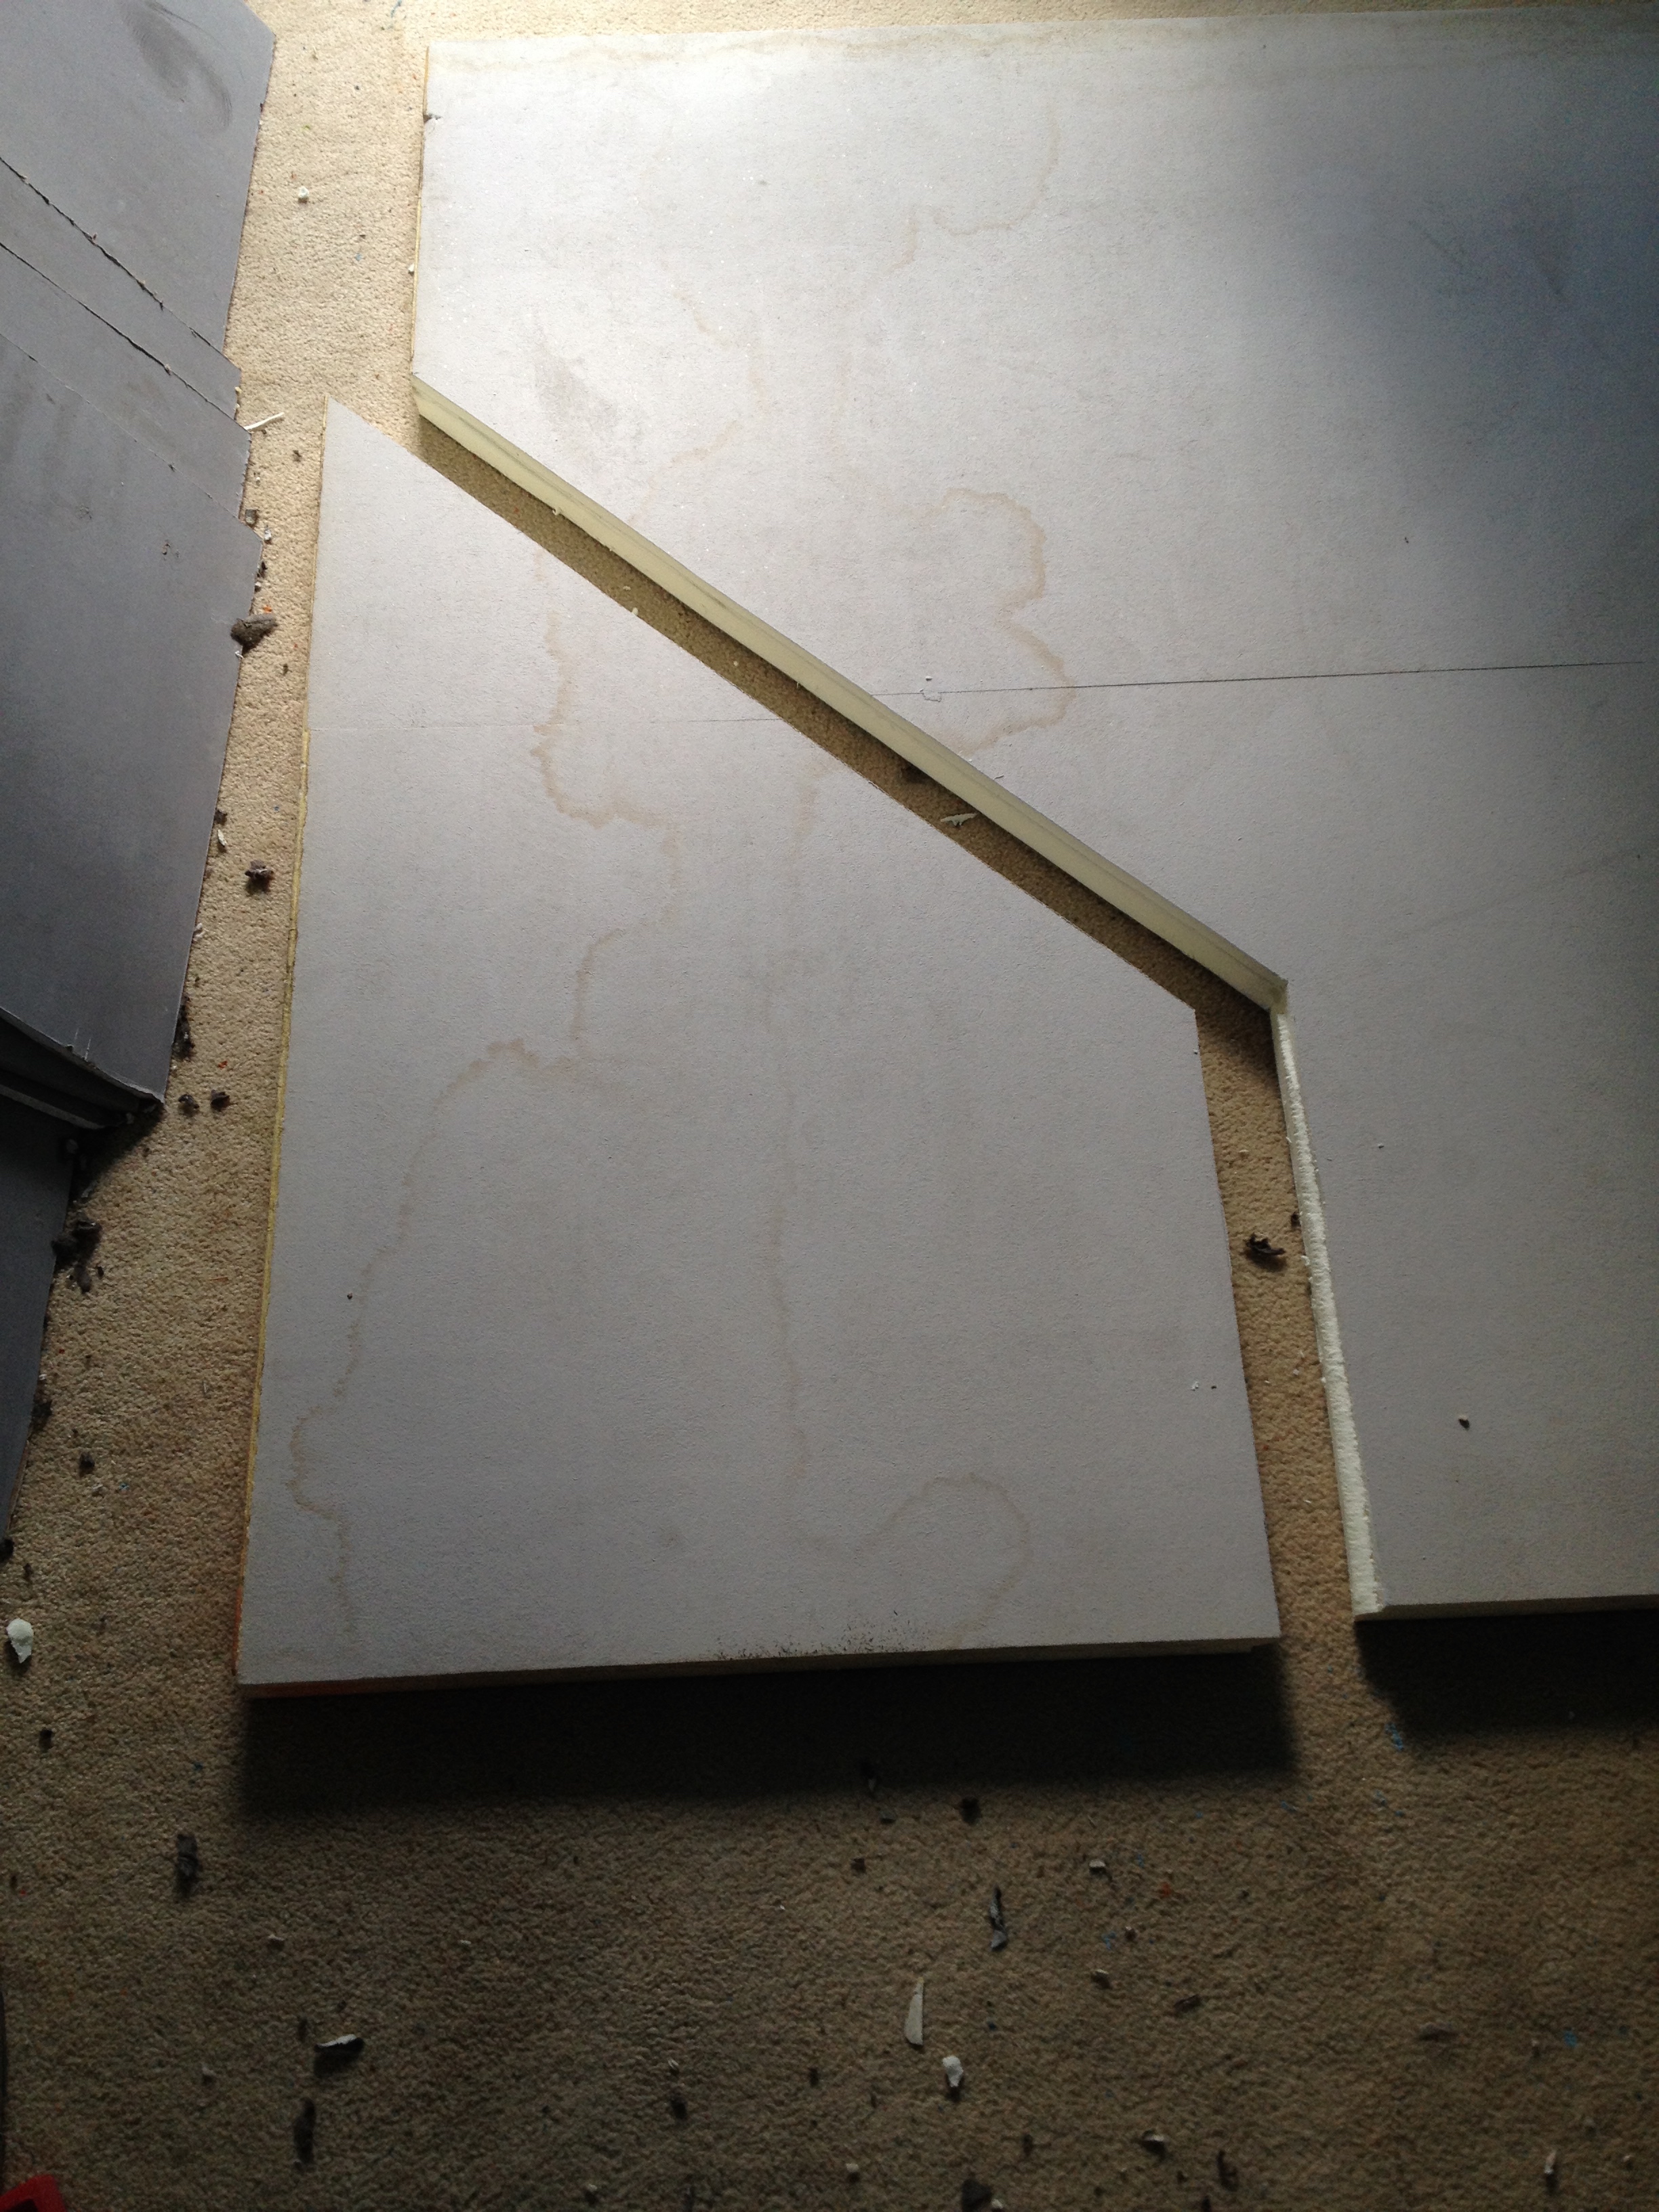
Filling the cavities between studs and rafters was simply a matter of measuring
Cutting
Fitting into place and foaming along the edges.
Here is the end result.
This room went much faster than the dormer. I spent a few mornings and a Saturday working on it. I had just enough foam board to do this room. Eventually, I would like to double the R value of this room by installing an additional 2″ of foam board on the underside of the rafters. That would bring this room up to an R 20-25, still well below the recommend value of 30-38 for a cathedral ceiling in zone 5.
Materials cost around $220. Assuming it will cost $700/year to heat our house (based off last years bills) we can make some predictions about the payback period. If we save 5% a year, $700 x 0.05 = $35, then it will take about 6 years to make up the material cost.
A different way to think about it is that we may be able to raise our thermostat by 5% and pay the same amount per year. Last year we kept the temperature at 62°. This year we have raised it up to 65° (about a 5% increase). I do not think that temperature and bills scale linearly though because a larger difference in internal/external temperatures would likely result in a nonlinear amount of heat loss. Anyway, in six months time, I will have another set of bills to add as a second data point in this little experiment.
It is hard to believe that it is almost Thanksgiving. What happened to 2014? I haven’t done any big home improvement projects for some time so there was an itch that needed scratching.
Secret Entrance
That looks like a rather innocuous attic wall. I wonder if there is something behind it? It would be a dull blog post if there wasn’t!
Our 2nd floor bathroom is part of a dormer/turret and this is the unfinished attic portion. Some sort of rodent had made a nest up here but I didn’t find any signs of recent activity.
I had several goals for this space.
Clean out all of the nests and old soiled insulation
Uncover all electrical wiring so I could assess its condition and possibly replace
Insulate the space to be air tight
#1 wasn’t very difficult. Wearing a respirator, long sleeves, and gloves I carted out seven trash bags full of crud. Whenever you are working in an unfinished attic, you will want to pay special attention not to step through the ceiling. To that end, I laid down a scrap piece of plywood so I could crawl around without falling through into the bathroom.
With the space ‘cleaned’ up I was able to inspect the exposed electrical.
109 year old wiring
Given its age, it looked to be in good shape. There are some spots that I may want to address in the future (receptacle wired in with a light switch). Eventually we will hire out an electrician to redo the whole house, but until then the plan is to leave well enough alone.
#3 goal of re-insulating the space took some consideration. Fiberglass rolls and blown in cellulose would not make the space air tight (both of these types of insulation are air permeable). I knew that I wanted to insulate against the rafters, not along the floor joists because the existing electrical was in the floor joists and because the finished attic space connected with this unfinished space.
The only insulating products that I know of that are air impermeable are foam based. You can either go with a spray foam or a rigid foam board product. Spray foam is not for DIYers. There are kits that are sold for DIYers but they start at around $600. Foam board is best applied in continuous sheets on the underside of rafters or even better yet on the roof deck itself (outside of house). Seeing as we just had a new roof put on, and a curved turret makes it almost impossible to hang straight boards, I chose to use a hybrid approach.
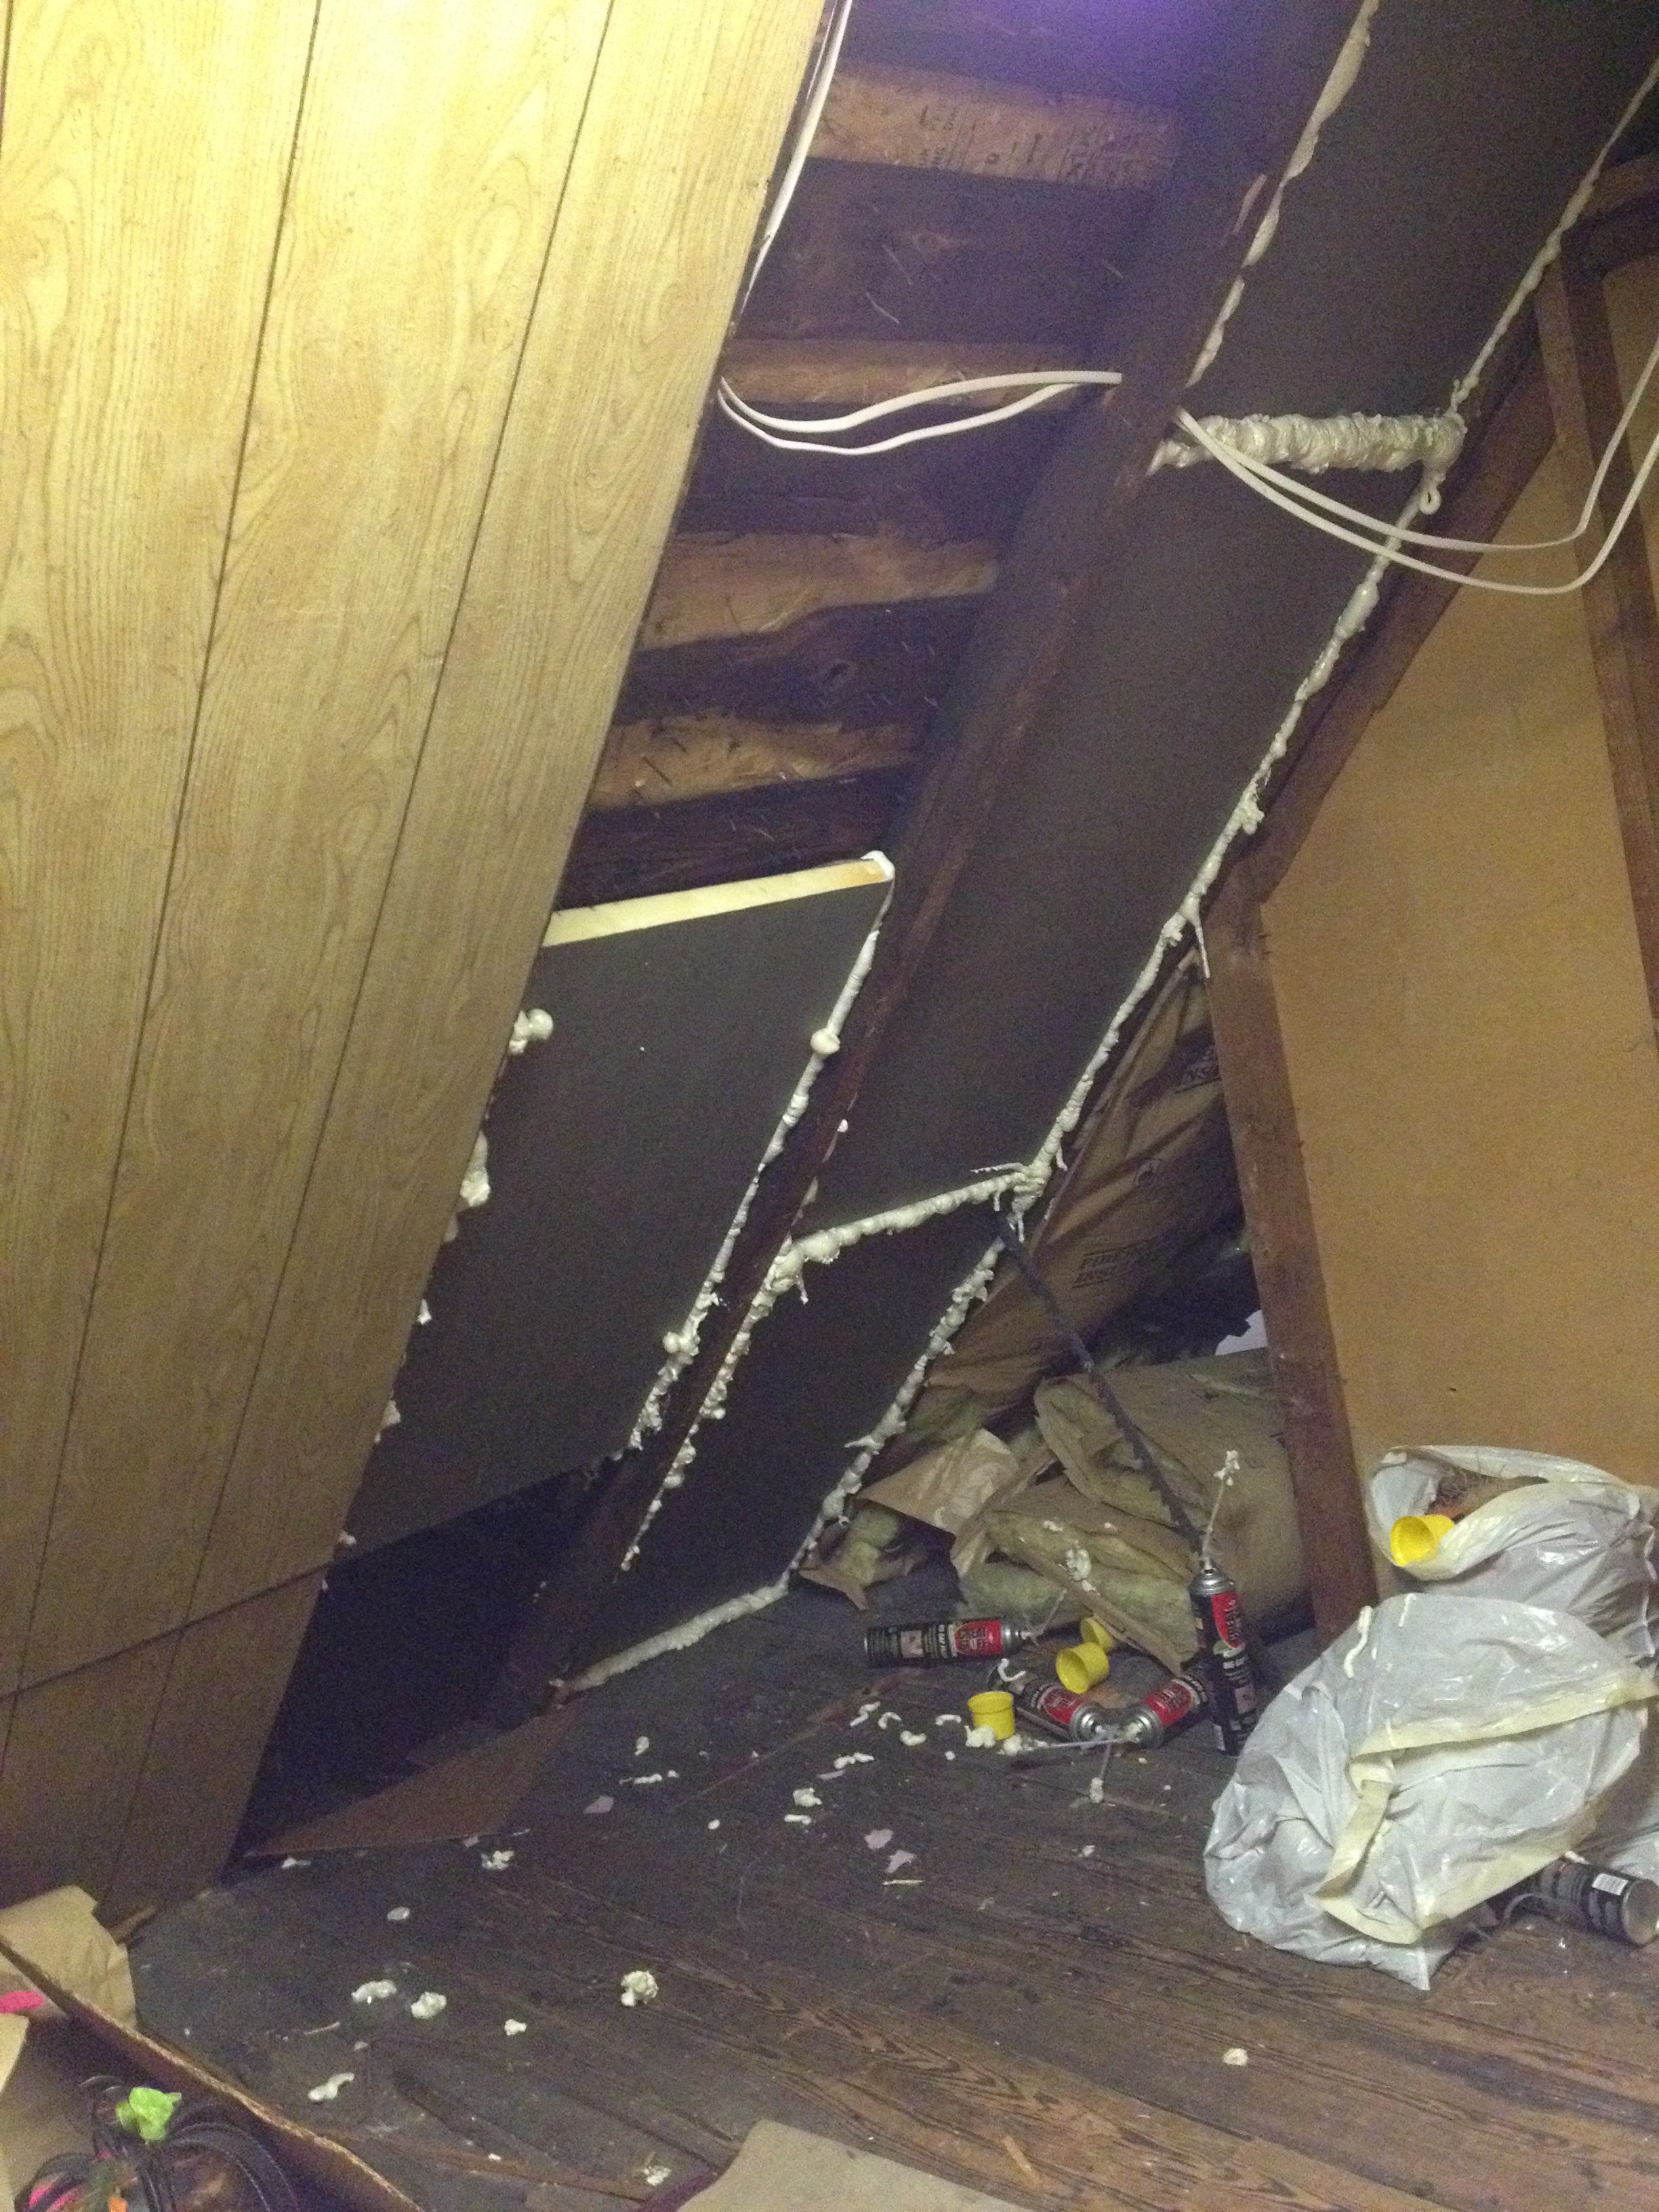
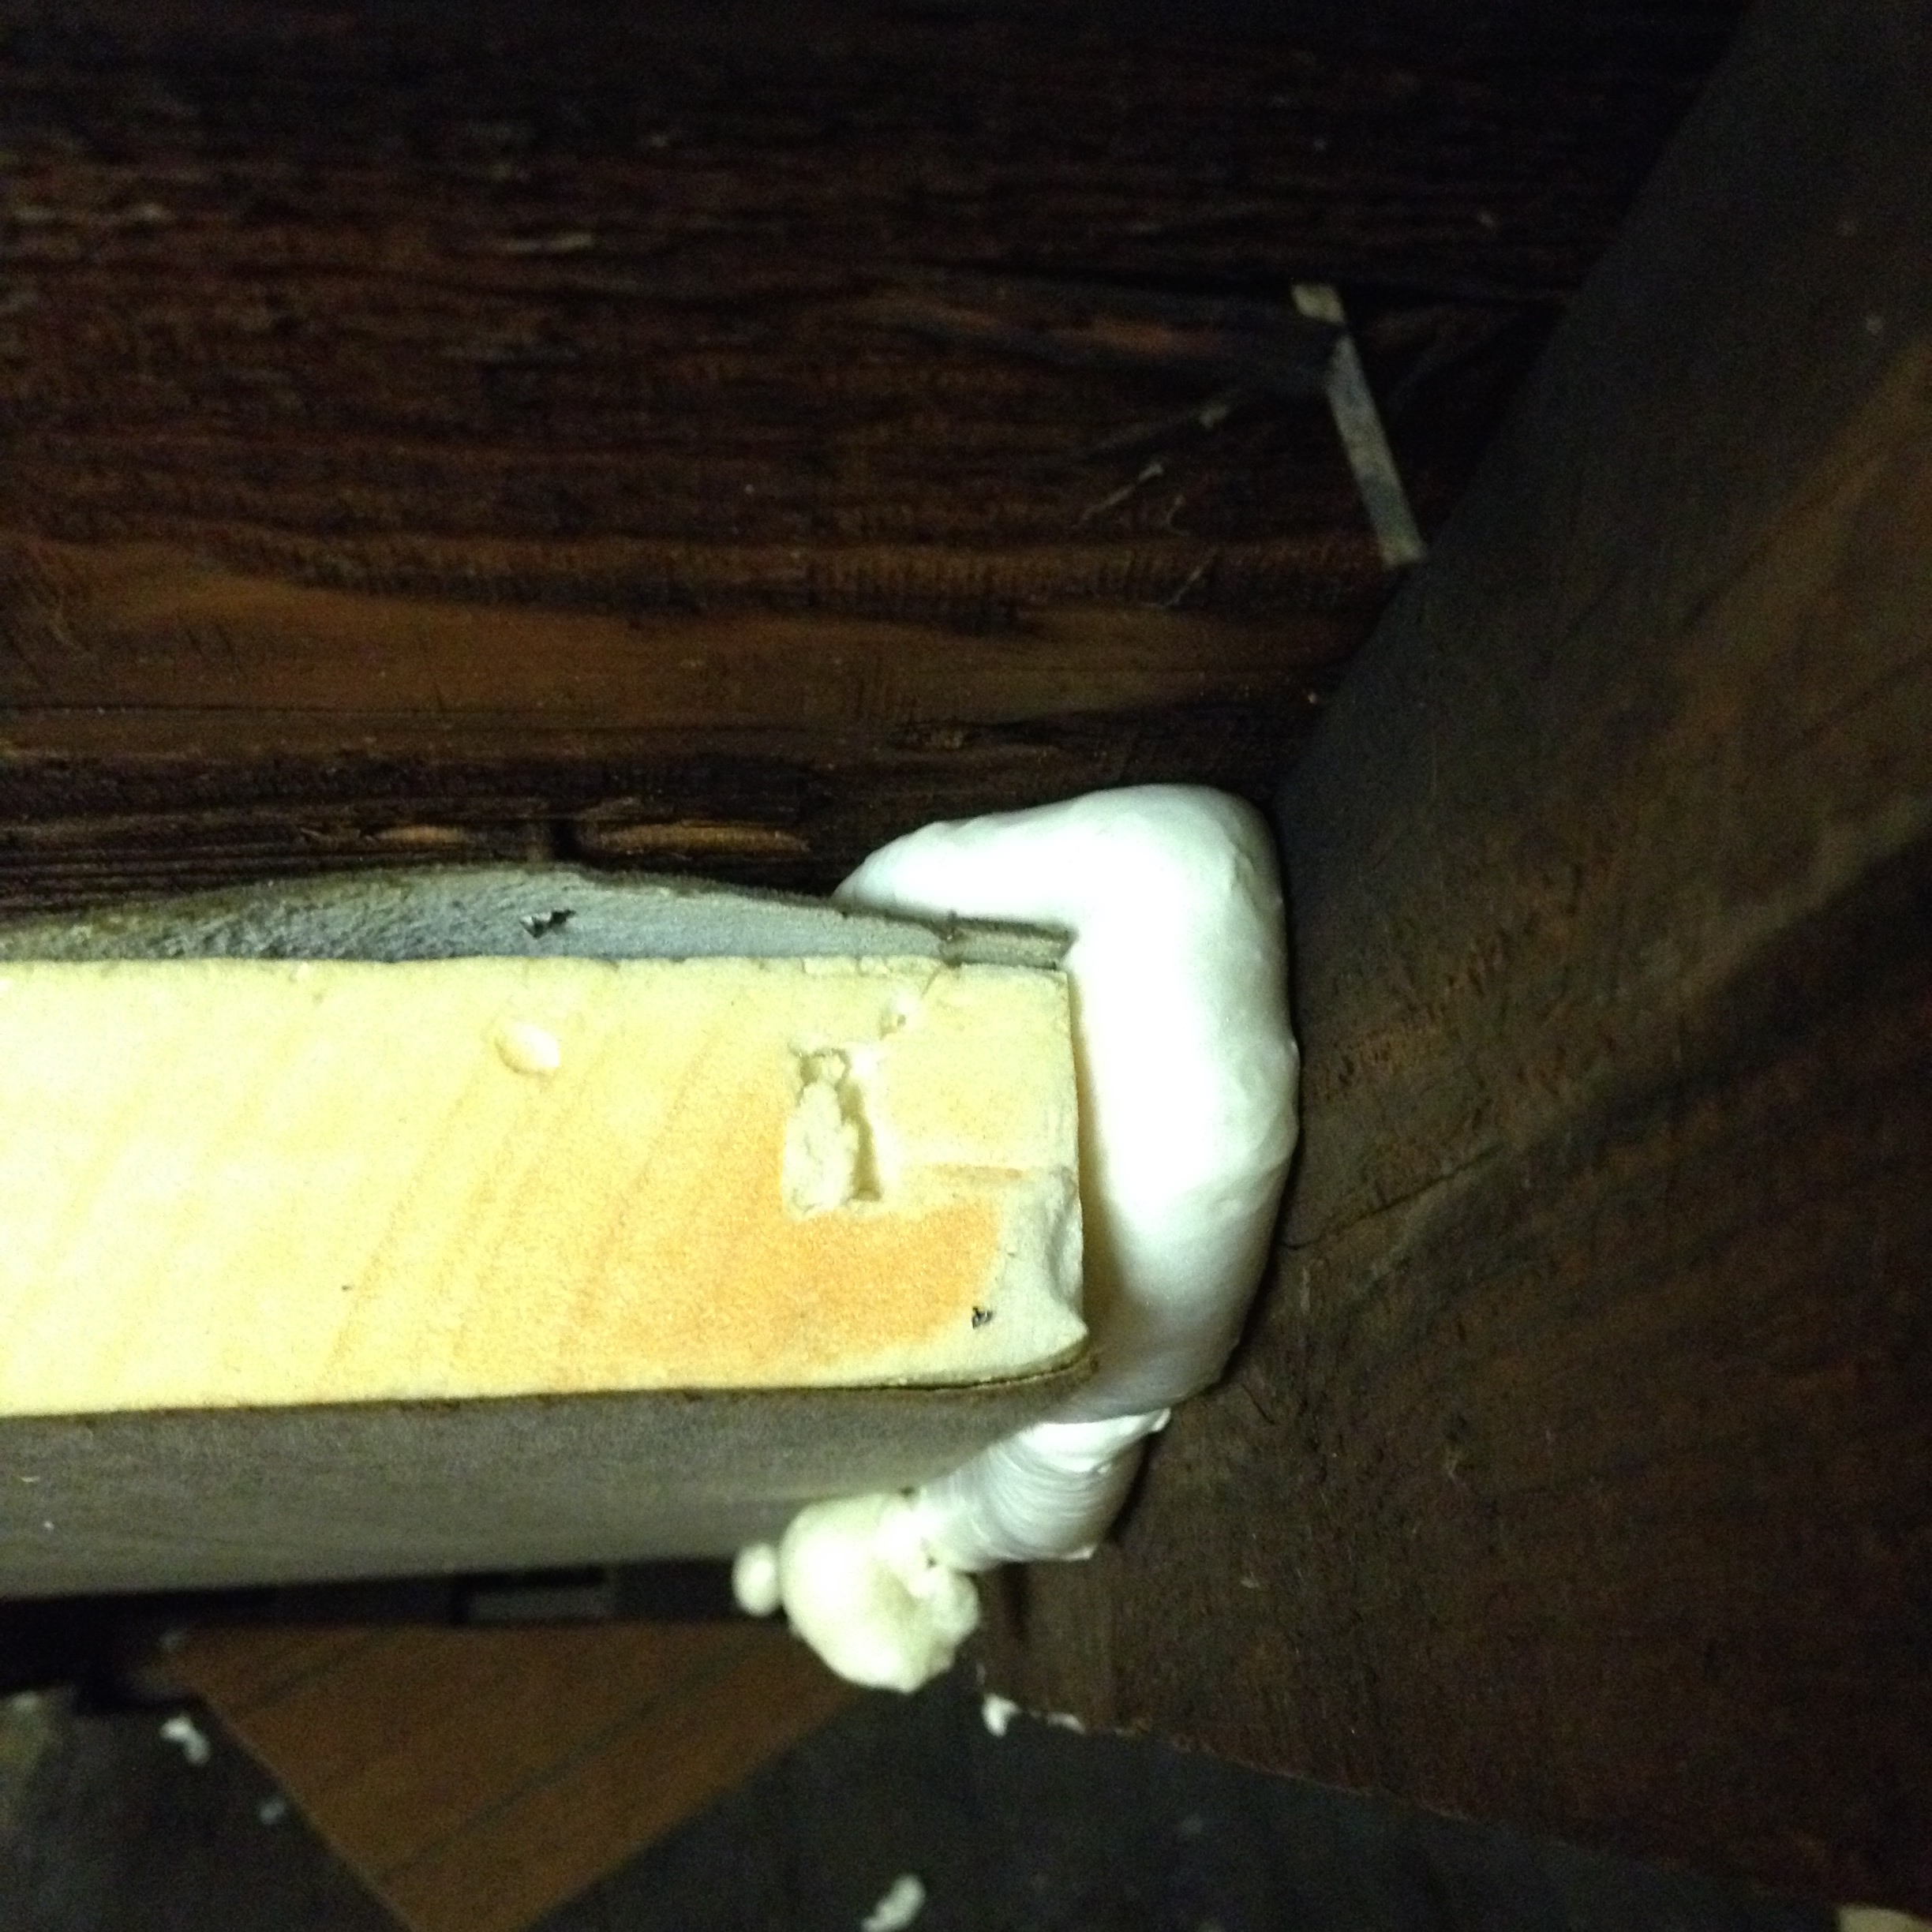
Cut & Cobble is an insulating technique where you cut pieces of rigid foam board to fit in-between joists or rafters. Then you use canned spray foam to seal the edges. Here is an example of where I have insulated using cut and cobble.
The foam board should have about a half an inch gap to allow the spray foam nozzle to fit. While you could fit the boards snugly against the wood you would have a hard time sealing the edges because you would either have to caulk or tape them.
Ideally, an air gap would be left between the insulation and roof deck to allow air to circulate from the soffits to the ridge vent. This helps keep the roof cool in the winter and prevents ice dams from forming.
Yet another reason why I wanted to redo the insulation in the attic is because last year when our roof was redone, the roofers correctly installed a ridge vent. The pre-existing fiberglass bats did very little to keep air from moving from the ridge vent/soffit system to the conditioned space. In fact, in some spaces you can see the ridge vent while standing in the attic!
nada insulation 🙁
Cut & Cobble is meant as derogatory name because it has many critics. For starters, it isn’t exactly pretty to look at.
About 60% done with dormer
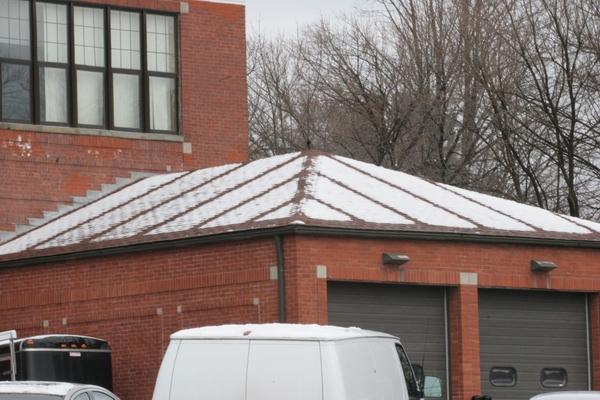
The process of measuring, cutting, fitting, and installing tens or even hundreds of panels is very time consuming. C&C allows thermal bridging. Thermal bridging is where heat moves through a less insulating material, such as a 2×4. After a frost or light snowfall, thermal bridging may be visible from the outside.
guess where the rafters are
Not many studies have been done on C&C, but there are many anecdotal stories of premature failure where the edge sealing fails either immediately or after some time has passed. Finally, the cost of C&C is questionable compared to hiring out a professional spray foam contractor.
I have thought about these negatives and believe that C&C is still the right option in our circumstance.
I am not interested in how it looks. The areas that I am insulating are not living spaces.
I am doing the work myself so it is not like I am paying an hourly wage to someone to install a tedious product.
Fiberglass also allows thermal bridging and that is what we have installed right now
premature failure *might* be an issue. Then again, it might not. This is a gamble.
I got an awesome deal on factory seconds insulation meaning that the material cost for this project is well below what the alternatives would be.
For $80 + $20 delivery I bought approximately 25 panels of 4’x4′ x assorted thickness (between 1 1/2″ to 4″) of polyisocyanurate (polyiso) rigid foam board off a guy on craigslist.
If I had to guess, I would say the retail value of this insulation would be around $500. Polyiso has one of the highest R values per inch of any insulation at 6.5.
I only need a small fraction of that bundle to finish the dormer. In the meantime, I moved the extra from the garage to the attic so it can ‘work’ while it is being stored.
When I get this project wrapped up I’ll post a followup with pictures and any final thoughts that I had on doing the project. So far, I can attest to the length of time required to C&C. It will be interesting if there are any noticeable differences in temperatures when it is all done.
Being a home owner is awesome. That awesomeness has a price stapled to it and when we became home owners for the first time last year, it became abundantly clear that we would need to acquire some more stuff. One of those things was a lawn mower and because we moved in at the beginning of the summer it wasn’t something that I could procrastinate on.
Who am I kidding, I bummed and borrowed neighbors mowers for the first month while I avoided spending any more money on house stuff (buying five new appliances, a water heater, mattress, and tons of other stuff will cure you of shopping).
Thankfully, my in-laws gifted us with their used corded electric mower. It had a tiny 18″ mowing deck, but our yard is tiny and most importantly the price was right, free! I bought a new blade for it and a really long extension cord and quit bothering our neighbors (probably to their relief). Over the course of the summer I learned the best way to cut the grass while being mindful of the energy supplying umbilical cord. It got the job done, even if I spent more time untangling cord than cutting grass.
This spring shopping fever was starting to take hold again. All of the home improvement stores had such nice displays of mowers. The memory of fighting extension cords was still fresh and motivating me to find something better. Gas mowers have been around a long time, don’t have cords to worry about, and are economical. I used to mow my parents lawn and some lawns around my hometown using a trusty gas mower, but given the fact that we have such a dainty yard and no other gas powered tools, it seemed inefficient to add a gas tool to our otherwise all electric collection. A corded electric mower was out of the running from the get go but maybe a battery powered one might be the answer. Battery powered mowers have come a long way in recent years thanks to the mass production of lithium ion batteries. These energy dense rechargeable batteries have taken the consumer electronics market by storm, but like any rechargeable battery, it will wear out over time. The prospect of spending $100 every three years is not very appealing to me. The only other way of mowing a yard is by human power. Reel mowers are a centerpiece fixture of my imagining of the 1950s. One of our neighbors has a reel mower and it is wonderfully quiet, especially when his neighbor brings out a gas monster. My wife, Shae, is all in favor of reel mowers, but she’s also mowed the yard once (ever in her whole life). So like any on-the-fence individual, I did nothing and slugged out another season with the long tailed red devil.
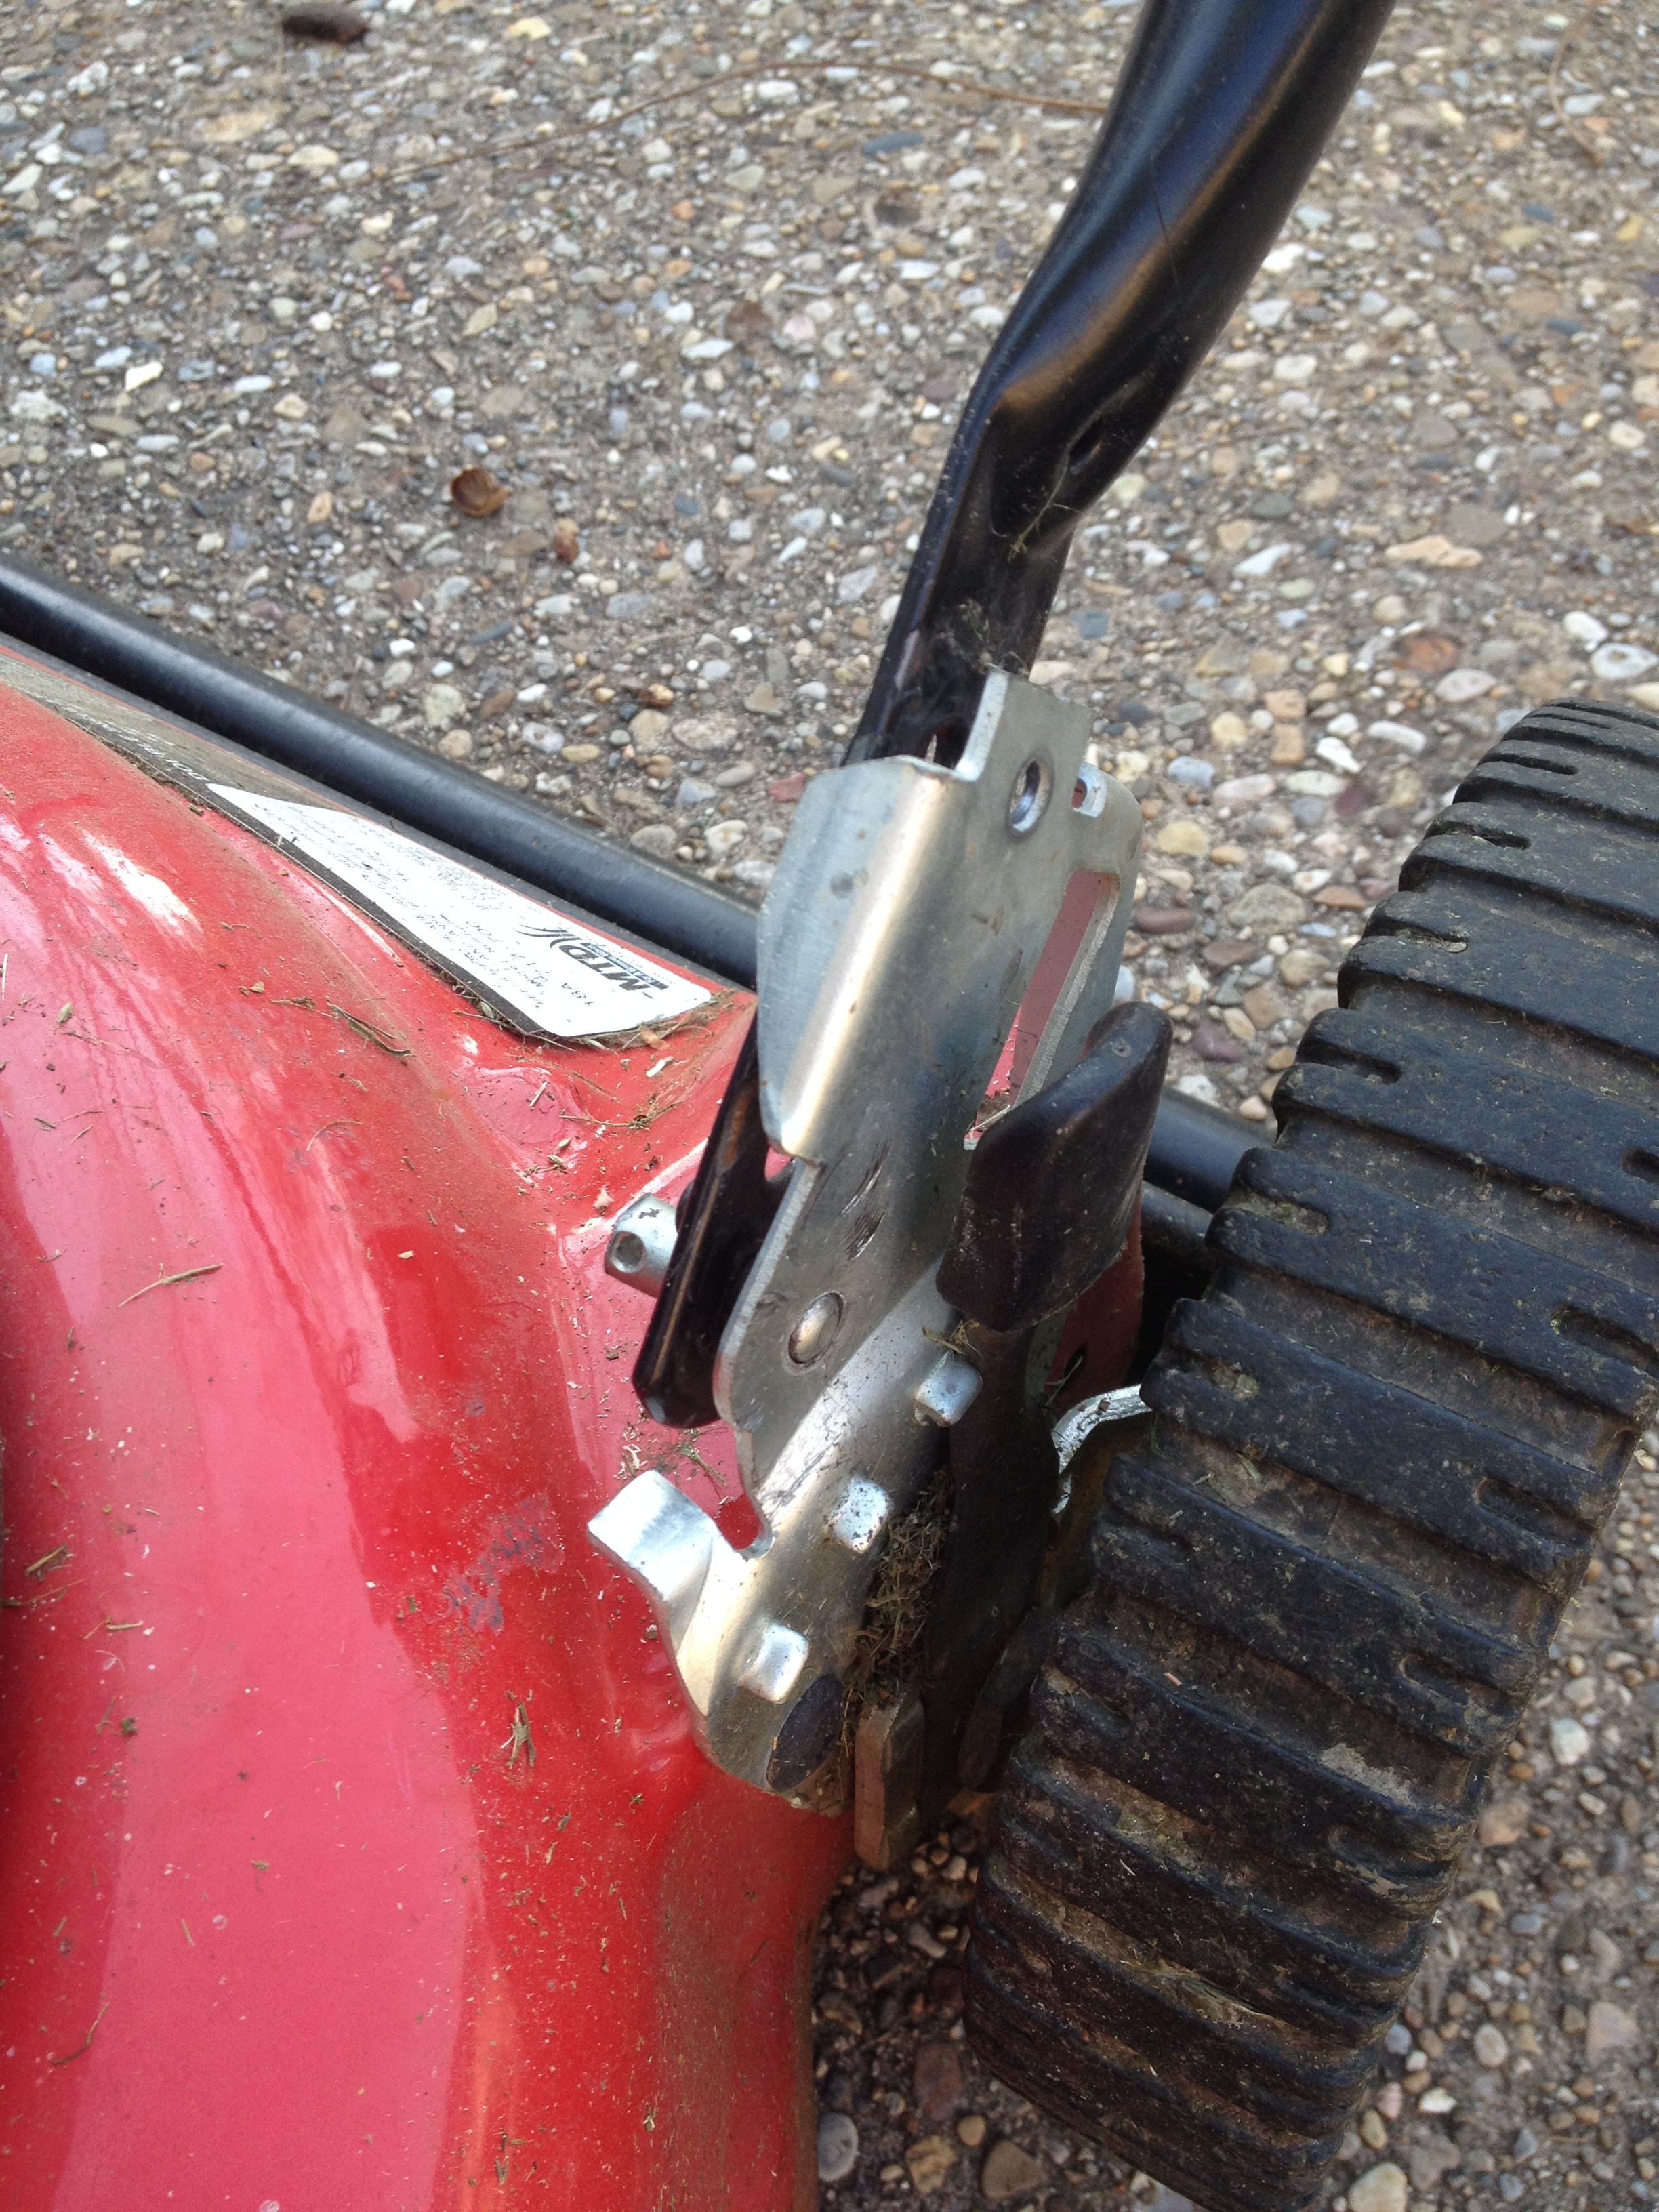
This past week while mowing the yard, the mower became very difficult to steer. Looking down I saw that one side of the handle had disconnected from the mower body. “AHA, the mower is broken, now I can justify a new one”, I thought, until the ridiculousness of that statement hit me a minute later.
Knowing what I had to do, I went to the hardware store and spent $1.31 for a new bolt and wing nut.
Two minutes later, the mower was fixed.
While this mower is a bit of a pain to use, it does do the job it is meant to do and until it properly dies, I’ll keep on using it. How often do we throw something out or buy something new just because we don’t have the best or shiniest. I bet I can get another year out of this mower, and at the end of next year, I will probably say the same thing.
Thanks in-laws for the functioning mower. It gets the job done and we’ve been able to put money towards things that really matter, like Frugal Boy’s education fund.
Hello July! June was a rainy month, so much so that it set the record as the 3rd rainiest in area history. The last time we had more rain in June was back in ’93.
All of that rain has made the ground swollen with water and couple that with gusty winds and you have the perfect recipe for downed trees. This morning we woke up and discovered that the tree on the property line had finally succumbed to gravity and fell under its own weight.
Our neighbors rented a chainsaw and had it turned into firewood by lunch.
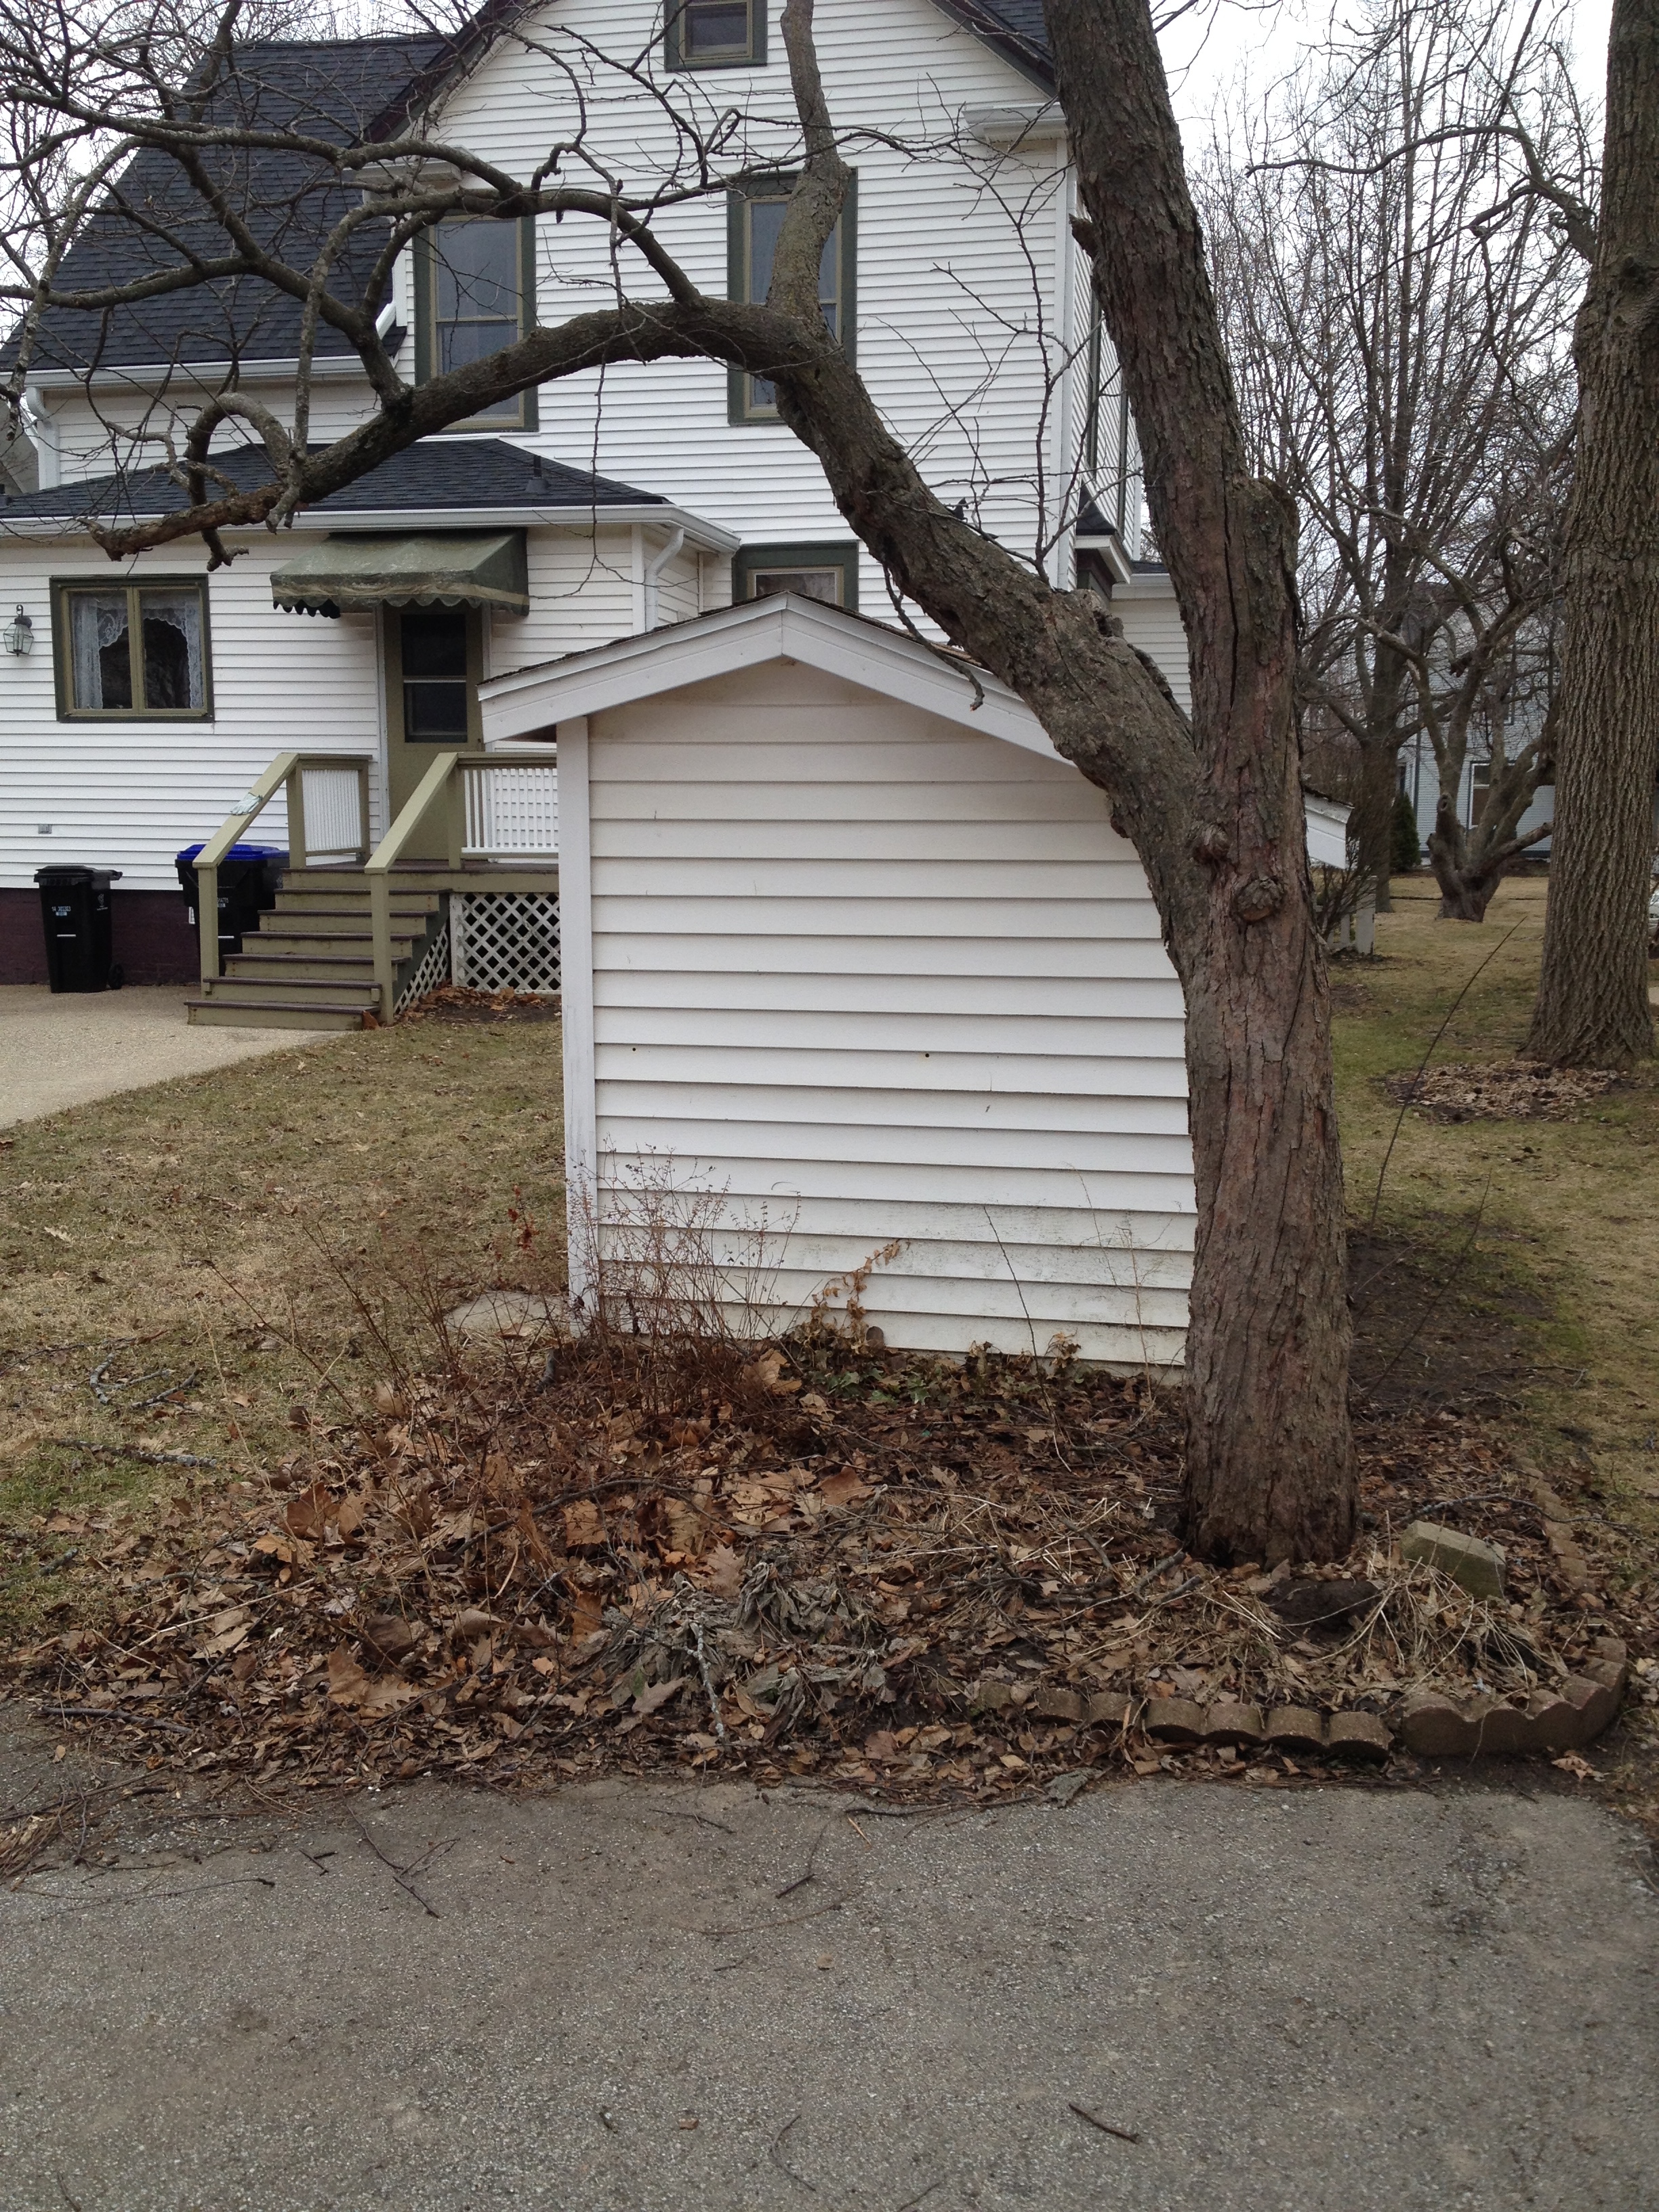
If you noticed the pile of dirt at the bottom of the picture, that was my doing. I wasn’t about to let this all day chainsaw rental go to waste, as I had my own lumber jacking to do. Here was the target.
This small tree was almost dead last year when we moved in and it was completely dead this summer. The squirrels liked to perch in it and that was about all it was good for. I started by transplanting a bunch of hostas that were growing around the trunk to safer homes in the yard. Then I set about digging a big hole around the trunk.
Apparently, hostas attract slugs, so I found a few behemoths.
After a couple sweaty hours of digging it was time to put my tree slaying plan in action. I was simply going to push it over.
TIMBER!
The best part was that there was no stump left in the ground. I just backfilled all of the dirt that I had dug out and now you’d never even know a tree was ever there.
By doing the work myself, I saved between $125-450. I also got a great workout in!


 The bathroom below feels noticeably warmer. It use to be one of the coldest rooms in the house and down right miserable to visit at 4 or 5 in the morning.