We have been doing a slow burn birthday celebration for Frugal Boy for the past week that culminated with a trip to his grandparents house.
On Friday night we made sugar cutouts.
Then on Monday he got a cupcake.
That night he also got to open a few of his cards.
Then we built a snowman. His name might have been Olaf.
Olaf is about the size of a snowball now thanks to the warm weather we have had over the last couple of days.
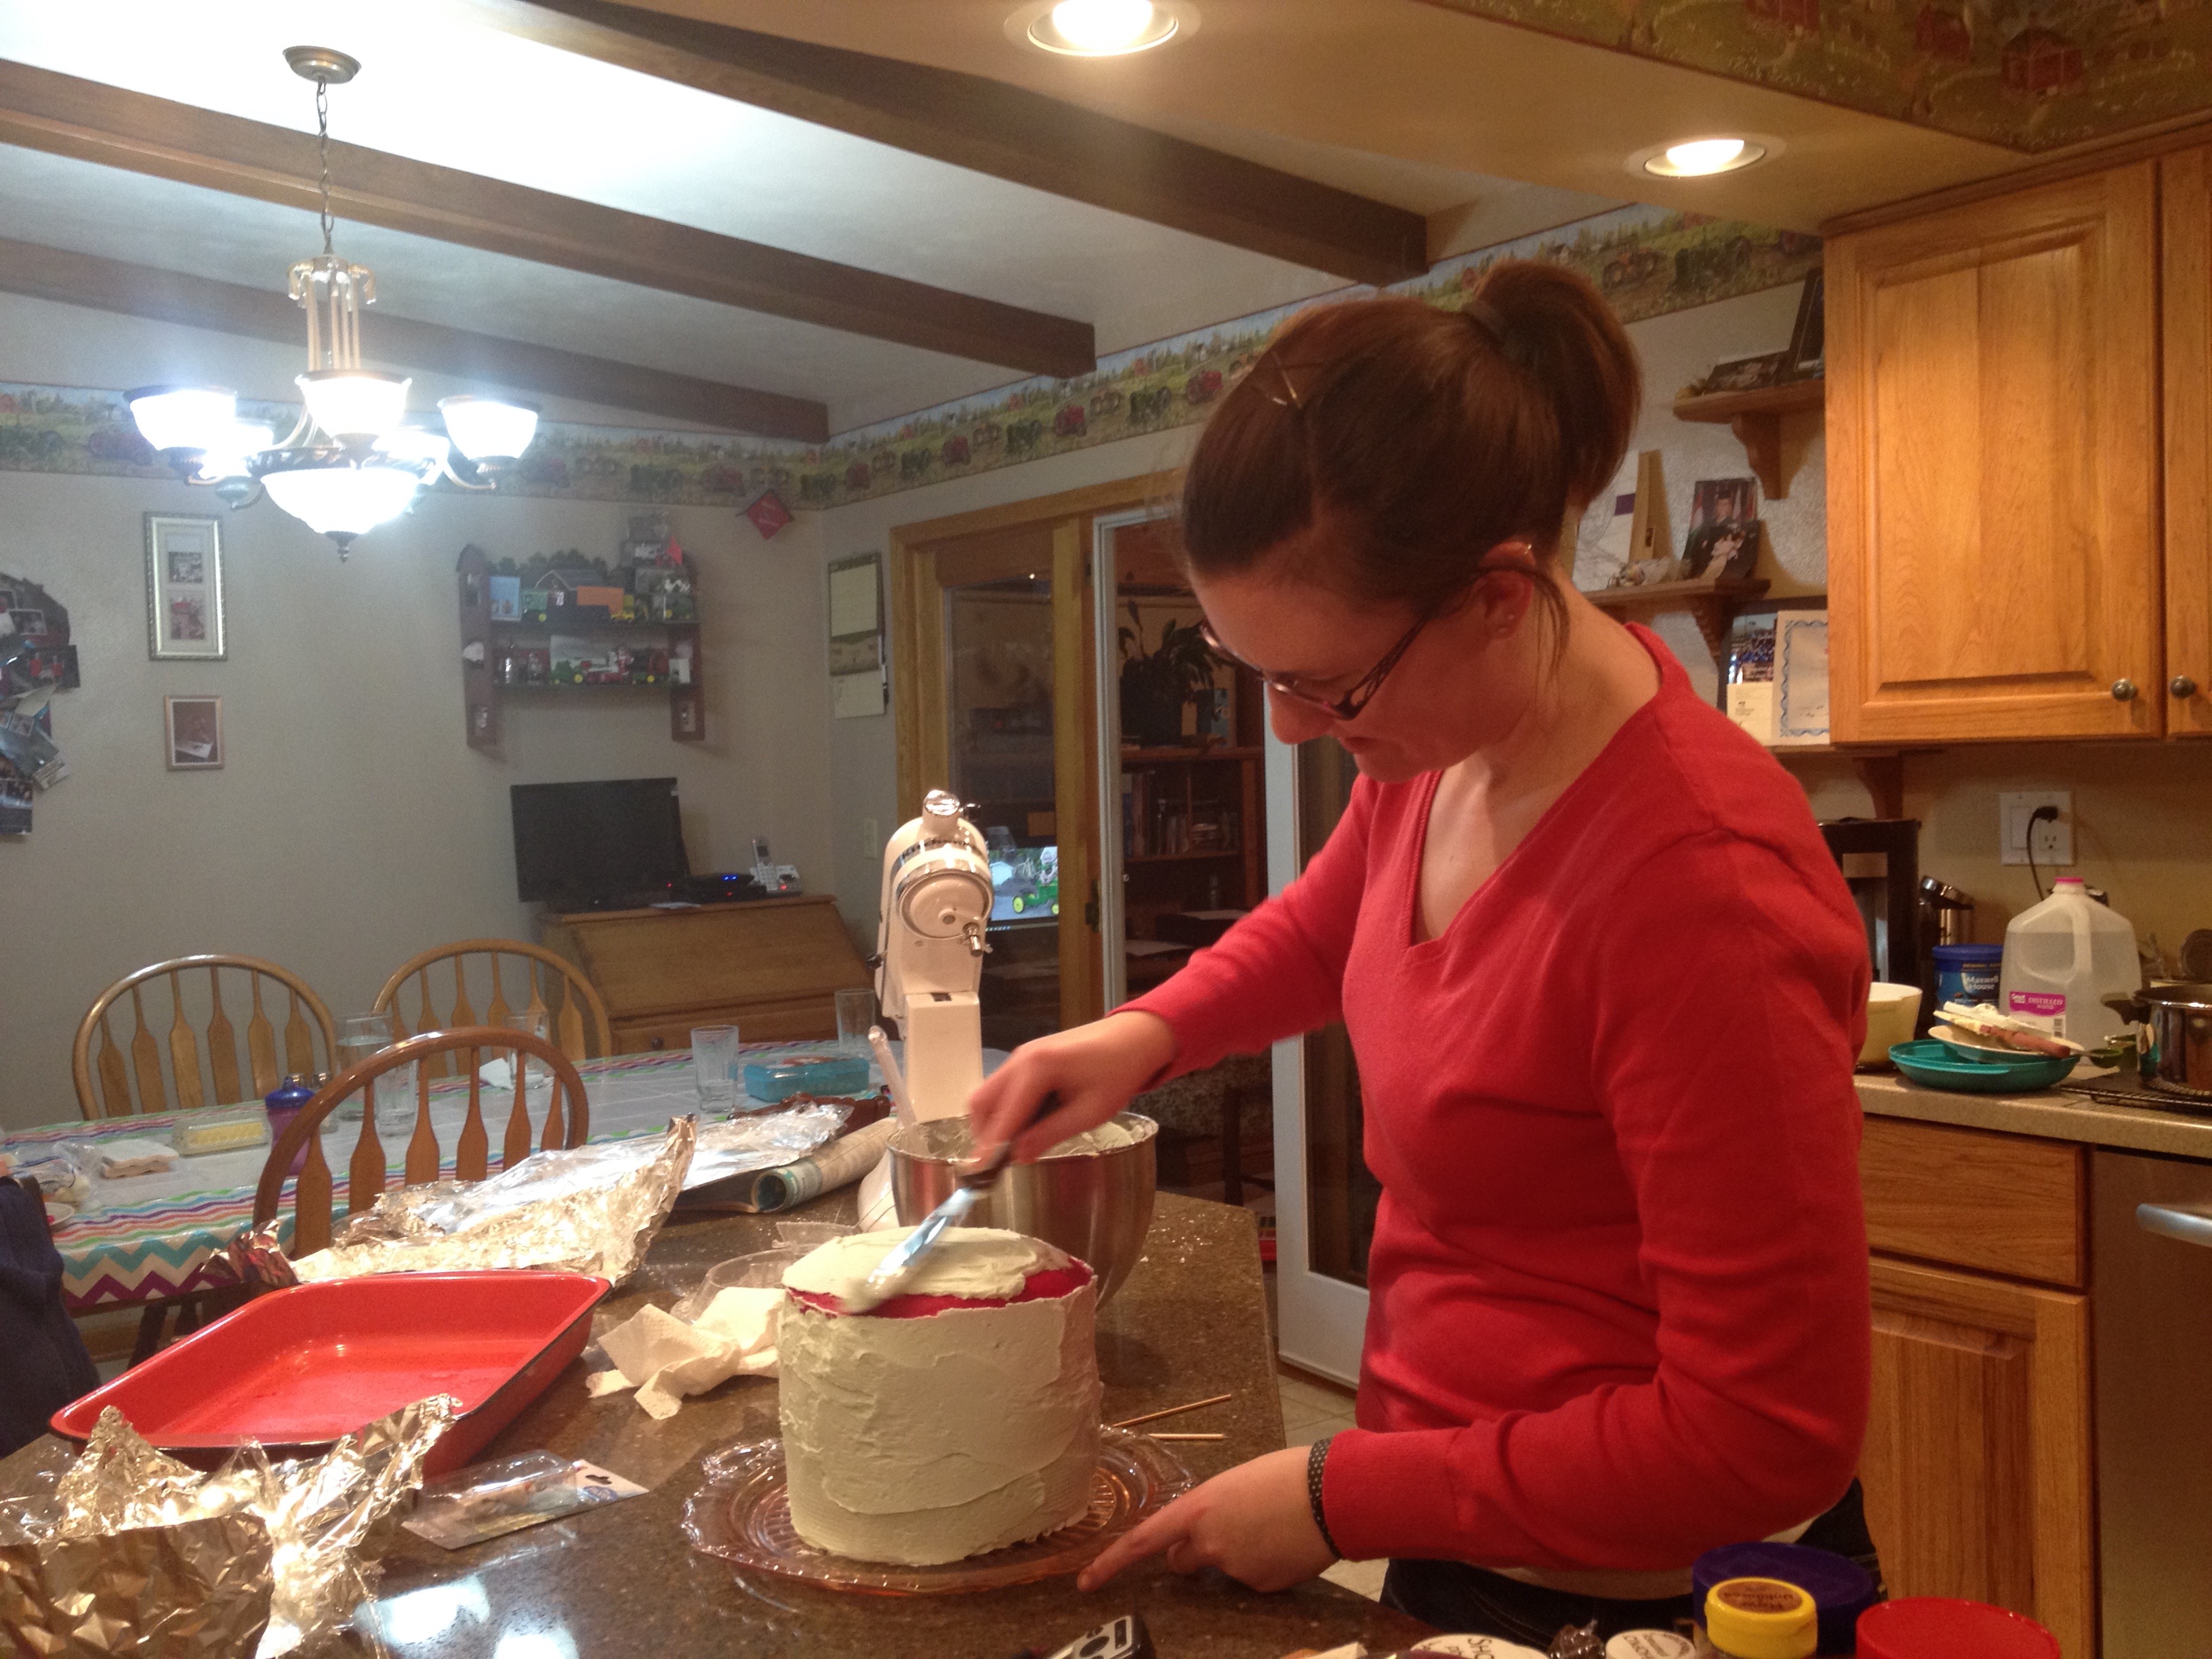
Then the real fun began when we went up to Grandma and Grandpa’s house this weekend. His Aunts helped make a four layered cake.
It was a pretty awesome cake.
It even came with a side of ice cream. How *cool* is that?!
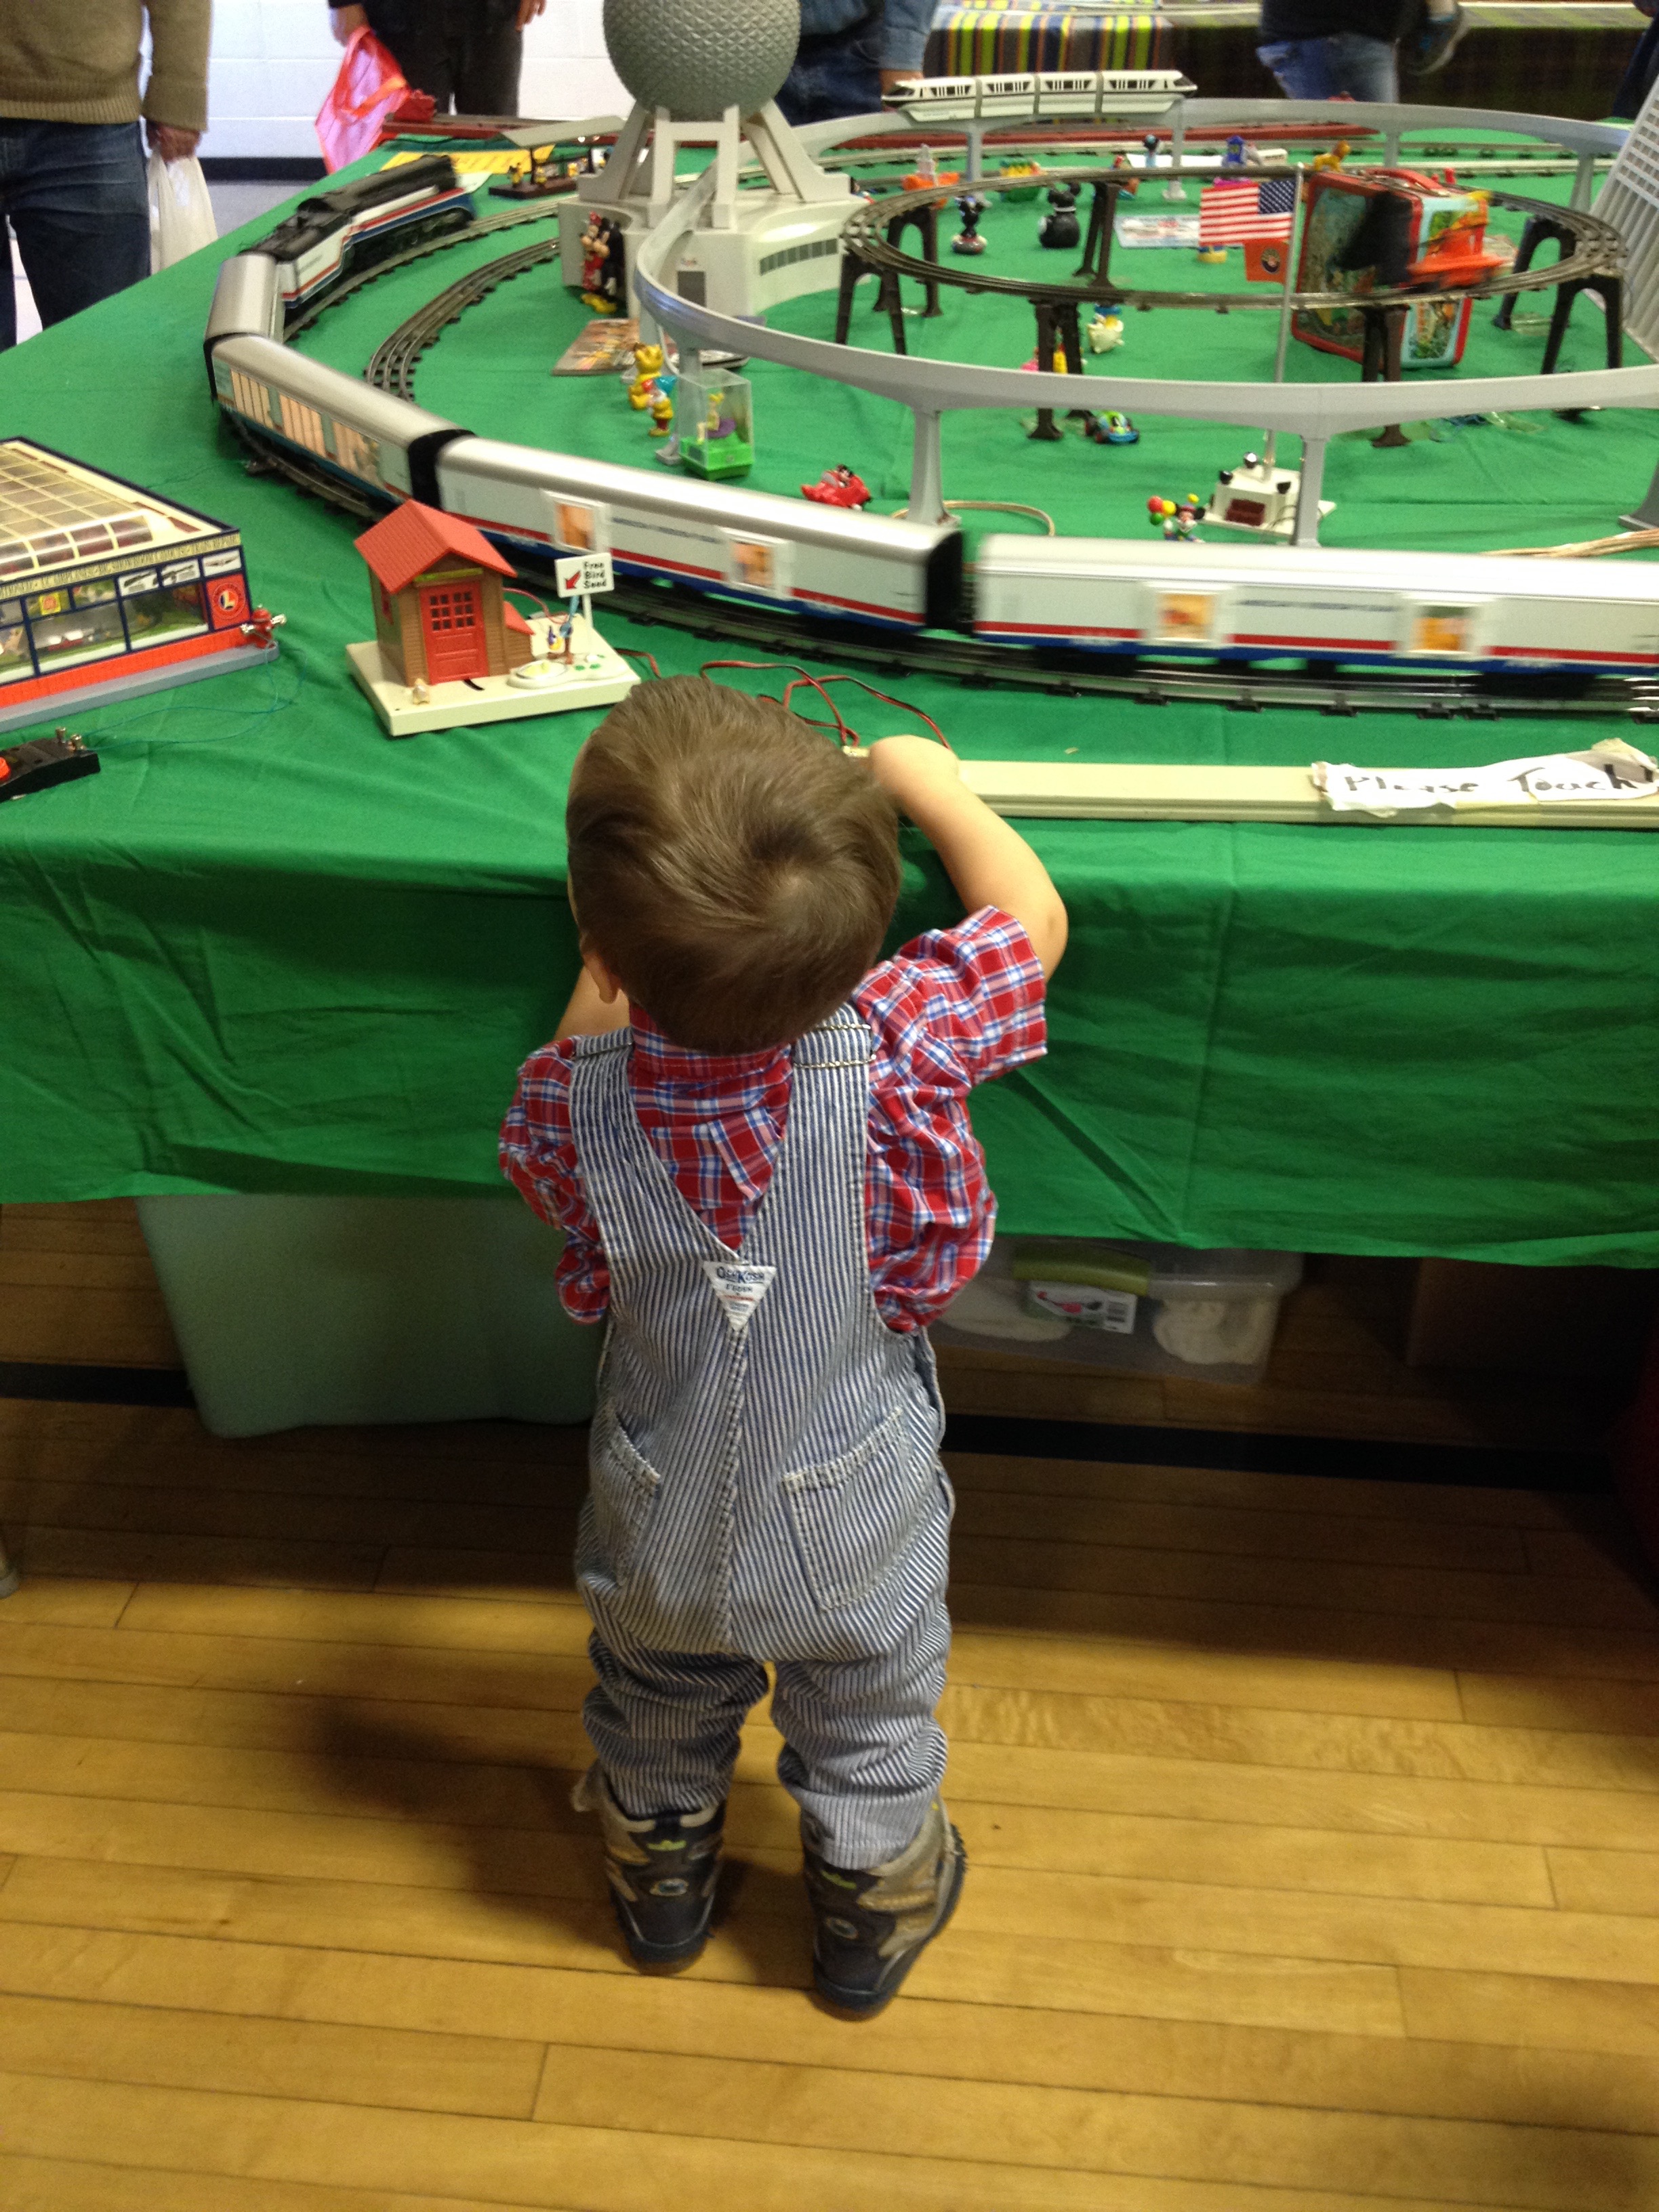
Frugal Boy had fun experiences, such as the train show we went to on Saturday. His striped bib overalls fit in perfectly.
There were three gymnasiums and a cafeteria all filled with train setups and trains for sale. Many of the displays were interactive and included buttons that kids and adults could press to activate different models and gadgets.
Other highlights included playing with the dog, going for tractor rides, and playing by Grandma’s rules (which are far more lenient than Mom and Dad’s) 😉
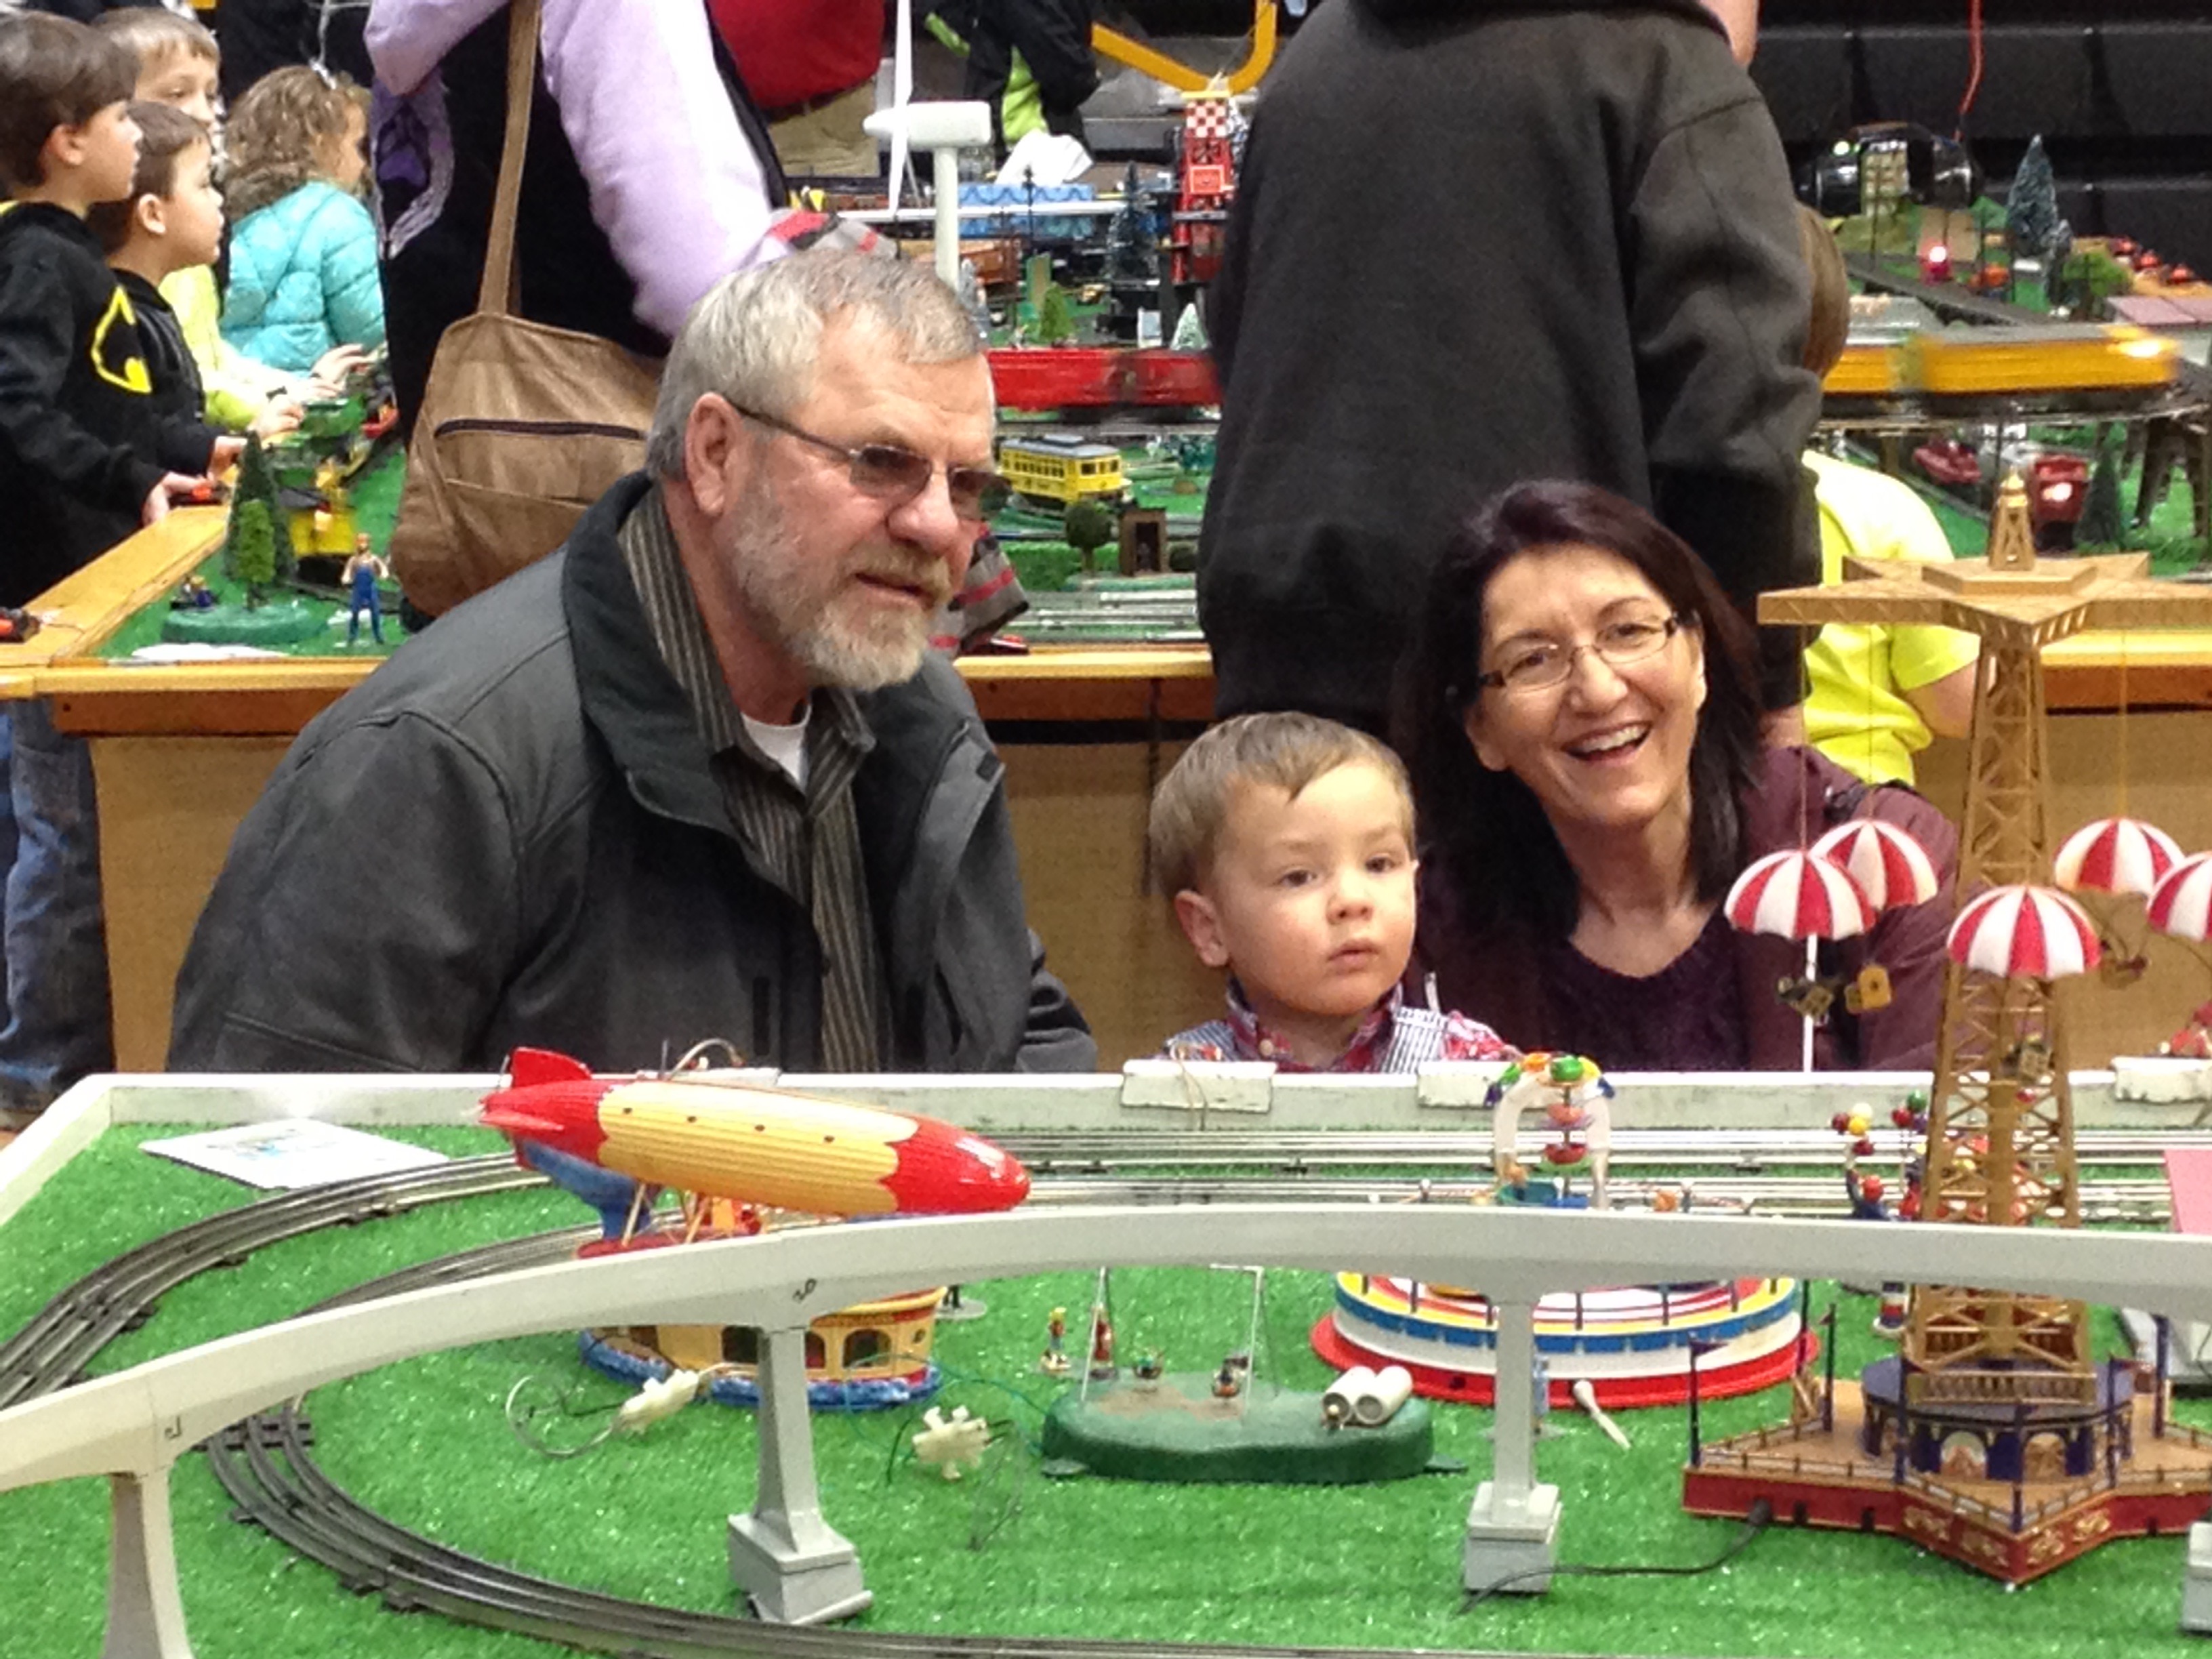
Here he is with Grandpa. He was really upset that he didn’t get to say bye to the tractor, and Grandpa was nice enough to take him down to the shed so he could.
Shae and I did the boring birthday things, a basket of fruit and a 529 contribution. Thank you to everyone that helped make his week a little more jovial.
The extent of my baking knowledge up until now has been to follow the instructions on the back of the ready mix boxes. Come along with Shae and myself as we embark on a six week baking challenge where we push our comfort zones and try baking recipes we have never done before!
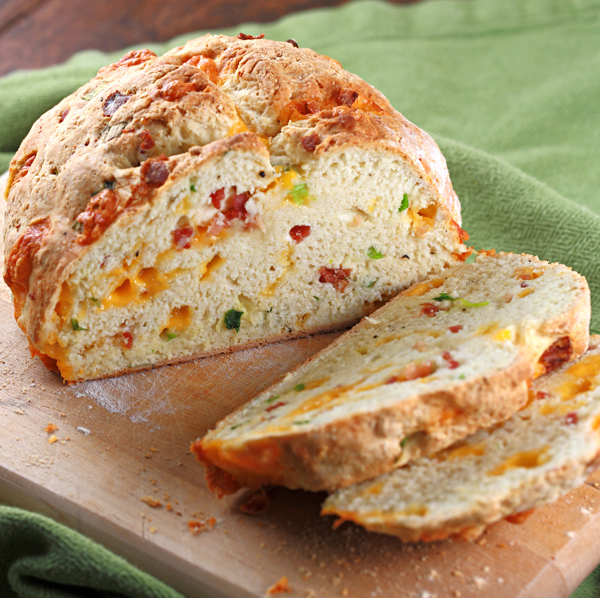
Week 3 – Soda Bread
We all know that there are two types of bread, leavened and unleavened. Leavened breads incorporate some type of rising agent such as yeast or bicarbonate, where as unleavened breads do not.
This week, I attempted a leavened soda bread. The bread gets its rise from the chemical reaction of bicarbonate (a base) with lemon juice (an acid). When bases and acids mix together they fizz, and it is that fizz that gives the soda bread its air pockets and rise.
Soda breads are a part of the quick bread family. They only take about an hour to prepare and cook because you do not have to wait for the yeast to break down sugar and ferment.
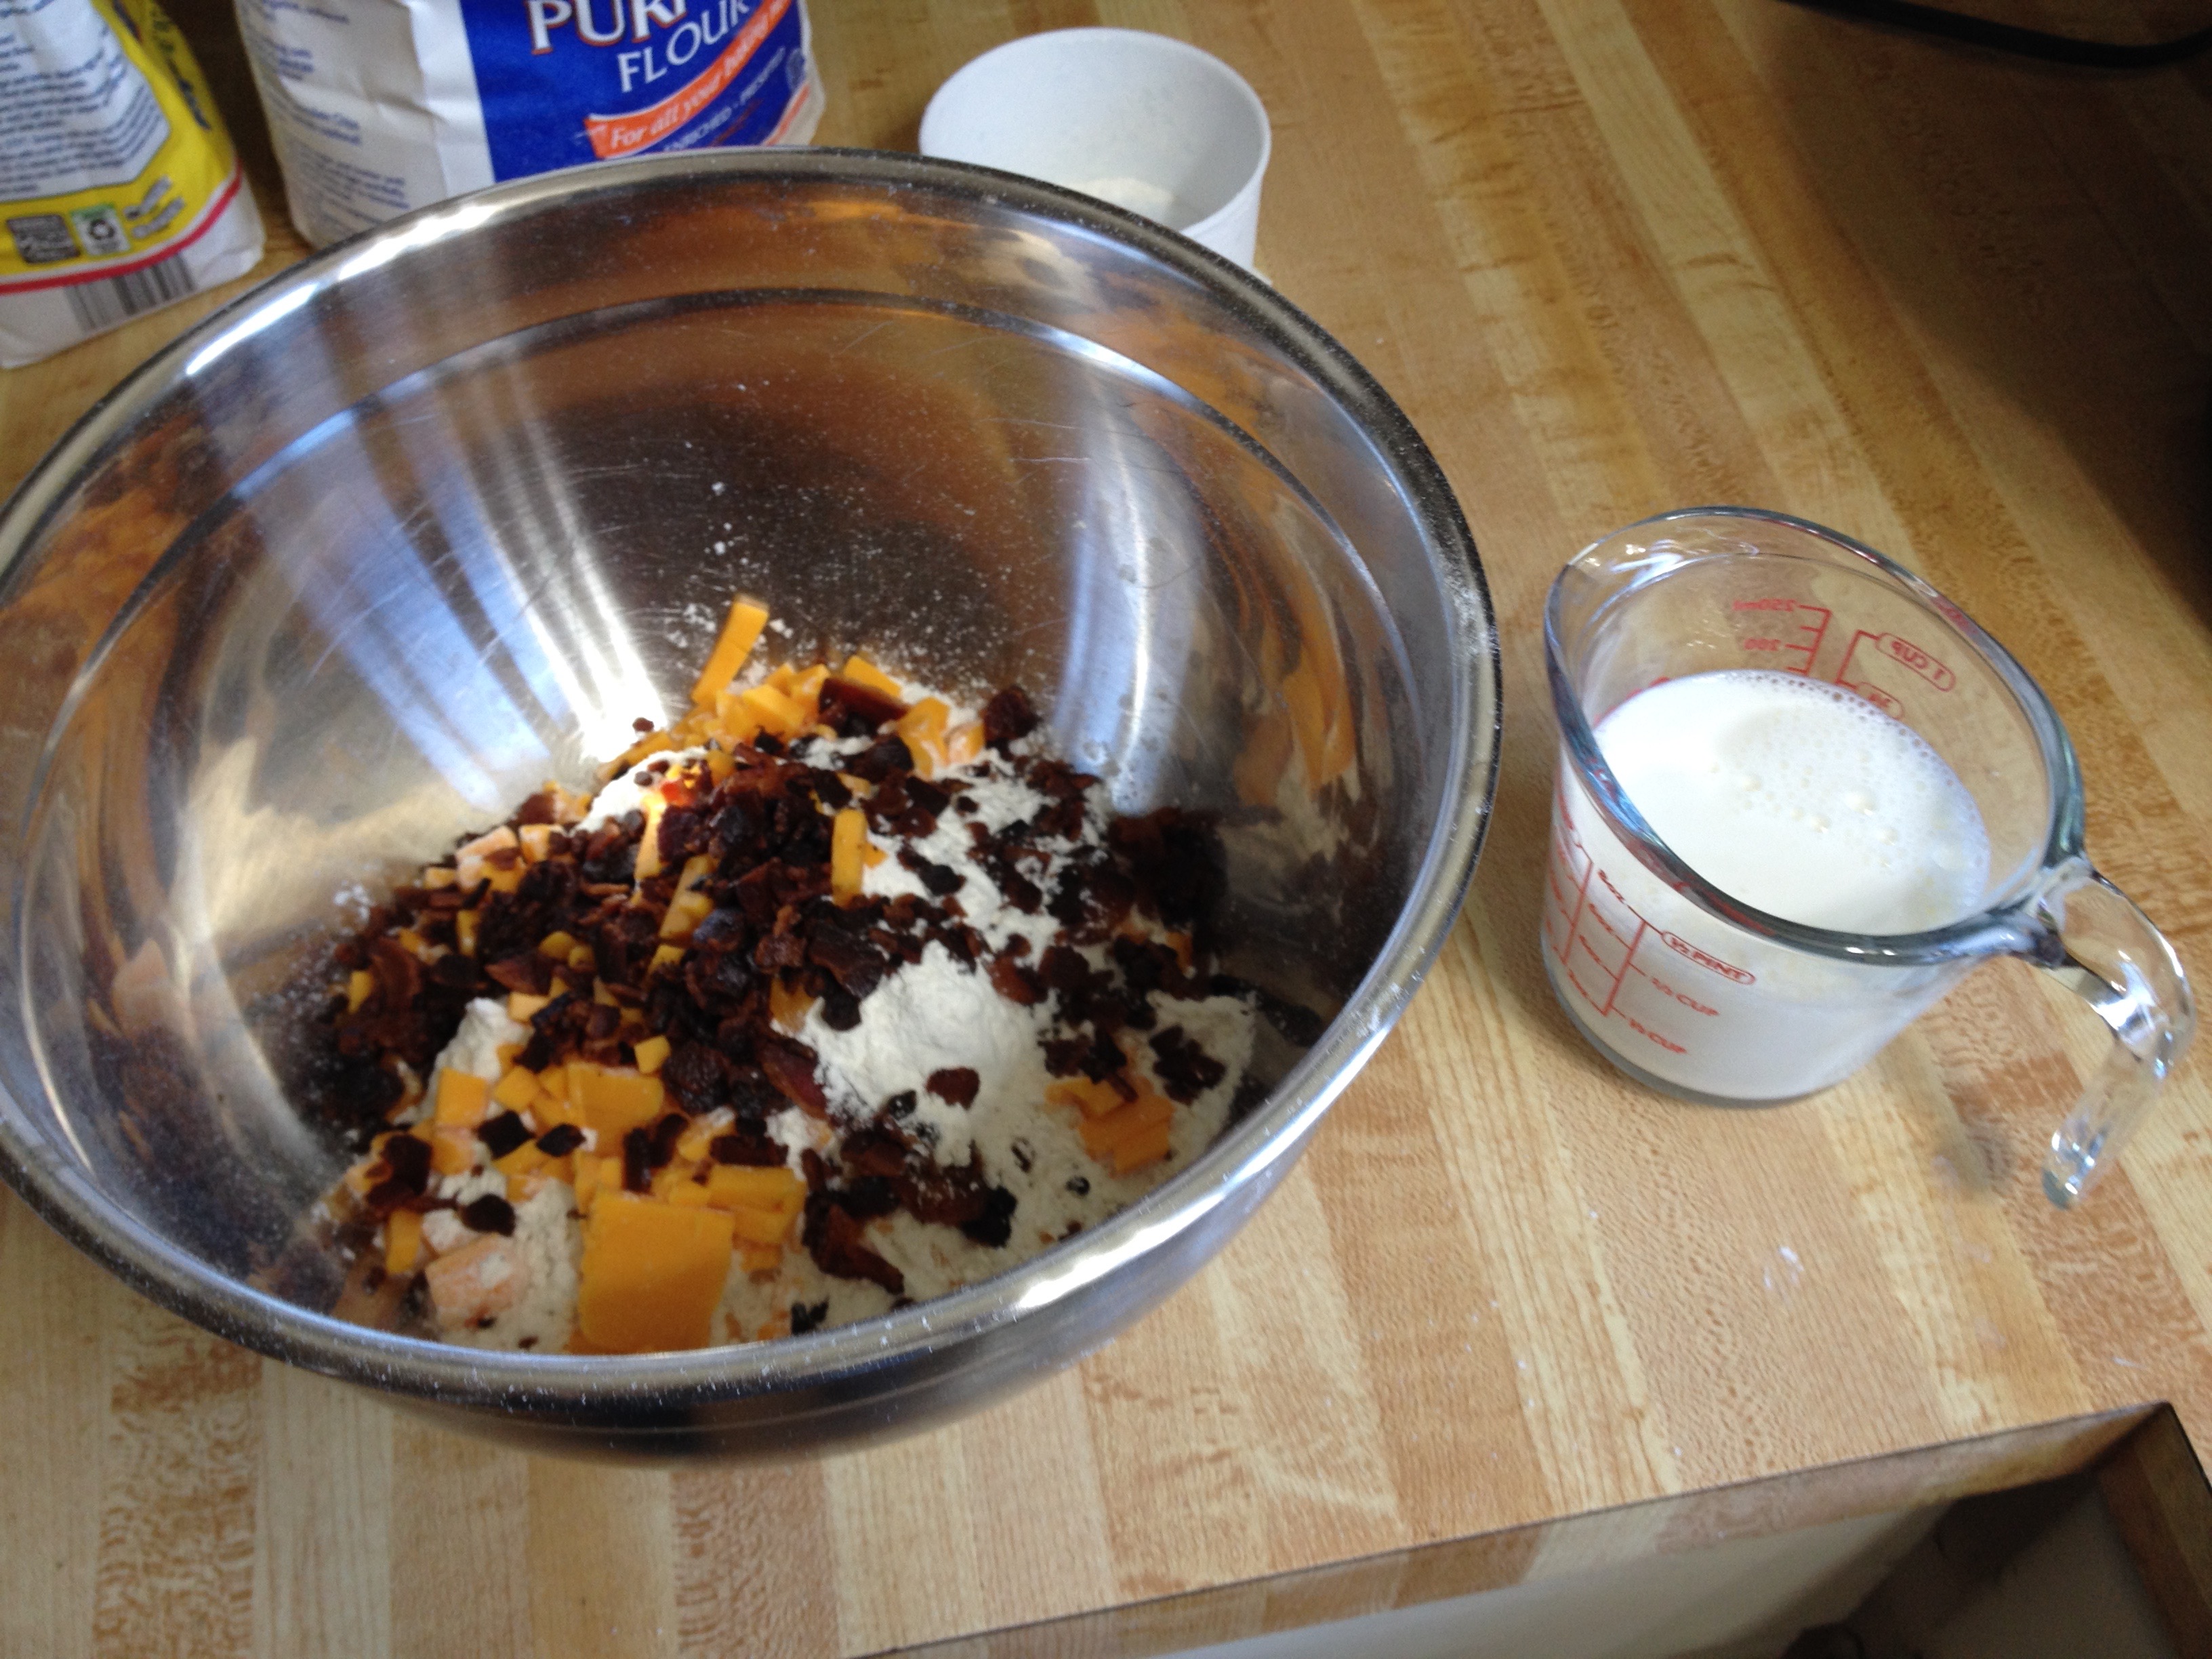
I used flour, sharp cheddar cheese, bacon, baking soda (my base), milk, lemon juice (my acid), a pinch of sugar, a pinch of salt, and dried chives for my mix.
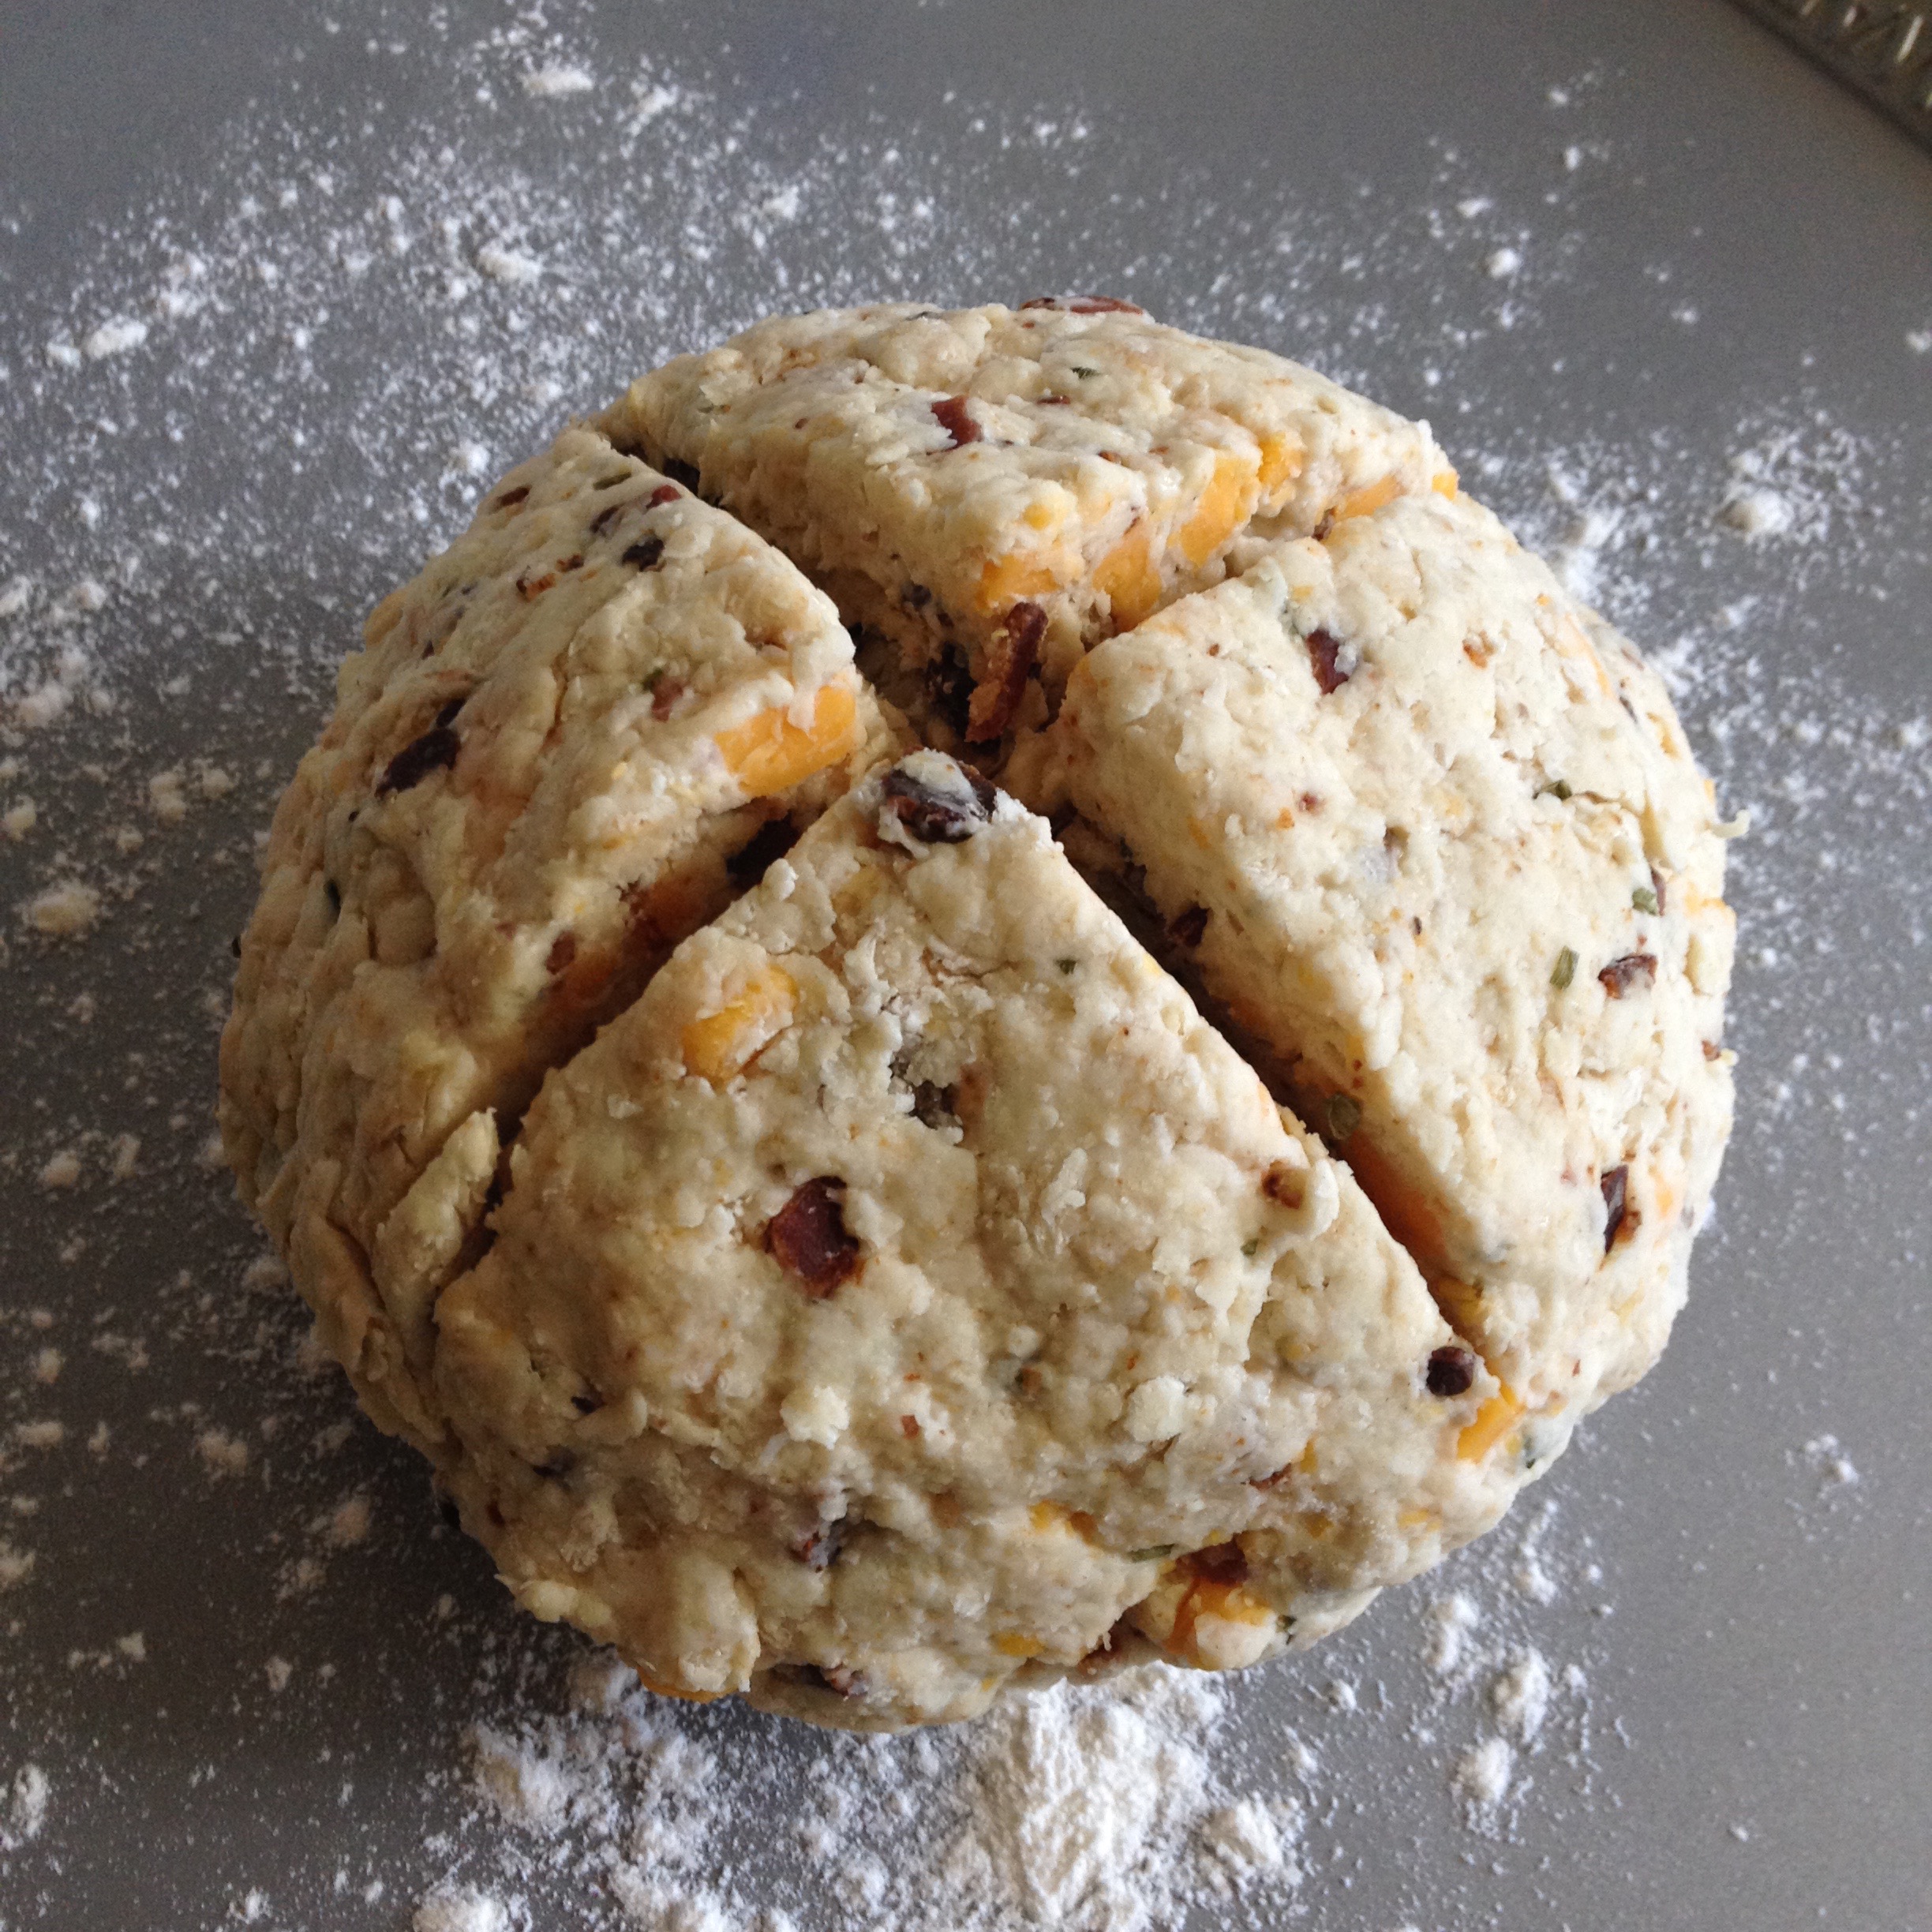
After combining all of the ingredients thoroughly and a little bit of kneading the dough was formed into a ball and a cross was cut into the top to help heat penetrate during baking.
The recipe I was following said to bake it for 22 minutes. After 30 minutes it was starting to look done on the outside.
But the inside was a different story. As Paul Hollywood would say, “It’s raw”.
I found the flavor to be quite bland. The bread needed a lot more filling to be interesting and should I attempt another soda bread I would make it flatter to promote more even baking.
What should we try baking for next week? I was thinking of tackling puff pastry.
“The light won’t turn off, I had to pull the cord” said Shae as she came down the stairs. “Huh” I responded. That statement makes no sense, there are no corded lights in Frugal Boy’s bedroom. We both went upstairs were Shae explained to me that the ceiling fan light switch had stopped working when she was putting Frugal Boy down for bed.
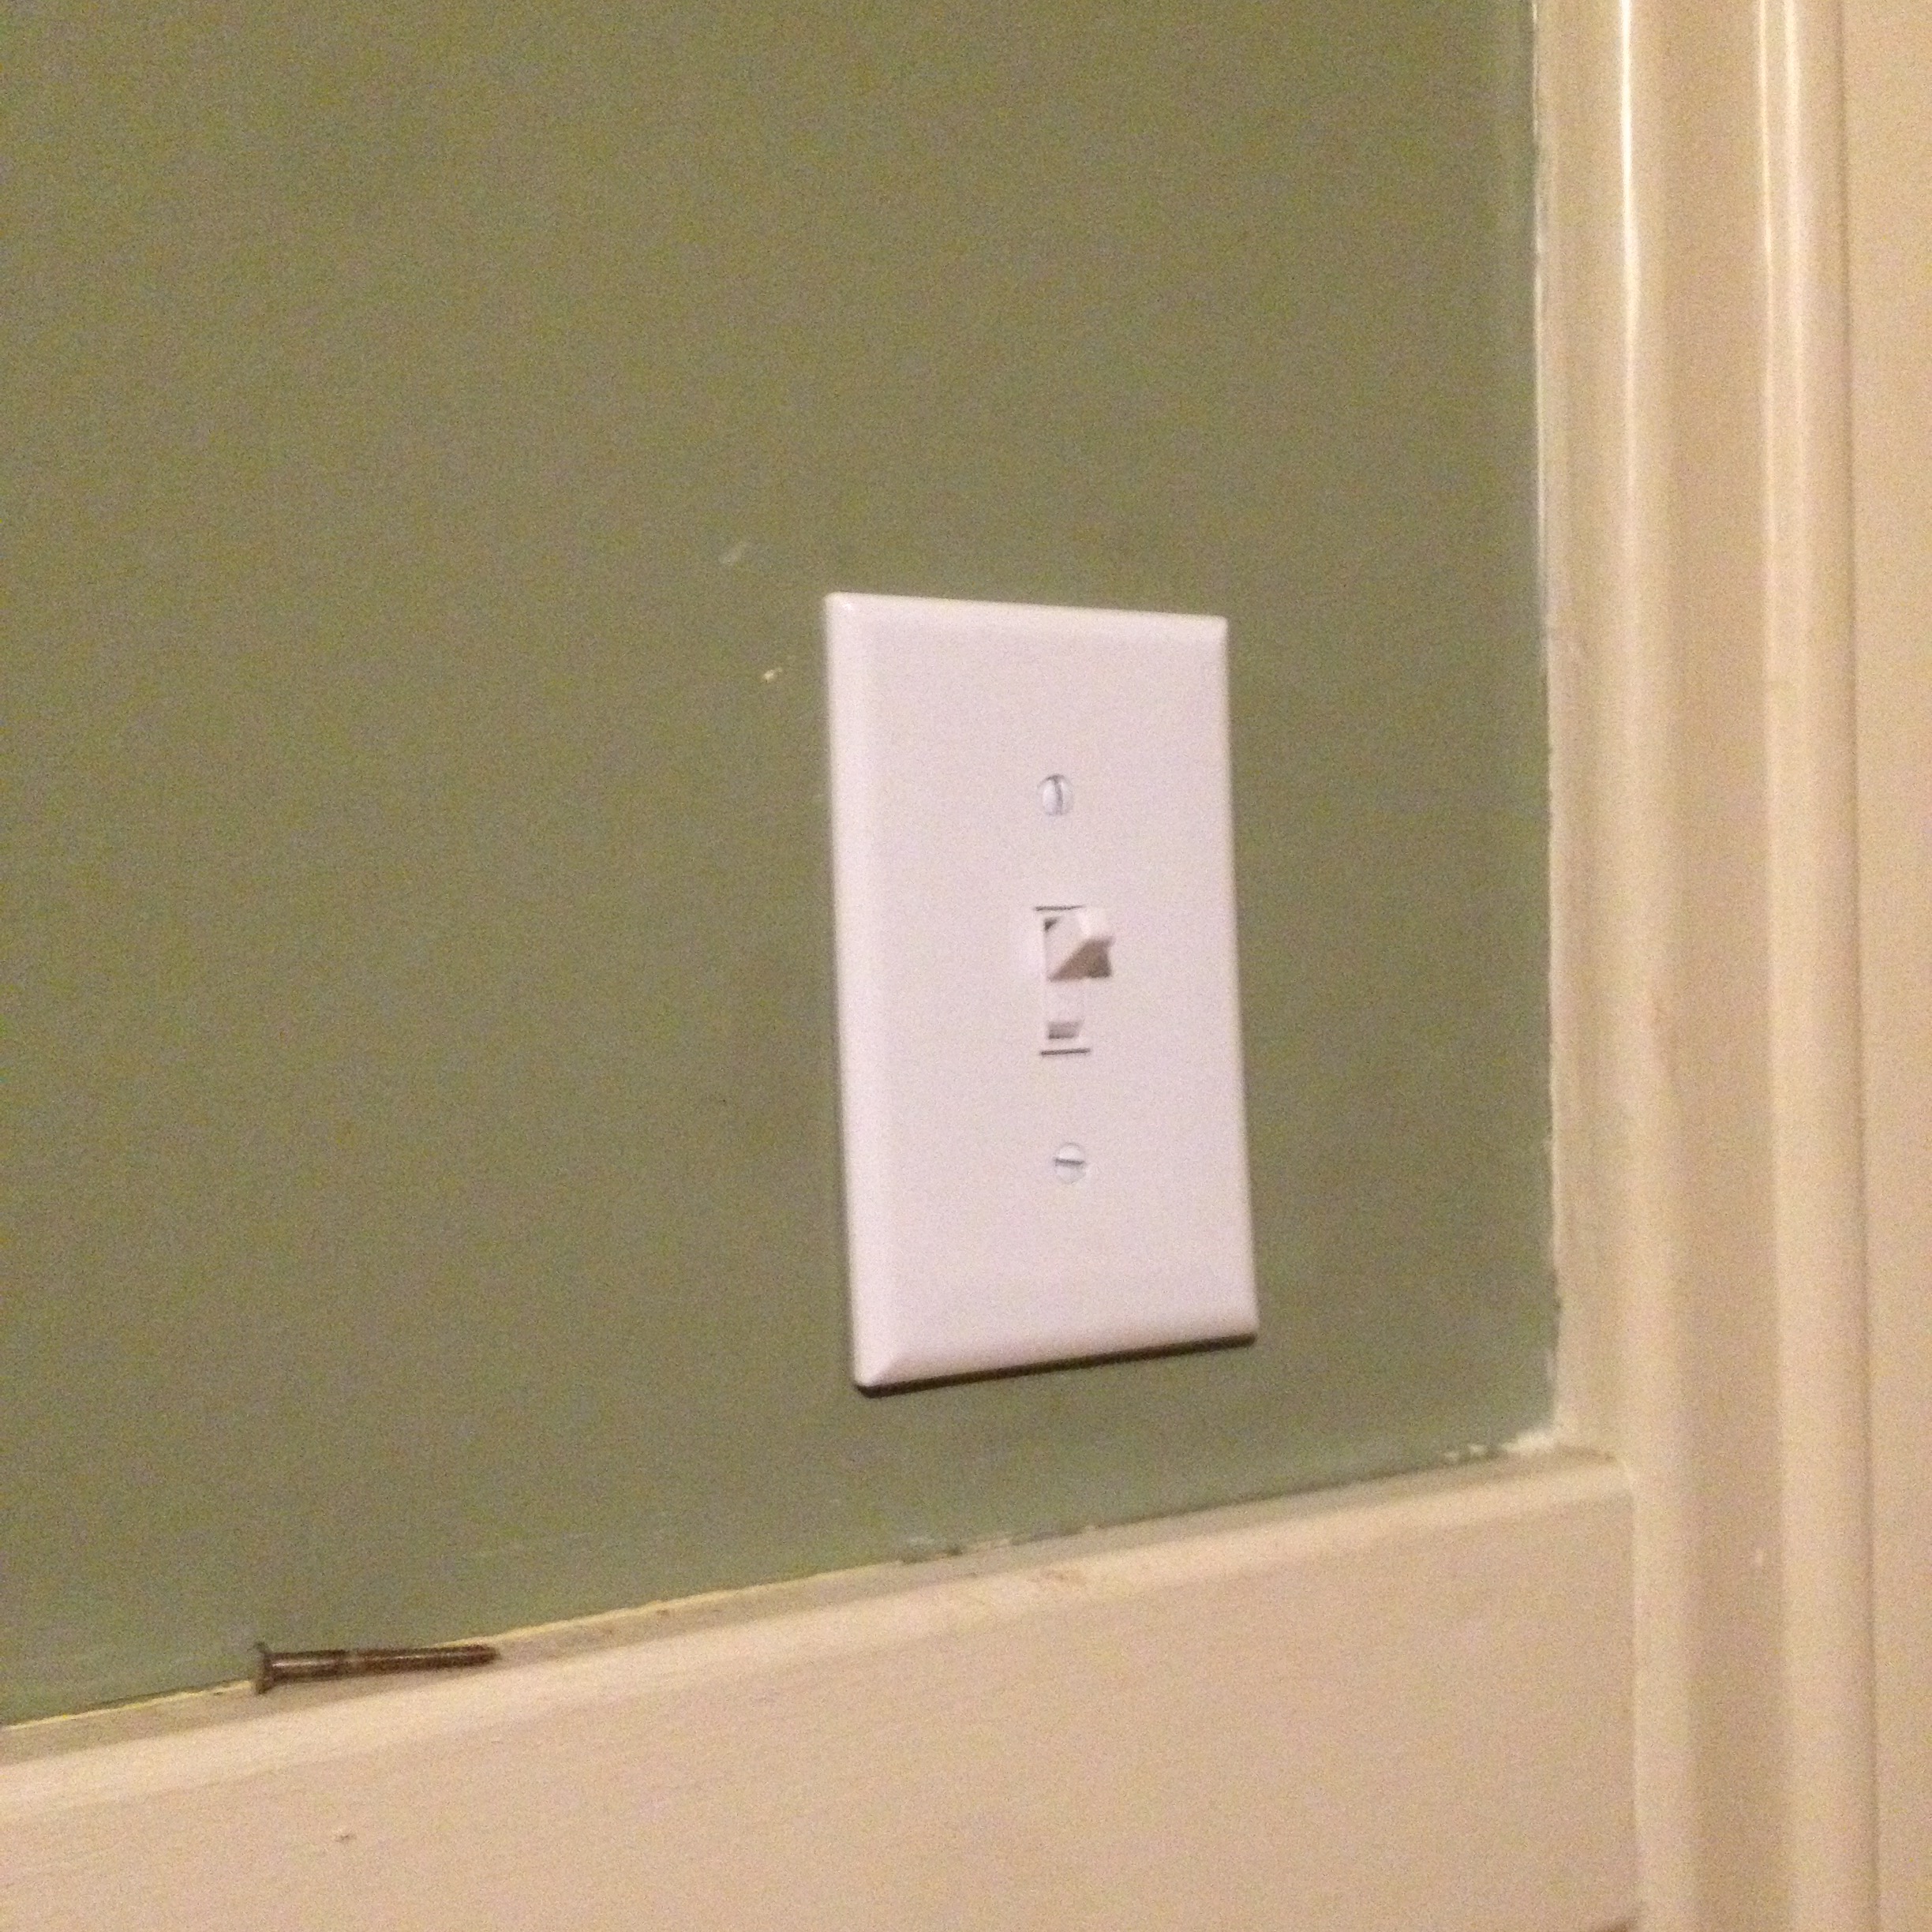
Sure enough, the switch was faulty and was staying closed irrespective of the toggle position.
We moved Frugal Boy to a different room and I tramped through the snow and ice (of course this is the day of a big snow storm) to the home improvement store to get a replacement switch. I didn’t feel comfortable letting 15 amps flow through a faulty switch all night long while we slept.
After shutting off the power at the breaker box, I removed the old switch. Argh, the installer had backstabbed the electrical connections.
Backstabbing, or more properly known as back wiring, is when an outlet or switch is wired by using a push in slot on the back of the fixture instead of using the side screws. While it is a code approved way of wiring, there are some potential downfalls. Firstly, a simple google search on “backstabbed electrical outlet” will yield many ancedotal stories of premature failure, fires, or other grievances. Secondly, the wires are very difficult to remove. In my case, I simply cut them and that brings on a second problem. With an old house and old wiring, the now shorter wire may need an extension or jumper to make it long enough. They aren’t very difficult to add with some extra wire and wire nut but look at how much easier life would be if they just used the side screws like the below switch in our master bedroom.
I also replaced the upstairs bathroom switch and in the process converted it from a normal switch to a lighted switch. That should make it easier to find at night.
While I had electrical on my mind, I replaced two outlets in our living room that were chipped or loose.
The grand total for replacing 3 light switches and two outlets was $28. I would estimate that having an electrician come out and lift up a tool would start at $75 and would likely end up in the low 100s for a simple job like this. The list of tools required is quite small and will pay for themselves after even a small job.
flathead screwdriver
wire stripper multi-tool
multimeter (I like to double check that the power is indeed off)
wire nuts
extra 14 gauge wire (12 gauge if you are working with 20 amp circuits)
utility knife (for cutting away paint or wallpaper around a cover plate)
flashlight
There are plenty of instructional youtube videos and how-to books available at your local library.
The extent of my baking knowledge up until now has been to follow the instructions on the back of the ready mix boxes. Come along with Shae and myself as we embark on a six week baking challenge where we push our comfort zones and try baking recipes we have never done before!
Week 2 – Baked Alaska
Think of an ice cream dessert. Now set it on fire. That is the magic of baked alaska! Baked Alaska consists of three main parts, a cake base, an ice cream core, and a meringue shell. The meringue shell helps to insulate the cold ice cream inside so you can do dramatic baking acts such as taking a blow torch to it, pouring flaming alcohol on top of it, or even pulling an ice cream dessert out of the oven!
The recipe that we followed was here, but I wouldn’t recommend it because the cake base was way too sweet. It was basically fudge, so if that is what you like then go for it, but next time we make baked Alaska I will opt for a less sugary base.
So let’s get baking shall we! We spread it out over two days. The ice cream needs time to freeze hard if it has any hope of surviving the heating process.
Shae started by mixing up the cake batter. Frugal Boy was content getting the chocolate mixing bowl leftovers.
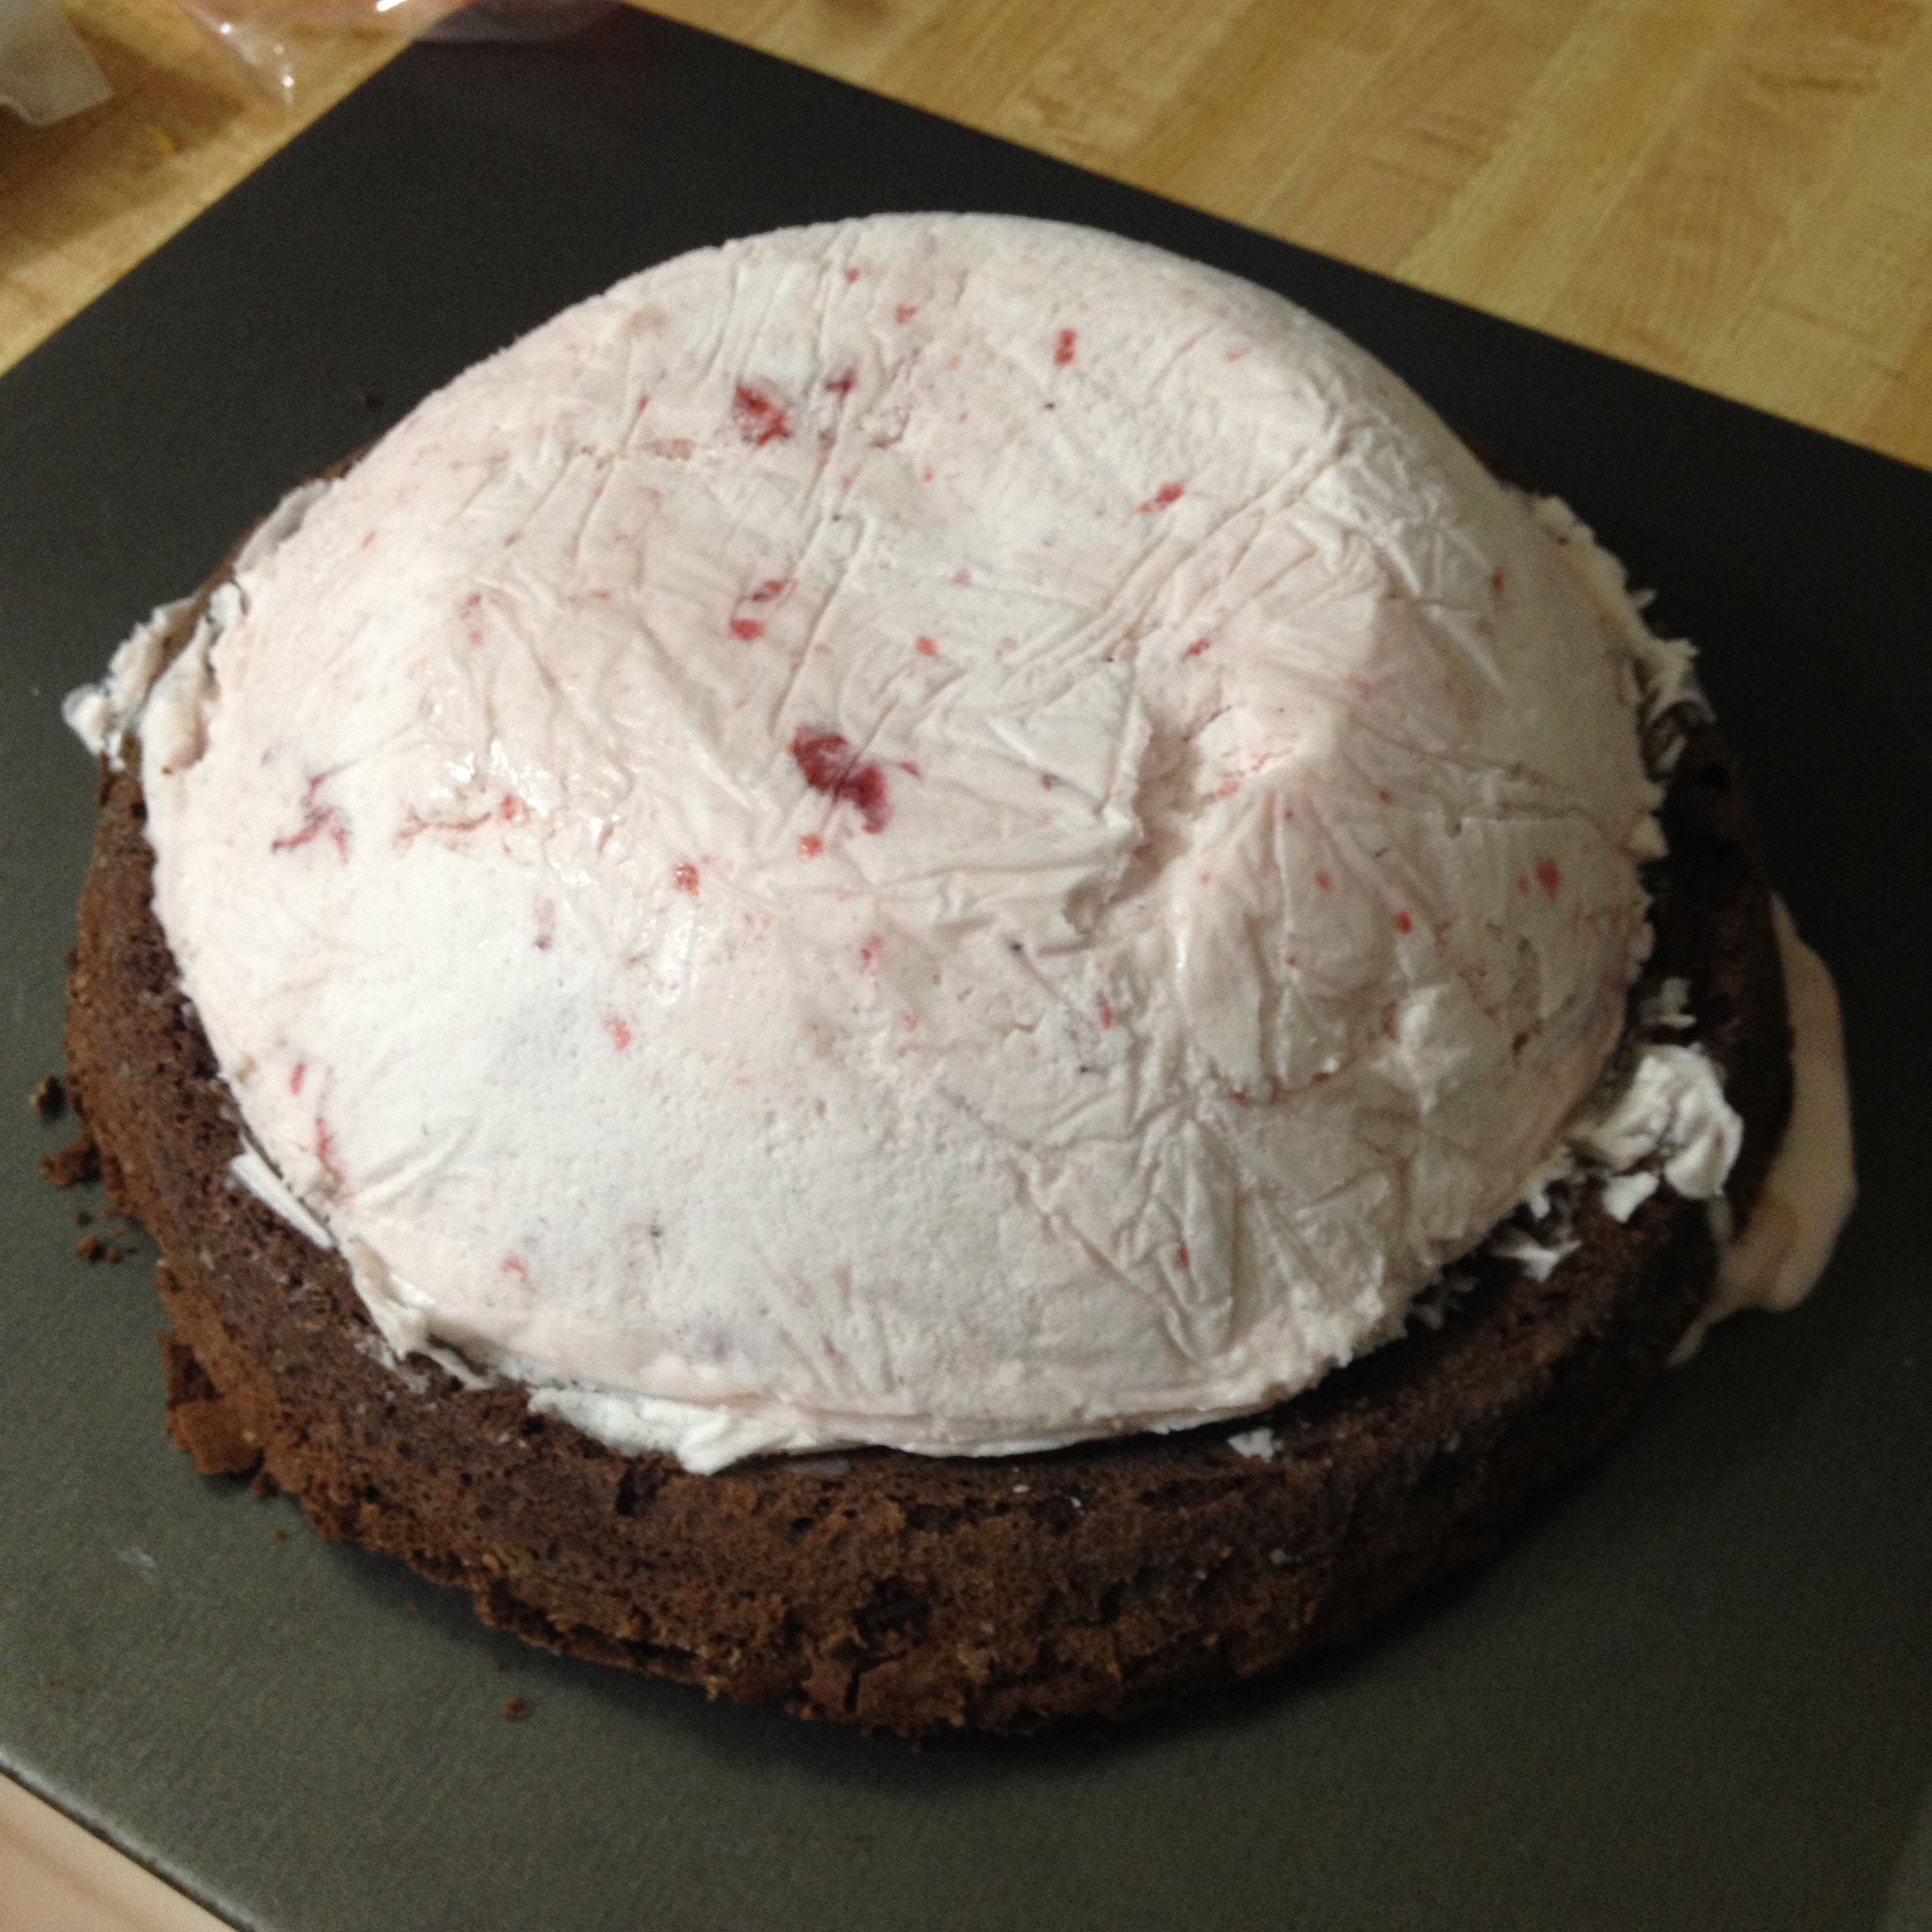
I had the really hard job. I lined a metal mixing bowl with plastic wrap and then dumped a half gallon of store bought strawberry ice cream into it. By pressing the ice cream down into the bowl it made a nice dome shape. Once the cake was finished baking and had cooled, we simply flipped the ice cream on top of it and stuck the whole thing back in the freezer to keep cold.
That night we set about making the meringue. There are different meringues, French, Swiss, Italian, and so forth. Meringues are to my knowledge all made with egg whites and sugar. The difference is how and when you combine those ingredients. We opted to use a Swiss meringue. Swiss meringue is pasteurized, so it is completely safe from salmonella. To make up the meringue, you combine your egg whites and sugar in a mixing bowl over a pot of steaming water. The steam will pasteurize the egg whites, and the sugar in the mixture will keep the eggs from turning into scrambled whites. The next step tricked us up a couple of times. You need to beat the mixture a lot. Beating the mixture adds air and that air gives it a billowy, fluffy, white appearance. The egg whites puff up, and the sugar gives it stability so it doesn’t immediately collapse down. The trick with Swiss meringue is that since the sugar is added from the get go, it is very difficult to beat in air. Our first attempt used a hand mixer and after 10 minutes or so it was still a runny mess. Our second attempt we got out the stand mixer and just let it run on high speed with a whisk attachment. Eventually the meringue will firm up and hold stiff peaks.
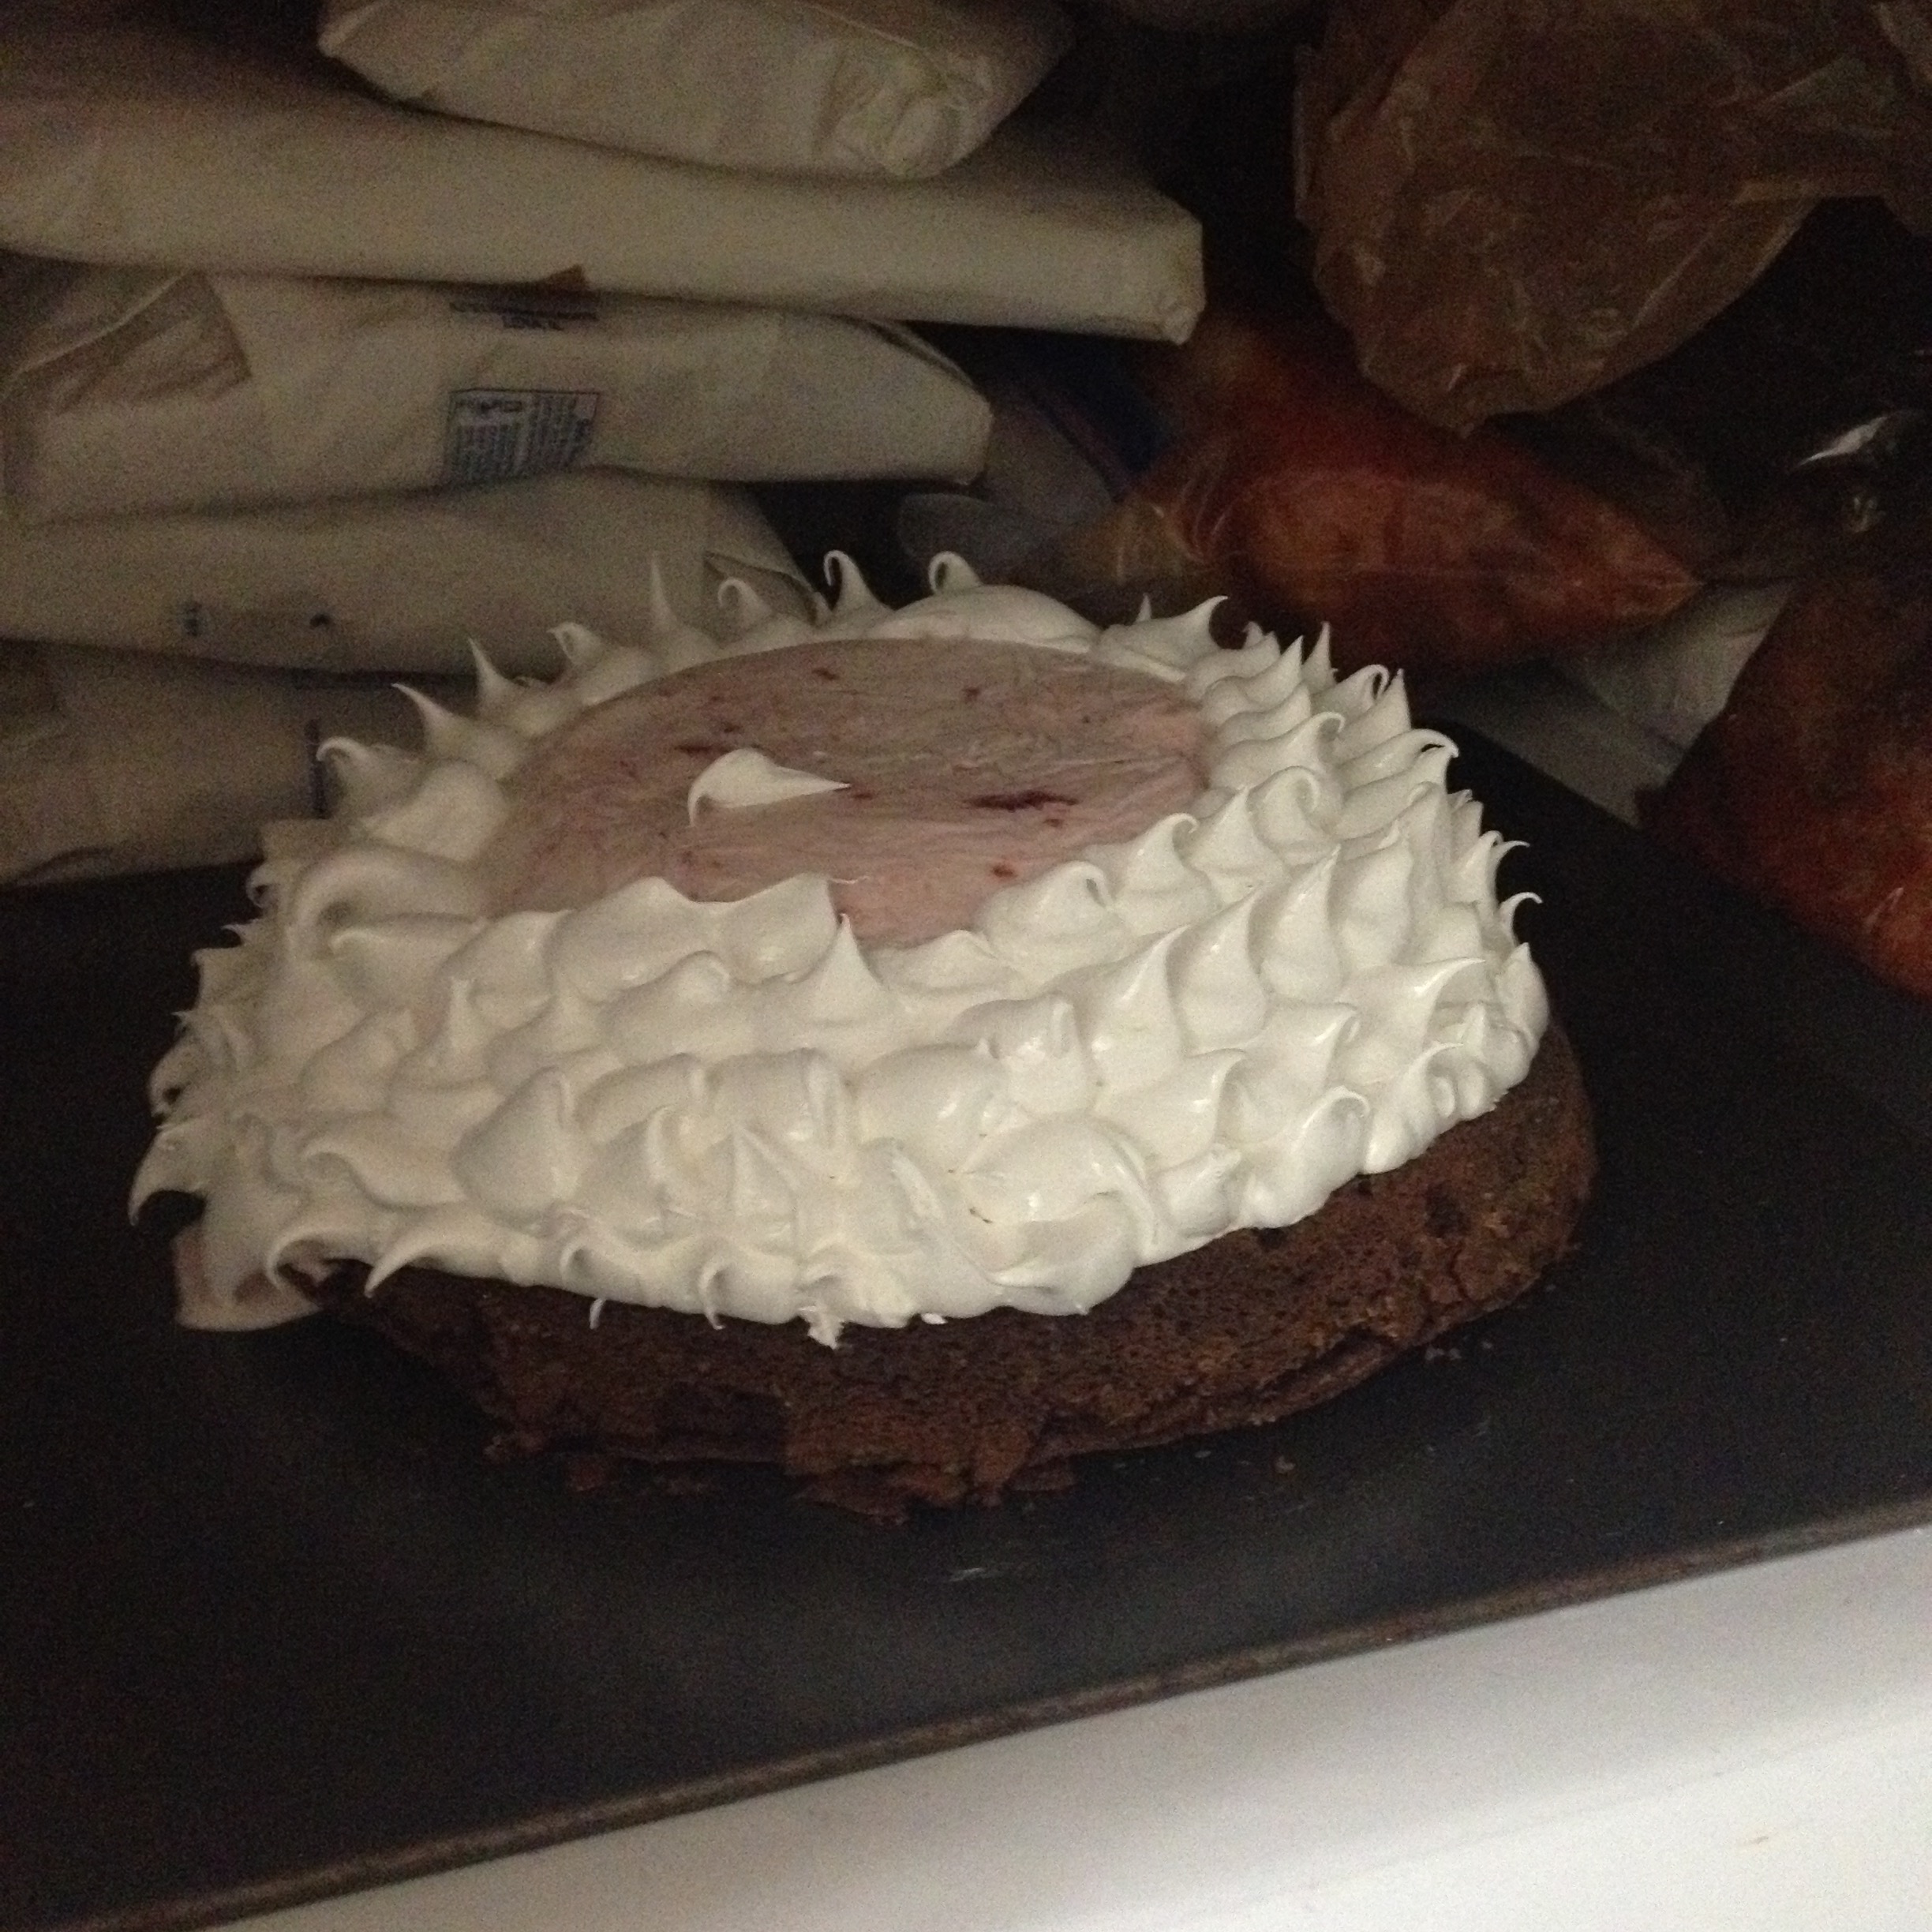
Using a ziplock bag with the corner cut off, I piped on meringue to cover and insulate the ice cream.
Unfortunately, I ran out of meringue before I finished, so I had to stick the cake back in the freezer while I made up a 3rd batch. You can see how the ice cream had already started to melt a bit just from the short time of being out!
The next day we were ready to finish up our baked Alaska. Here it was before the dramatic finale.
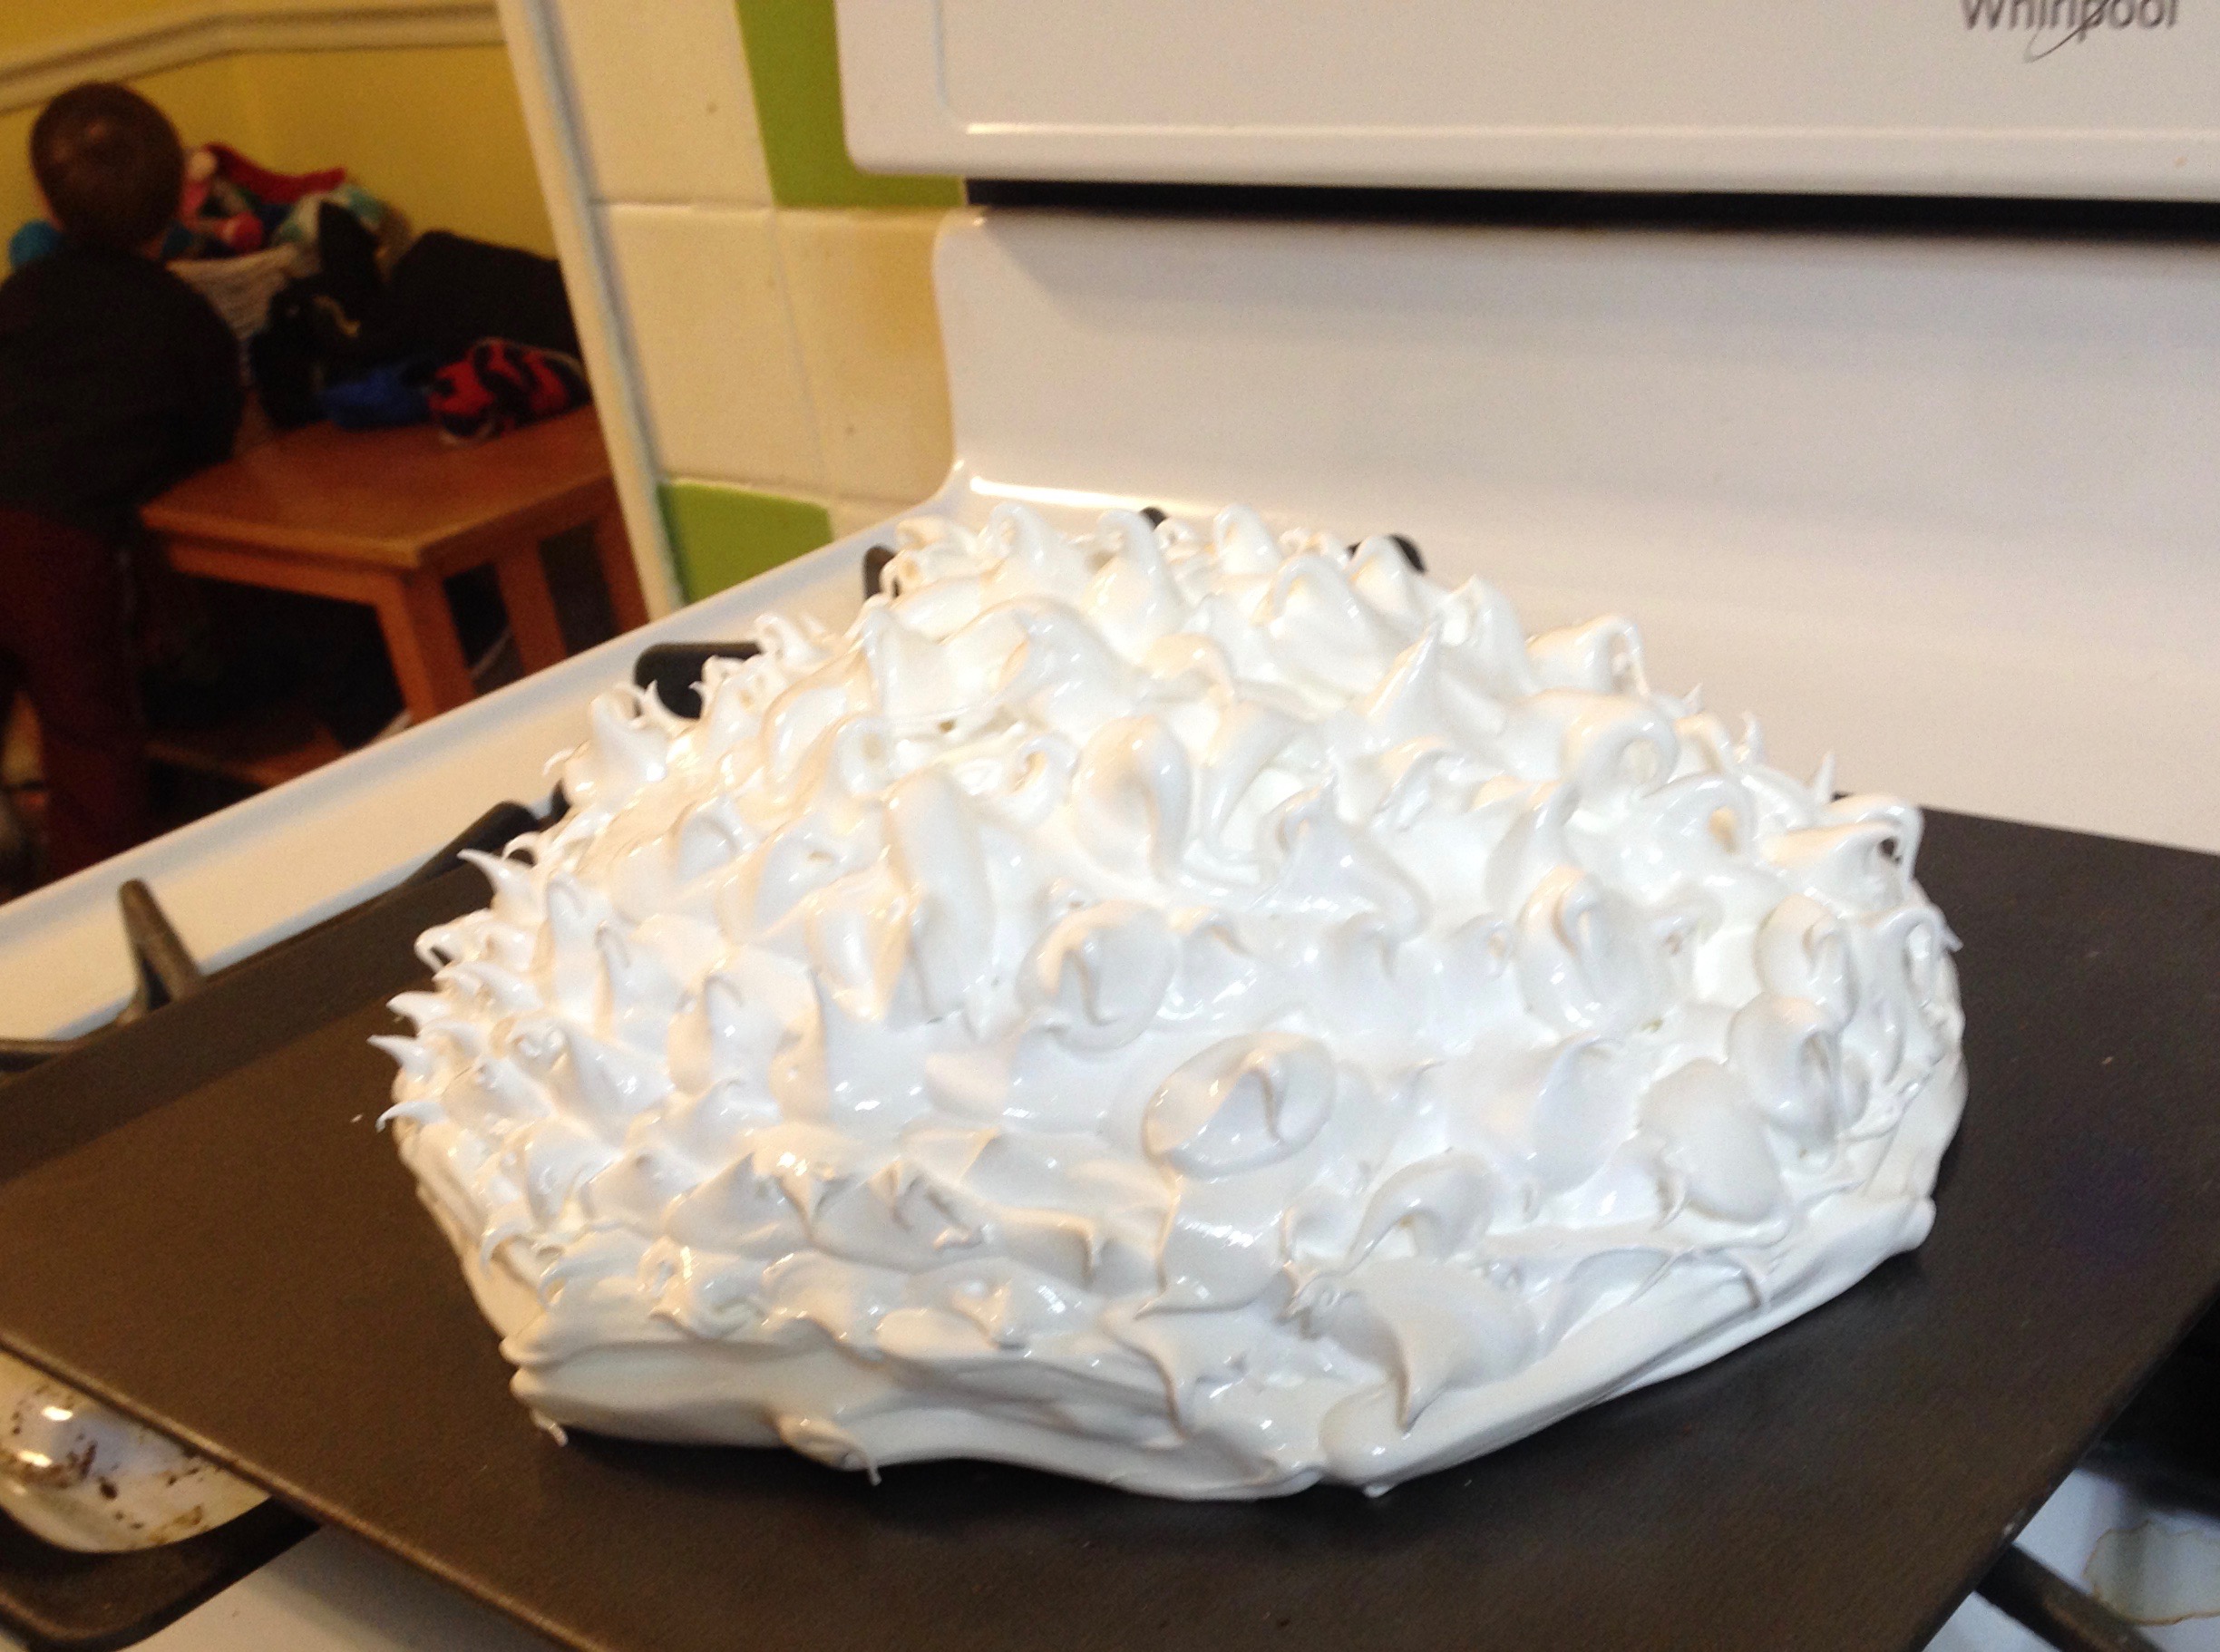
Armed with a propane torch, I caramelized the meringue.
This gives it a nice golden color. The bruleed meringue tastes quite a bit like toasted marshmallow. The consistency is similar as well.
Here is the finished product. The ice cream survived the blow torch!
This dessert is very good, but also very rich. I kind of wish that we had made it when company was around so they could help eat it. Having a flaming alcohol presentation would be very grandiose and perfect for a birthday or other special occasion.
All in all, baked Alaska is a fairly simple dessert to whip up because you can cheat quite a bit with store bought ice cream and even a store bought cake mix. I would like to experiment with a key lime pie styled baked Alaska. Perhaps a graham cracker type crust/base with a lime flavored ice cream.
Frugal Boy just had his two year wellness checkup. He weighed in at 31.8 pounds (93%) and measured a lofty 35.5 inches tall (79%). He has grown quite a bit from his one year birthday.
Instead of sending cake or candy to the babysitters for his birthday, Shae put together a fruit tub instead.
$10 of fruit goes a long way!
All in all, he is developing just like a kid should.