We broke a 119 year old record yesterday when the mercury recorded at -1 degrees for April 2nd. The cold and accompanying snowfalls had cancelled most of the egg hunts in the area. Our neighborhood had an egg ‘handout’. It was fun, but not as good as the real thing. Frugal Boy and I made a giant snowman and other people accessorized it.
Frugal Boy had Spring Break last week and spent most of it at the grandparents house. He had a fantastic time and even got to visit Lego Land.
Shae, Frugal Girl, and I took advantage of the relative quiet to go out on a date. Frugal Girl really liked the crab tacos.
Easter was on April 1st this year, so we had fun throwing some April Fool’s pranks into the day. Red velvet cake anyone?
Grandma and Frugal Boy enjoyed watching the latest Jumanji movie. Most of the jokes about gender switching flew right over Frugal Boy’s head, but Grandma got a kick out of it.
On Easter morning Frugal Boy was in a bad mood because his sister had a chocolate bunny and he didn’t.
Until he found out that there was one with his name on it.
Frugal Girl did surprisingly well finding easter eggs and putting them in a basket.
I made up a simple bone-in ham for lunch.
After lunch Frugal Boy did a little easter egg hunt outside.
And it started to snow again. We ended up getting about 3″.
With our tummies full and the snow flying outside it was the perfect time to take a snooze.
But not too long!
A huge thank you to the grandparents for taking Frugal Boy for the week and doing so many cool activities with him. Also a big thank you to everyone that brought side dishes for Easter. Yum yum!
Andrew left Friday for a week-long adventure with his brothers and a couple of uncles up to his uncle’s lake house. This is his first kid-free trip in a long time and my first time watching both Frugal kids alone for an extended period. 🙂
Before he left Andrew put a load of laundry into the washer so it’d be ready for the dryer by the time I got home from work, getting a jump start on the weekend chores. I walked into the house that afternoon and was greeted by the chirping of the washer. Unfortunately it wasn’t the happy “I’m done” kind of chirping. Nope, it was the “Houston, we have a problem” variety. After getting Frugal Boy’s dinner ready and making sure Frugal Girl was content I headed down to the basement to see what the problem was. E01 F09. The LED panel blinked flashed the error code over and over. We occasionally see E01 F08 – water supply problem – due to the undersized supply lines in the house (can’t run anything else while the washer is trying to fill) but this was something else – a drainage issue. The error had appeared a few days earlier but canceling out the cycle and restarting seemed to work fine. No such luck this time. After a couple cancels and a couple attempted restarts I was resigned to pull out sopping wet laundry and bail out the remaining water the best I could with a bucket.
Still water left
As you may recall we use cloth diapers with Frugal Girl. One of the weekend tasks is to wash said diapers but a broken washer puts a damper on that job. What to do? My options were:
Call a repair person ($$$)
Leave the diapers sit, put Frugal Girl in disposables, wait for Andrew to get home in a week and have him fix it (no AC in the house means those diapers are going to get mighty stinky)
Drag the diapers to the nearest laundromat and sit for 2+ hours with a fidgety 3 year old and a four month old (did I mention Andrew took our only vehicle with him? We’re walking or hailing an Uber this week)
Beg to borrow a neighbor’s washer (regular clothes sure, diapers in the washer for whatever reason seems to make people squeamish)
Fix it myself
We’re going with the last one.
Google indicated that the most likely culprit was a clogged coin trap. Like the name implies, this handy part catches all the coins, bobby pins, screws etc. that you do not want traveling to and damaging the drain pump. Some machines are conveniently designed to have an access door right by the trap for regular cleaning. Our Maytag Maxima does not have this nice feature; you have to take off the whole front panel instead. Thanks Maytag. Well, those diapers aren’t getting any fresher so let’s get cracking.***
The first step in any appliance diagnostic and repair job is to unplug the machine. Might seem like common sense but as Grandpa would say “common sense is a gift not a given.” Once no more power is flowing it was time to remove the top panel of the washer. Yes, you read that right – the top panel has to come off before the front panel. I didn’t take any photos but on the back of the machine there are 3 screws along the top edge. Undoing those let me slide the top towards the back of the machine and reveal two screws for the electronics console panel. These are the same type of screw on either side of the machine in the corners. Once those are out don’t try to tug off the console just yet as you have to remove the dispenser and reveal even more screws.
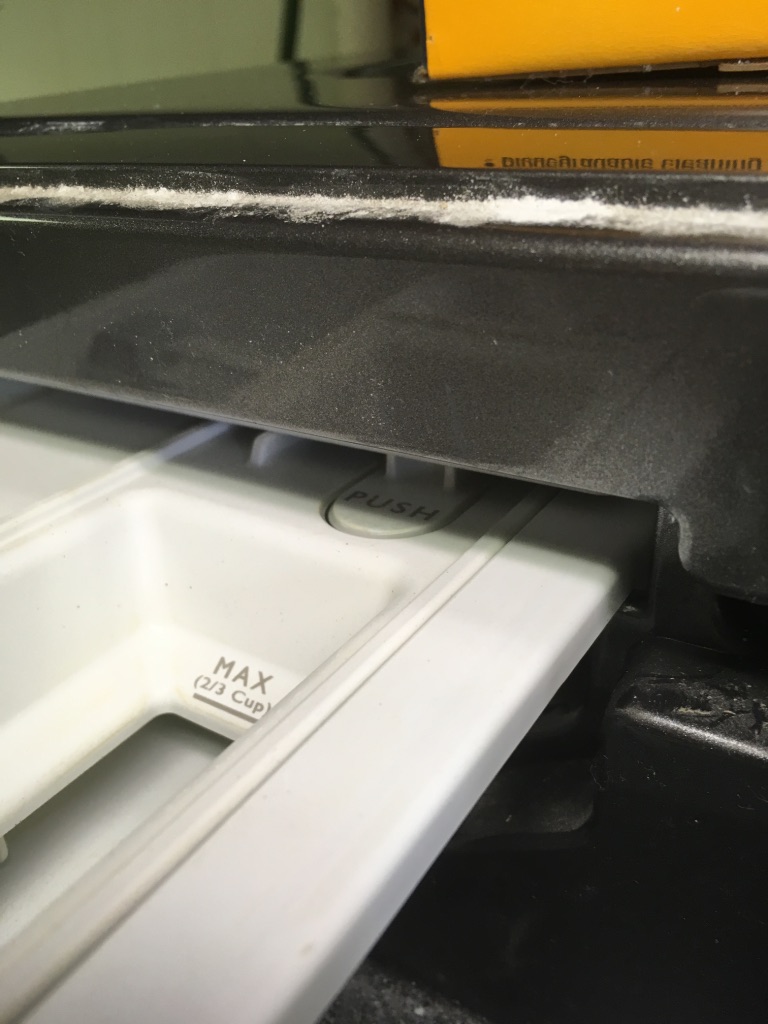
Push the button and the dispenser will slide out.
Of course these two screws have completely different heads from before requiring a different tool.
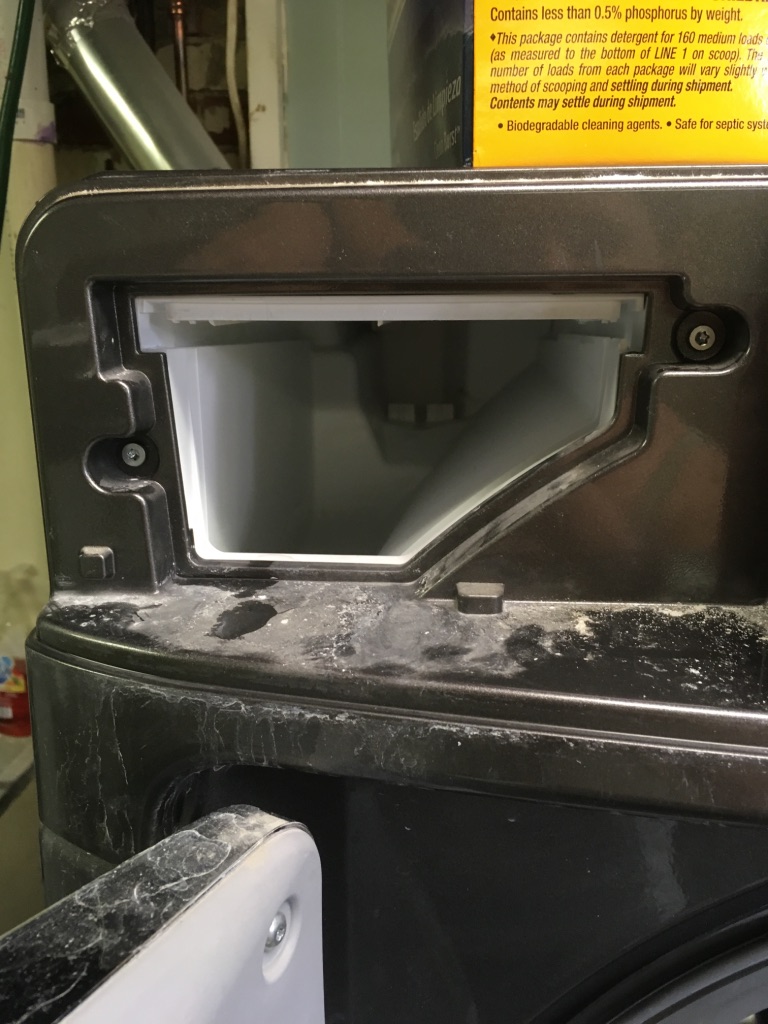
7 screws down and more to go! I was able to very gently lift off the electronics panel at this point and set it on top of the machine. It’s still connected to the main machine via wires so you can’t just rip it off or you’ll have a much more costly problem on your hands.
With the top and electronics panels removed I could now start tackling the front panel removal. But of course it’s not going to be that easy. The center of the front panel is connected to the tub of the machine by a rubber gasket/boot. This is held in place by tension using a wire and spring. There’s a tool that professionals use to extend the spring but I don’t have that. I made do by sliding pliers into the loops (being careful not to rip a hole in the rubber) and pulling in opposite directions. This extended the spring and loosened the wire just enough to be slipped off the gasket. I then unhooked the gasket from the front panel and shoved it towards the inside of the machine and out of the way.
We’ll revisit this pain in the butt again later.
9 more screws to go. There were four screws along the bottom edge of the front panel. Most tutorials on the web had you tilt the machine back or lay on the floor to access them. Our machines are on a custom made pedestal and with a rachet extender I was able to take them out without having to try and move the heavy machine myself.
Thank goodness for small fingers
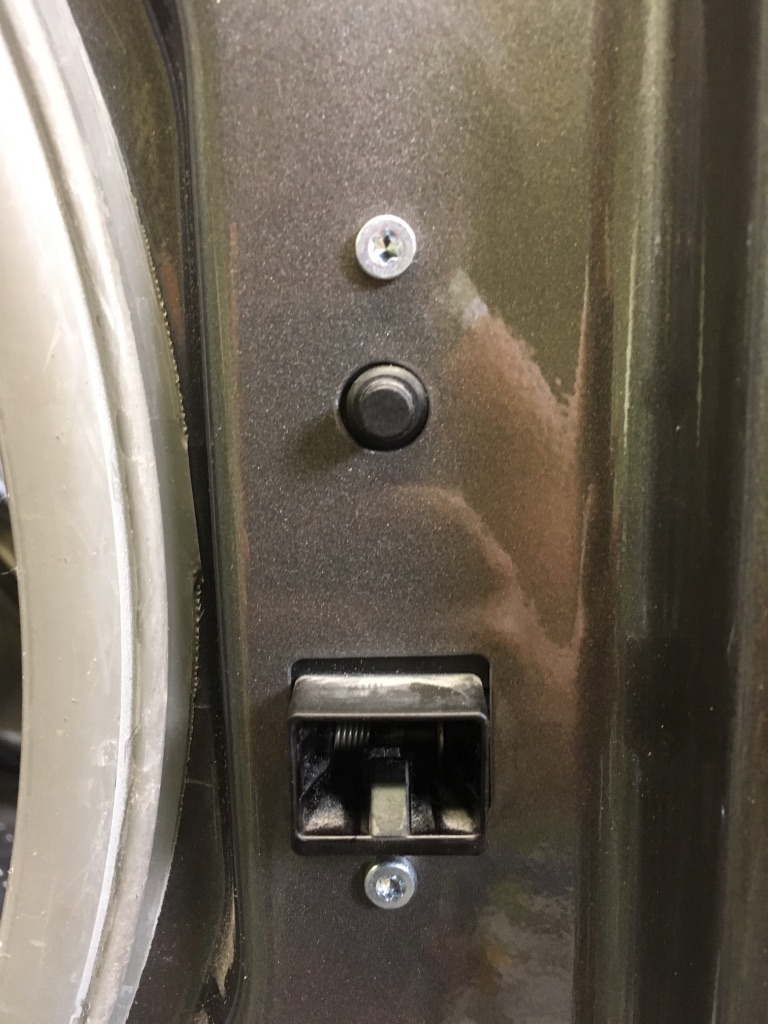
There were three more easily accessible screws along the top of the panel (with a different head from either of the two previous types) that came out and I was able to start lifting the panel up and off the hooks holding it in place. I got the panel clear of the pedestal when I was stopped by more wires attached to the door latch. Two more screws and the front panel was off.
The latch and sensor button stayed with the machine not the door panel.
Front panel gone!
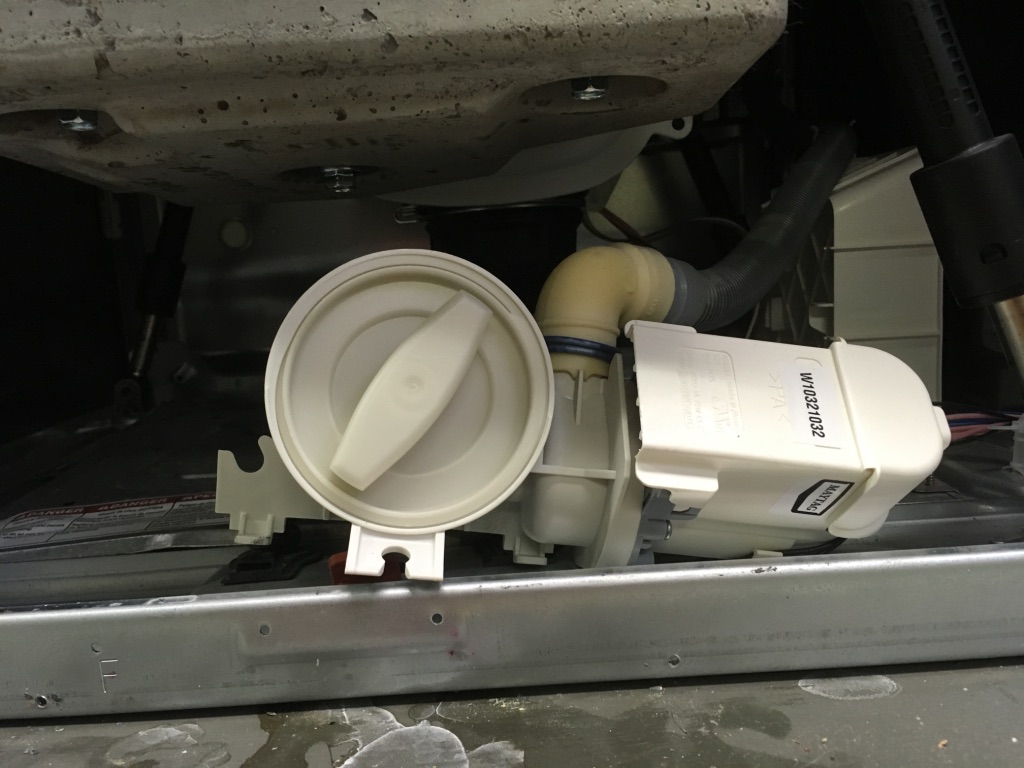
I was surprised how relatively empty it was inside. The white piece in the bottom center of the above photo is the coin trap and drain pump. Here’s a close up.
The parts are held in place by rubber feet that slipped into tabs. I removed the rubber feet to have more room to maneuver a bucket underneath the trap and started unscrewing the coin trap lid. Be happy that smells can’t be transmitted over the web yet as a gallon of foul smelling water poured out as well as the clogged trap.
Yes it was as gross as it looks.
Youtube and the like recommended sticking your finger into the drain pump and trying to spin impeller a bit to make sure there are no clogs there either. Ours was clear and I was free to clean out the trap and start putting the machine back together.
This is what it is supposed to look like.
The reassembly was pretty much the reverse of the above and smooth sailing with two exceptions – both rubber boots. I made the stupid mistake of taking off the rubber boot that leads from the outer tub down to the coin trap. I had felt something in there and turned out to be an intentional hard plastic ball. The tough tension combined with a restricted work space and an odd angle resulted in numerous attempts to get the darn thing back on. Once it was back on I poured a couple gallons of water into the drum to make sure we weren’t going to have any leaks (and subsequently have to take the machine apart again).
Seriously, don’t take this off unless you’re a masochist.
The other problem came when trying to reattached the door gasket to the front panel. Remember that wire and spring? It’s a hard thing to put back on. If you happen to have an extra set of hands to hold it in place it’d probably make the job a lot easier. The tension in spring kept forcing the wire off. I ended up having to hold the gasket top in place with my shoulder, pull the spring as hard as I could using a pliers in one hand, use a putty knife in the other hand to work the wire back into place, and send Frugal Boy to watch Paw Patrol in the other room so he wouldn’t learn new words. An hour later an the machine was back together and ready to be tested out.
So what was the culprit?
I did not heart the slime.
Those heart shaped pieces of fabric are washable nursing pads. I had lost them when I was nursing Frugal Boy…18+ months ago. I thought they were somewhere in the sea of baby clothes. I guess not. I was tempted for a second to bleach them for use but my senses got the better of me and they were thrown into the trash instead (like I said only a second). Three wash cycles later and I’m happy to report the machine is draining well and no signs of leakage yet. Start to finish it took me about 5 hours split between Friday evening (researching and starting to disassemble the machine) and Saturday morning (cleaning everything out, reassembling and testing). If this happens again the fix should go much faster. The kids pretty much let me work in peace. Frugal Boy was happily entertained by Saturday morning cartoons and Frugal Girl thought the back of her eyelids were more interesting than watching me work.
Obligatory photo for the grandparents. Also before you start worrying Grandma and Aunties, that towel is clean just stained.
Hopefully nothing else will break in the next few days until Andrew gets back. 🙂
***Note: I am not a professional appliance repair person. I am a software developer (aka professional googler). You follow what I did at your own risk. I am not responsible for any damage to your machine or you.
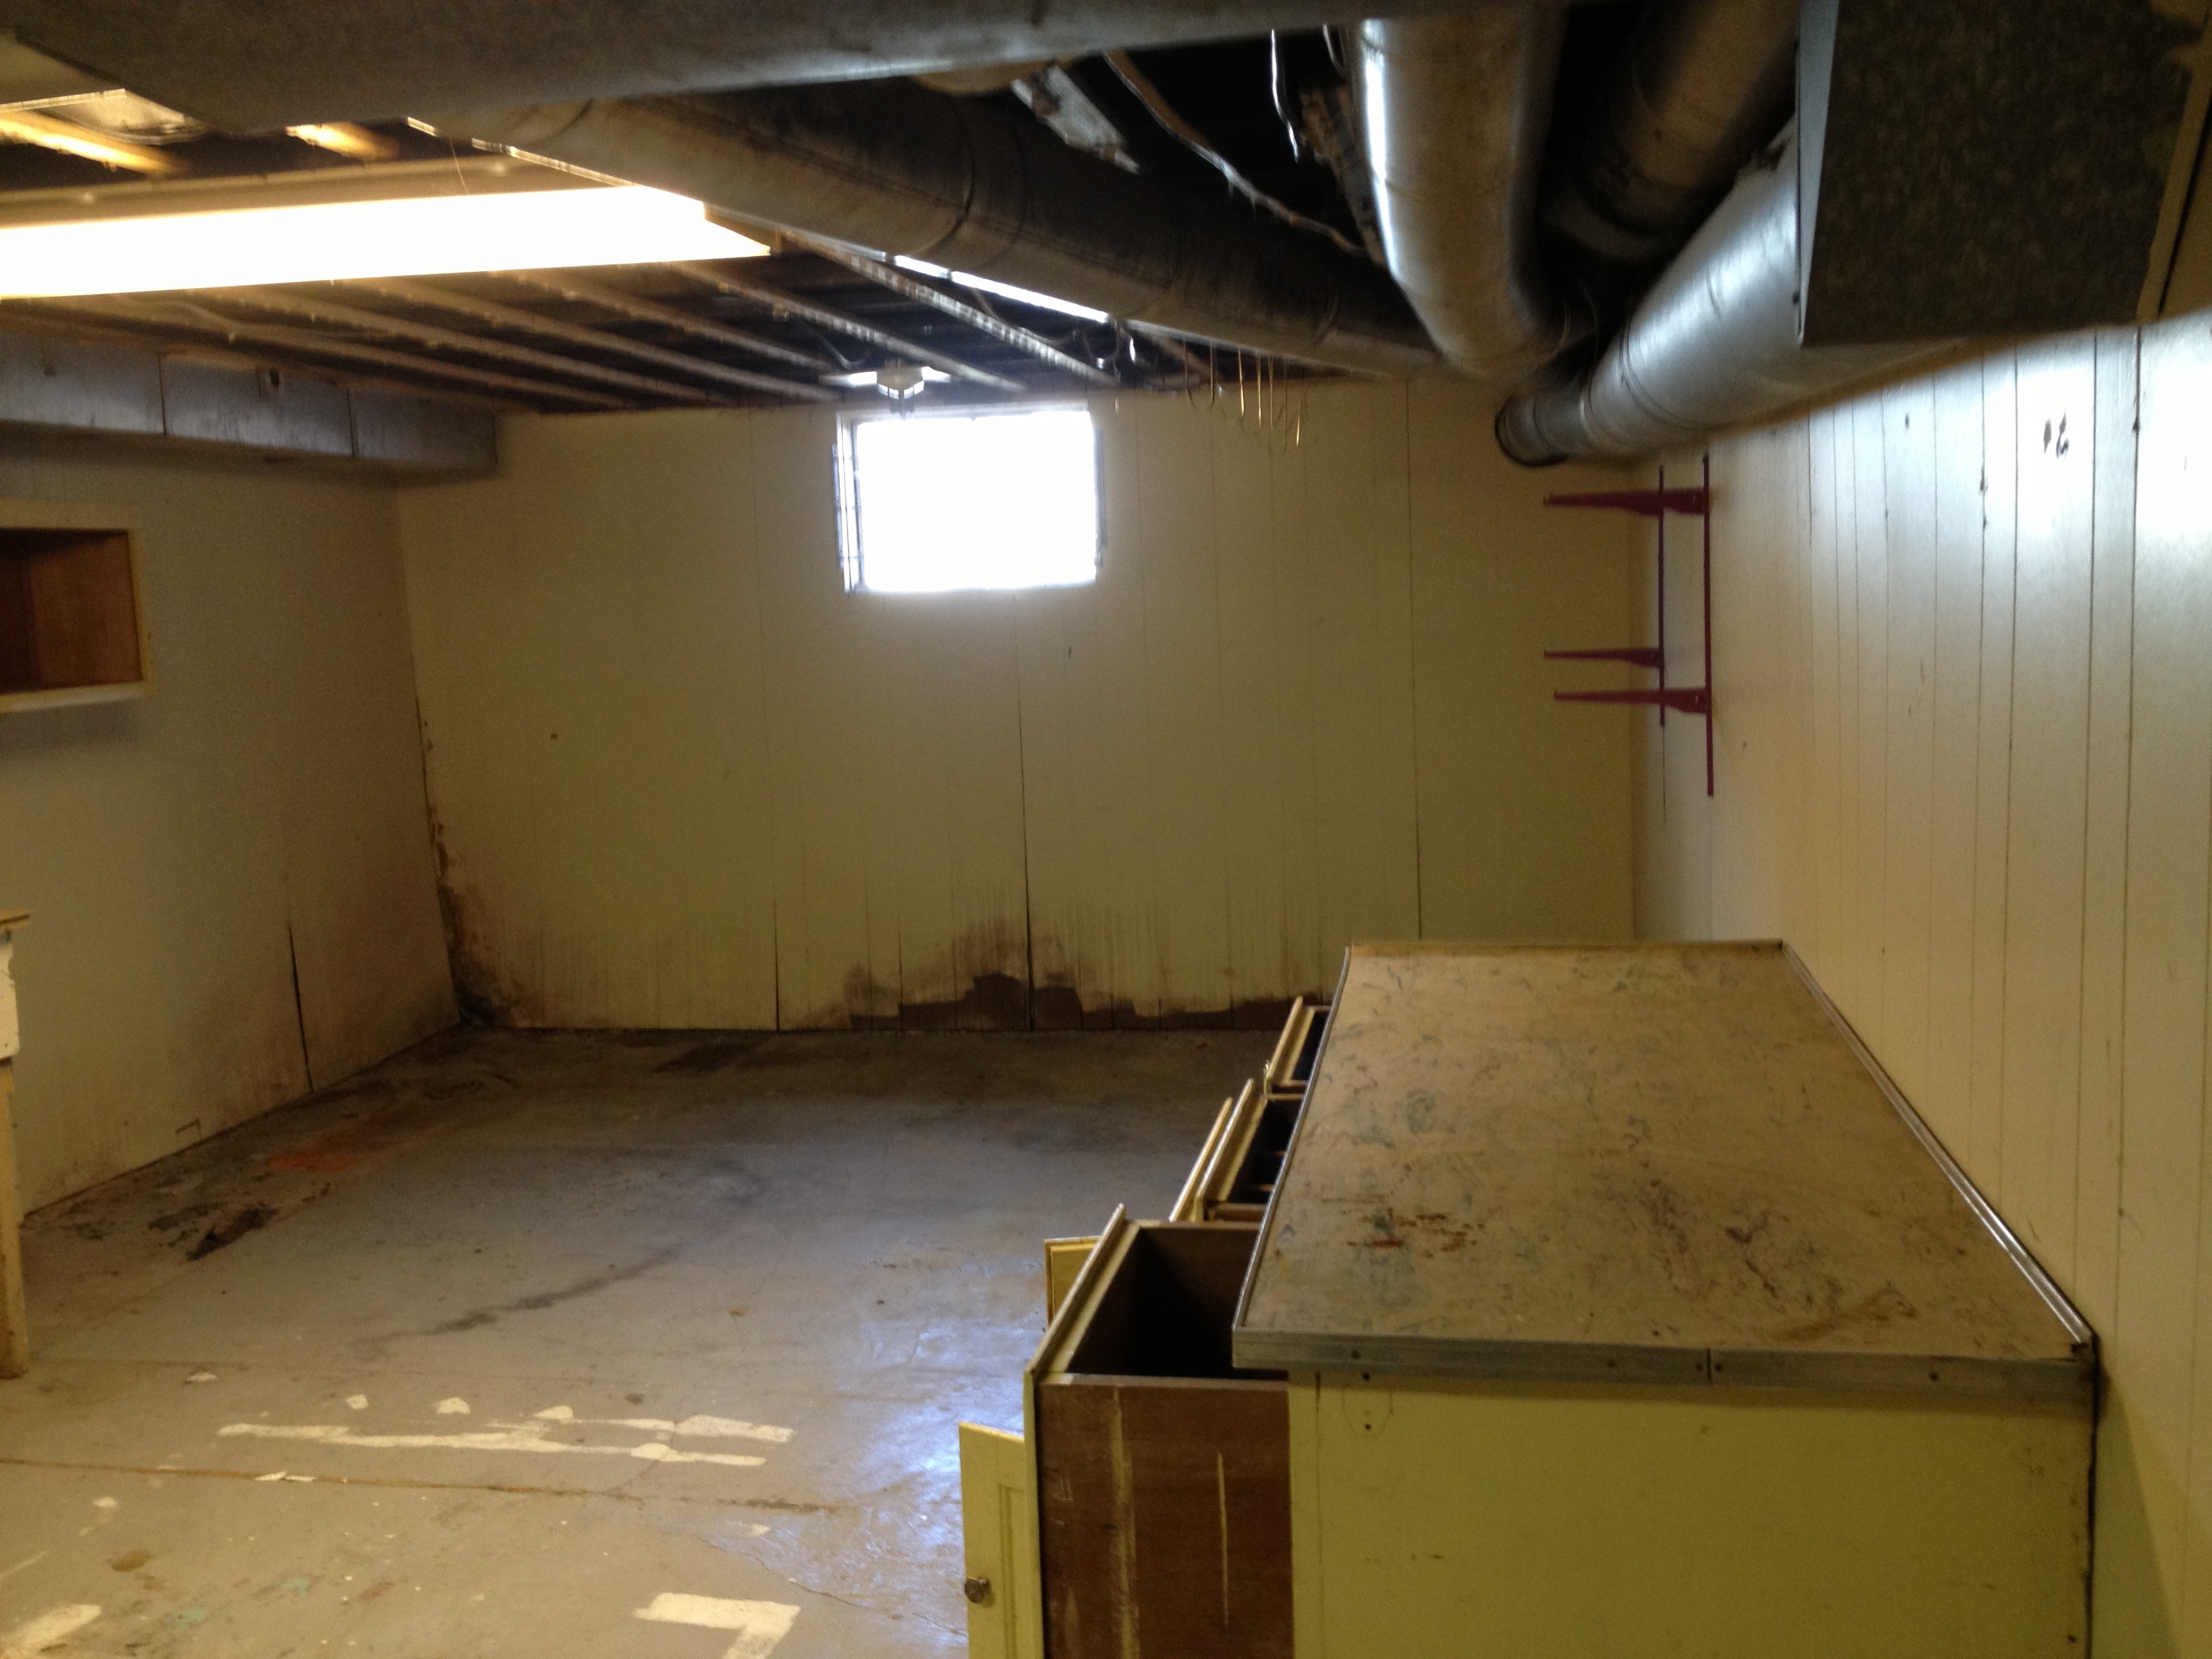
Shae, Frugal Boy, and I have been working tirelessly on redefining half of the basement into a second living room. When Shae and I toured the house almost four years ago, the space was for lack of a better word, gross.
70’s wood paneling covered the walls. Some sort of black mildew or mold was growing on the walls along the floors and corners. A finished ceiling had been half ripped out, but the furring strips remained. The singular window had bars over it. Our house isn’t in a rough neighborhood, so it seemed very out of place. The remaining windows, while visible from the outside had been covered up from the inside. There was only one electrical outlet for the entire room and that room was labeled “Play Room” on the electrical panel. Maybe at one time it was a fun play room, but it had certainly degraded past that point years ago.
Fast forward almost four years and below is a picture of the space now.
It is not finished, but it looks so much better. The best part, by combining a barge full of sweat equity and a penchant for using other people’s rejects, we didn’t break the bank doing this renovation.
In previous years we tore down paneling, repaired/replaced windows, and repointed the brick mortar. That gave us a clean slate to start rebuilding the room. The first item of business was insulation.
We used reclaimed polyiso rigid board insulation sheets that had been removed from a commercial building roof.
2″ thick 4×8 polyiso boards such as these normally retail for around $30 a sheet. I was able to pick them up second hand for $14/ea. That is a $16/sheet difference. Multiply $16 by the 12 sheets that we used to insulate and you end up with a cost savings of $192.
The next big cost savings we scored was by using factory seconds porcelain tile. One of the big current trends/fads in floor tile right now is large format, wood-like, porcelain tile. This tile often comes in 8×36″ or 8×48″ and features an ink jet printed surface that looks like real wood grain because it comes from pictures of real wood grain.
This type of tile normally runs around $4/sqft at big box stores. You may be able to find a sale and get it for less. We bought 336 square feet of factory seconds tile at $1.30/sqft for a total of $437. Buying the same thing from a big box store would have cost us $1344. By taking factory rejects, we saved a whopping $907.
While laying the tile floor was hard work, it only took about a week to get it all done working nights and weekends. Looking around the internet, pegs porcelain tile labor costs at around $5/sqft. That is another $1680 saved by rolling up our sleeves and taking a couple of ibuprofen before bed.
Sometimes the savings are smaller. For instance, I bought a snap tile cutter for $20 at Lowes to install this floor. Our neighbor was throwing out an old cutter and offered it to us for free. It worked ‘well enough’ to get our job done. We saved $20 by using an older, less-than-perfect tool.
I rejected the notion of buying a projector mount and opted to make my own instead. $10 in hardware was adequate to mount our slickdeals.net projector deal to the ceiling.
We saved $5 on the DIY mount and $80 on the projector.
Getting furniture into the room is very difficult because of the narrow stairwell. We barely fit the water heater down four years ago.
We finally found an interesting deal on a futon through Craigslist.
For $180 we picked up a brand new, in the box futon that normally retails for $290 + $24 in tax. The craigslist seller was running an interesting side business of buying RETURN lots at auctions and then reselling them.
The general gist of the business is that people buy furniture at Walmart or other retailers, get it home, open it up, and realize that it is broken, the wrong color, or just not what they wanted. They return it to the store where they bought it from, but the store doesn’t want it. The instruction booklet even has a big STOP printed on the front telling customers NOT to return it to the store. Instead, unhappy customers should call the manufacturer, often DHP or Ameriwood. So the store is left with a box that they cannot readily resell. They load it up on the next outgoing truck and it ends up at a processing center. All these rejected returns are then bundled up into a lot and sold off at pennies for the dollar at auction.
A middle man can then buy these rejects and sell them in their own store or eBay or craigslist. A thrifty shopper like myself would buy it, realize that a part is damaged and then get a replacement part for free from the manufacturer.
The craigslist reseller gave us two options. She could request the replacement part, or we could do it ourselves and she’d knock off $20 from the price. We chose to do it ourselves. The process could not have been simpler, and it was FREE.
Not only is our new sofa well traveled like us, but we also saved $134 by following simple replacement instructions.
We bought a media cabinet as well from the same craigslist reseller. It had no damage.
We paid $50 for it when it retails for $74+tax. $30 saved.
You think that would be the end of the post, but wait, there’s more!
We saved $20 by buying a refurbished 4th generation Apple Tv.
It streams content just as well as a brand new one.
For those of you keeping score at home, the total savings of buying rejected second hand material for this project and doing the tough tiling work ourselves comes out to a humongous savings of $3068. That doesn’t even take into account all of the other sweat equity that we put into the room including, demolition, framing, electrical, drywall, painting, and trim. Taking some time to shop around and look at alternative sources can really pay off. You don’t always have to buy things brand new or from traditional retailers. There are a lot of little resellers that can often cut you a much better deal on the same material.
An Autumn chill has crept into the nights and we have closed up most of the windows in the house to keep the warm daytime air in. The cooler weather is a welcome respite from the heat and humidity that has dogged us for the majority of the summer. On Sunday, after we waved goodbye to the grandparents, a tale for a different day, Shae and I set to work on planting fall perennials and spring bulbs around the house. Frugal Boy moped inside, he had a serious case of the blues and missed Grandma and Grandpa.
Before we rebuilt the porch, it was surrounded by perennial mums. A year and a half of construction had killed off the majority of the plantings surrounding the porch, so we picked up almost 100 bulbs plus 16 quart sized yellow garden mums from Menards. The home improvement store was running an 11% off sale that made the mums an attractive $1.11/ea. Tulip bulbs were 19¢ a piece and giant alliums were 20¢ each.
We spent a couple of hours relocating two dozen hostas from the front of the house to fill in other areas. Then we laid out a two row pattern of hyacinths and tulips for the flower bed in front.
Next Spring we’ll probably need to add in some Summer and Fall color to this flower bed.
Next, we dug a trench around the southern and eastern porch edges to plant giant alliums, tulips, hyacinths, and yellow mums. Mums are a fall perennial so my hope is that as one plant dies off or loses appeal, another will take its place. Experienced gardeners call this layering and know what they are doing. I took a more spray and pray attitude.
With any luck, everything that we planted will come back for years to come.
When we bought our house three years ago, we also inherited a basement full of window screens in various states of disrepair. Each Summer, I dutifully pull them out of storage and put them in place and each Summer there are more left in the basement needing repairs. This year, I decided it was time to spend a day to fix them all. If the temperature forecasts for this summer are at all accurate, we are in for a real scorcher season.
Frequent readers of this blog know that our central AC has never worked. The condenser outside is an ’84 Sears Kenmore unit. You can imagine my excitement when I saw a screen material at the home improvement store that claimed to reduce temperatures by blocking sunlight and UV rays.
Armed with a gift card, I started an experiment to see if this screen material lived up to the hype or not.
Hypothesis
Replacing existing aluminum screening material in a South or West facing window would reduce the temperature recorded inside that window.
Experimental Method
I gathered up the needed materials,
New York Wire Sun Guard Charcoal 90 Screening
.14 Spline
Spline tool
Existing South/West facing window
Scissors
Utility knife
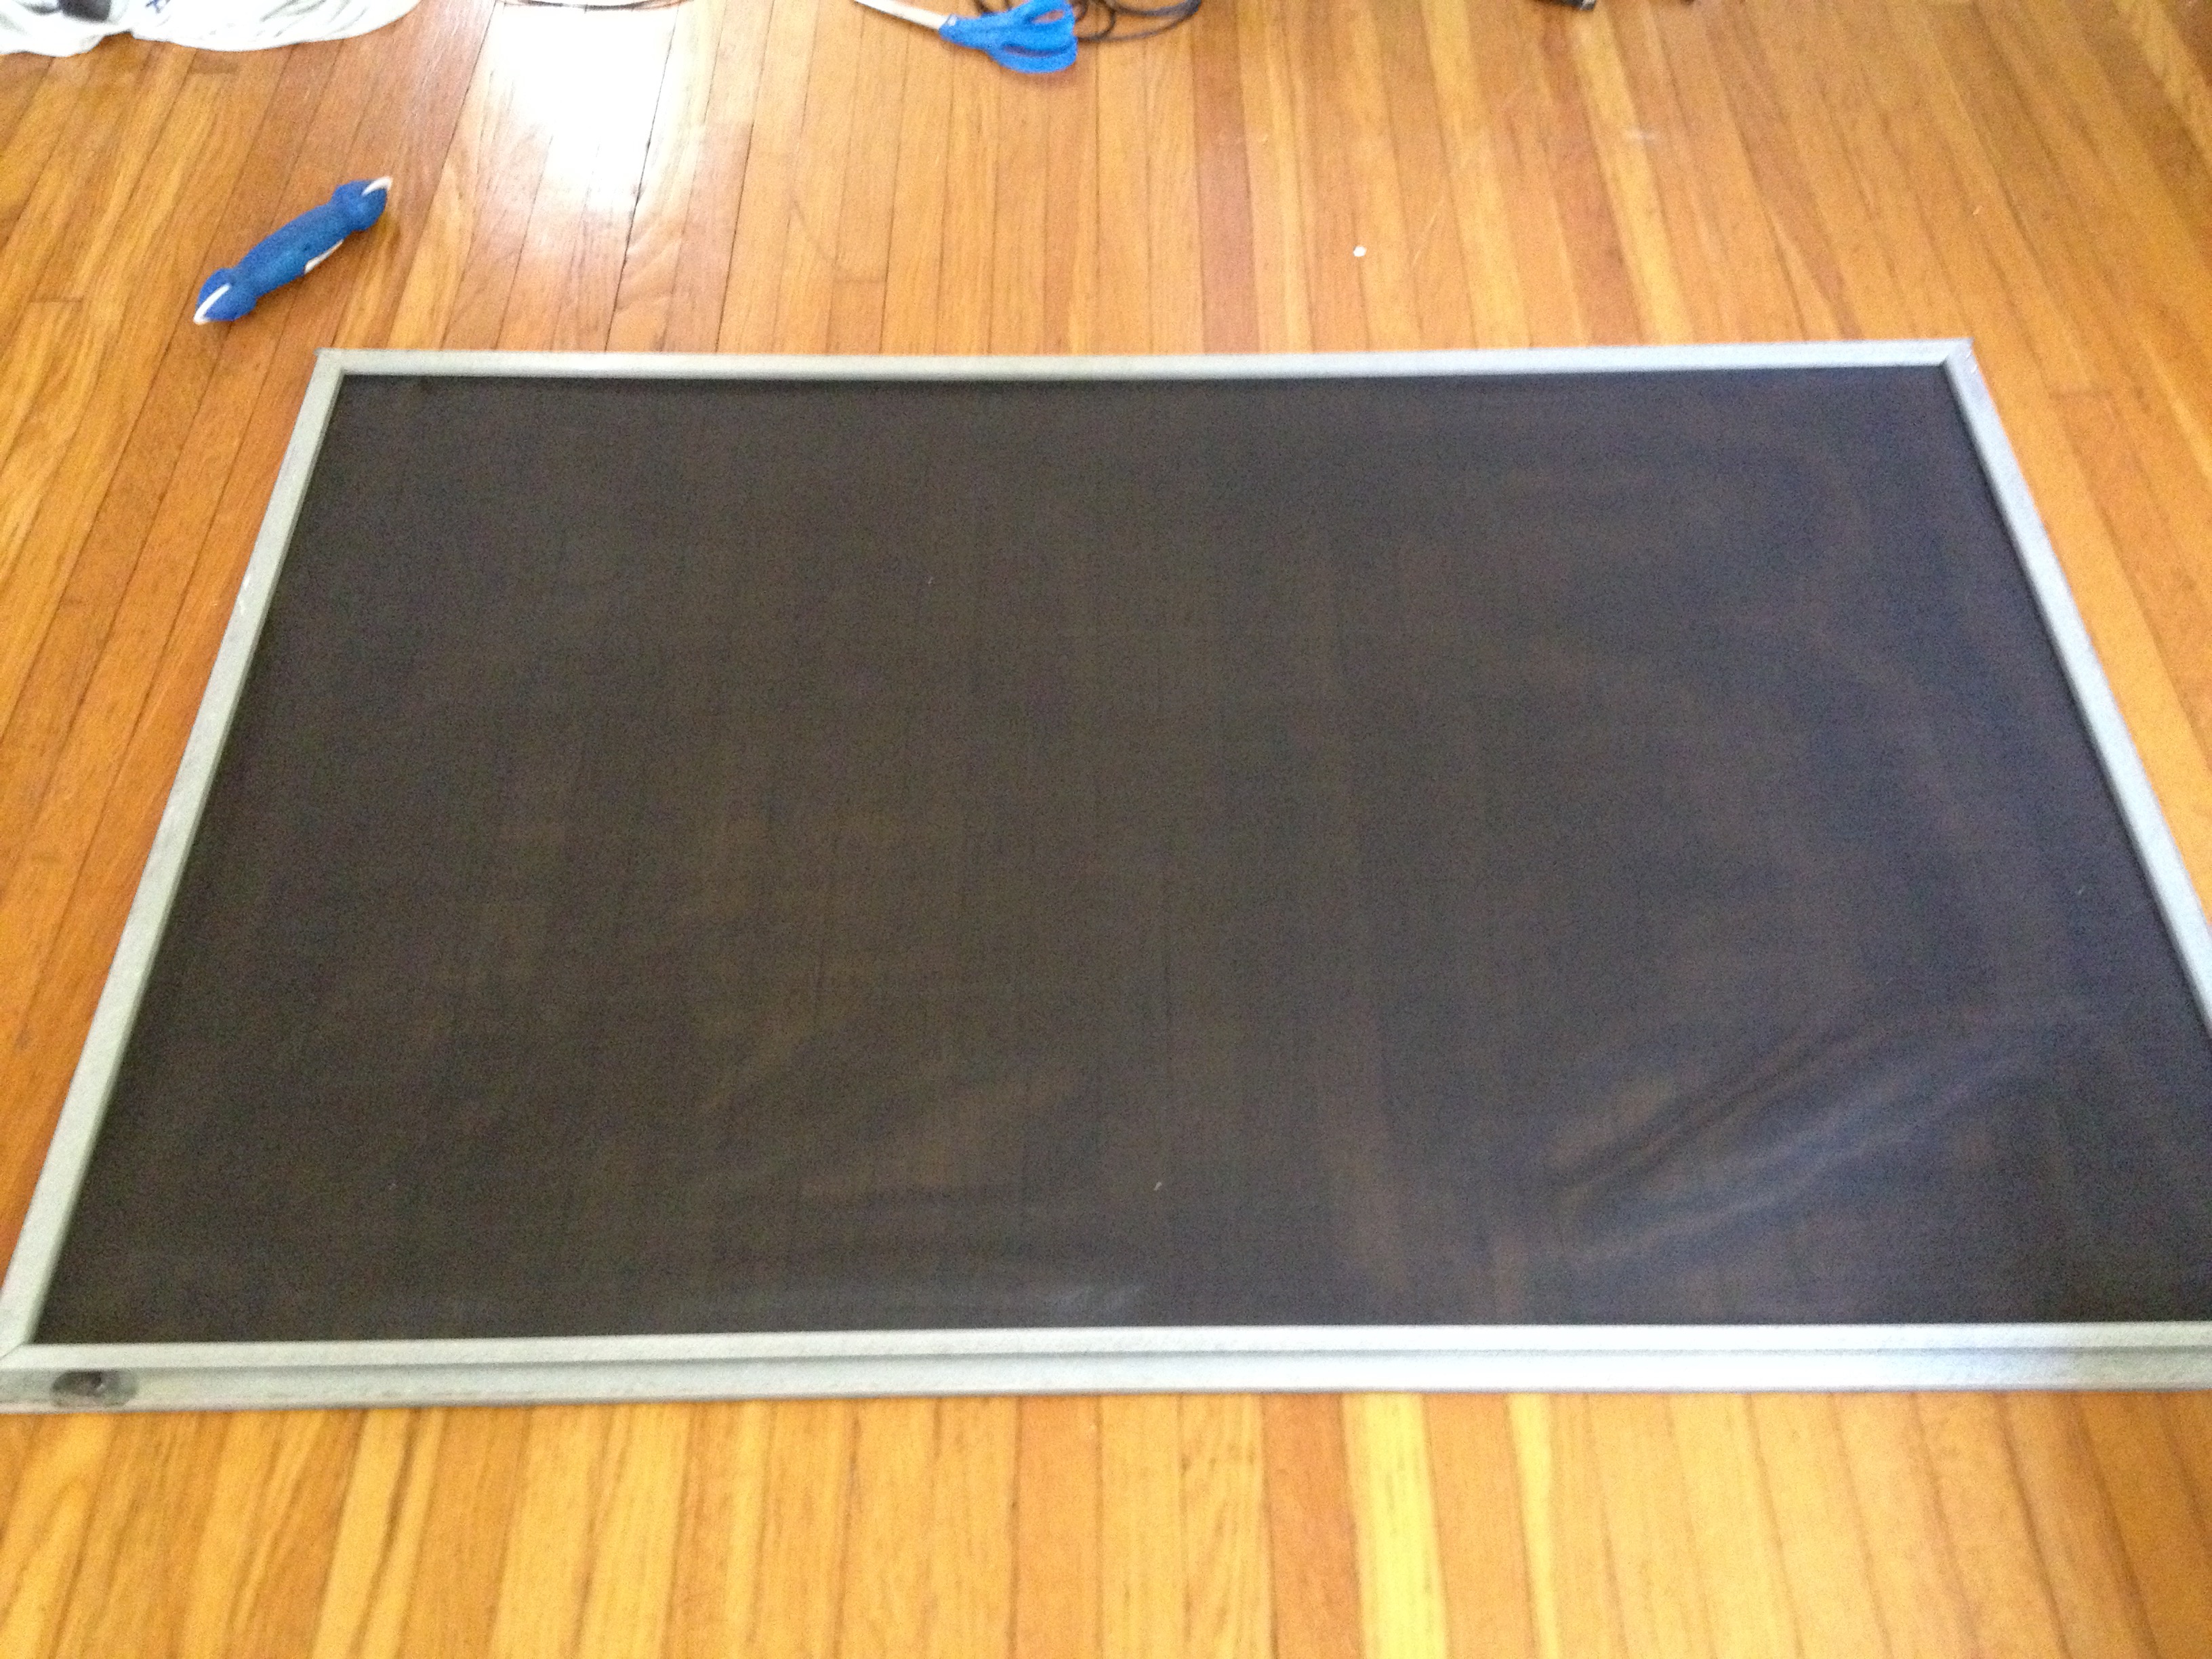
After removing the old spline and screen material, I rolled the new sun guard screen over the frame.
Then I pressed new spline material into place and cut off the excess screening. I learned the hard way that it is best to keep the screen material somewhat loose. Over tightening the screening will bend the frame and it won’t fit right into the window opening.
With the renovated screen in place for a hour, I then placed a thermometer on the window sill.
You can see that there is a lot less sunlight behind the renovated screen.
After letting the thermometer settle for five minutes, I took a reading. I then moved the thermometer behind a regular window adjacent to the renovated one. After five minutes to stabilize, I checked the thermometer again.
Sun Guard screening recorded at 82° F. The control window recorded at 90-91° F.
Conclusion
The Sun Guard screening does prevent sunlight from entering the house and helps keep the interior cooler than a regular window. After seeing these results, I plan on replacing all of the South and West facing screens with this type of material to help keep our house cooler. I suspect that this type of upgrade would also be beneficial for lowering AC utility bills if you had this type of setup:
outside hot – screens – windows – ac conditioned space.
 Frugal Boy had Spring Break last week and spent most of it at the grandparents house. He had a fantastic time and even got to visit Lego Land.
 Shae, Frugal Girl, and I took advantage of the relative quiet to go out on a date. Frugal Girl really liked the crab tacos.
 Shae made a bunny butt cake for Easter.


 Frugal Girl did surprisingly well finding easter eggs and putting them in a basket.
 I made up a simple bone-in ham for lunch.