Frugal Boy and I were walking through the produce department and he noticed a strange looking orange. He asked if we could buy it, and sensing a learning opportunity, I indulged him.
It was labeled as a “Sumo Citrus” PLU 3632.
Here is a worksheet that I made that kids can use to investigate the unusual citrus fruit. (Click image for PDF version).
Our kitchen is one of the few rooms in the house that we have not made any substantial changes to during our tenure here. At some point, in the 1950s or 1960s, the owners built an addition to the back of the house to add space for an expanded kitchen and a water closet. How do I know the approximate dates? Just take a look at the electrical.
This website has a nice array of pictures to help date different outlets.
All of the kitchen counter outlets and the over-the-sink lights were all on the same 15 amp circuit. The 2014 National Electrical Code, NEC, calls for two (2) 20 amp circuits to service the kitchen counters. We are about 25 amps short of where we need to be.
Why So Many Amps?
If you have ever lived in an old house, you’ll know why. Have you ever tried to use the microwave and toaster at the same time? What happened? The fuse or circuit breaker probably blew or tripped! Small appliances can draw a lot of power. For instance, our countertop microwave draws 1,350 Watts.
The coffeemaker draws 1,450 watts, and the toaster oven requires 1,100 watts.
Watts / Voltage = Amps.
Microwave: 1350W / 120 V = 11.25 Amps
Coffeemaker: 1450W/ 120 V = 12.08 Amps
Toaster: 1100W/ 120 V = 9.12 Amps
Circuit breakers don’t always trip exactly when the amperage exceeds their listed value. A 20 amp circuit breaker won’t necessarily trip if you plug in 20.01 amps worth of appliances. There are many factors that go into when a breaker trips including heat, the multiple of amperage demanded, as well as time.
Adding a New Circuit
The answer to our personal dilemma was to simply add another circuit. I chose to wire up a new 20 amp circuit from the breaker to the receptacle closest to where the microwave sits. Snaking and fishing new cabling is the hardest part of the job. I still have a few holes to patch in the walls from where I had to navigate around insulation, fire blocks, and a 2″ galvanized vent pipe.
I had never seen an outlet like this. The electrician that installed it had to piggyback hot and neutral from the top receptacle to the bottom receptacle. The manufacturer was stamped onto the part and read ‘Bryant’.I replaced both the outlet and two switches with modern equivalents. I used a new Leviton 20 Amp tamper resistant GFCI outlet. I also replaced the old light switches because I could not find a cover plate to fit the old size.
With the microwave on its own 20 amp circuit we shouldn’t trip a breaker nearly as often on the existing 15 amp. It would be quite a chore to rewire the 15 amp circuit into a 20 amp, so I settled for replacing the receptacles with modern ones that add GFCI protection, a built-in night light, and USB chargers for guests.
The one GFCI outlet to the left of the knife block protects all downstream outlets. It also contains an integrated ambient light sensor and LED guide light. If you cover up the light sensor with your finger, the lights will turn on.
The last one that I added was this duplex 15 amp Leviton receptacle with integrated USB chargers (link). It is GFCI protected because it is downstream from the interrupter receptacle.
It was definitely a squeeze to fit the bulky receptacle into the narrow 1950s electrical box, but with some careful finagling I got it in. I like these Leviton receptacles because they have an innovative side/back wiring mechanism. Instead of the distrustful backstab style of wiring or the time taking wrap around a screw wiring, Leviton created a system where you slide the wire into a tab underneath the side screw and then tighten the screw. The result is a back wiring that has all the pros and few of the cons of either of the traditional systems.
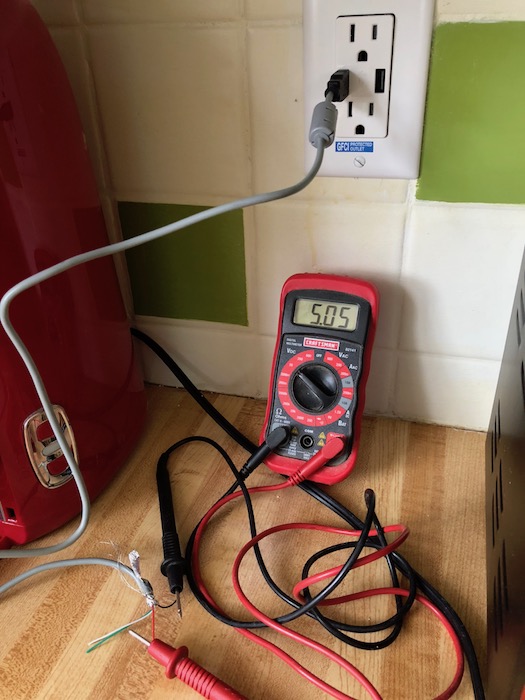
The Leviton T5632-W USB charger outlet had one critical review on Amazon about the USB charging voltage being out of spec. A standard USB should deliver 5 volts. Naturally, I tested mine.
5.05 volts! That looks perfect. Leviton claims that it is the most powerful USB charger on the market. Why does that matter and how do you verify it? It matters because more and more phones and tablets are coming with quick charge capabilities. Plug your device into a USB charger and in 30 minutes you’ll go from 0% battery to 80%. That can be a really useful feature, but you need the right charger to support it. Most charging capabilities are measured in Watts. Amps x Volts = Watts. Leviton claims their product puts out a collective 3.6 amps of current. 3.6A x 5.05V = 18.18W of charging power. For reference, the standard charger that Apple supplies with their 2018 iPhones is a 5W charger.
And the iPad charger is either 10W (older style) or 12W (newer style).
The Leviton T5632 will charge your device faster. How much faster? Well that depends on what device you have and if it supports quick charging.
Dan Loewenherz put together this chart showing how fast an iPhone 8 (which supports fast charging) would charge given different wattages of power.
The purple line shows a standard 5W charger. The Leviton, at 18W, would fall between the red and yellow lines. For example, to charge from 0% battery to 80% would take about 135 minutes with the standard charger, but only about 50 minutes with the Leviton.
Frugal Girl has an interest in electronics, or maybe she was just looking for a snack.
It isn’t a complete kitchen remodel, but this long weekends worth of electrical upgrades does bring increased safety in the form of GFCI protection, added amperage capacity, and grounding as well as modern conveniences such as night lights and built in USB chargers that eliminate the need for wall warts. Plus who doesn’t like being able to use the microwave and toaster oven at the same time. 😛
The city inspector came to our apartment building for an annual review. It’s nice for the tenants because it doesn’t cost them anything and helps to ensure a certain standard of living. The inspector pointed out three things that I needed to fix. Three points for four units isn’t too bad especially compared to the 200+ violations found at a different landlords 12 unit property earlier this year. It was all over the news because the building had a kitchen fire shortly after inspection and burned down. 0.75 items per apartment for us vs 17 for the local slumlord puts us in a pretty good light.
One hardwired smoke detector didn’t test right, so I replaced that. That was the first time that I replaced a hardwired smoke detector. Of course the electrical panel wasn’t marked properly, so I had to go through a number of breakers and use my pen tester to figure out which circuit the detector was on. I also needed to read the instructions to find out what the red wire was for. Apparently, it is for interconnecting two or more smoke detectors that are on the same circuit. You learn something everyday!
The sidewalk/driveway has deteriorated and needs to be replaced. I called a concrete contractor and should have that addressed as soon as they get back to me.
Finally, one of the bathroom sinks didn’t have working hot water. I’m not sure why the tenant didn’t call about it, but it was a simple enough fix.
The plumbing underneath was a mess. Someone made a simple job a lot harder than it needed to be.
There are 1/2″ copper supply lines coming out of the wall, soldered to 90° fittings, that are soldered to old style gate valves, then soldered to a 3/8″ reducer, where it then rises up two or three inches before another fitting, and then finally the braided flexible supply hose that goes up to the faucet itself.
I used a compact wheel cutter to cut the 1/2″ copper supply line as close to the 90° fitting as possible. Then I used a right angle quarter turn compression valve that went to a flexible braided supply hose to the faucet.
It installs fast, looks cleaner, and has fewer points where it can leak.
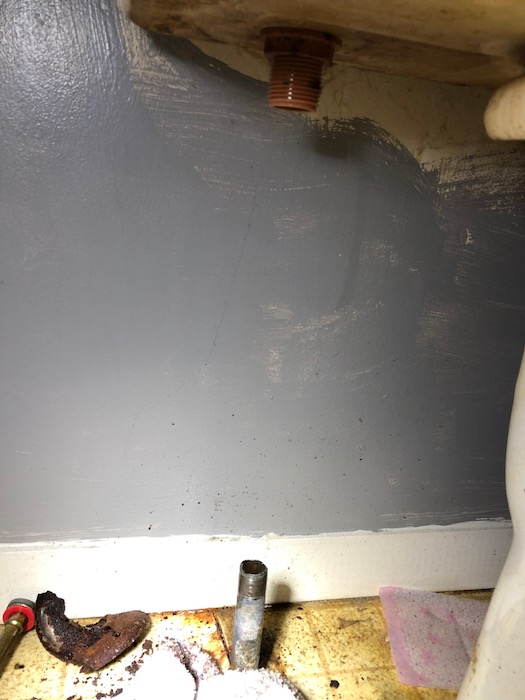
Even though it wasn’t on the original work order, I checked out the toilet while I was there. I noticed that it was filling incredibly slowly. With the water supply turned off, I removed the shutoff valve and saw that the supply pipe was 3/8″ threaded galvanized iron pipe.
The inside of the pipe was completely clogged up with debris. Using a screwdriver I chipped away at the buildup until a larger area had been freed up. By this time, I had already made half a dozen trips to the hardware store, so I reused the existing multi turn shutoff valve and just put on a new braided supply hose. With the water turned back on, the toilet tank refused to fill. Time to start troubleshooting. I unhooked the braided supply line from the tank and aimed it into a bucket. Yep, water was making it through there just fine, so the problem wasn’t with the shutoff valve or the supply hose. The issue had to be with the internal mechanisms in the toilet tank. With another trip to the hardware store and a new fill kit in hand, I replaced the guts of the tank.
The replacement parts come with lots of instructions, so even if you have never done this before, you can do it if you know how to read.
I tried it again, and this time the tank filled, but it didn’t stop filling. I thought maybe the part was defective but first I tried the troubleshooting section in the instructions. It said that pipe debris might be in the way of the fill valve seal and gave instructions on how to check and clean that out. Sure enough, when I followed the instructions I found little bits of rock in there, probably from me chiseling earlier. With that cleaned it was all working. Yay!
Some projects a little closer to home include bringing electrical up to code in our 1905 house. I replaced the ungrounded, unpolarized exterior outlet with a new GFCI receptacle. I also had to upgrade the supporting wiring, breaker, and weather box.
I shudder to think of all the times I used a corded electric lawnmower with that old receptacle. The 120 volt shuffle would have been entertaining for the neighbors, but not me!
I also replaced the front porch exterior receptacle with a weather resistant (WR) GFCI and new weather box.
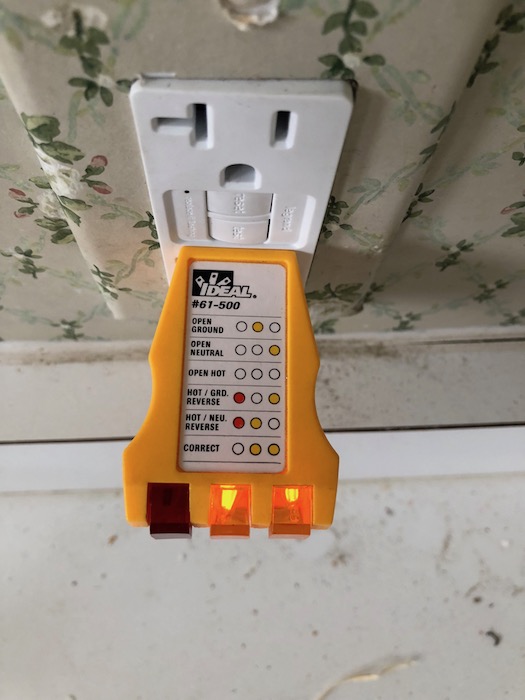
Inside the house, I made some improvements for both safety and convenience. I had never given much thought to the first floor half bath receptacle until my sister-in-law used it with a hair dryer. She’s lucky she didn’t end up extra frizzy.
For the sake of keeping the peace with my wife, and not killing off the in-laws, I installed a GFCI outlet to bring it up to code.
Interestingly, the 2014 NEC which most municipalities have adopted for their building codes, states that it is perfectly fine and compliant to upgrade a non grounded outlet (common in old houses) to a ungrounded GFCI outlet. So if it is too difficult to bring new wiring to the outlet, you can keep the old wiring and simply replace the receptacle.
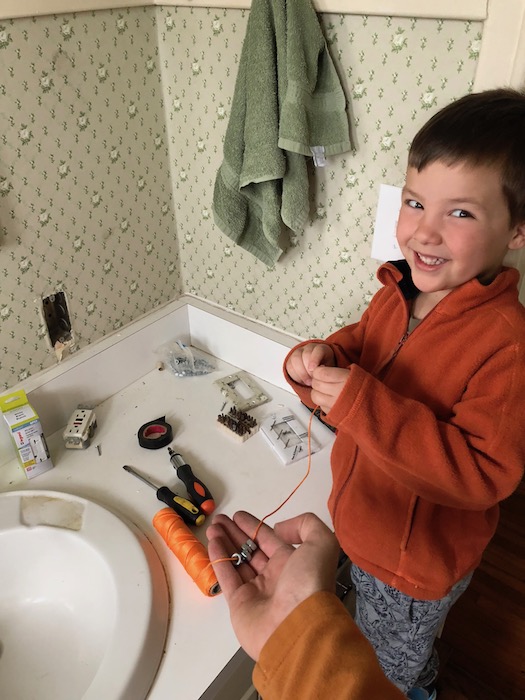
Finally, I ran a new 20 amp circuit for the 2nd floor bathroom receptacle. It already had a GFCI, but it was tied into the light switch and on top of all that, it was on knob and tube wiring. So not only was it on 113 year old wires, had no ground, but it also meant to use the outlet you had to turn on the lights first.
Frugal Boy helped me fish new wire up from the basement.
I was blown away by the electrical requirements of hair dryers. A quick look on Amazon shows that the top selling hair dryer uses 1875 watts. Watts/Volts = Amps. I put in a 20 amp circuit for just this one receptacle. 1875 Watts / 120 Volts = 15.62 amps. If I had put in a regular 15 amp circuit, it wouldn’t have been enough!!!
There are some more projects on the horizon, such as separating the microwave onto its own 20amp circuit (we’ll finally be able to run the microwave and toaster oven at the same time!), and adding GFCI protection to the kitchen counter outlets. My goal has been to increase code compliance where it most needs it, and also to improve convenience by adding in little modern amenities.
Frugal Girl turned 1 and we have had a couple of little celebrations to mark the occasion. Grandma made an adorable unicorn cake for her. It tasted as good as it looked!
I made this delicious roasted chicken. You can throw the entire carcass into a stock pot, and boil the remaining meat off to make an easy chicken noodle soup. Just add a quart of chicken broth or water and carrots or other veggies.
Shae made some tasty cupcakes. Frugal Girl looked to big brother for some guidance on the candle. He knew what to do.
She didn’t need any help eating the cupcake though!
We opened some presents, including this big one.
She had her 12 month vaccinations and checkup. 29.5″ tall (63 percentile), 20 lbs 2 oz (56 percentile), and a head circumference of 18.5″ (94 percentile).
She isn’t walking yet on her own (probably because of the high center of gravity), but she does enjoy cruising along furniture. She really enjoyed the trip to the zoo. Anything that she could see up close she liked including the primates, turtles, and fish.
All in all, she is a happy healthy girl.
Thank you to everyone who has contributed to making the first year as easy as possible for us parents!
Every winter our local zoo puts on a 5K, 3K, and kids fun run. It is a great way to support the zoo, get outside after a forced hibernation, and see the zoo.
This was the second year that Frugal Boy ran the kids fun run. It meanders through the zoo grounds past exhibits before finishing just outside the gates. Every participant gets a medal and a baggie of apple slices.
Frugal Boy did a great job this year and finished somewhere in the middle of the pack. I was proud that he didn’t wipe out on the concrete like some of the other kids. He is not the most graceful so that was a big accomplishment in my book.
After the kids fun run, it was time for the 5K to start. Shae pushed Frugal Girl in one jogging stroller while I pushed Frugal Boy in a second stroller.
I finished in 25:02 and Shae finished in 36:47. We were both satisfied with our times considering the stroller handicap and both recuperating from illness.
Afterwards we had a little picnic lunch at the park. Post race food always tastes so good. It must be a running thing.
It was such a lovely day that we went to the zoo afterwards. Part of the race registration fee included a ticket for admittance to the zoo. Frugal Girl found someone as stubborn as her.
And later on, I found a couple of chicken nuggets.
 It was labeled as a “Sumo Citrus” PLU 3632.
 Happy investigating!