Frugal Boy is eating more and more ‘solids’ and to keep pace we have been making our own baby food. A recent acquisition of a $5 blender makes short work of pureeing solids down to something a six tooth digestive track can handle.
We saved some of the store containers to reuse.
The economics of making our own baby food varies wildly with what we use. We try to buy what is in season as that is the cheapest. However you can always pick up family sized bags of frozen veggies and steam them for a cheap, but nutritious meal.
Ultimately we would like to get him eating what we eat, but he just isn’t ready for veal, spinach, and cheese stuffed manicotti with vodka sauce (a meal we made this past Saturday for $4/serving).
Until then, we’ll stick with simpler foods like pureed veggies and wheat circles.
It is hard to believe that it is almost Thanksgiving. What happened to 2014? I haven’t done any big home improvement projects for some time so there was an itch that needed scratching.
Secret Entrance
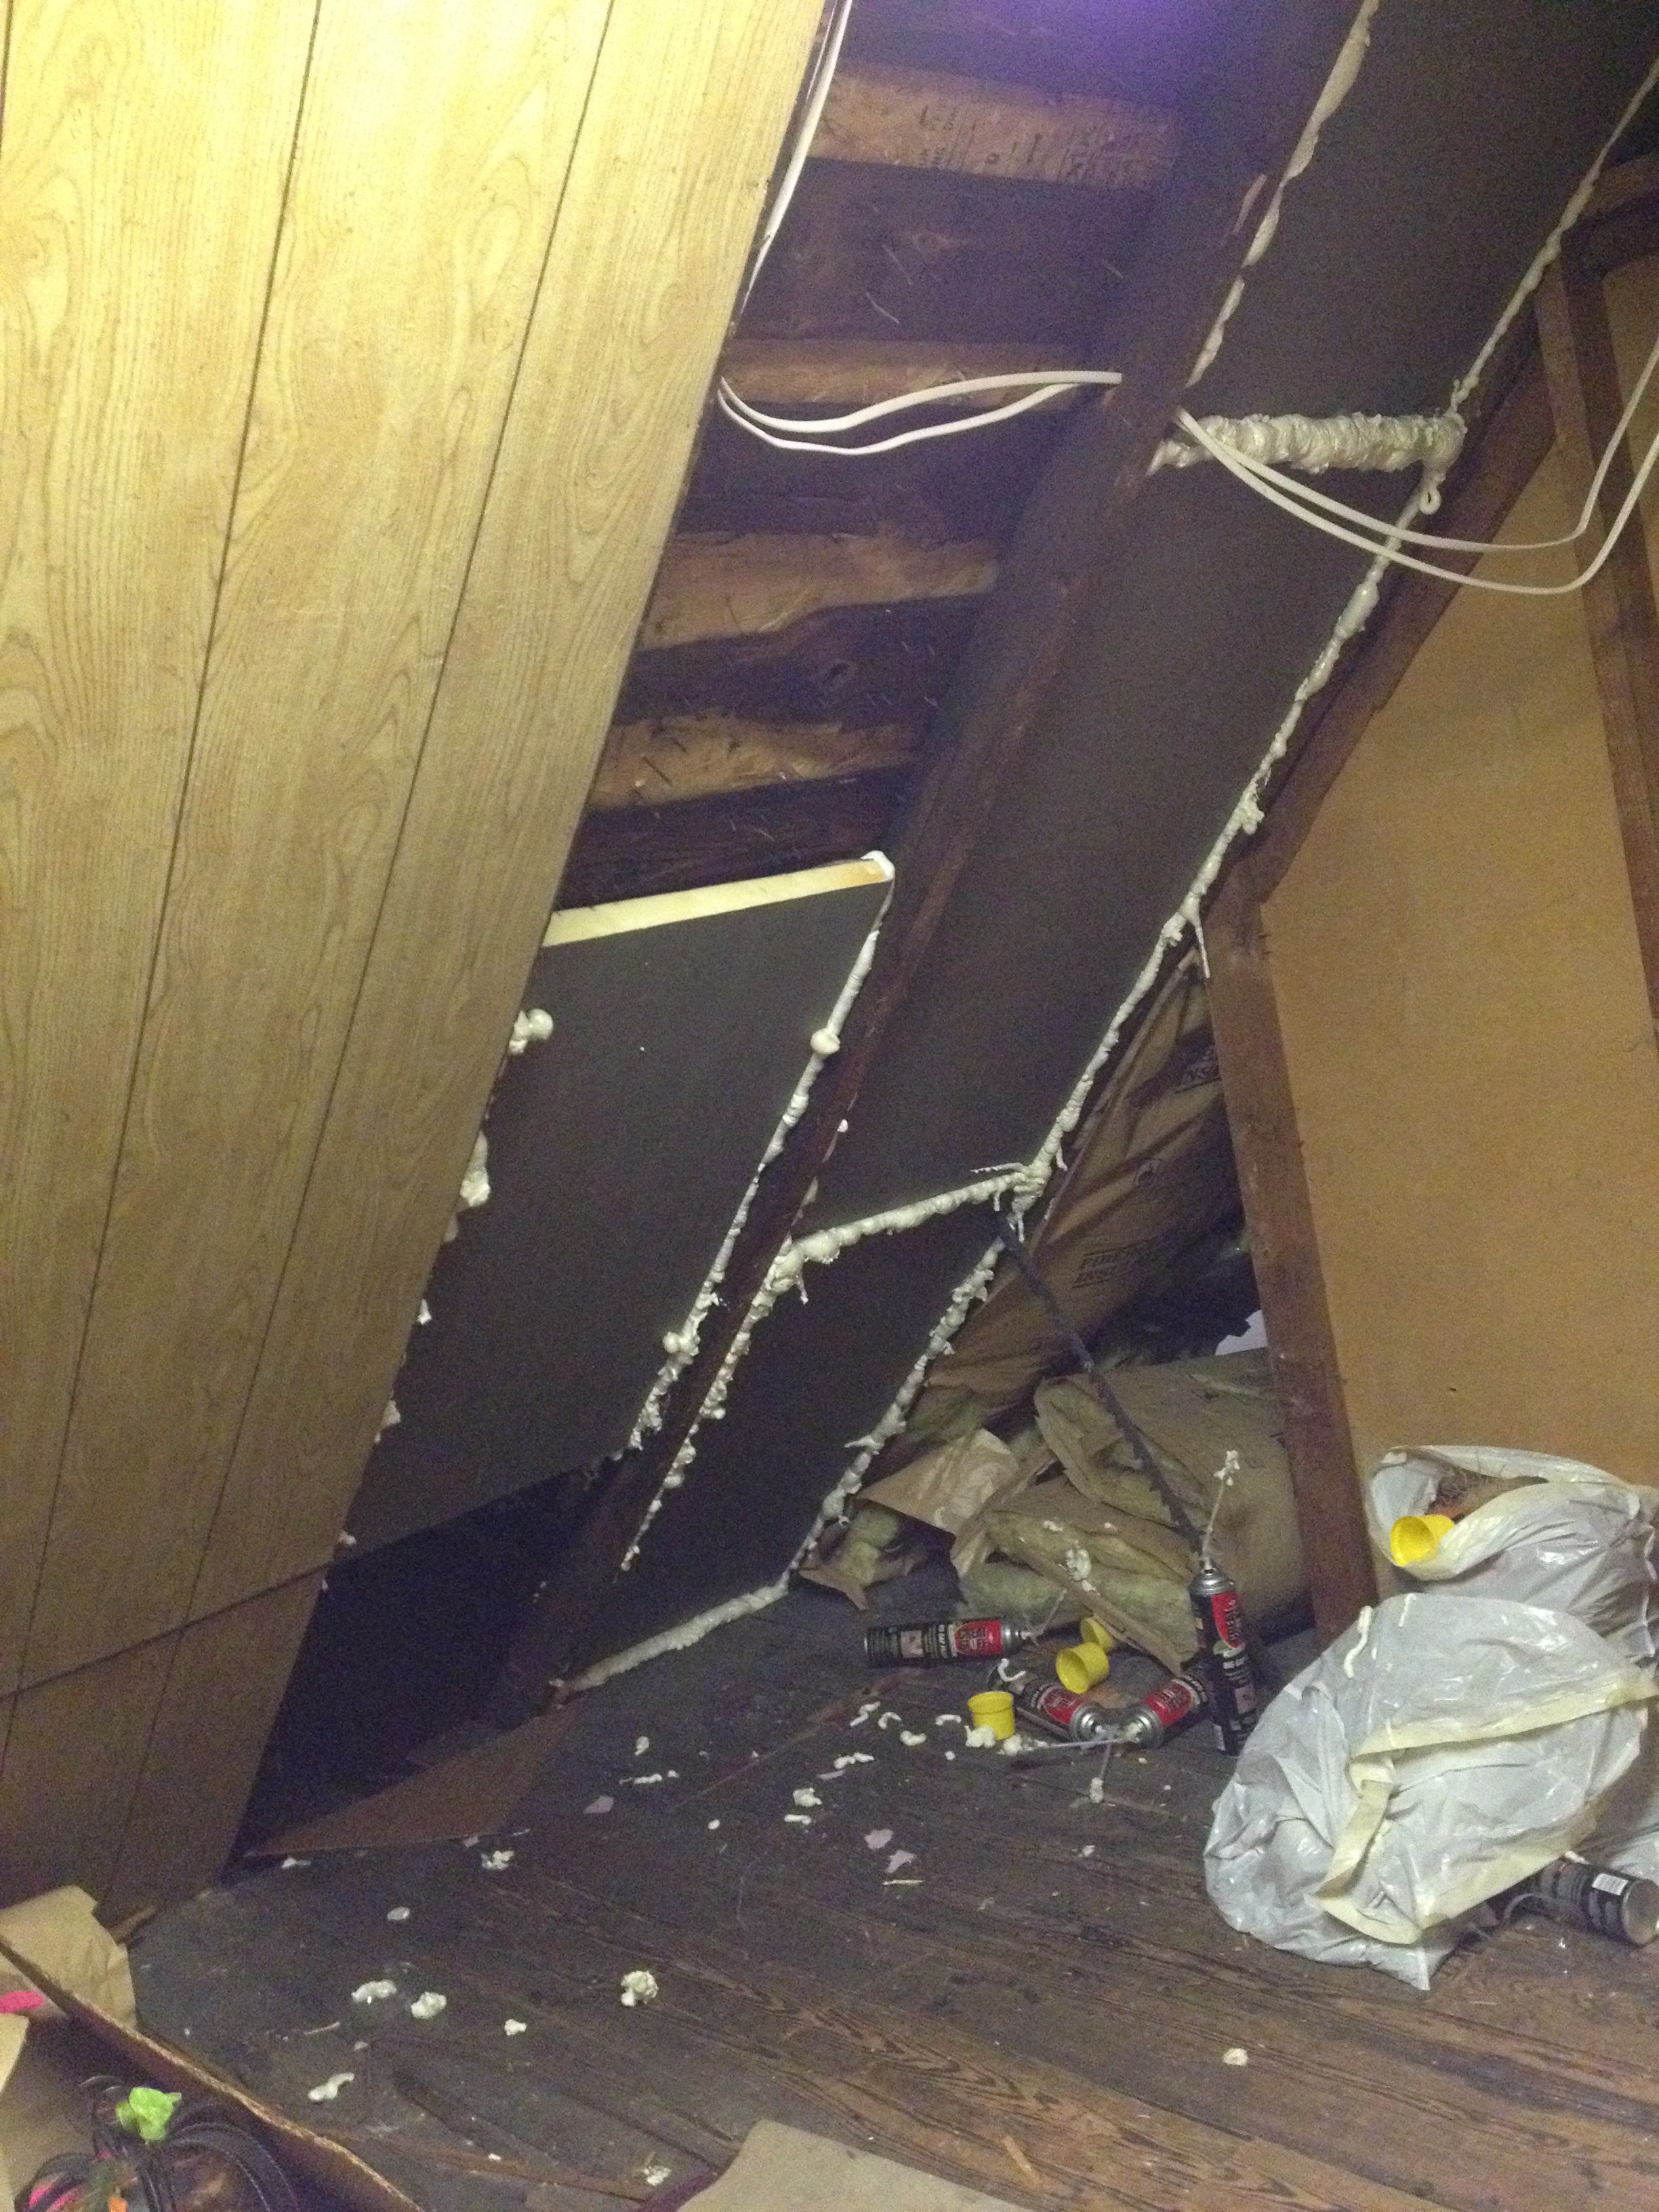
That looks like a rather innocuous attic wall. I wonder if there is something behind it? It would be a dull blog post if there wasn’t!
Our 2nd floor bathroom is part of a dormer/turret and this is the unfinished attic portion. Some sort of rodent had made a nest up here but I didn’t find any signs of recent activity.
I had several goals for this space.
Clean out all of the nests and old soiled insulation
Uncover all electrical wiring so I could assess its condition and possibly replace
Insulate the space to be air tight
#1 wasn’t very difficult. Wearing a respirator, long sleeves, and gloves I carted out seven trash bags full of crud. Whenever you are working in an unfinished attic, you will want to pay special attention not to step through the ceiling. To that end, I laid down a scrap piece of plywood so I could crawl around without falling through into the bathroom.
With the space ‘cleaned’ up I was able to inspect the exposed electrical.
109 year old wiring
Given its age, it looked to be in good shape. There are some spots that I may want to address in the future (receptacle wired in with a light switch). Eventually we will hire out an electrician to redo the whole house, but until then the plan is to leave well enough alone.
#3 goal of re-insulating the space took some consideration. Fiberglass rolls and blown in cellulose would not make the space air tight (both of these types of insulation are air permeable). I knew that I wanted to insulate against the rafters, not along the floor joists because the existing electrical was in the floor joists and because the finished attic space connected with this unfinished space.
The only insulating products that I know of that are air impermeable are foam based. You can either go with a spray foam or a rigid foam board product. Spray foam is not for DIYers. There are kits that are sold for DIYers but they start at around $600. Foam board is best applied in continuous sheets on the underside of rafters or even better yet on the roof deck itself (outside of house). Seeing as we just had a new roof put on, and a curved turret makes it almost impossible to hang straight boards, I chose to use a hybrid approach.
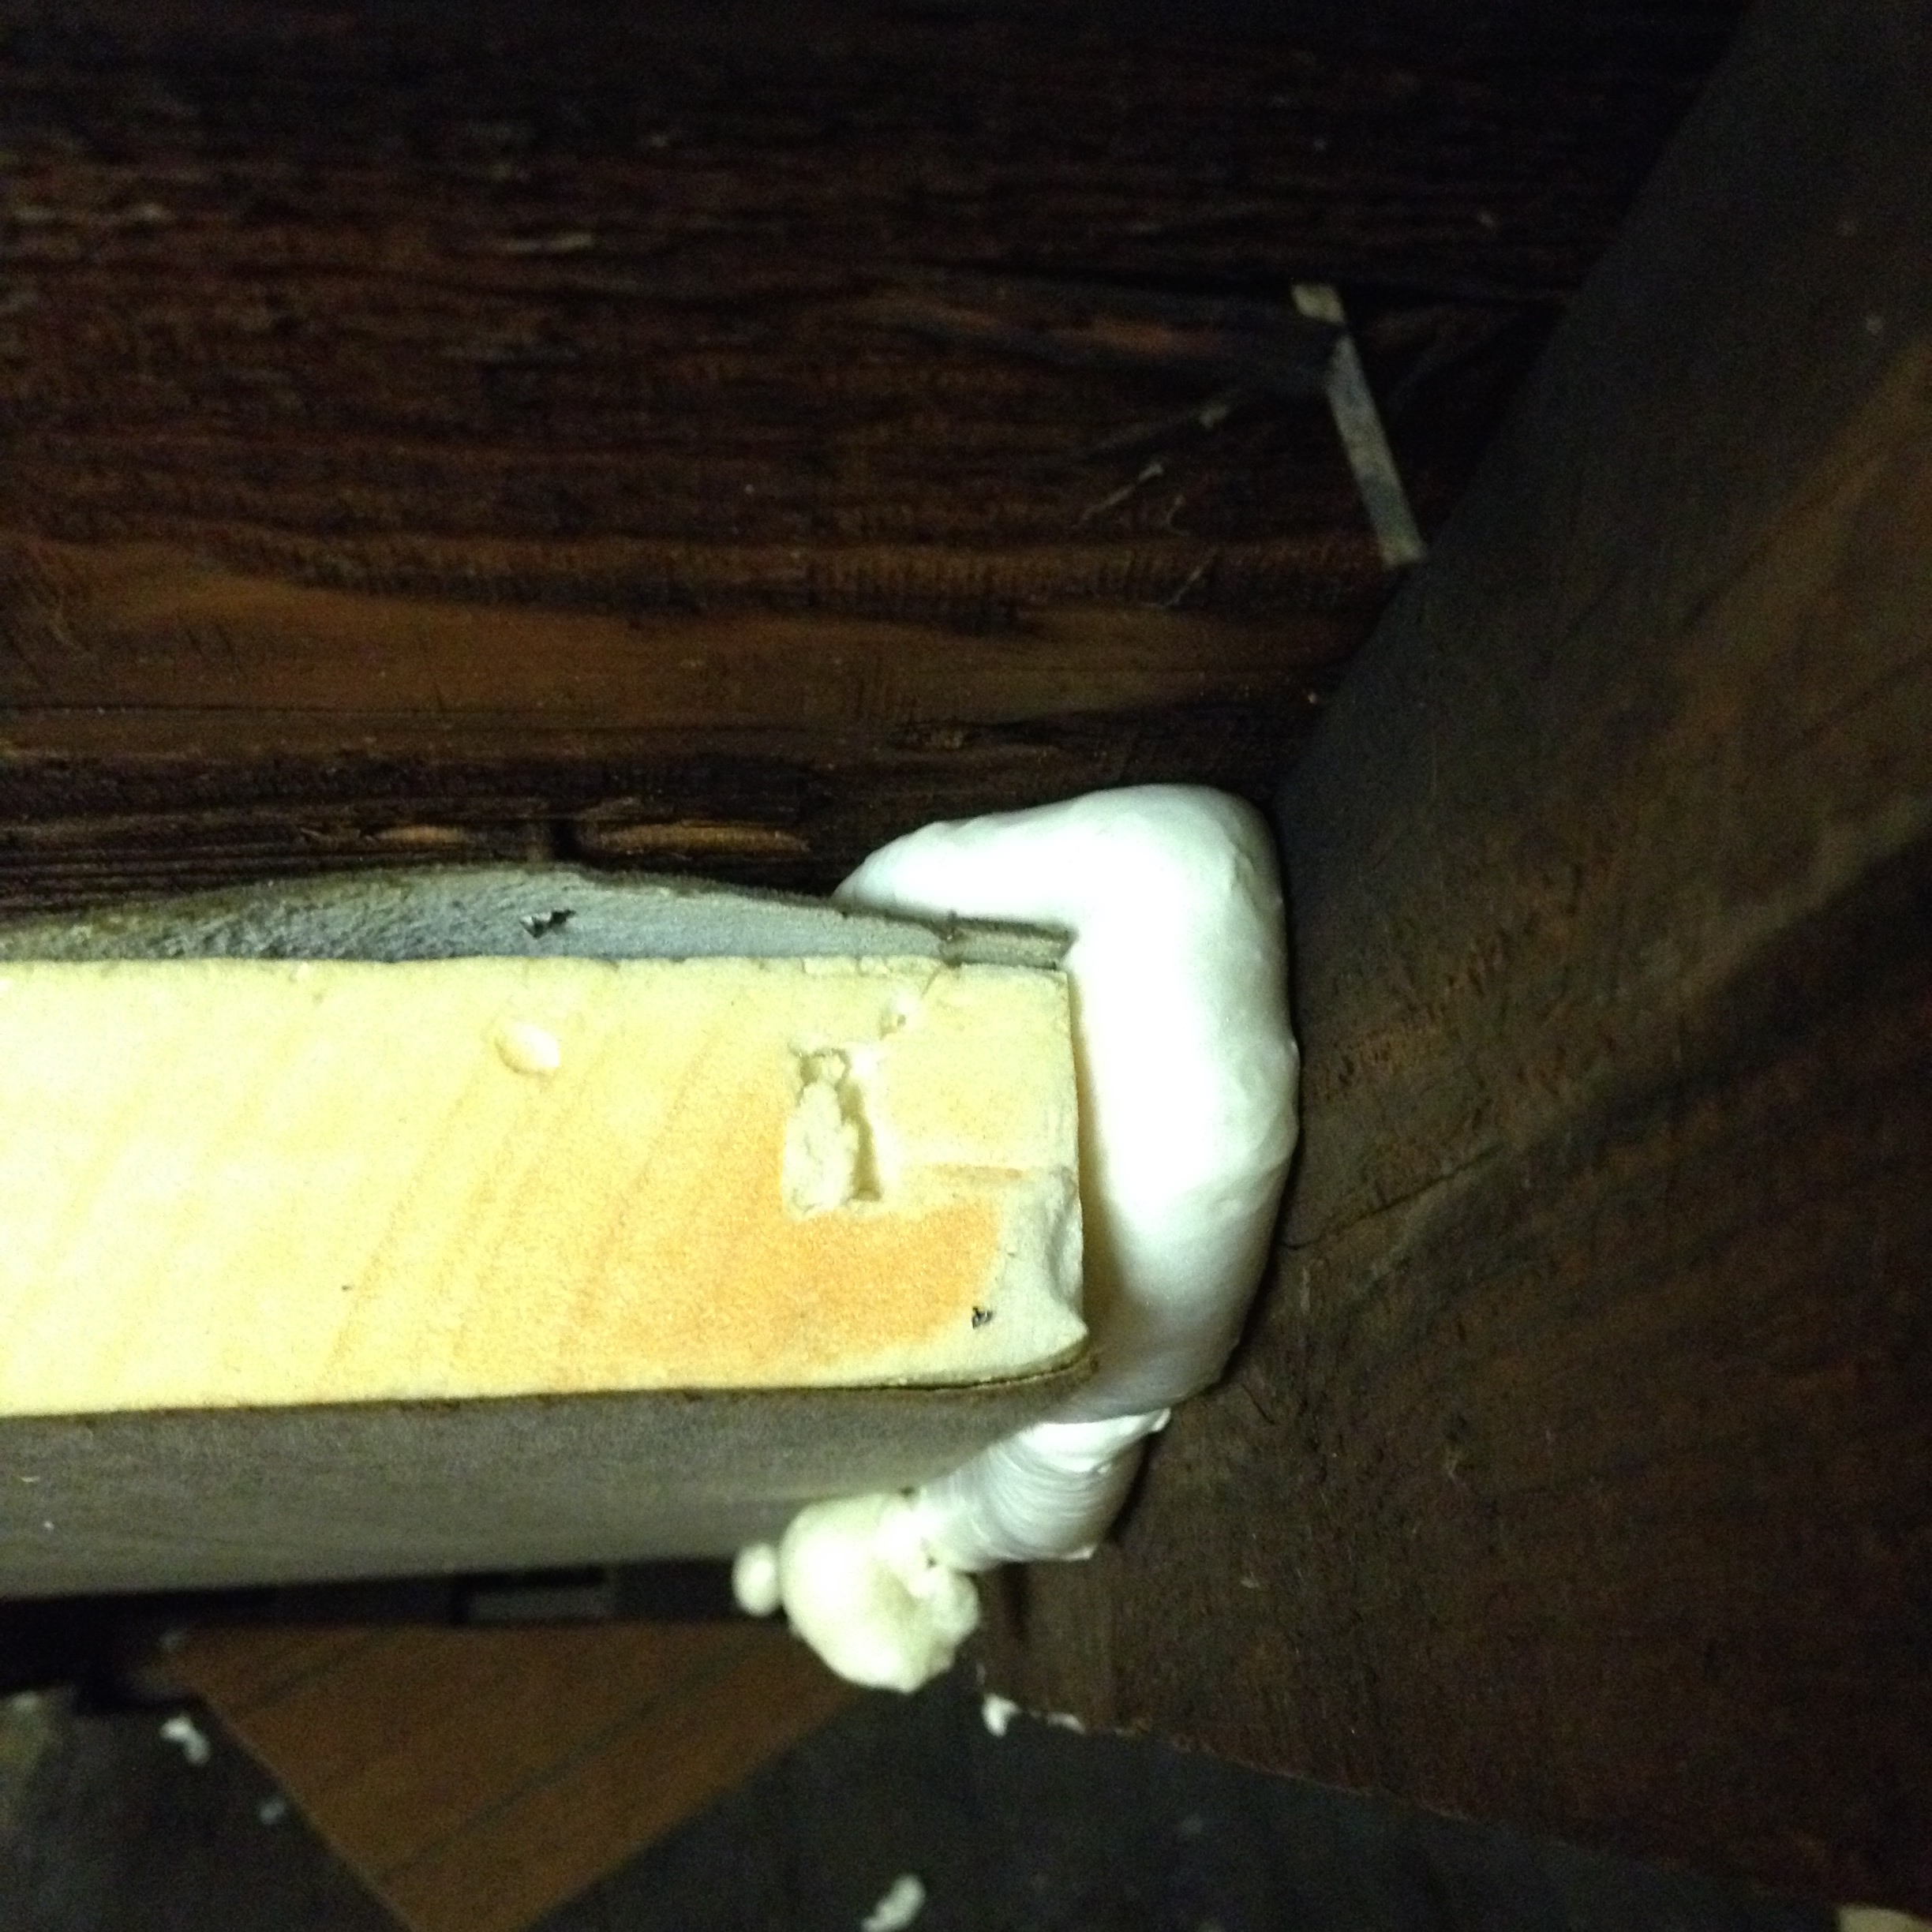
Cut & Cobble is an insulating technique where you cut pieces of rigid foam board to fit in-between joists or rafters. Then you use canned spray foam to seal the edges. Here is an example of where I have insulated using cut and cobble.
The foam board should have about a half an inch gap to allow the spray foam nozzle to fit. While you could fit the boards snugly against the wood you would have a hard time sealing the edges because you would either have to caulk or tape them.
Ideally, an air gap would be left between the insulation and roof deck to allow air to circulate from the soffits to the ridge vent. This helps keep the roof cool in the winter and prevents ice dams from forming.
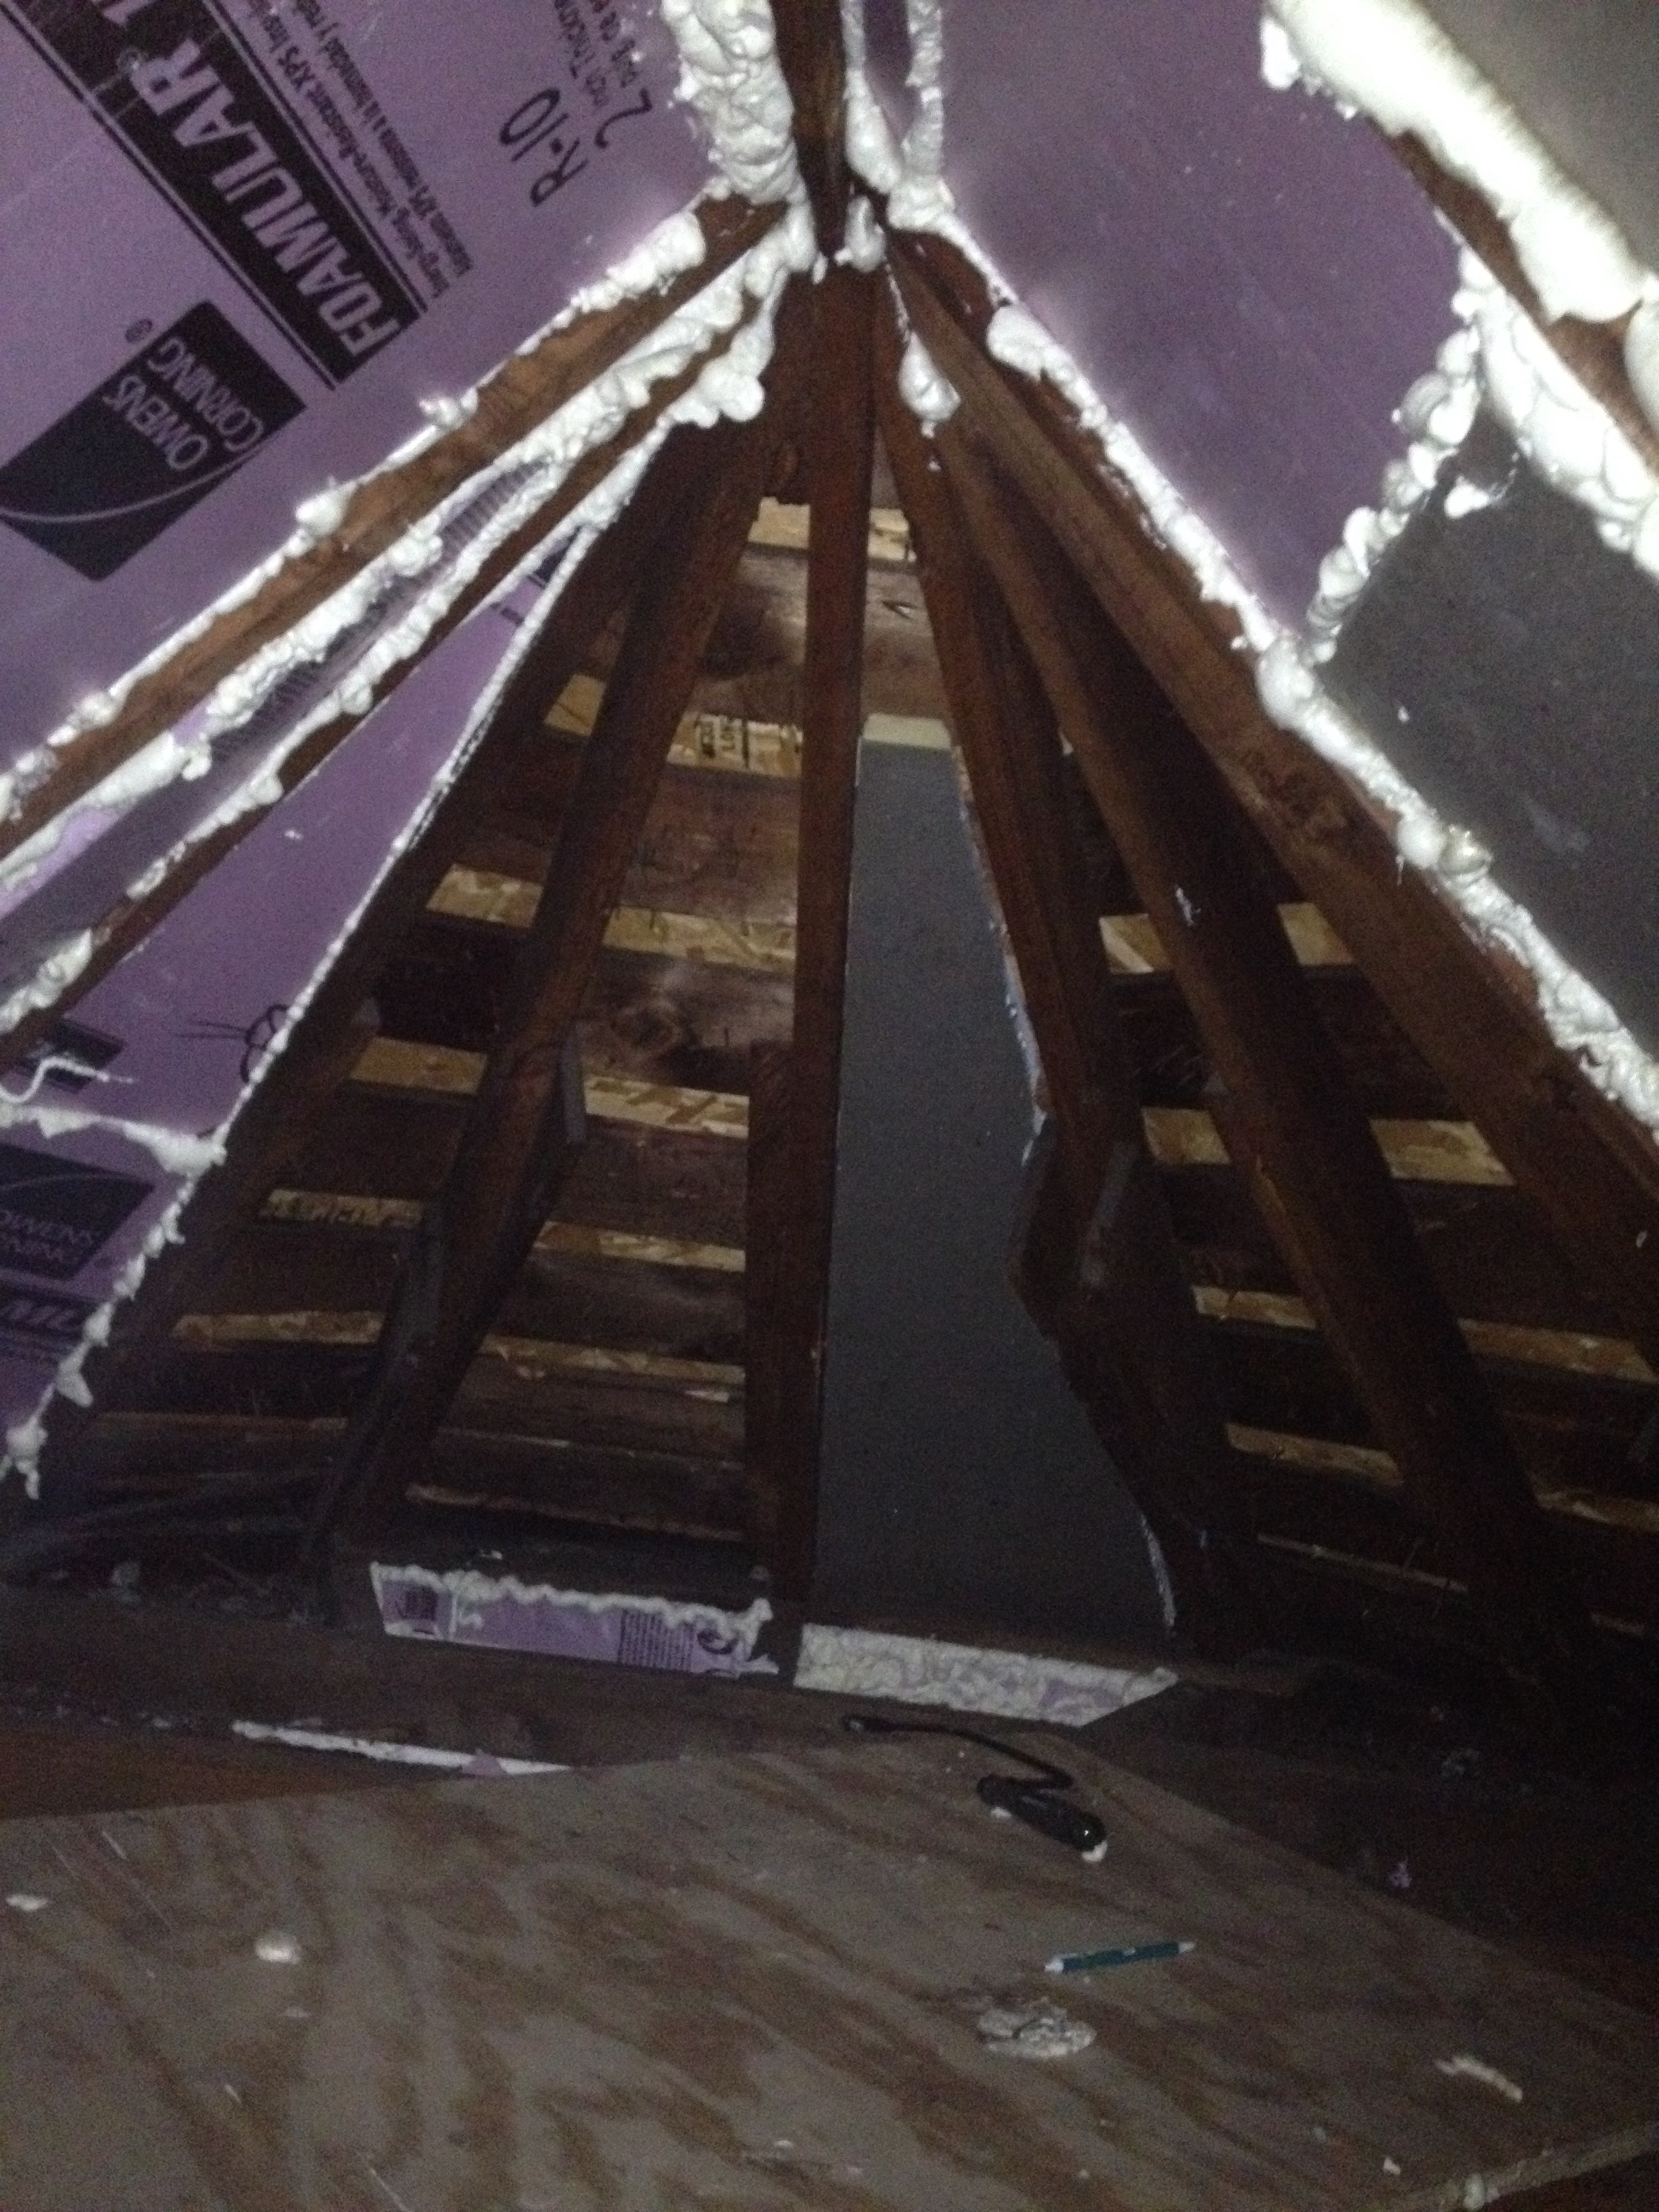
Yet another reason why I wanted to redo the insulation in the attic is because last year when our roof was redone, the roofers correctly installed a ridge vent. The pre-existing fiberglass bats did very little to keep air from moving from the ridge vent/soffit system to the conditioned space. In fact, in some spaces you can see the ridge vent while standing in the attic!
nada insulation 🙁
Cut & Cobble is meant as derogatory name because it has many critics. For starters, it isn’t exactly pretty to look at.
About 60% done with dormer
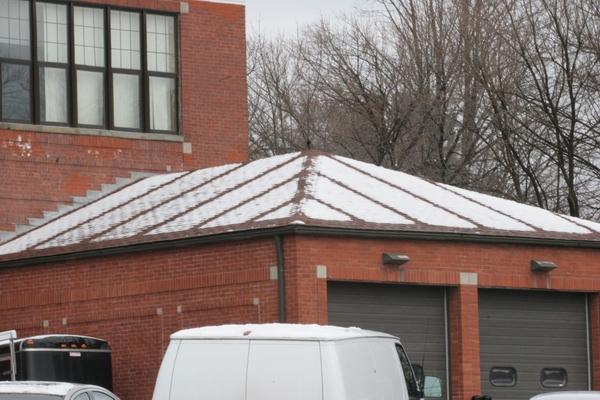
The process of measuring, cutting, fitting, and installing tens or even hundreds of panels is very time consuming. C&C allows thermal bridging. Thermal bridging is where heat moves through a less insulating material, such as a 2×4. After a frost or light snowfall, thermal bridging may be visible from the outside.
guess where the rafters are
Not many studies have been done on C&C, but there are many anecdotal stories of premature failure where the edge sealing fails either immediately or after some time has passed. Finally, the cost of C&C is questionable compared to hiring out a professional spray foam contractor.
I have thought about these negatives and believe that C&C is still the right option in our circumstance.
I am not interested in how it looks. The areas that I am insulating are not living spaces.
I am doing the work myself so it is not like I am paying an hourly wage to someone to install a tedious product.
Fiberglass also allows thermal bridging and that is what we have installed right now
premature failure *might* be an issue. Then again, it might not. This is a gamble.
I got an awesome deal on factory seconds insulation meaning that the material cost for this project is well below what the alternatives would be.
For $80 + $20 delivery I bought approximately 25 panels of 4’x4′ x assorted thickness (between 1 1/2″ to 4″) of polyisocyanurate (polyiso) rigid foam board off a guy on craigslist.
If I had to guess, I would say the retail value of this insulation would be around $500. Polyiso has one of the highest R values per inch of any insulation at 6.5.
I only need a small fraction of that bundle to finish the dormer. In the meantime, I moved the extra from the garage to the attic so it can ‘work’ while it is being stored.
When I get this project wrapped up I’ll post a followup with pictures and any final thoughts that I had on doing the project. So far, I can attest to the length of time required to C&C. It will be interesting if there are any noticeable differences in temperatures when it is all done.
One of the perks of walking to work includes seeing what is left on the curb as trash. You wouldn’t believe what some people throw out. I’ve picked up an Ethan Allen hardwood end table, a large bathroom mirror, camping chairs, tools, and even a couch! Okay, so the couch wasn’t on the curb yet, but they were carrying it out to the curb. Shae’s latest find was a toy dump truck and after a bit of bleaching and rinsing off, it was as good as new.
Depending on who you ask, the number of haircuts that a person gets in any given year can vary from none to once every two weeks (24/year). We average about 4 haircuts a year and when we pay for a haircut the total bill averages out to around $12. Growing up, my mom would cut my brothers and my hair. In college, I would wait until I went home to have my hair cut to save a few bucks. My folks probably saved around $200 a year by cutting hair themselves.
Shae and I cut each others hair on occasion. With Frugal Boy underfoot, it can be difficult to leave the house for an hour, especially when most of our free time is at night. The other night Shae asked me to cut her hair because it was getting long and resembled string to this playful kitten.
You’ll need some equipment to properly cut hair. A pair of sharp scissors designed for hair cutting. Don’t use them for anything else, you want them nice and sharp for cutting hair! A comb and clips are helpful for longer hair. Good lighting and a smooth floor make an ideal place to set up shop. I set down a chair in our kitchen so Shae could watch the aquarium while I worked (yes she trusts me with scissors).
A towel wrapped around your victim, err client, will make cleanup easier. If you are intimidated by the thought of it, do what I do and watch some youtube videos. The biggest challenge is just having the confidence to do it and know that hair grows back and it isn’t the end of the world if you make a mistake. It takes me a bit longer than a professional, but we save a little bit of money, have some time together, and can do it all from the comfort of our own home (within earshot of a sleeping baby).