The last bit of the snow mountain in our backyard has melted after an unusually warm weekend. We crammed as much into the weekend as we could including replacing the brakes on the car and logging almost 10 miles of hiking.
Frugal Boy was sent outside to play more than once and always came back dirtier than he started. Eating mud is a new favorite activity.
All of the fresh air and exercise have been good for him, and some nights he doesn’t even make it to bed.
Our first hike on Saturday was at a little county park. The ground was squishy and it ended up being a pretty good workout even though it was mostly flat. Having an extra 25 pounds on your back also helps work muscles you didn’t know you had.
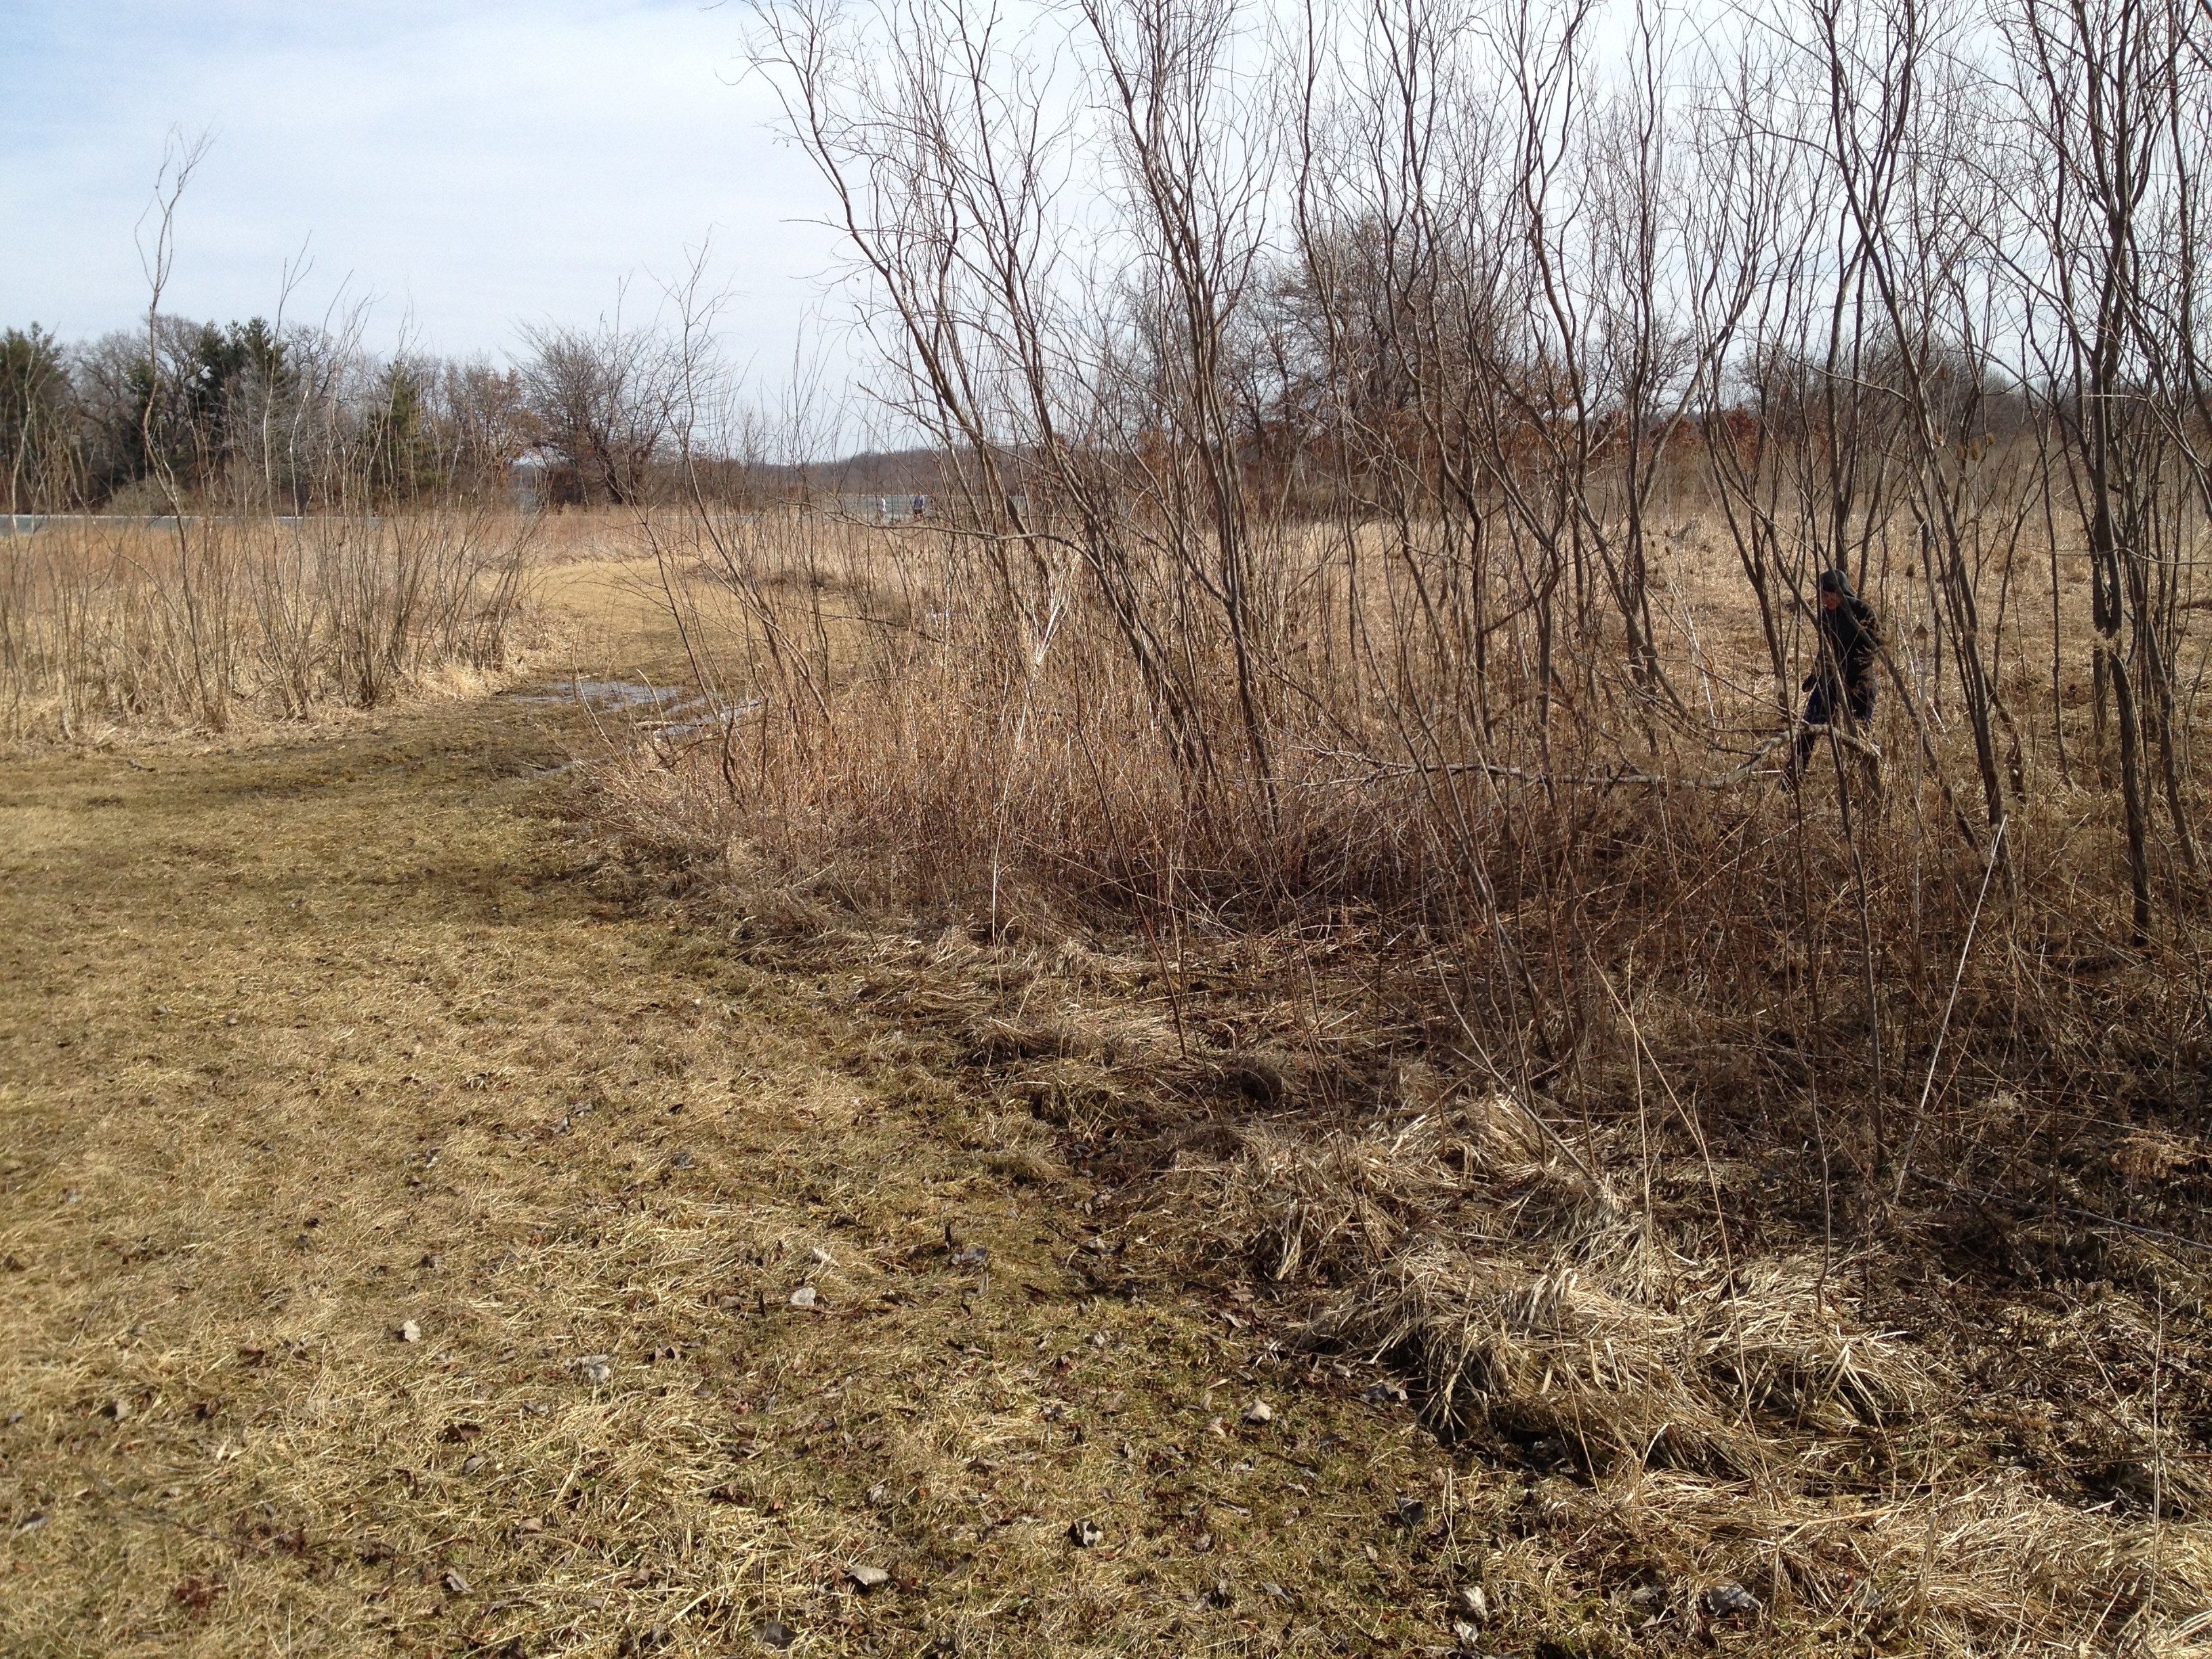
Some parts of the trail had running water crossing over it so a little intrepid bushwhacking was in order.
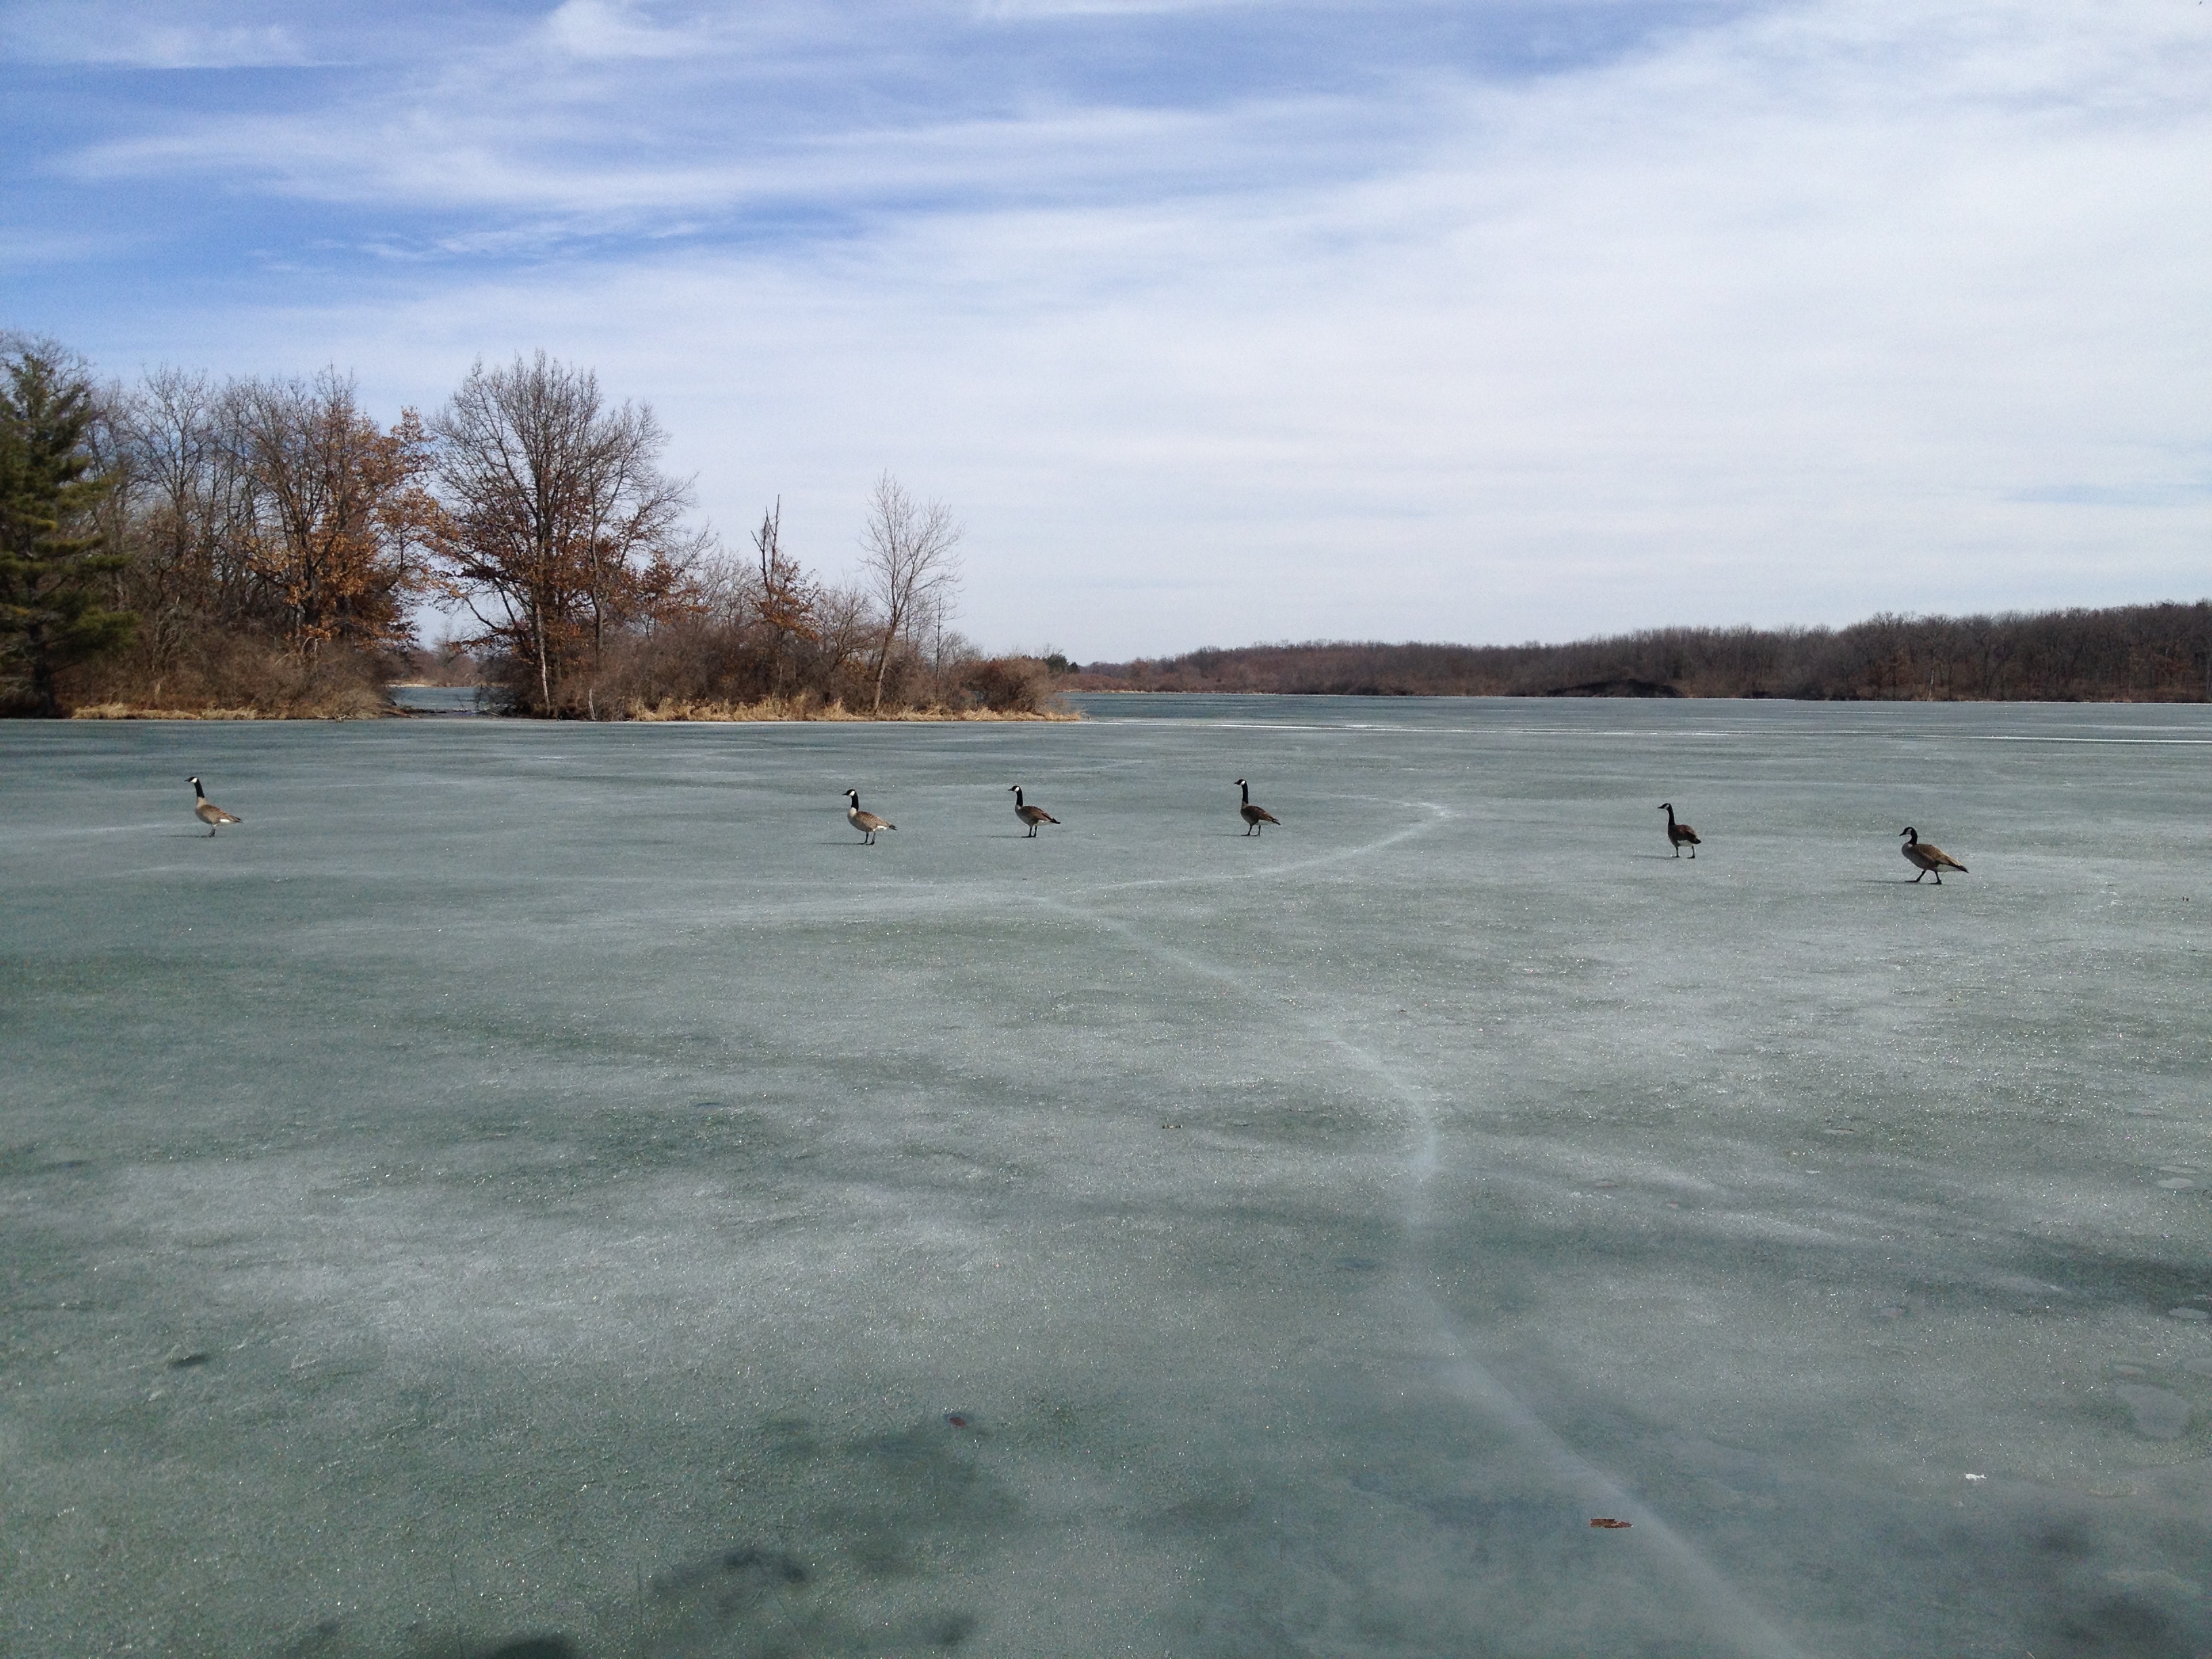
Even though it was about 60° out the ponds still had enough ice to support these geese.
I think all of that ice was to blame for partially destroying the fishing dock. It took a little bit of scrambling to get up and down the upheaved floating platform.
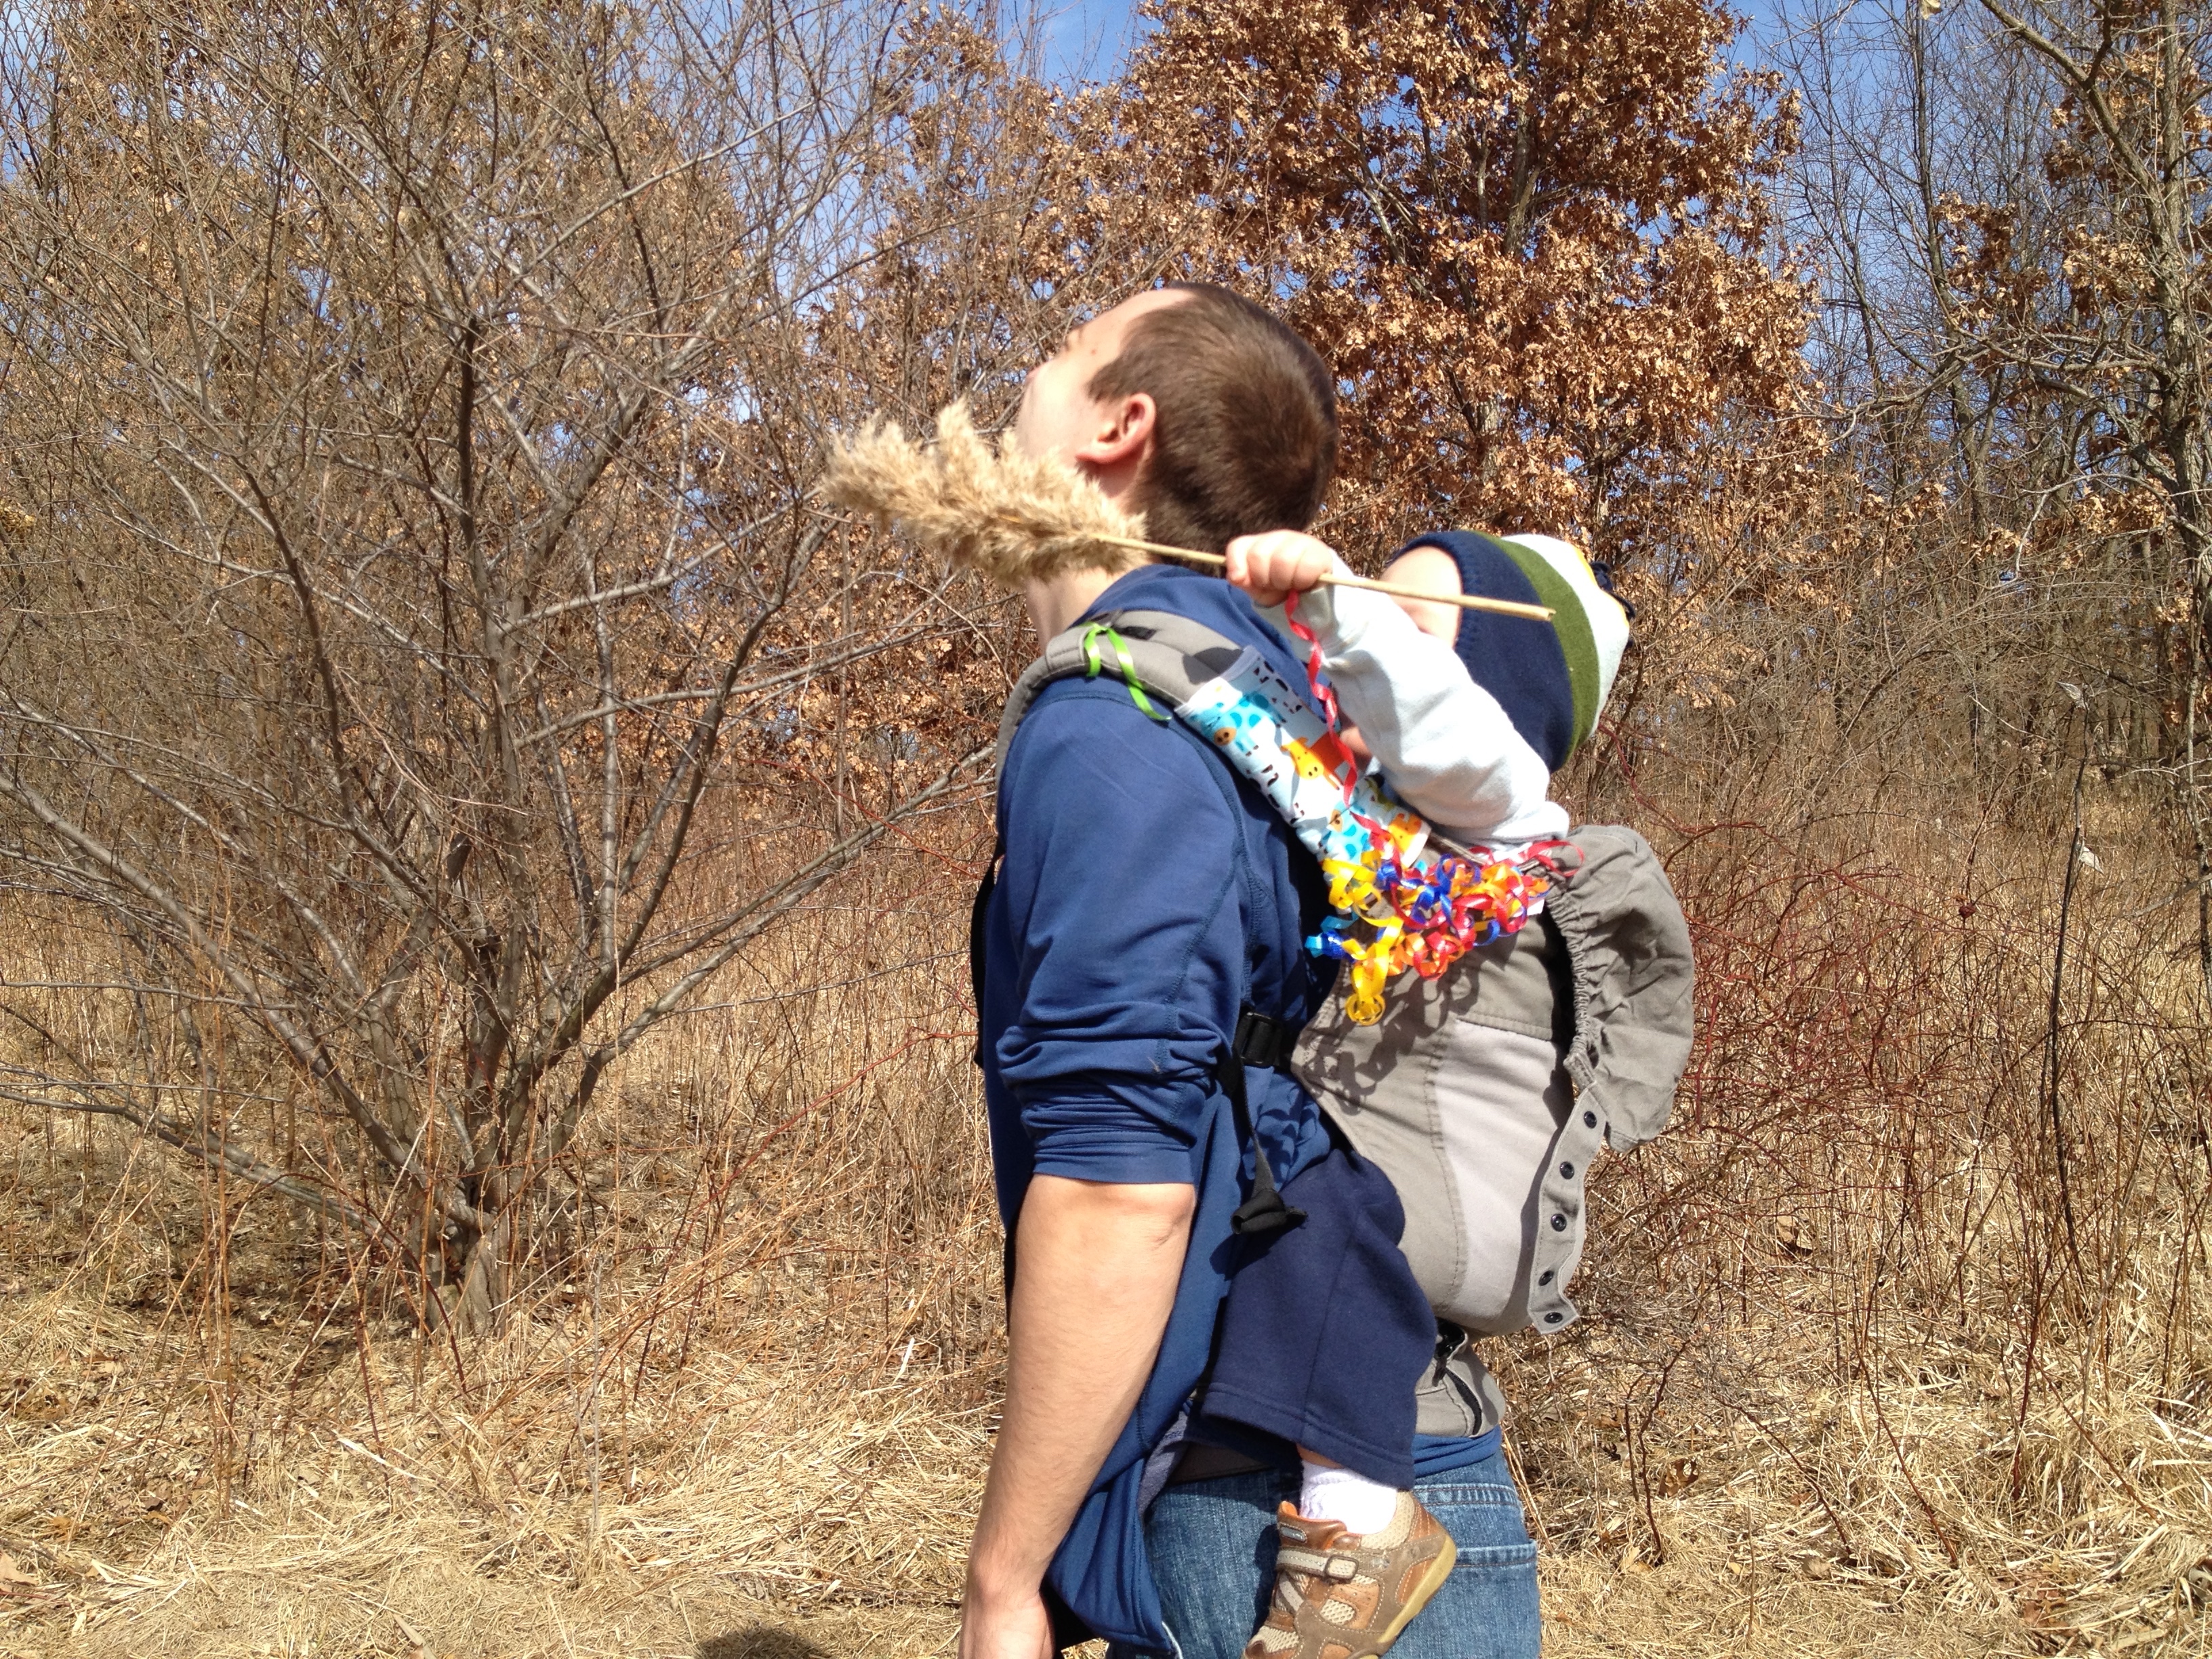
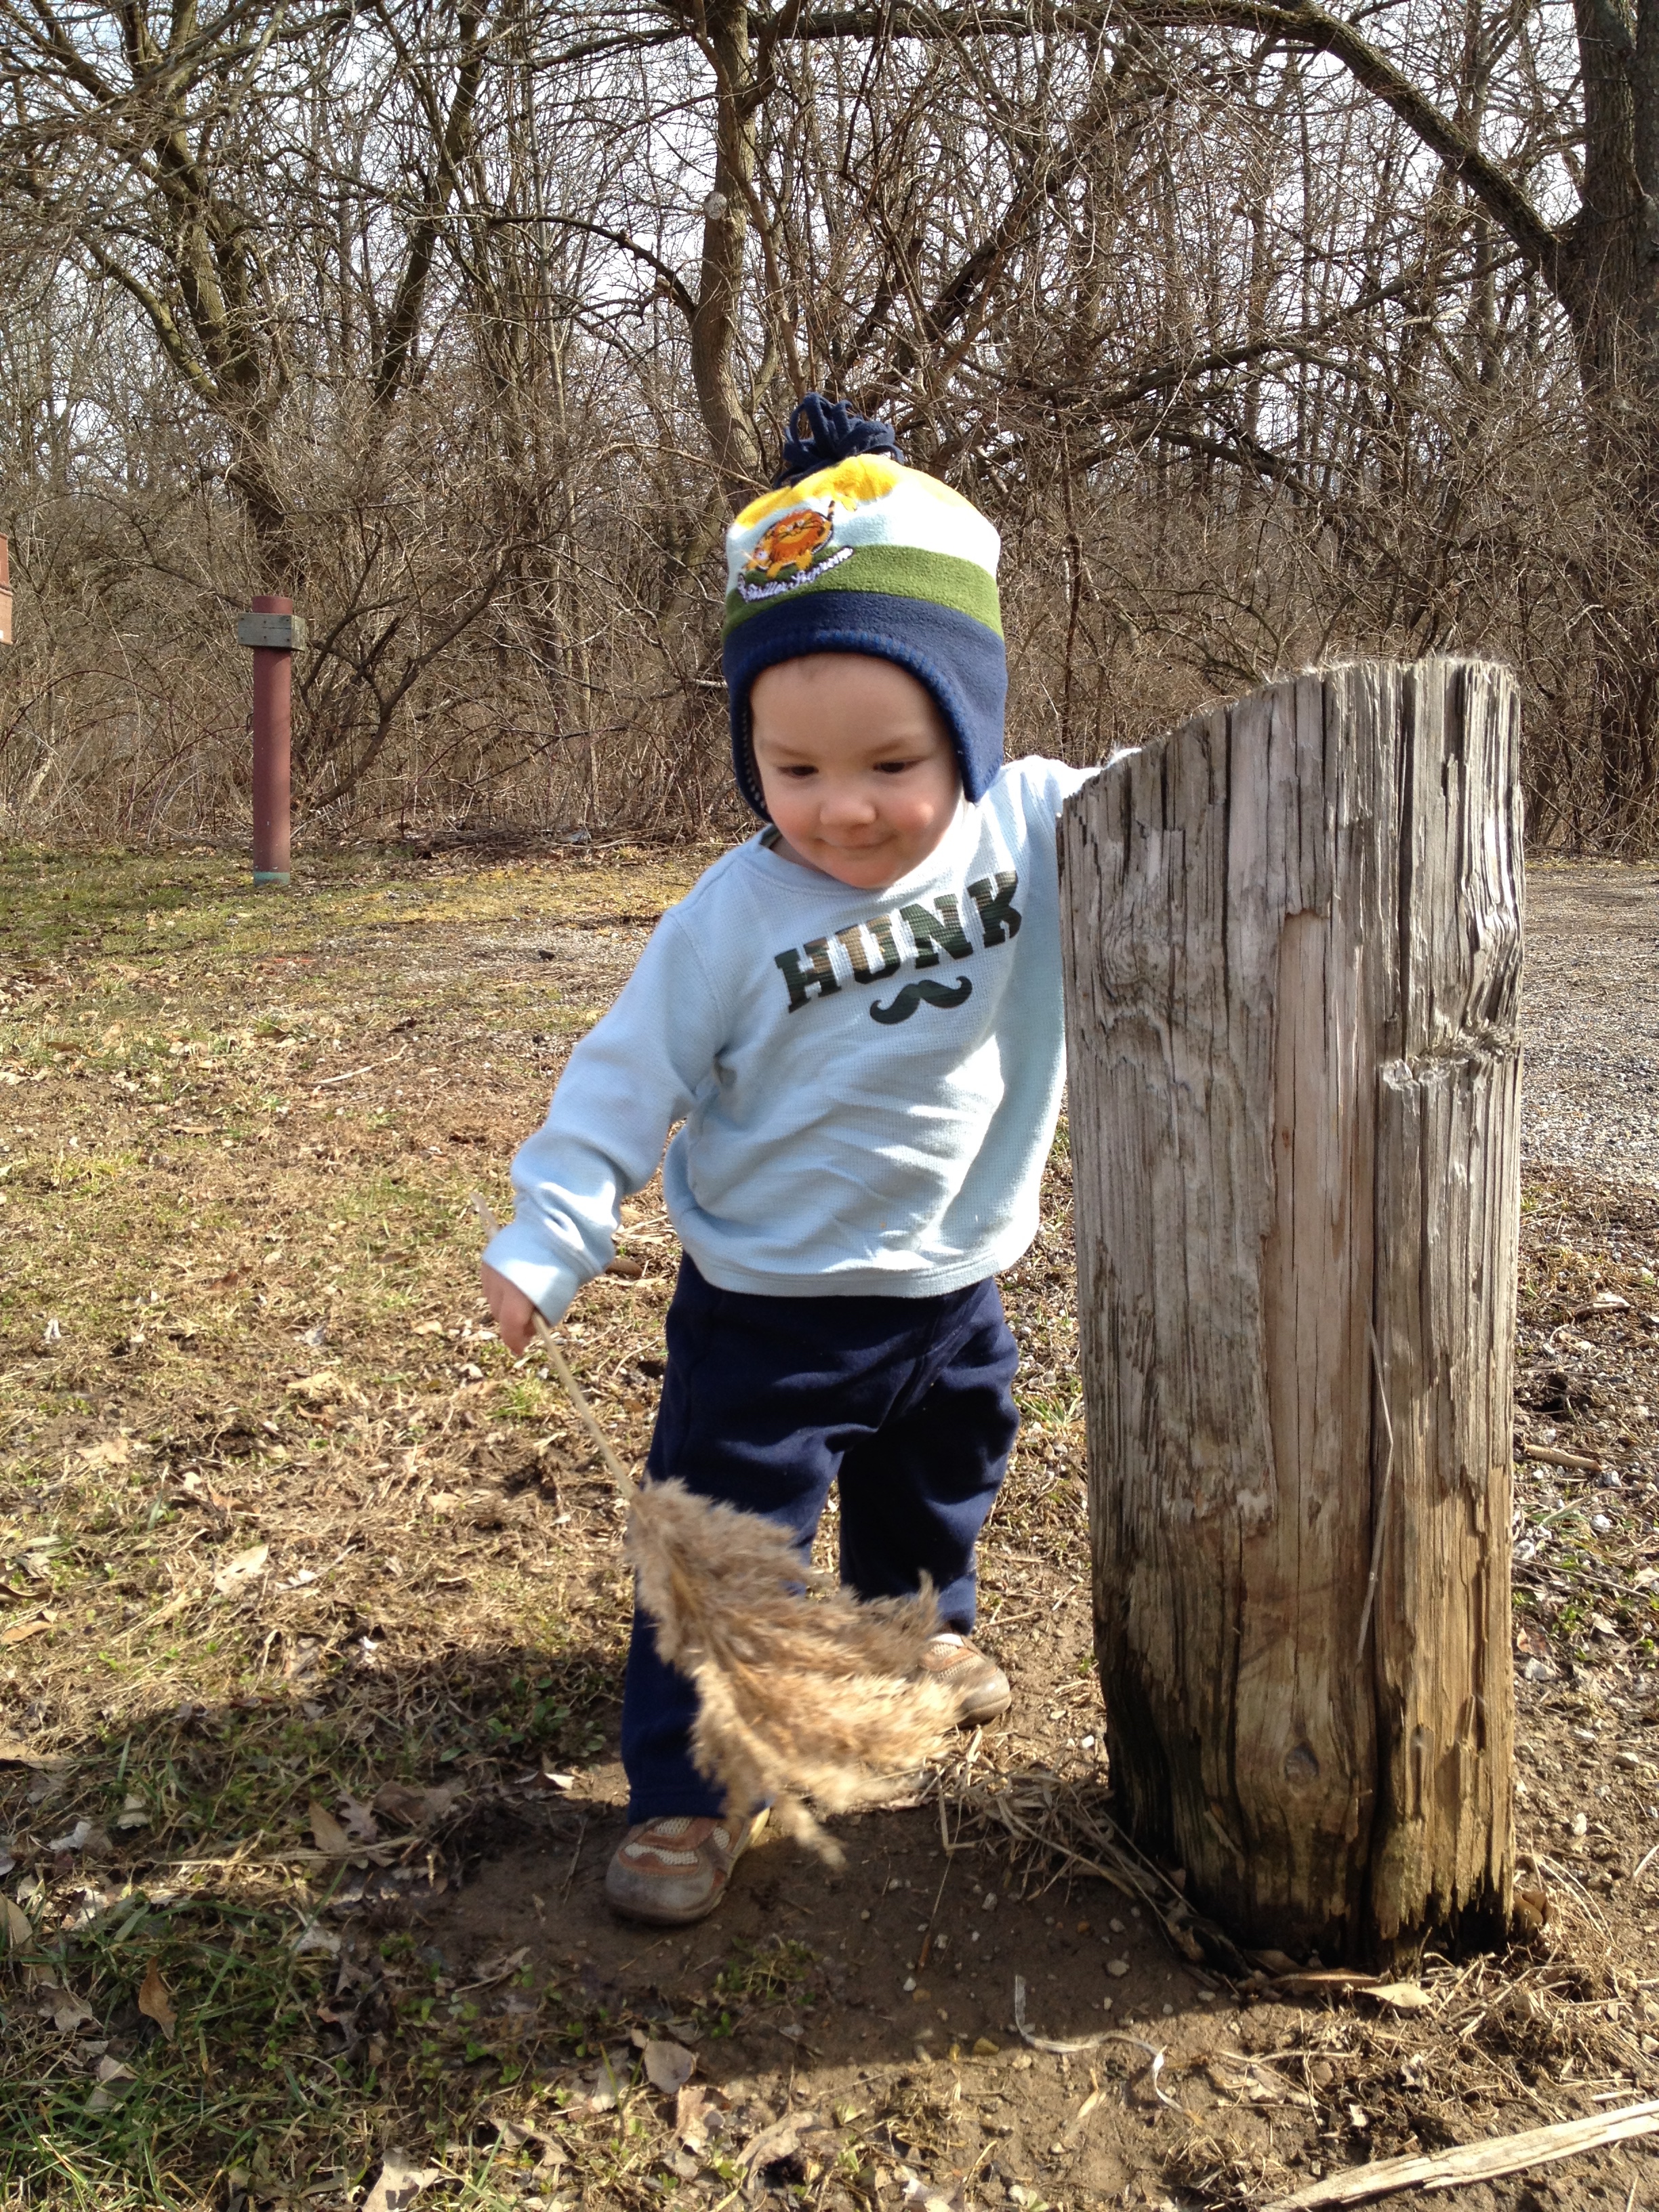
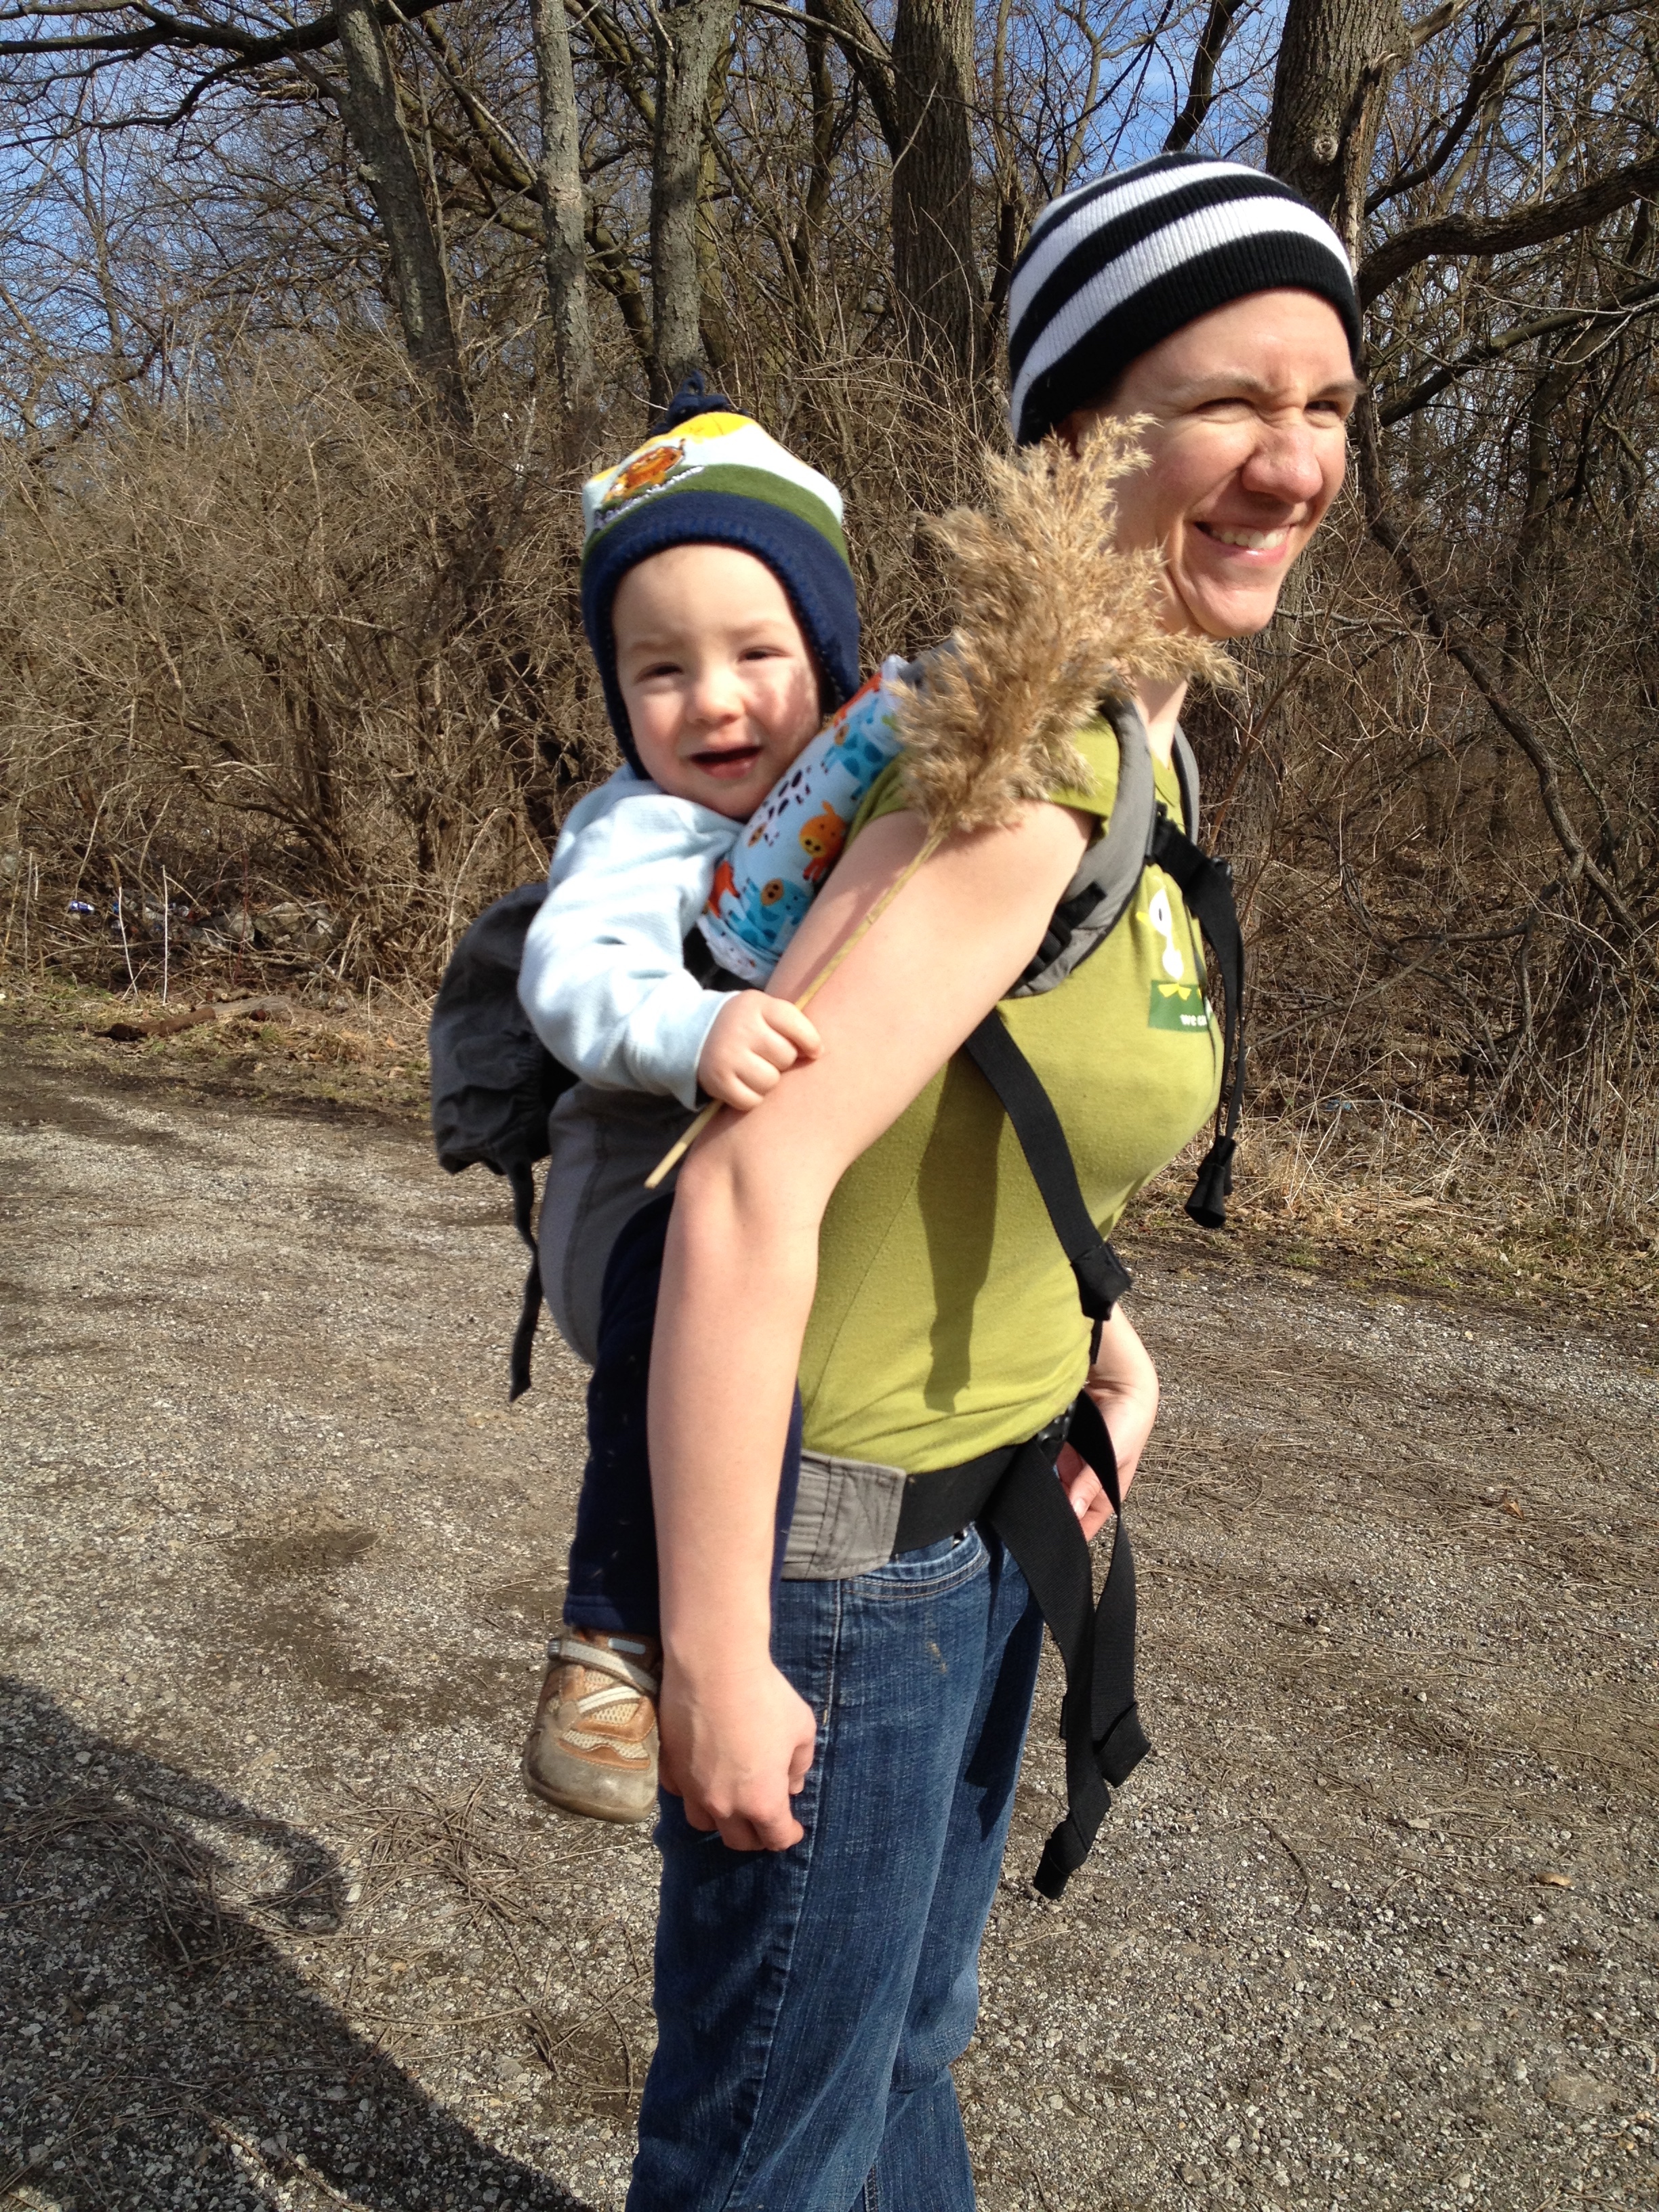
Eventually Frugal Boy woke up and it was somebody’s bright idea to give him a new toy.
It was a REALLY good toy.
After finishing the first two mile loop trail, Shae and I switched off so we could do another trail.
What we thought was another loop trail ended up being an out and back. We tried to connect the two ends with a little creative hiking, but were thwarted by a deep stream.
We trekked back to the car with muddy boots and started planning the next day’s grand adventure. Read about it in Part 2 (coming soon). 🙂
Back in November I took our car into the mechanics shop to have a nail removed from a tire. As usual, the mechanic does a quick inspection of the major systems and he made a few remarks about the amount of corrosion on the brake rotors. The brake pads had plenty of life left in them, but the rotors had some deep grooves and a lot of rust. The car was still stopping fine, so I declined any work and made a mental note to do something about it myself when Spring came.
It sure did feel like Spring today, and knowing that the weather was going to be good this weekend I had planned ahead and ordered some parts from RockAuto.com, my new favorite car parts supplier.
New rotors and pads for the front and back set us back about $150. Not a bad deal if you ask me. I was also wanting to change the brake fluid because the service manual said to do that the earlier of 30,000 miles or 24 months. Seeing as we’ve owned the car since 2009 and have never changed the brake fluid, I figured it was due.
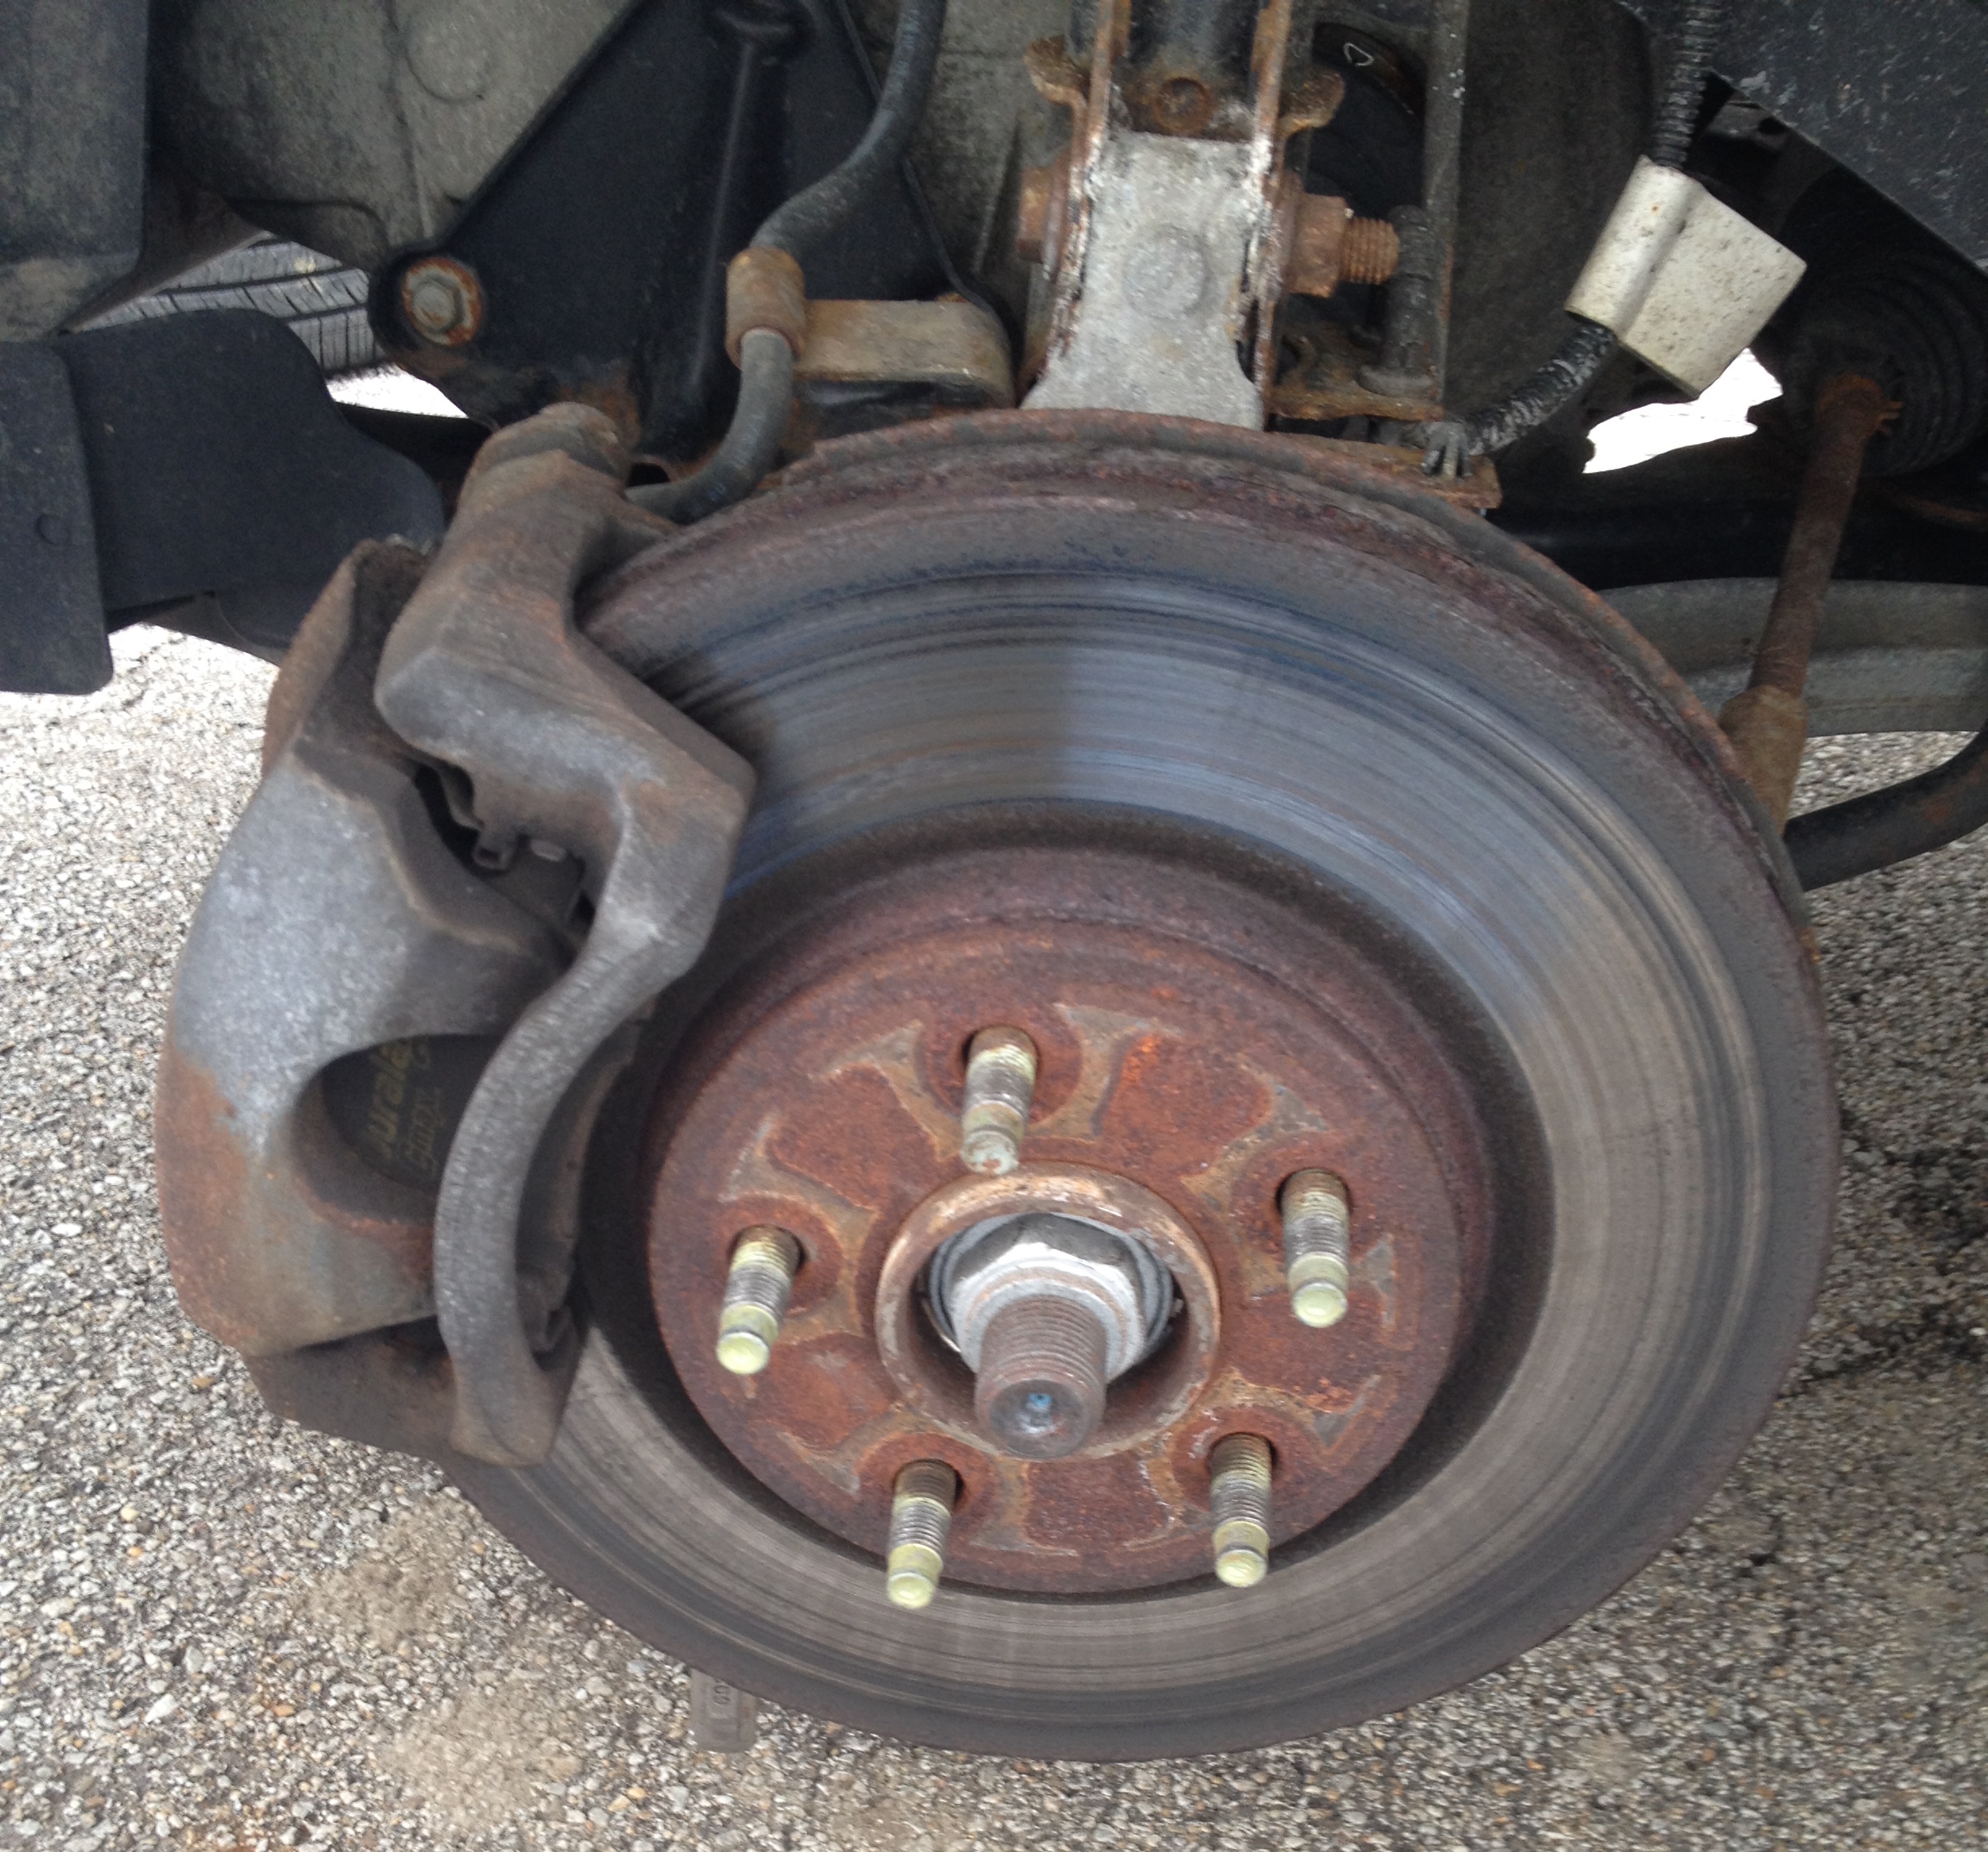
After jacking up the car, securing it with jack stands, and removing the front wheels, I had access to the brake components.
The large metal platter with the 5 bolts sticking through it is the brake rotor. It is gripped by the brake pads to create friction to change the kinetic (moving) energy of the car into heat. If you ever see a video of race car or airplane brakes getting red hot, it is because they are converting a lot of energy!
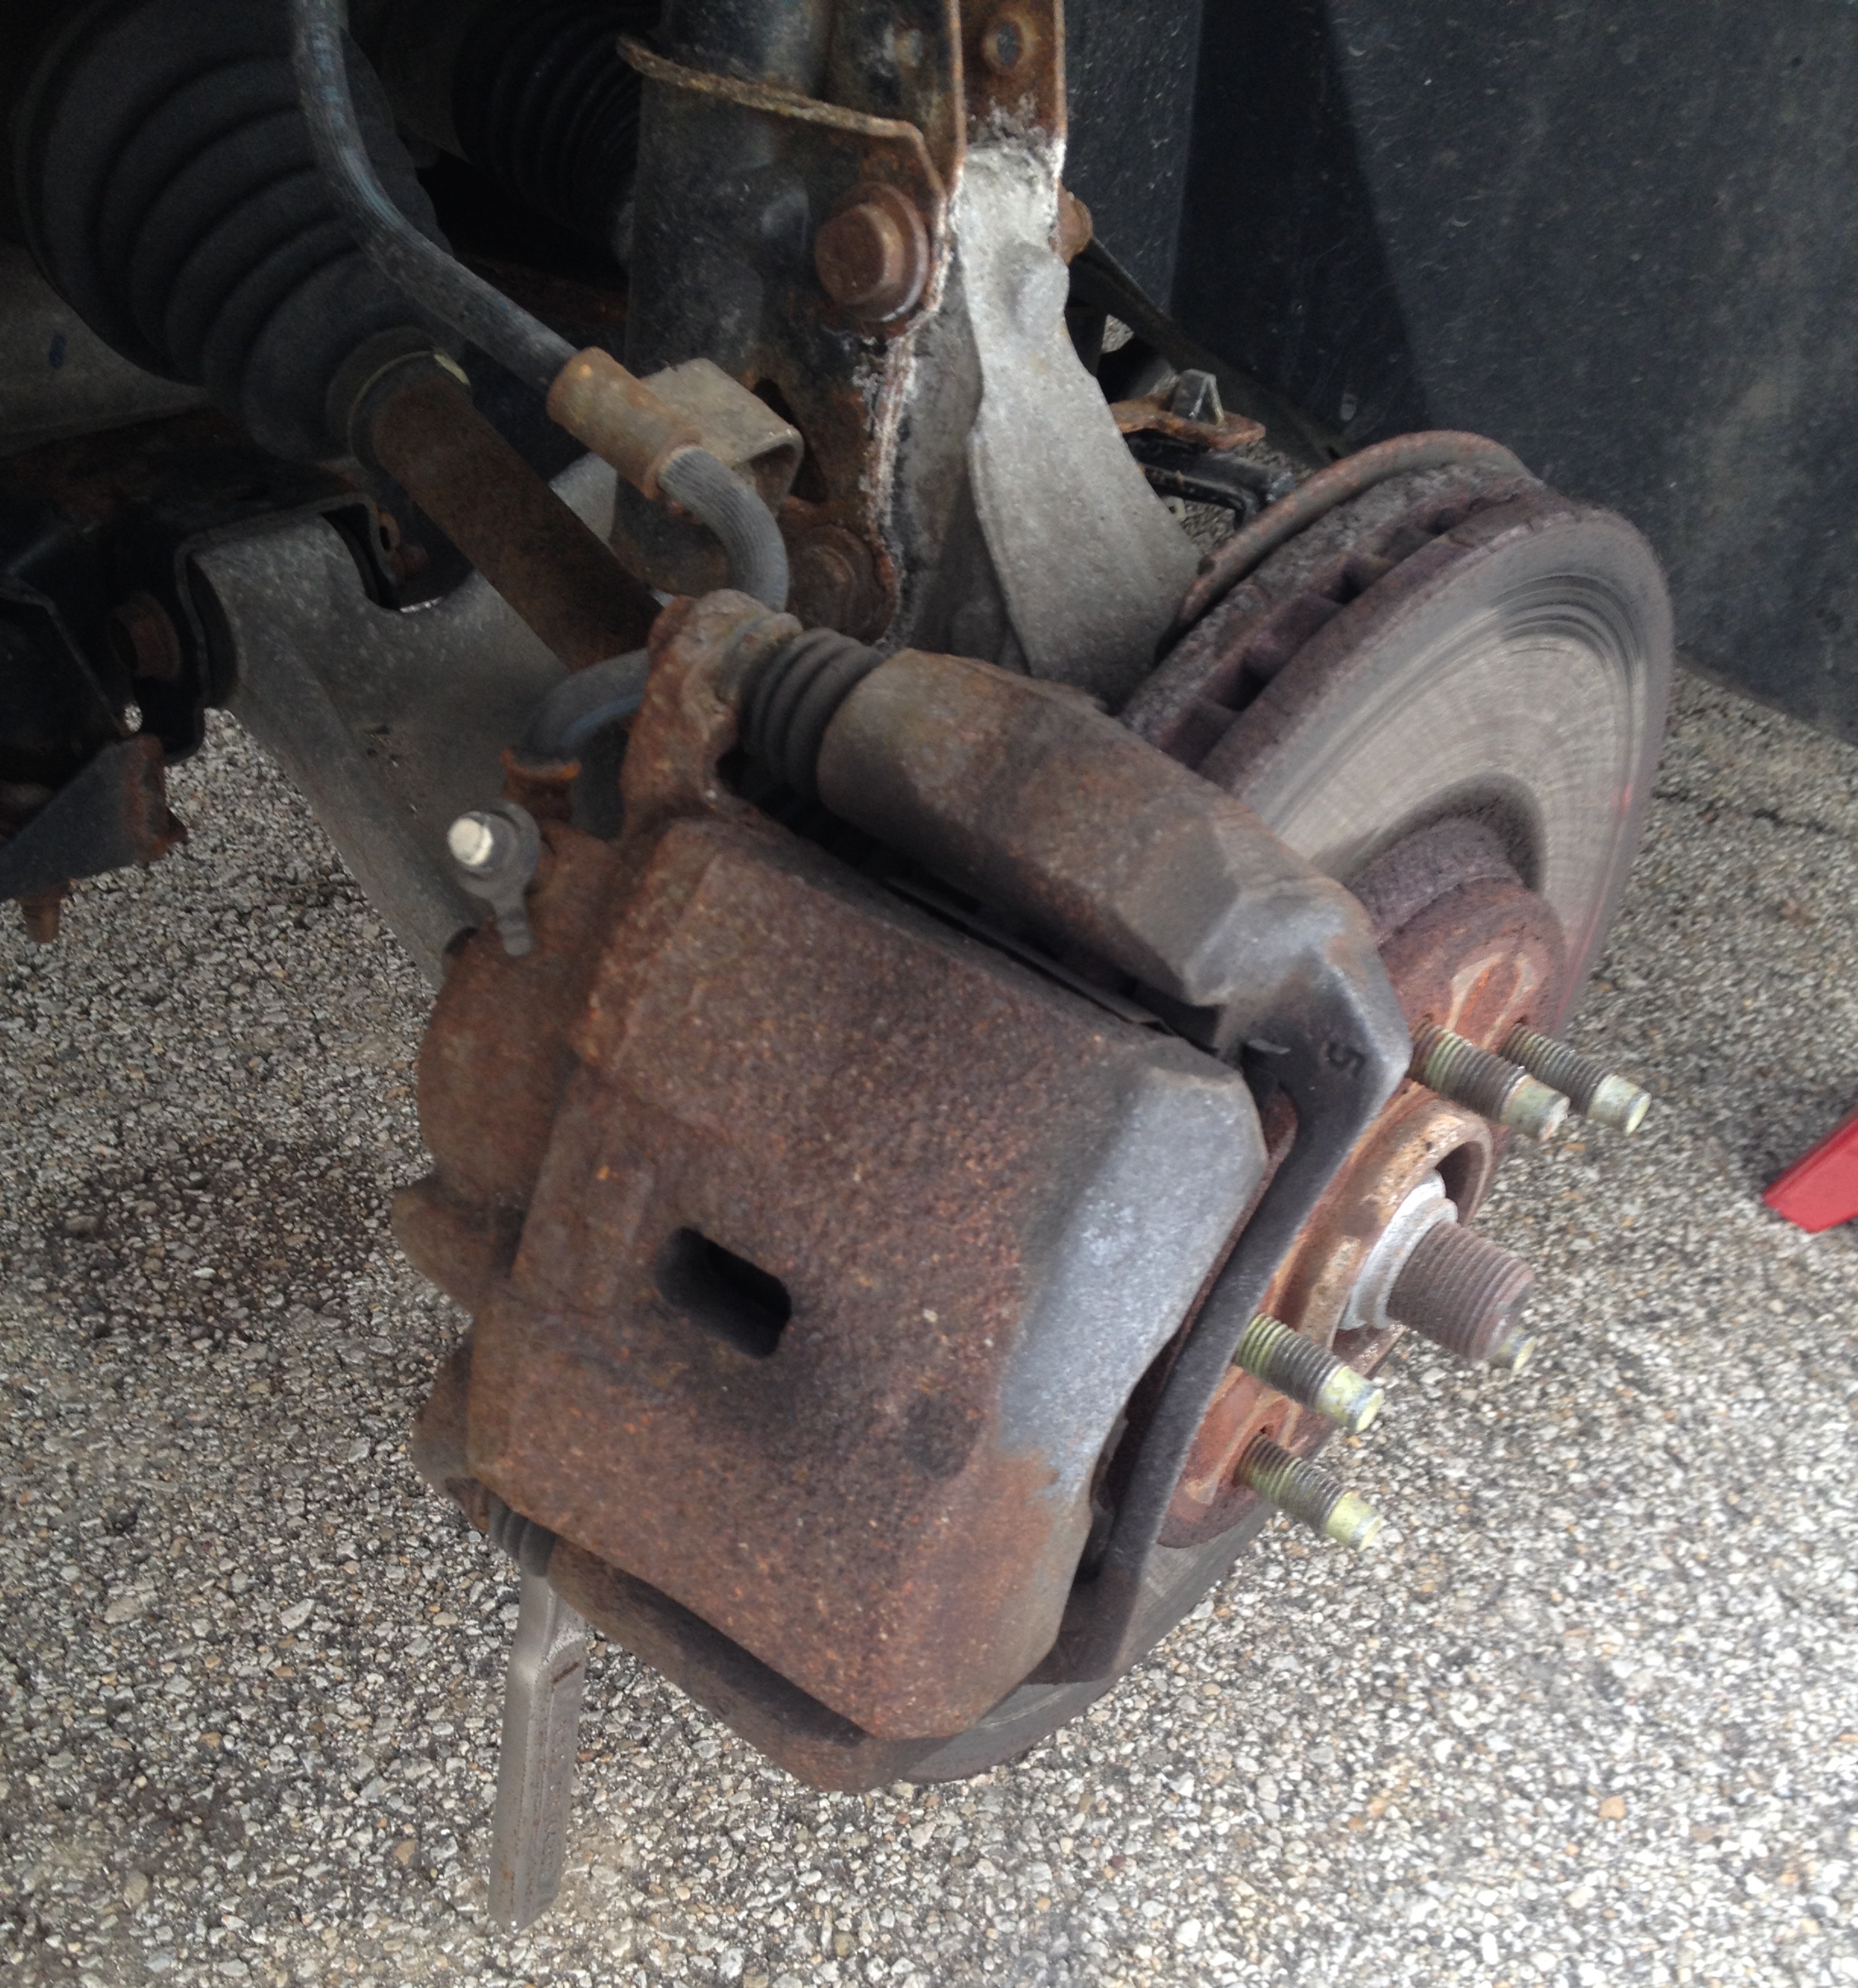
The brake caliper (shown above) is like a giant hand that holds a pair of brake pads. When you press on the brake pedal it forces brake fluid through hoses that actuate a piston in the caliper. That piston is what pushes the pads against the rotor.
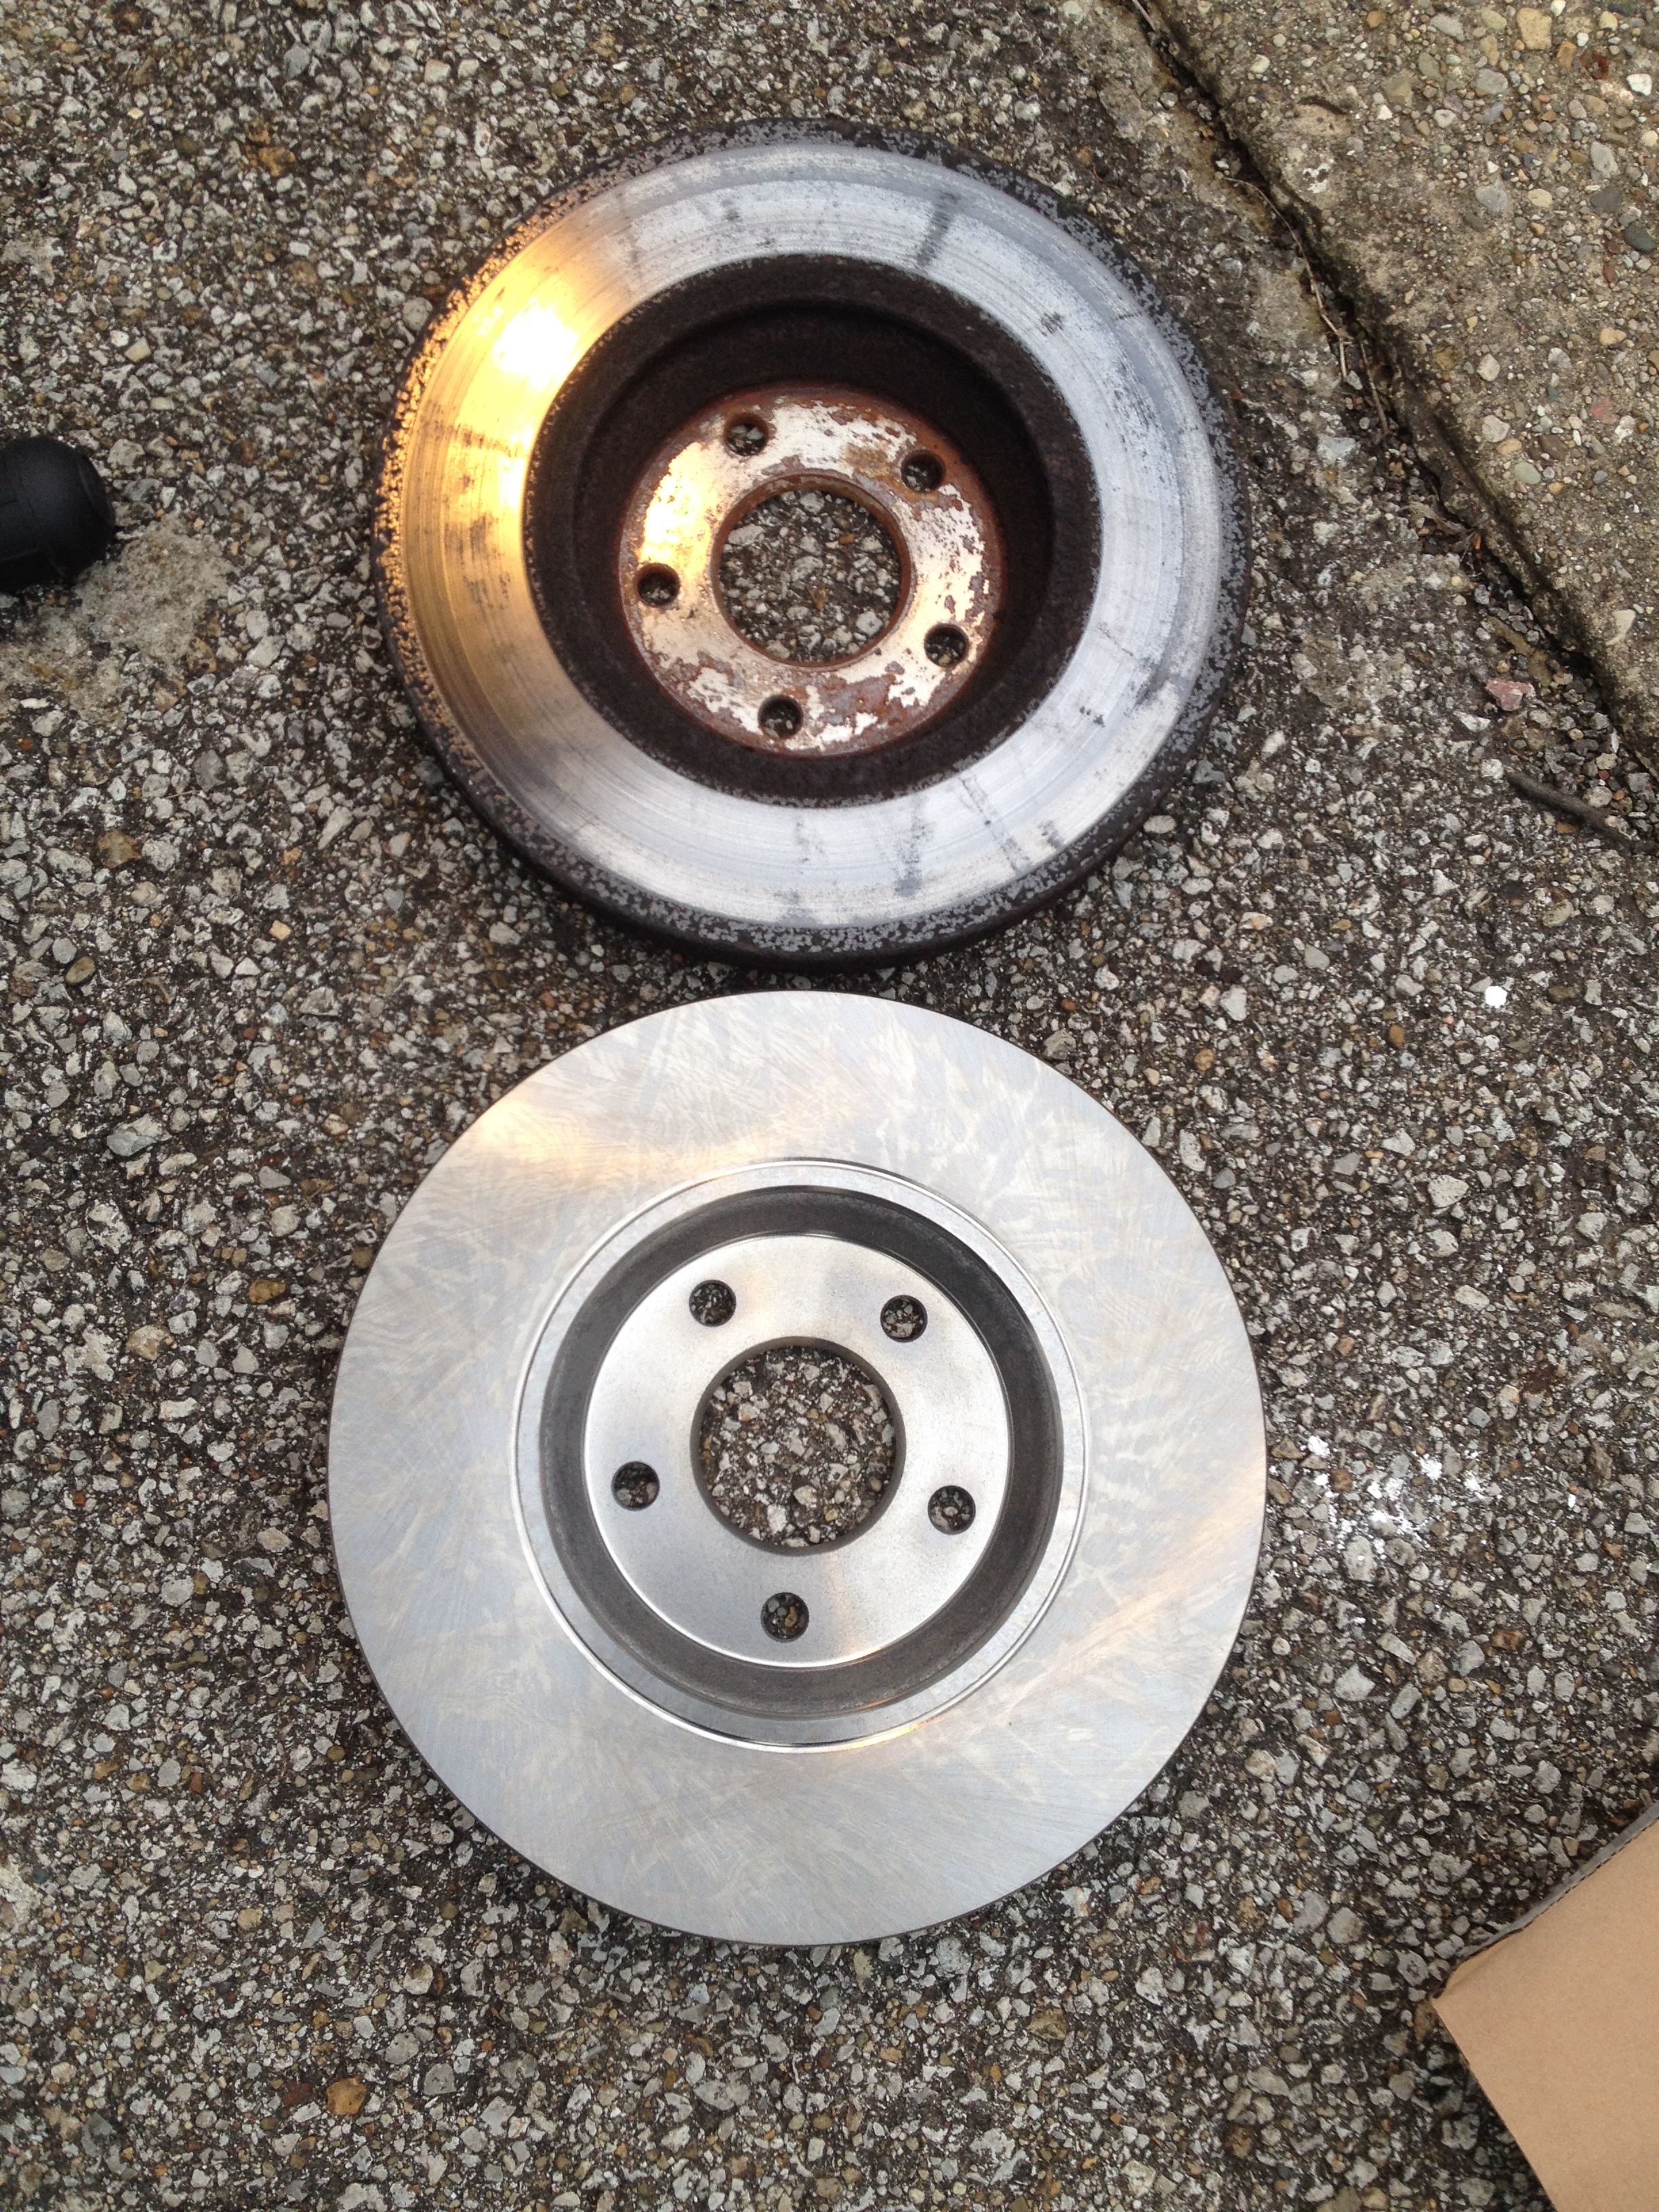
New rotors come with a rust inhibitor coating. If they didn’t they would be completely rusted over by the time you installed it on your car. The coating should be cleaned off with some brake cleaner spray before installing.
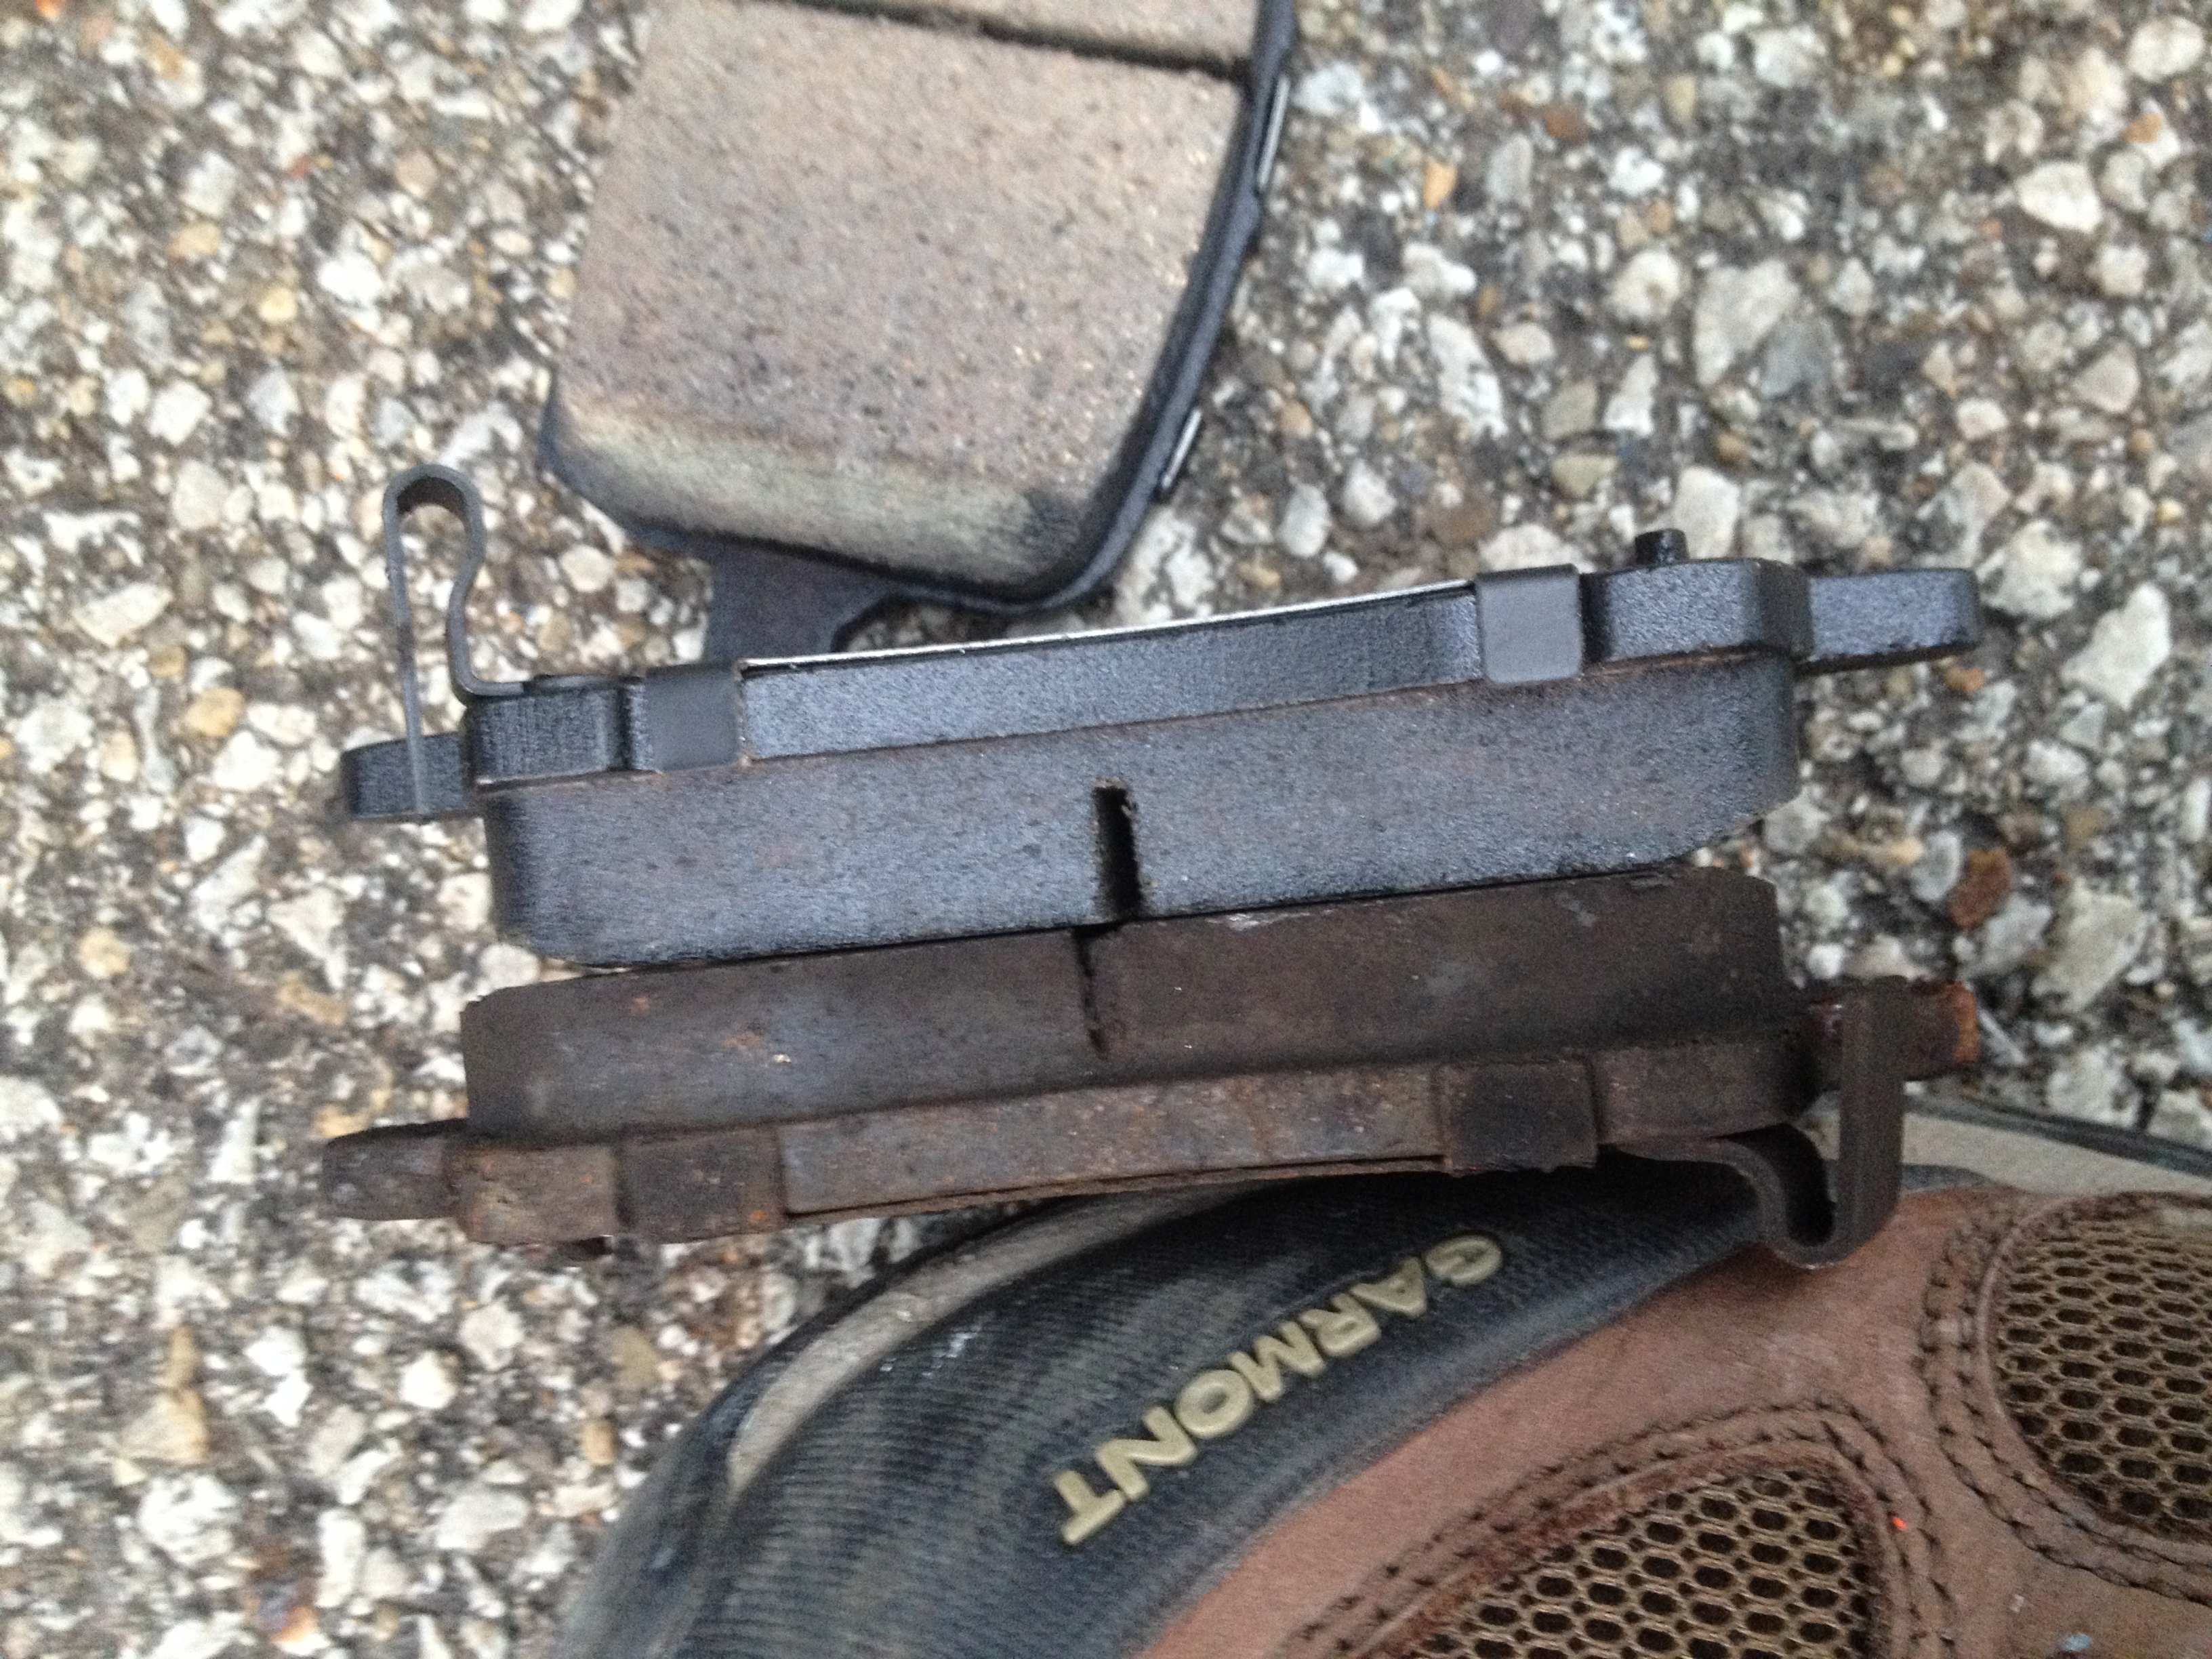
The old brake pad (nearer to my shoe) still has plenty of wear left. You can see the wear indicators (the metal clip that looks like a J) on both the new and the old pads. Do you know that horrible screeching sound when your brakes need to be replaced. That is caused by the wear indicators scraping against the rotor. It is designed to be loud and get your attention!
With the new rotor installed it is just a matter of putting everything back together again. Some parts are designed to be replaced with every brake job, like the little metal retaining brackets shown above. Also, some parts need to be lubricated.
With everything put back together and the brake lines bled (fluid completely replaced) the last critical step is to pump your brake pedal. The first couple of times that you push the brake pedal after replacing the brakes, the pedal will go all the way down to the floor! Once you have a brake pedal again, you can take it for a test drive.
A quick search on the internet revealed some big box store prices. For instance, Pep Boys offers a brake fluid exchange and ceramic pads for $250/axle. That does not include new rotors, but the machining of the old ones (they cut off a bit of thickness from your old rotors to save money and in return you are left with an inferior braking component). My total cost for everything was about $170, so I saved about $330 by doing the work myself. I spent two hours on Friday night doing the front axle and five hours on Saturday morning doing the rear axle and exchanging the fluid. $47/hour is worth it to me.
I skipped a lot of steps in this blog post, including important ones. If you want to know more about the details, I find that Eric the Car Guy has a great set of video tutorials online that you can follow.
We’re always looking for ways to save money, especially on things we use/buy regularly. You may remember our foray into making our own breakfast sandwiches. While not very big on cost savings when you factor in the time to make them, it does offer the opportunity to expand into variations other than the 3 flavors offered at Aldi.
Another food product we eat like it’s going out of style is yogurt. When we were starting out our lives post-college we went only for the cheapest yogurt we could get. At 33 cents for a 6 oz cup the Aldi & Kroger generic brands ruled the refrigerator. Then we started looking at the nutrition labels. The generic cups of yogurts, regardless of flavor, all had about 36 grams of sugar. We did the math:
4 grams of sugar = 1 teaspoon of sugar
36 grams of sugar = 9 teaspoons of sugar
9 teaspoons of sugar = 3 tablespoons of sugar
3 tablespoons of sugar in just one small container of yogurt. Yikes! Now granted some (not much) of the sugar comes from the milk, but companies tend to make up for lack of fat (flavor) in products by adding sugar. It’s very difficult to find full fat or low sugar yogurts without spending over a dollar per 6oz cup. Not very frugal when you’re on a limited budget.
After that realization we coughed up a little extra money for the name-brand regular yogurt at about 50-70 cents a cup. The sugar content was reduced but not by much (24-26 grams or 2 tablespoons).
About a year ago we started on the Greek yogurts and bought tubs instead of individual cups when it made sense (coupons make the pre-portioned cups a better deal). The plain Greek yogurt quart tubs cost $3.89 and only have 10-16 grams of sugar. You’re probably thinking why not just get the generic “lite” or “carb master” variety and save yourself the money and have the lower sugar content. That comes to the matter of taste. I can’t stand the aftertaste of artificial sweeteners. Picky, I know.
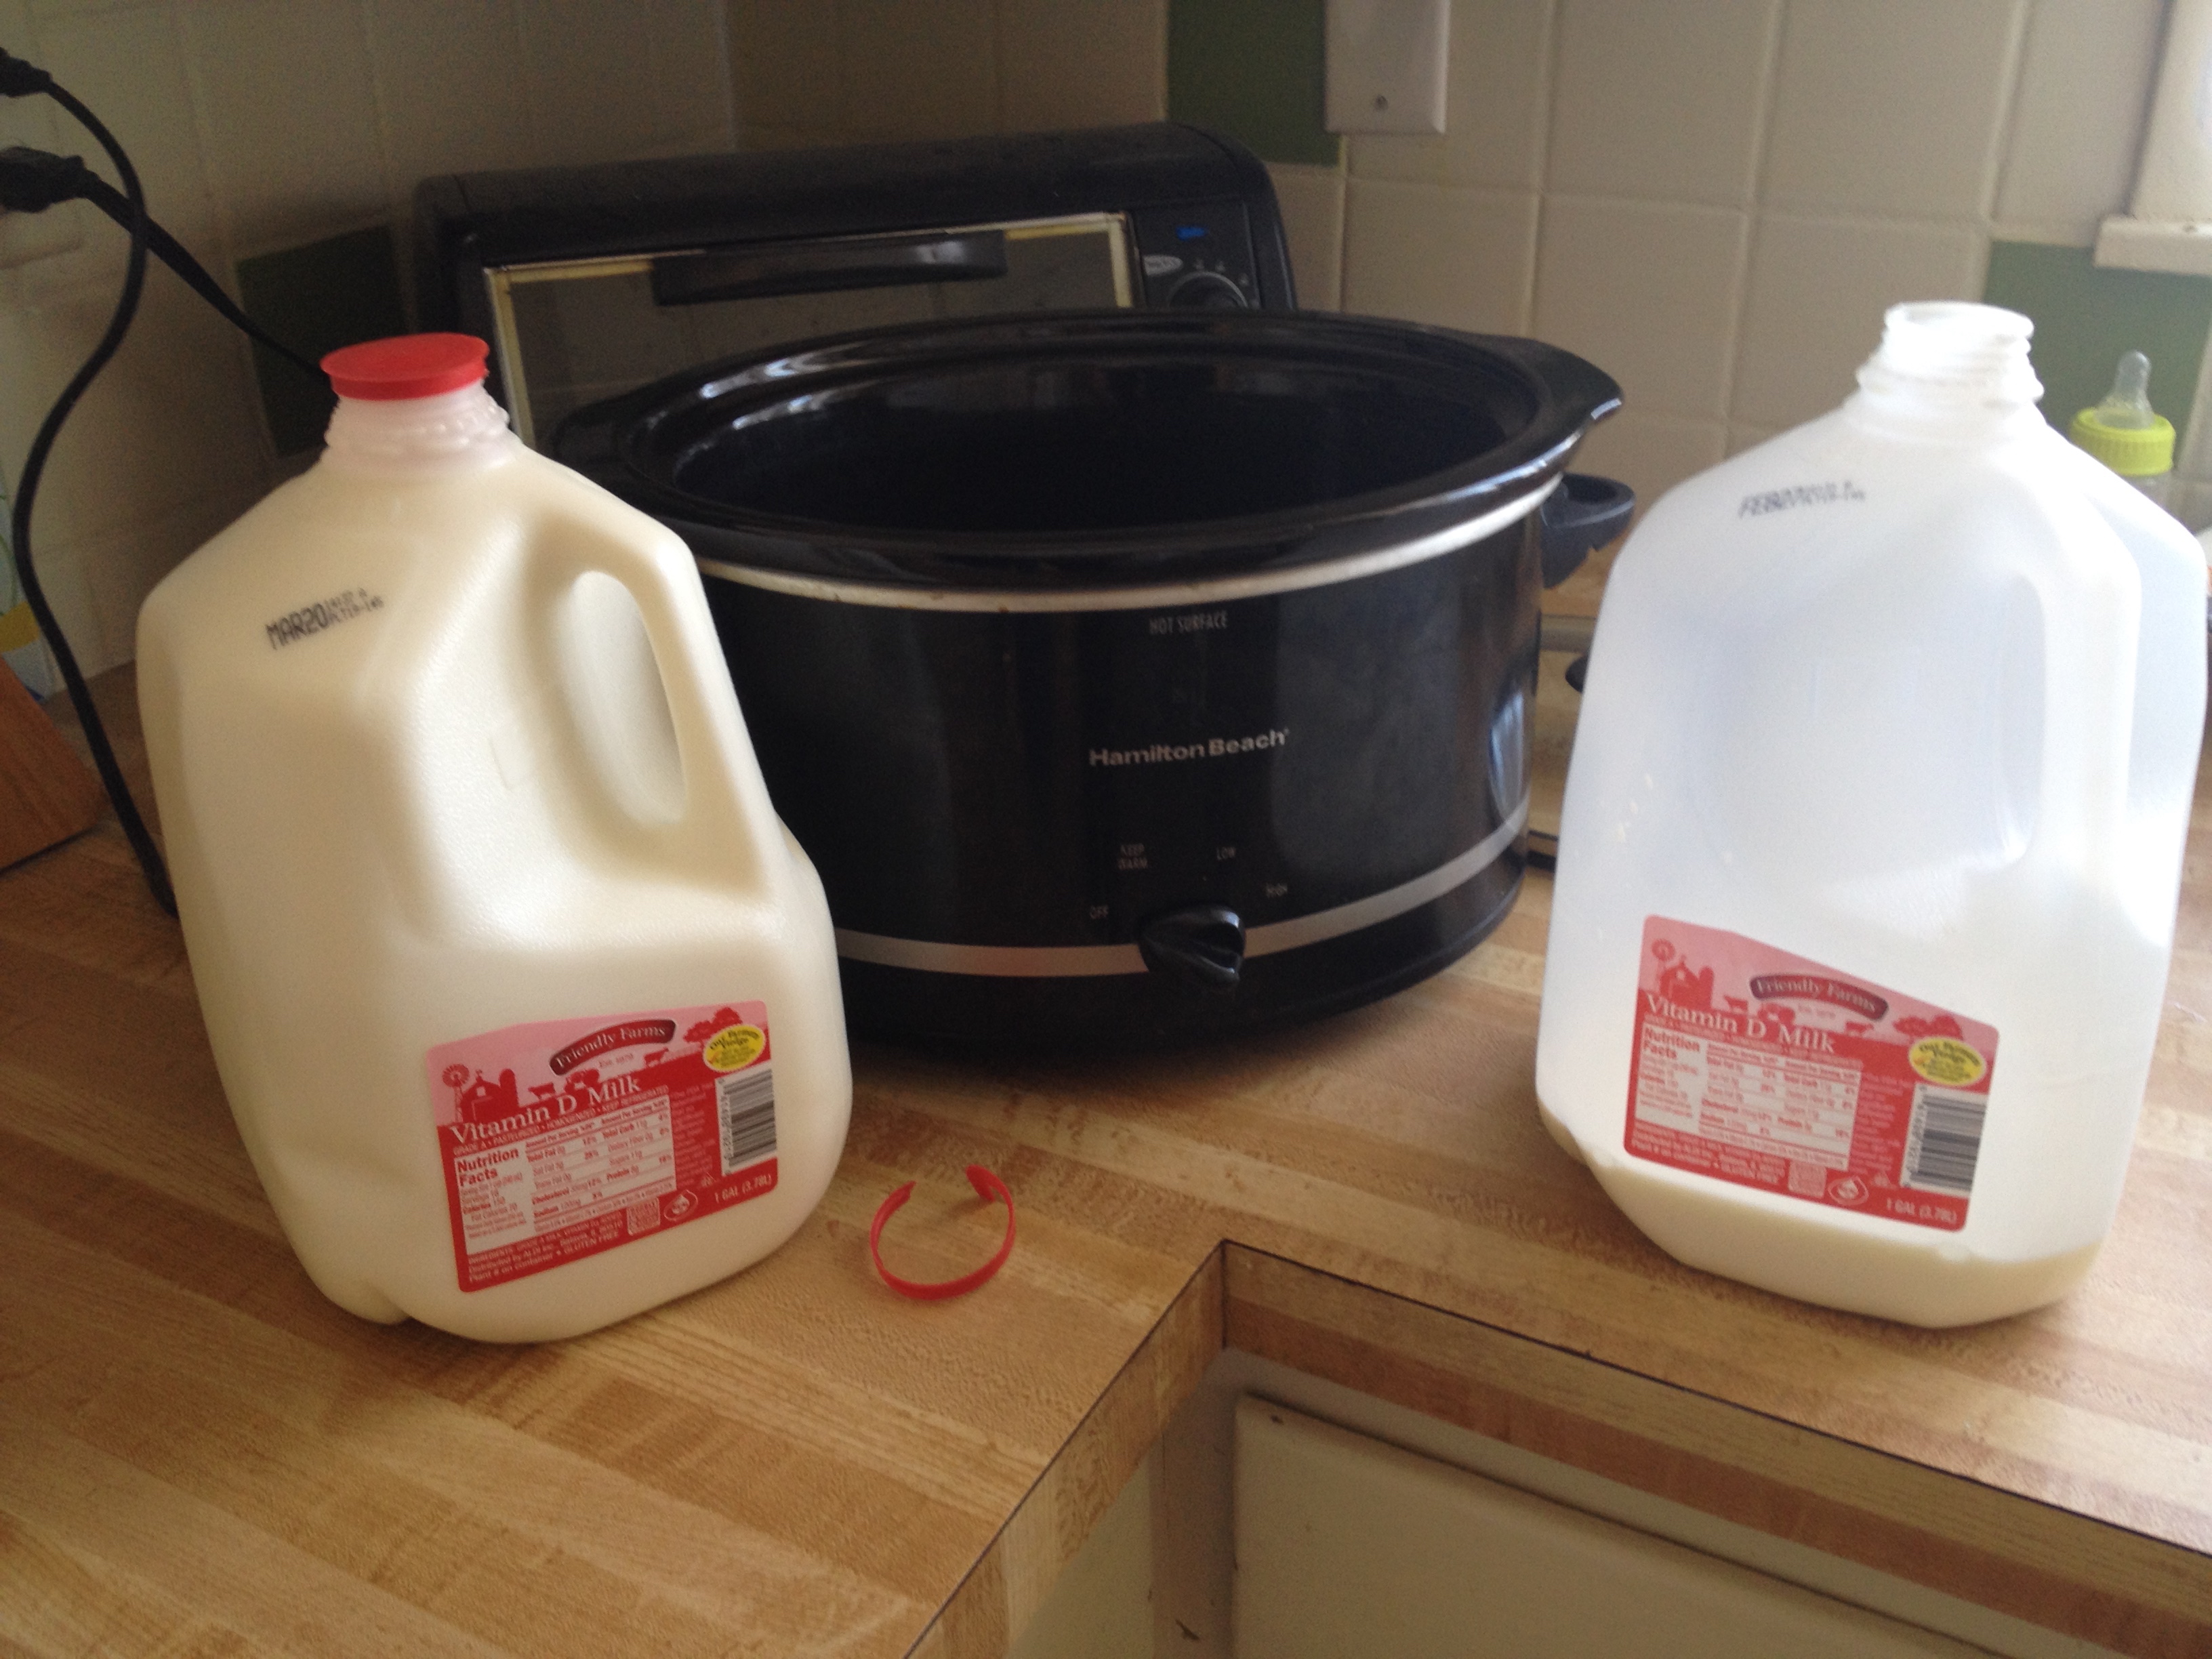
Now on to the main point of this post. I was browsing the web the other day and a recipe to make your own yogurt caught my eye. The process was very hands-off and for a little less than the cost of a quart tub you could have almost a gallon of yogurt (4 quarts if you can’t remember your US customary conversions). It only needed 4 things:
Slow cooker
Thermometer
Gallon of milk (the recipes say skim or 2% will work but whole milk is best)
6oz cup of no-sugar/sweetner added, plain yogurt – look for the live and active cultures seal on the label
You begin by pouring your gallon of milk into your slow cooker, put the lid on and turn it to the low heat setting.
We have a 4 quart slow cooker so we couldn’t quite fit in a whole gallon.
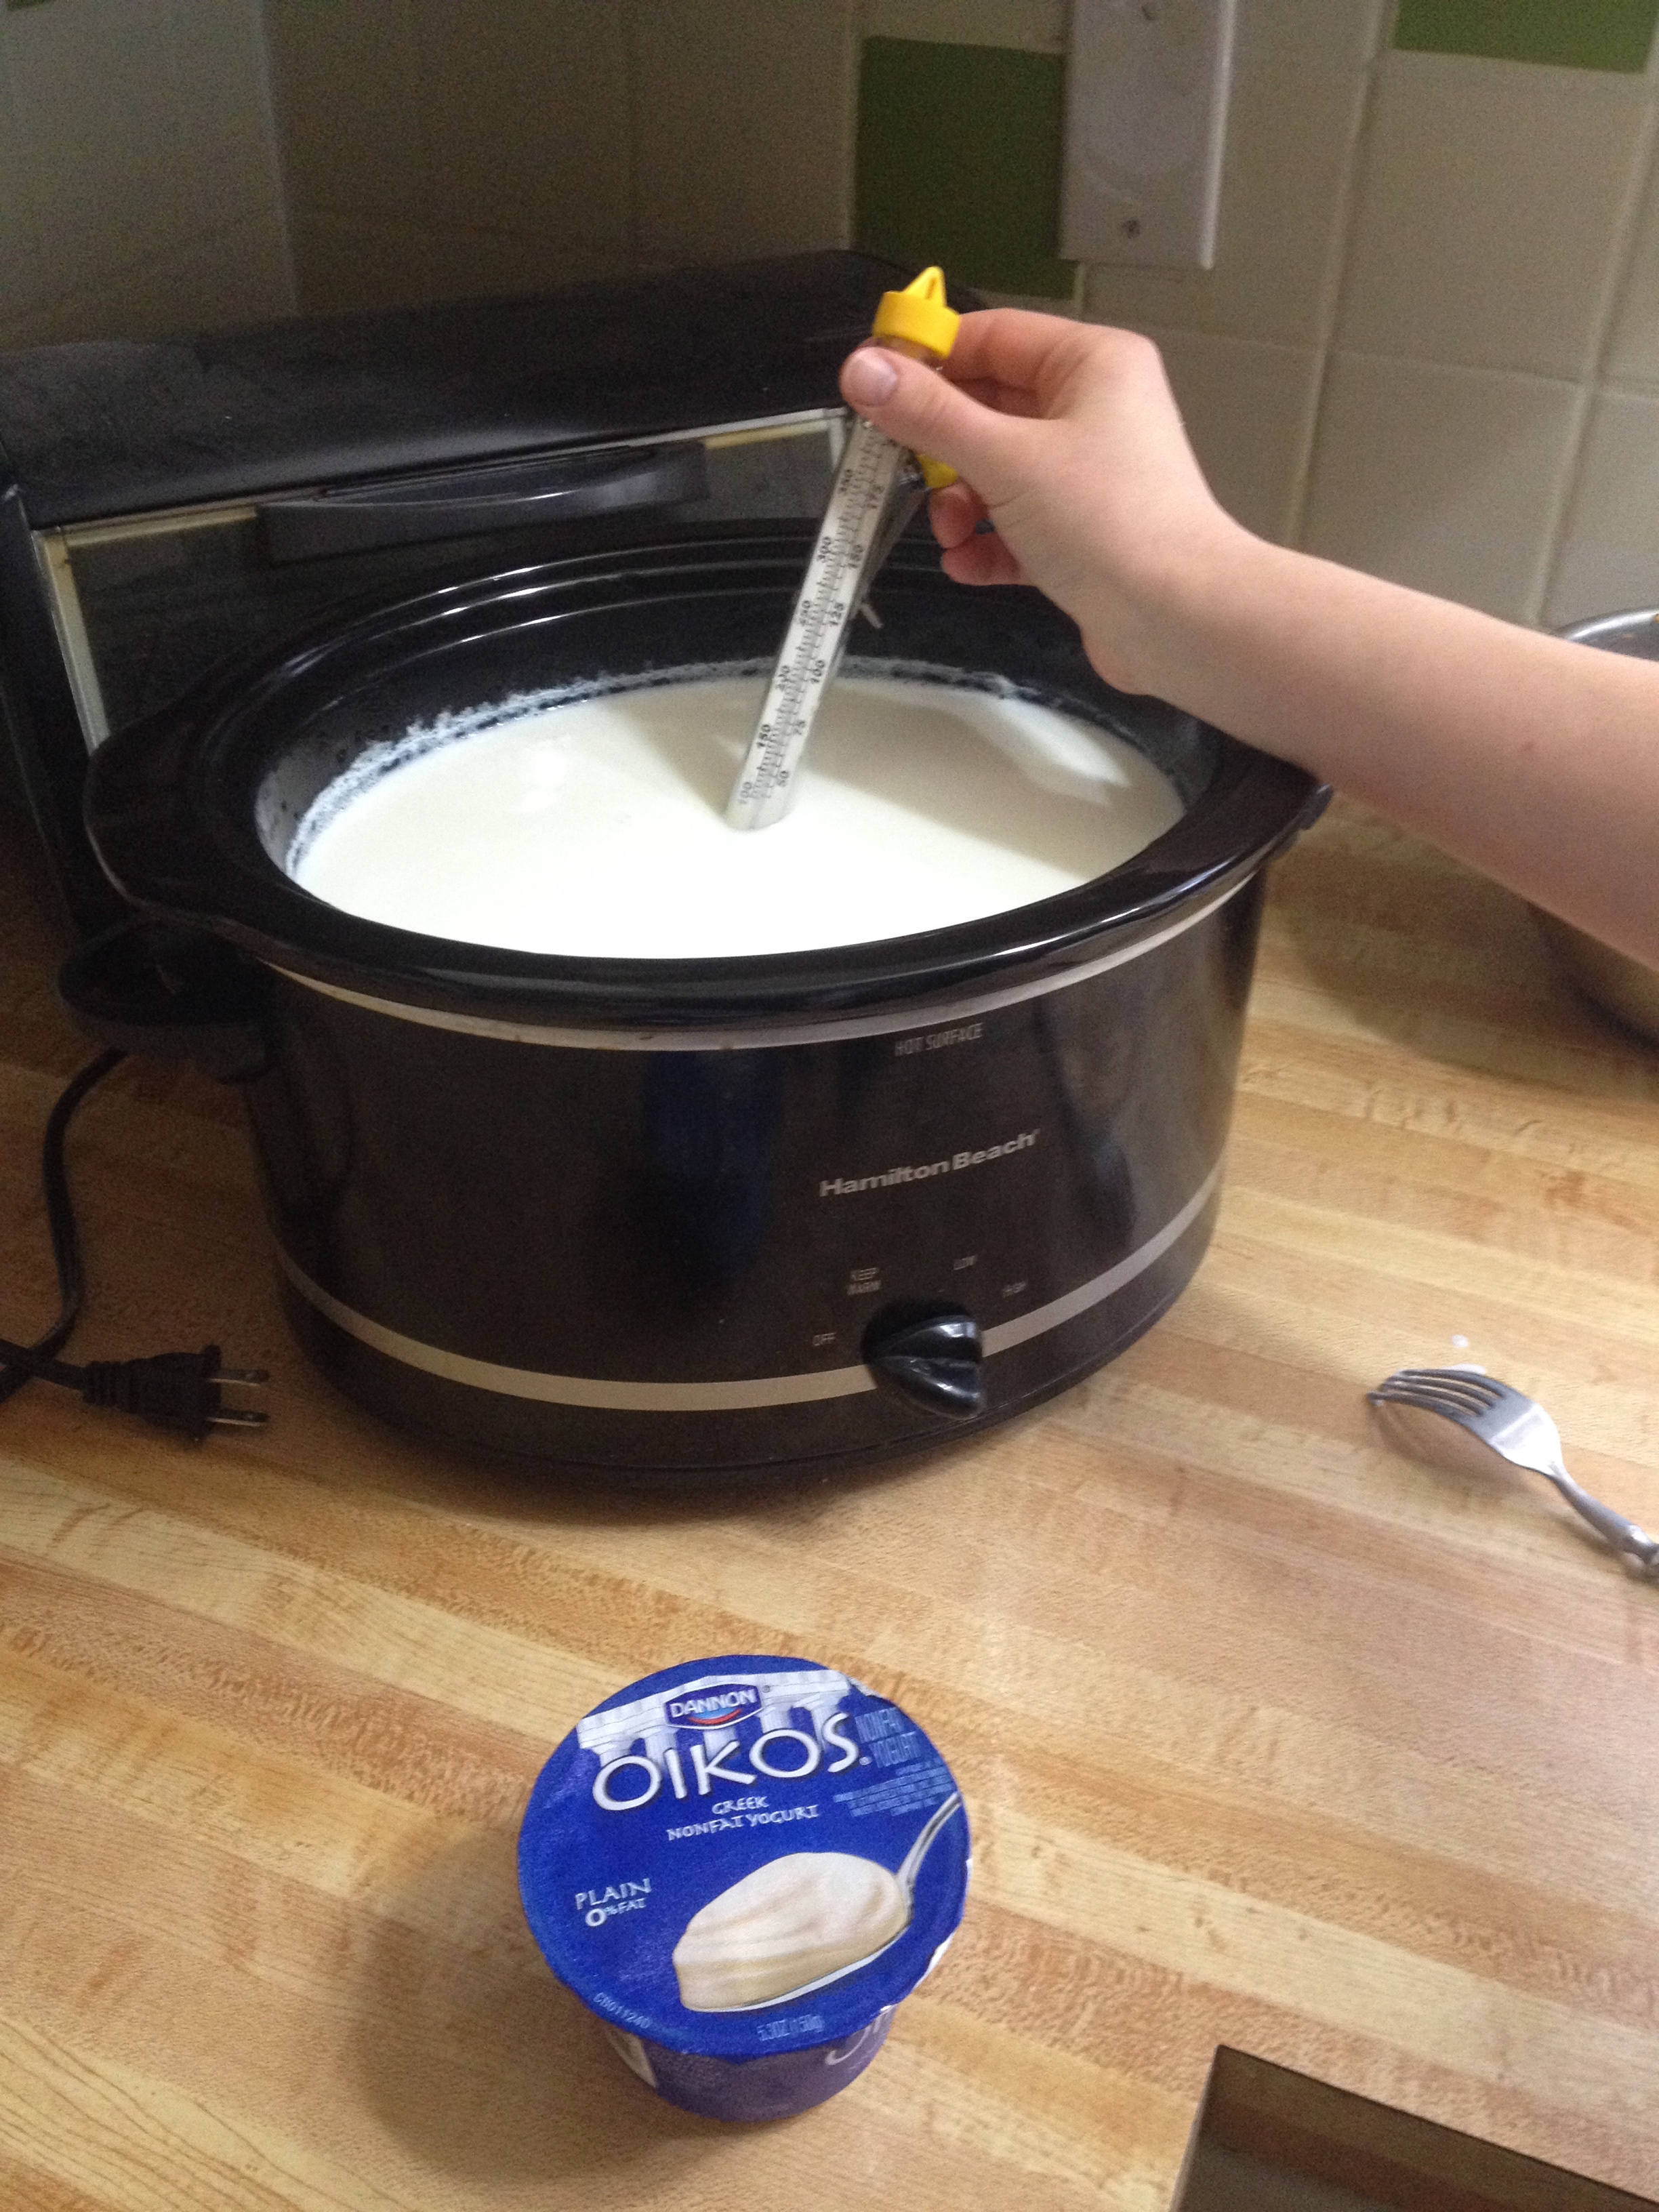
You want the milk to heat to 180 degrees to kill off any bad bacteria present so the good bacteria from the starter yogurt can grow freely. This is important so use your thermometer to make sure the milk gets hot enough. Depending on the heat output of your slow cooker it can take several hours (ours took about 3 hours).
Once the milk hits 180, turn off your slow cooker and let it sit with the lid on to cool to 95-115 degrees (another 2-3 hours). This is the ideal temperature for the good bacteria to grow. Take about a cup or so of the still warm milk out of the slow cooker and mix it with your starter yogurt. Pour that milk/yogurt mixture back into the rest of the milk and mix well.
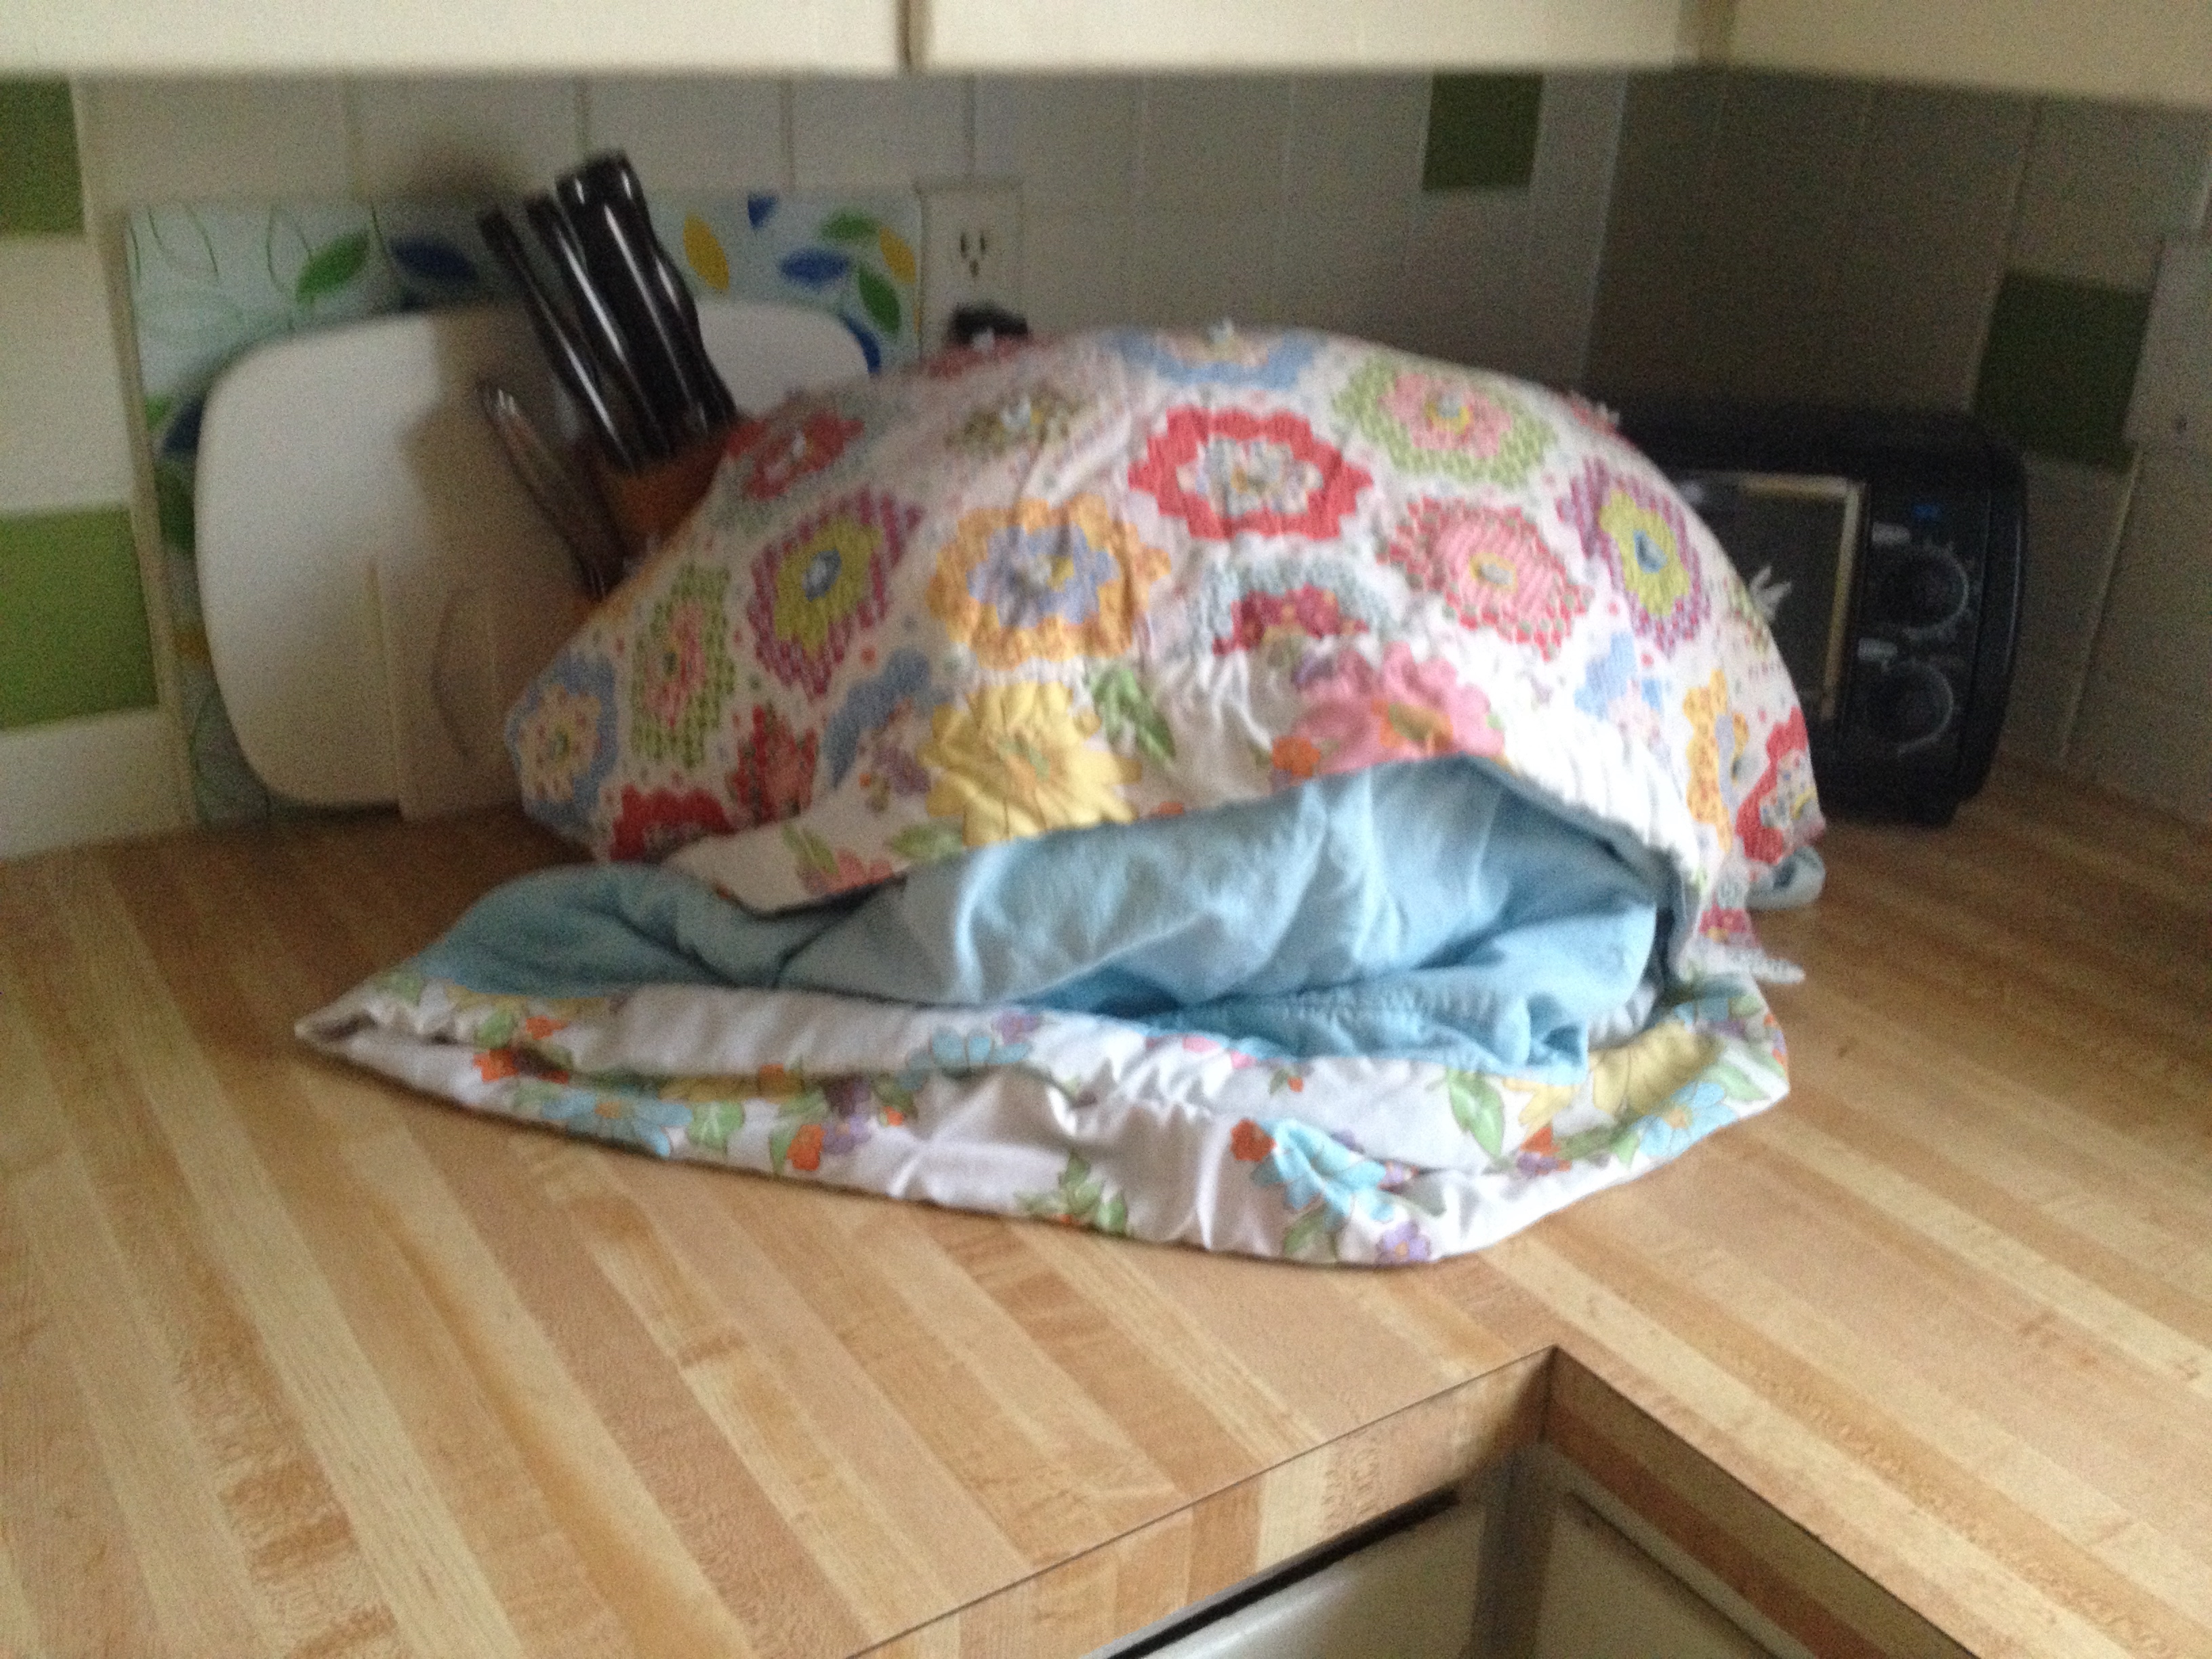
At this point some recipes had you stick the yogurt in a cool oven with the light turned on. Other recipes had you use a thermos or cooler. The goal is to keep the milk at a stable, warm temperature while it ferments. We opted for wrapping the slow cooker in a blanket to insulate.
Your job is done at this point and the live bacteria from the starter yogurt go to work. The yogurt should sit for 8-12 hours in its cocoon. If you like more sour tasting yogurt let it sit for the 12 hours, for a less tangy yogurt 8 hours should suffice. We let ours sit overnight for about 12 hours. Once the fermenting period is up you can transfer the yogurt to containers and place it in the refrigerator.
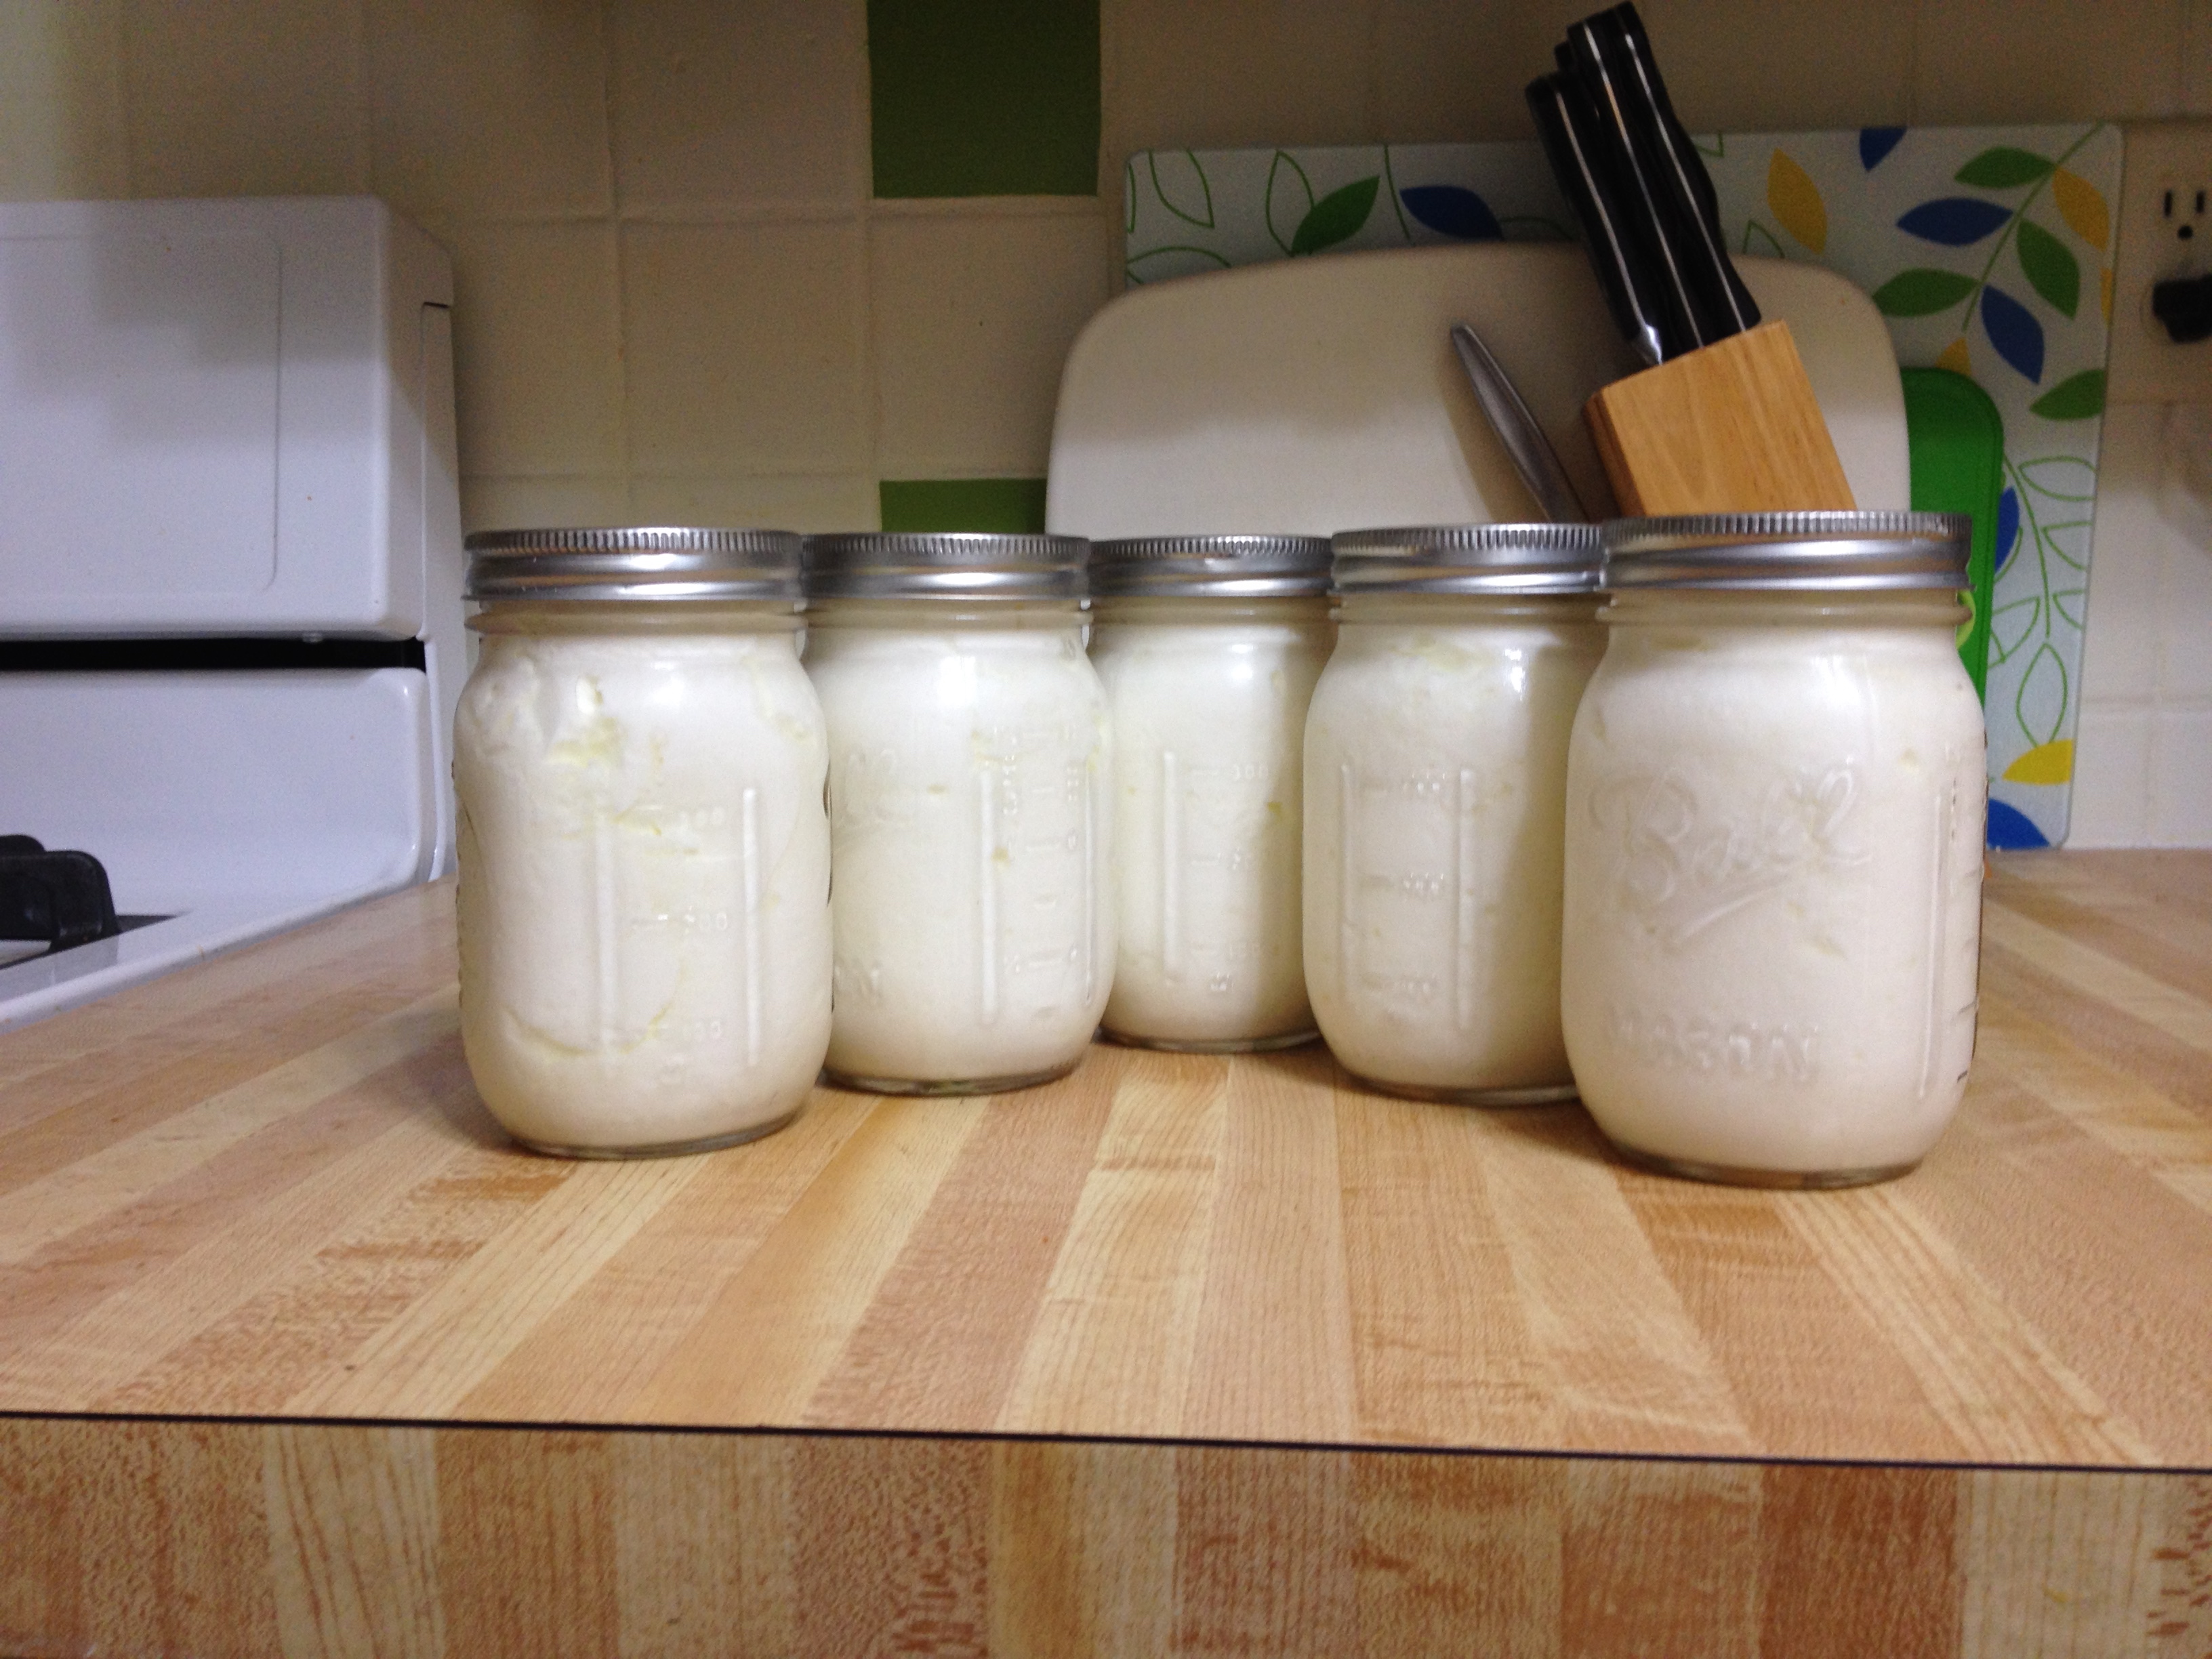
We had about 3 1/2 quarts total of yogurt. About a quart was eaten by the time I remembered to take this picture.
Your homemade yogurt will keep for about 2 weeks (if you don’t eat it all before then). Our total cost was $3.69. $2.69 for the milk and another dollar for the starter yogurt. The next batch will cost even less as we’ll use a cup of yogurt from this batch as the starter. The taste is great, even after 12 hours it wasn’t very sour at all and the whole milk made it very creamy. Even Frugal Boy has been enjoying the yogurt.
A few weeks ago I went on a cross country road trip with my brother Ed. I wish I could claim that I came up with the term Ed-venture, but I’m afraid that honor goes to my sister-in-law.
Ed was moving from the D.C. area to the Grand Canyon as part of his change in jobs. He picked me up in Illinois and from there we basically followed the old route 66 mother road (the one that the kids movie Cars is centered around).
We passed over the Mississippi river and into Missouri.
Later on we dipped down into Arkansas so Ed could claim his 47th visited state and my 37th.
Our family has a little competition to see who can visit all 50 states first. Flying over a state or just being in an airport doesn’t count. Here is my current map. [Thanks mom for reminding me that I had North Dakota]
I’m definitely a dark horse to win the competition as I’m still missing states in every cardinal direction.
Anyway, getting back on topic, in Arkansas we visited the original Walton’s drug store. If you know your history you probably know the big box store that came about because of Walton’s.
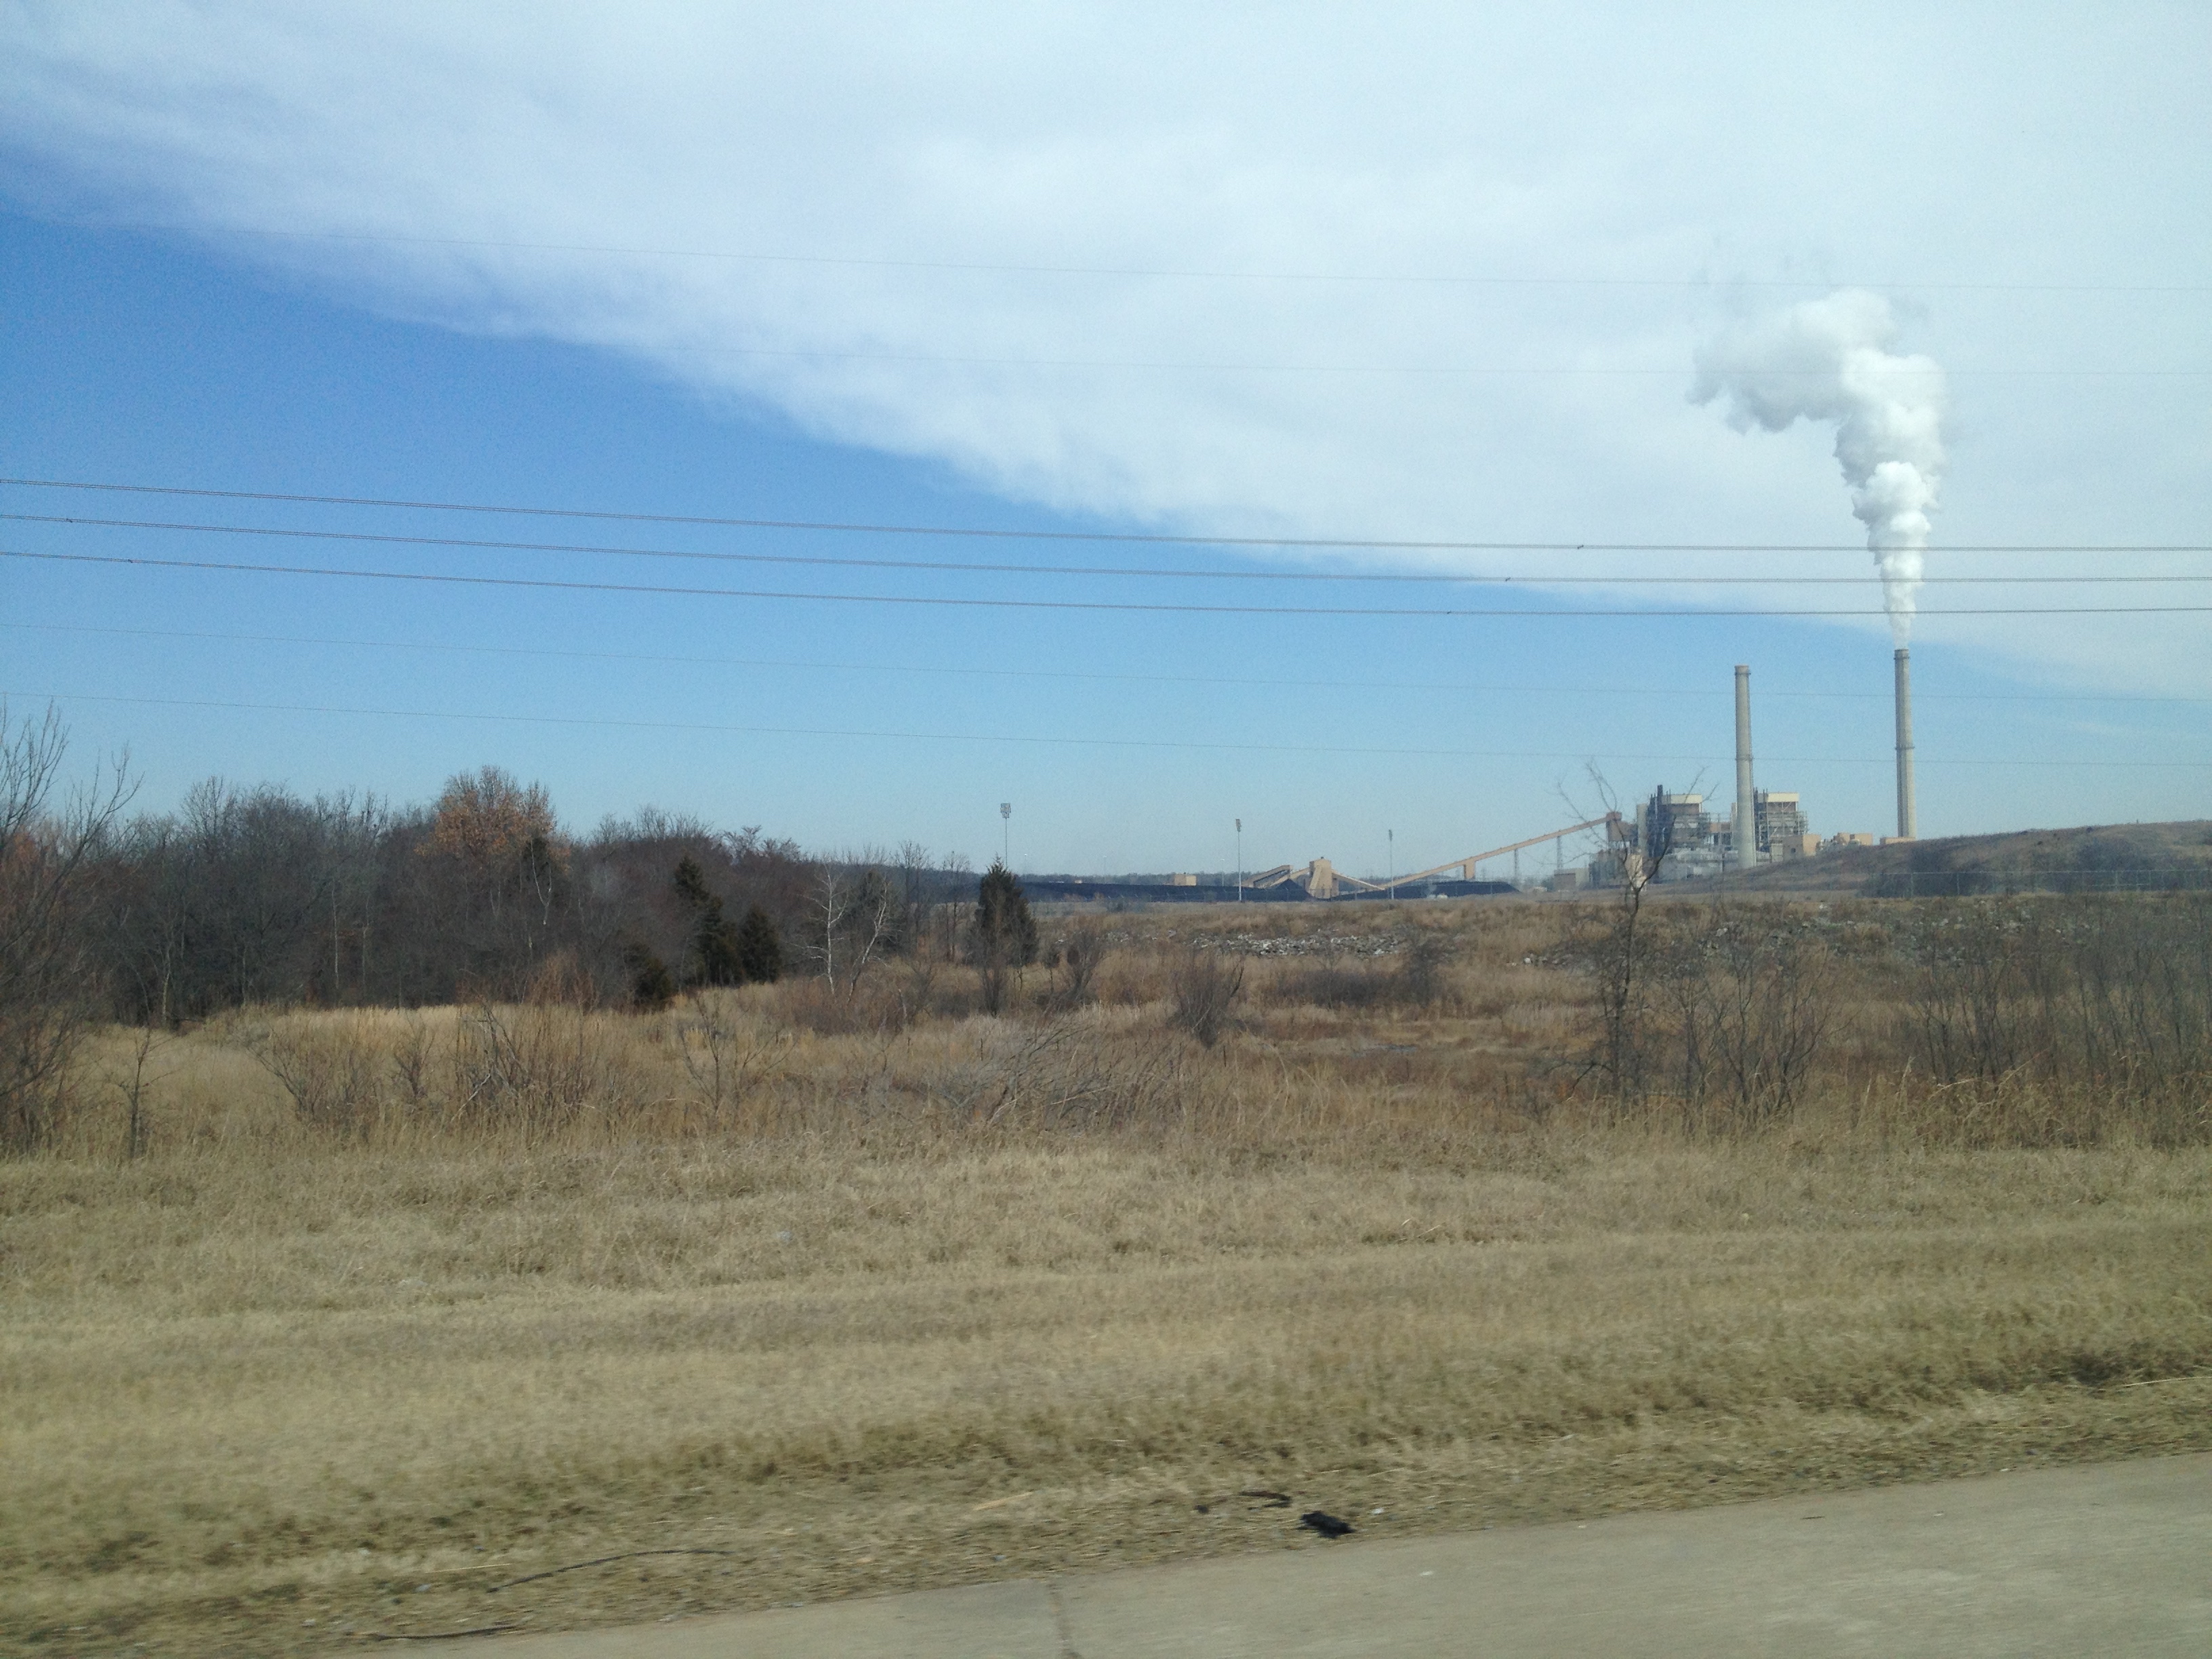
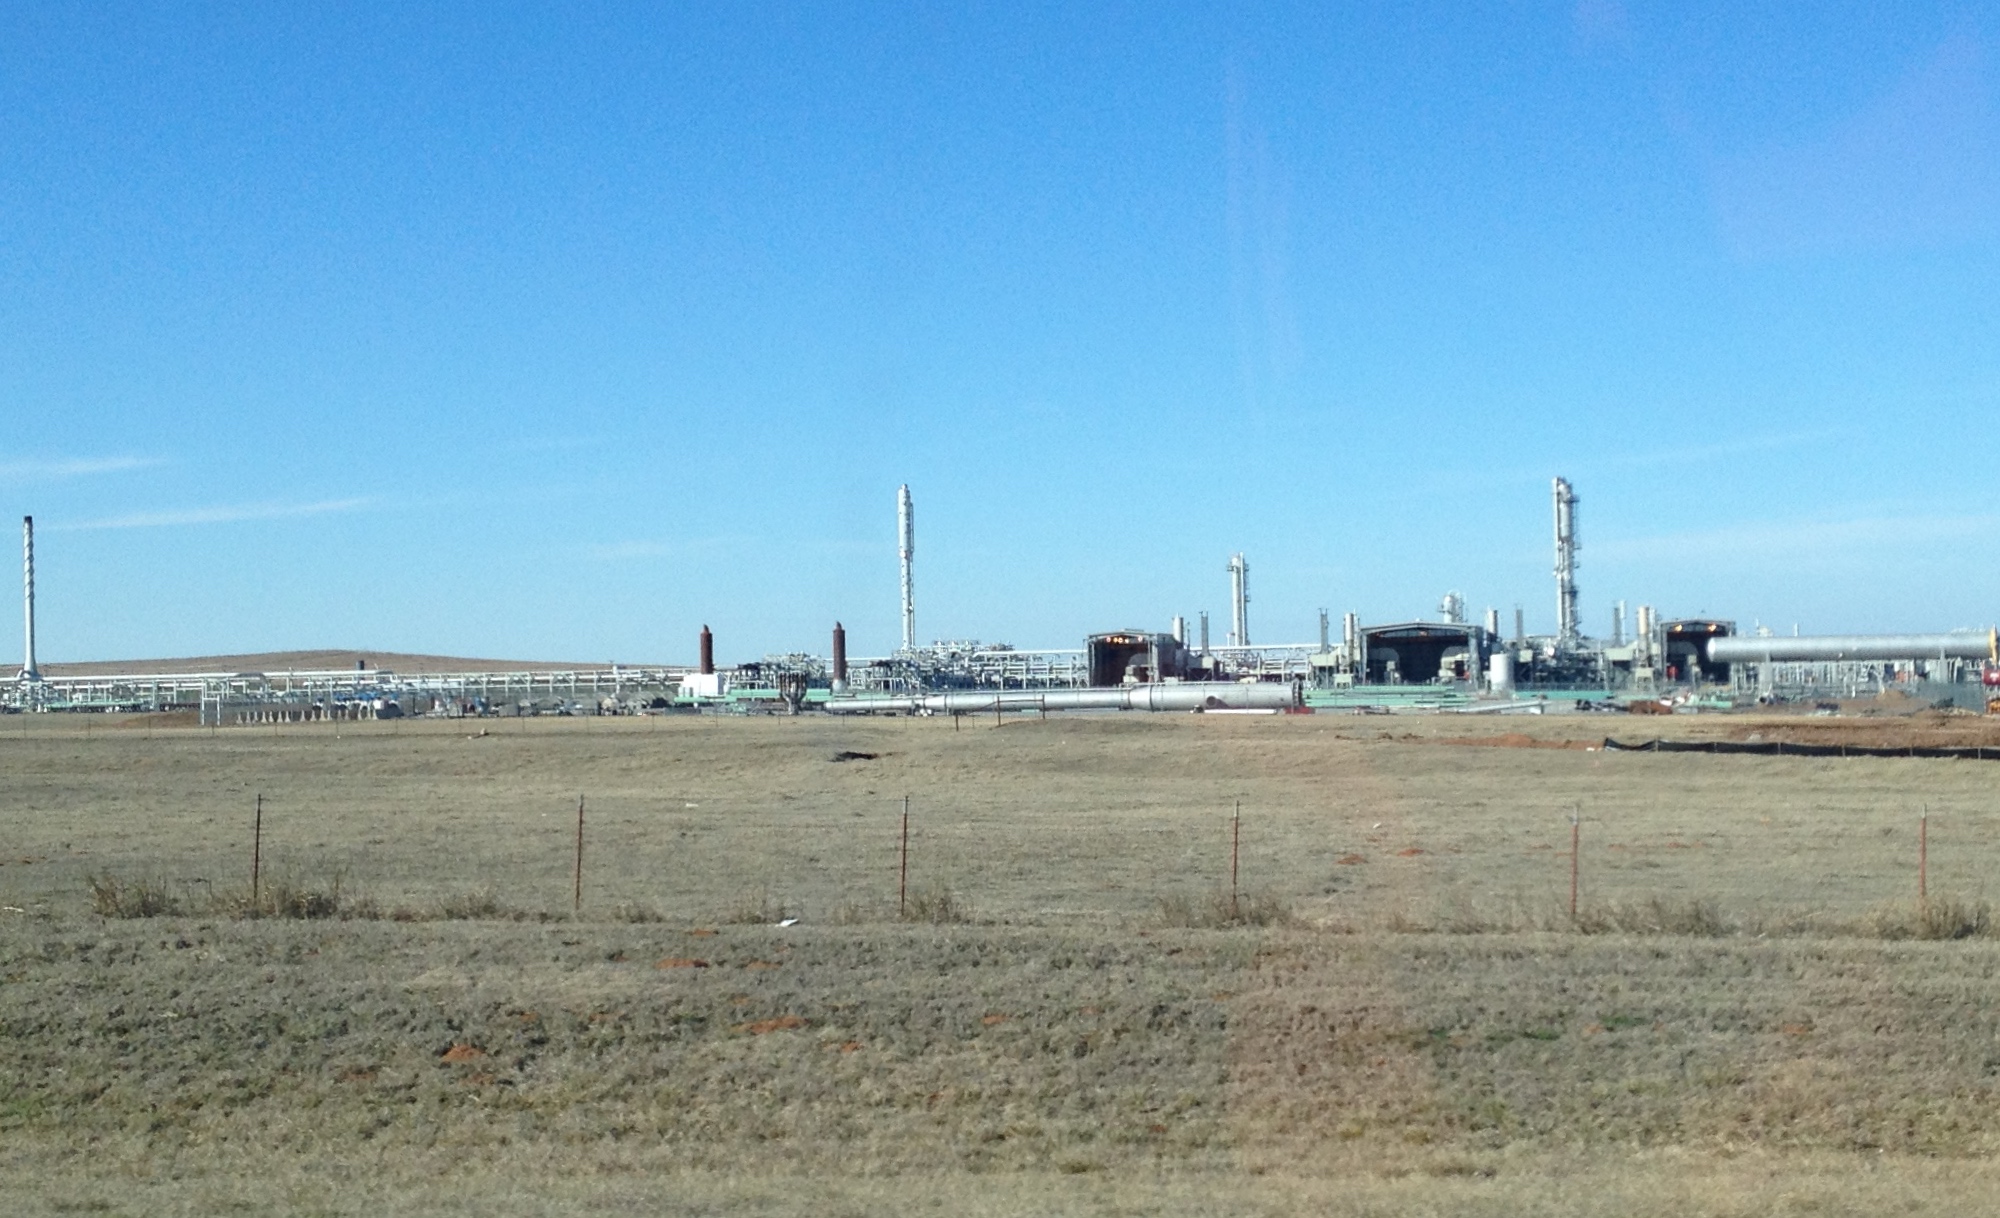
The bits and pieces of Oklahoma that we saw were very industrialized. Oil refineries and coal power plants seemed to dot the landscape.
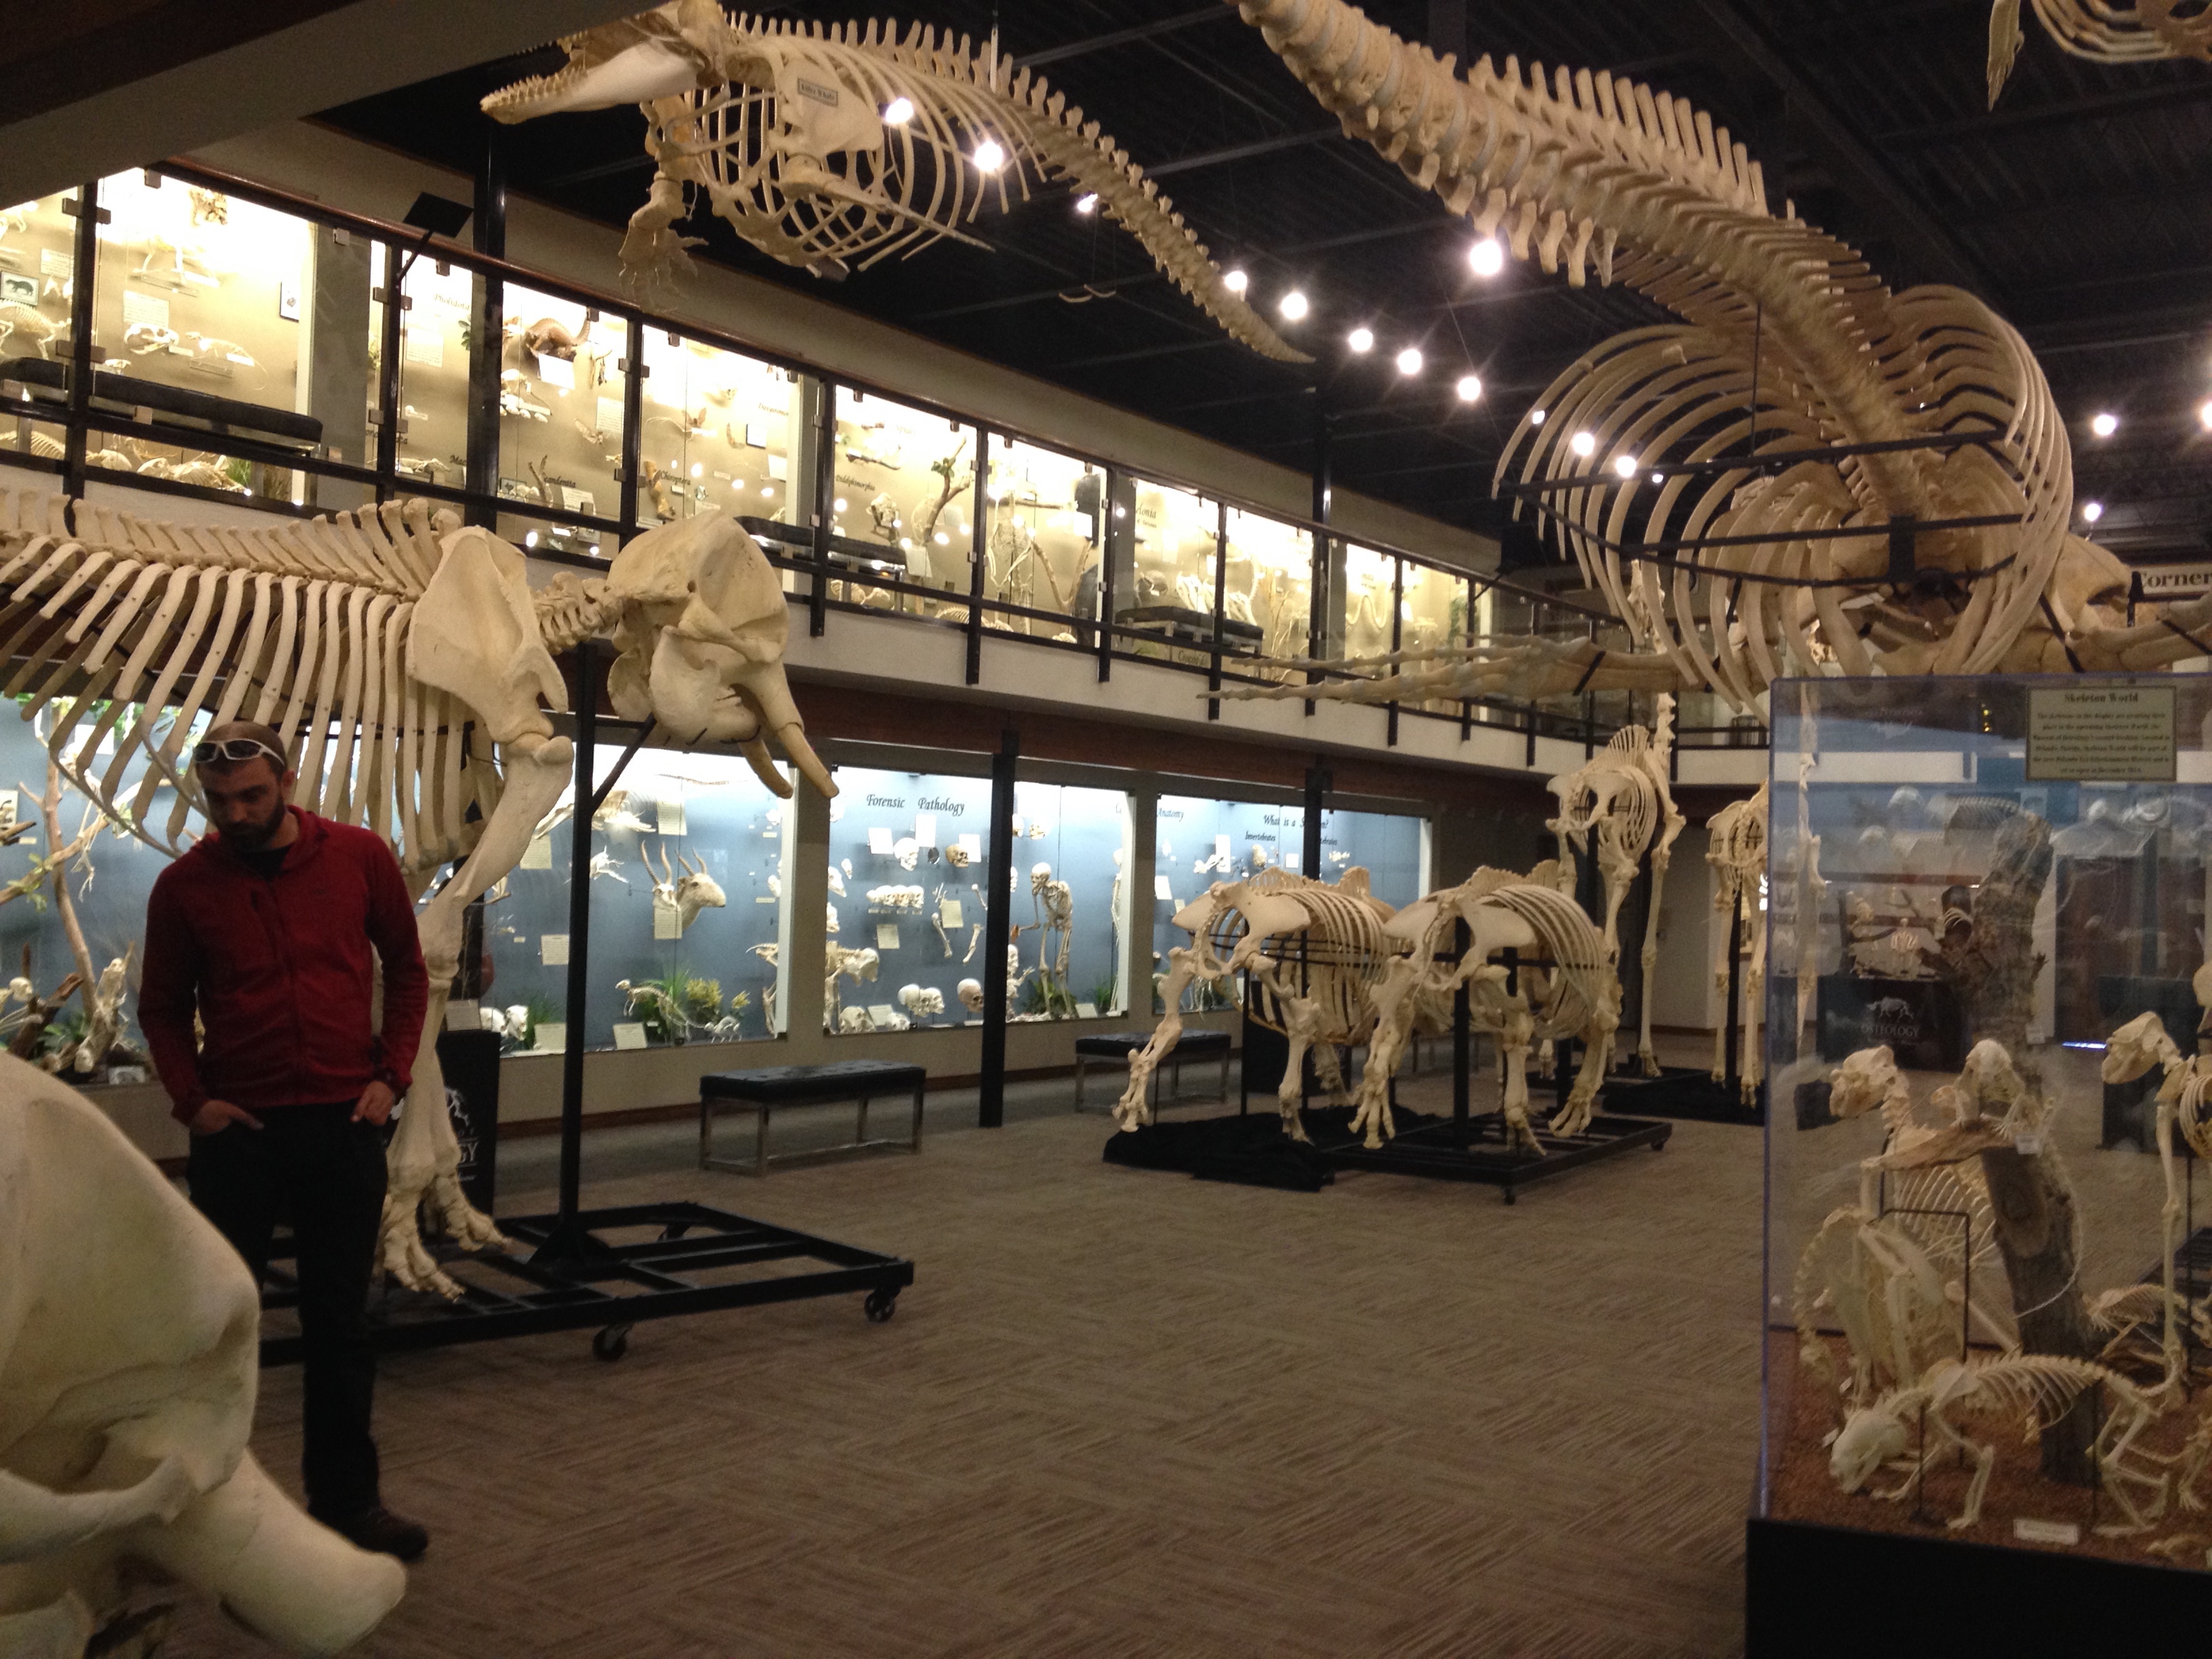
One of the highlights of the trip was actually in Oklahoma City. There is a private museum called the Museum of Osteology (bone museum).
I would highly recommend stopping for anyone age 2-200.
Continuing on towards Texas we spotted this funny leaning water tower.
Apparently it has been like this for years because I was able to find other accounts of it on the internet dating back to at least 2007.
When at all possible we tried to eat at Mom & Pop joints instead of chains. The ambience and food is generally better and with tools such as Yelp.com and UrbanSpoon.com it is increasingly easy to find the local hangouts in a city you have never been to before.
Coyote Bluff Cafe was a good example of a fun restaurant that would have been easy to drive by if we weren’t looking for it. I always like seeing uniformed men and women eating at a local place, that’s how you know it is good.
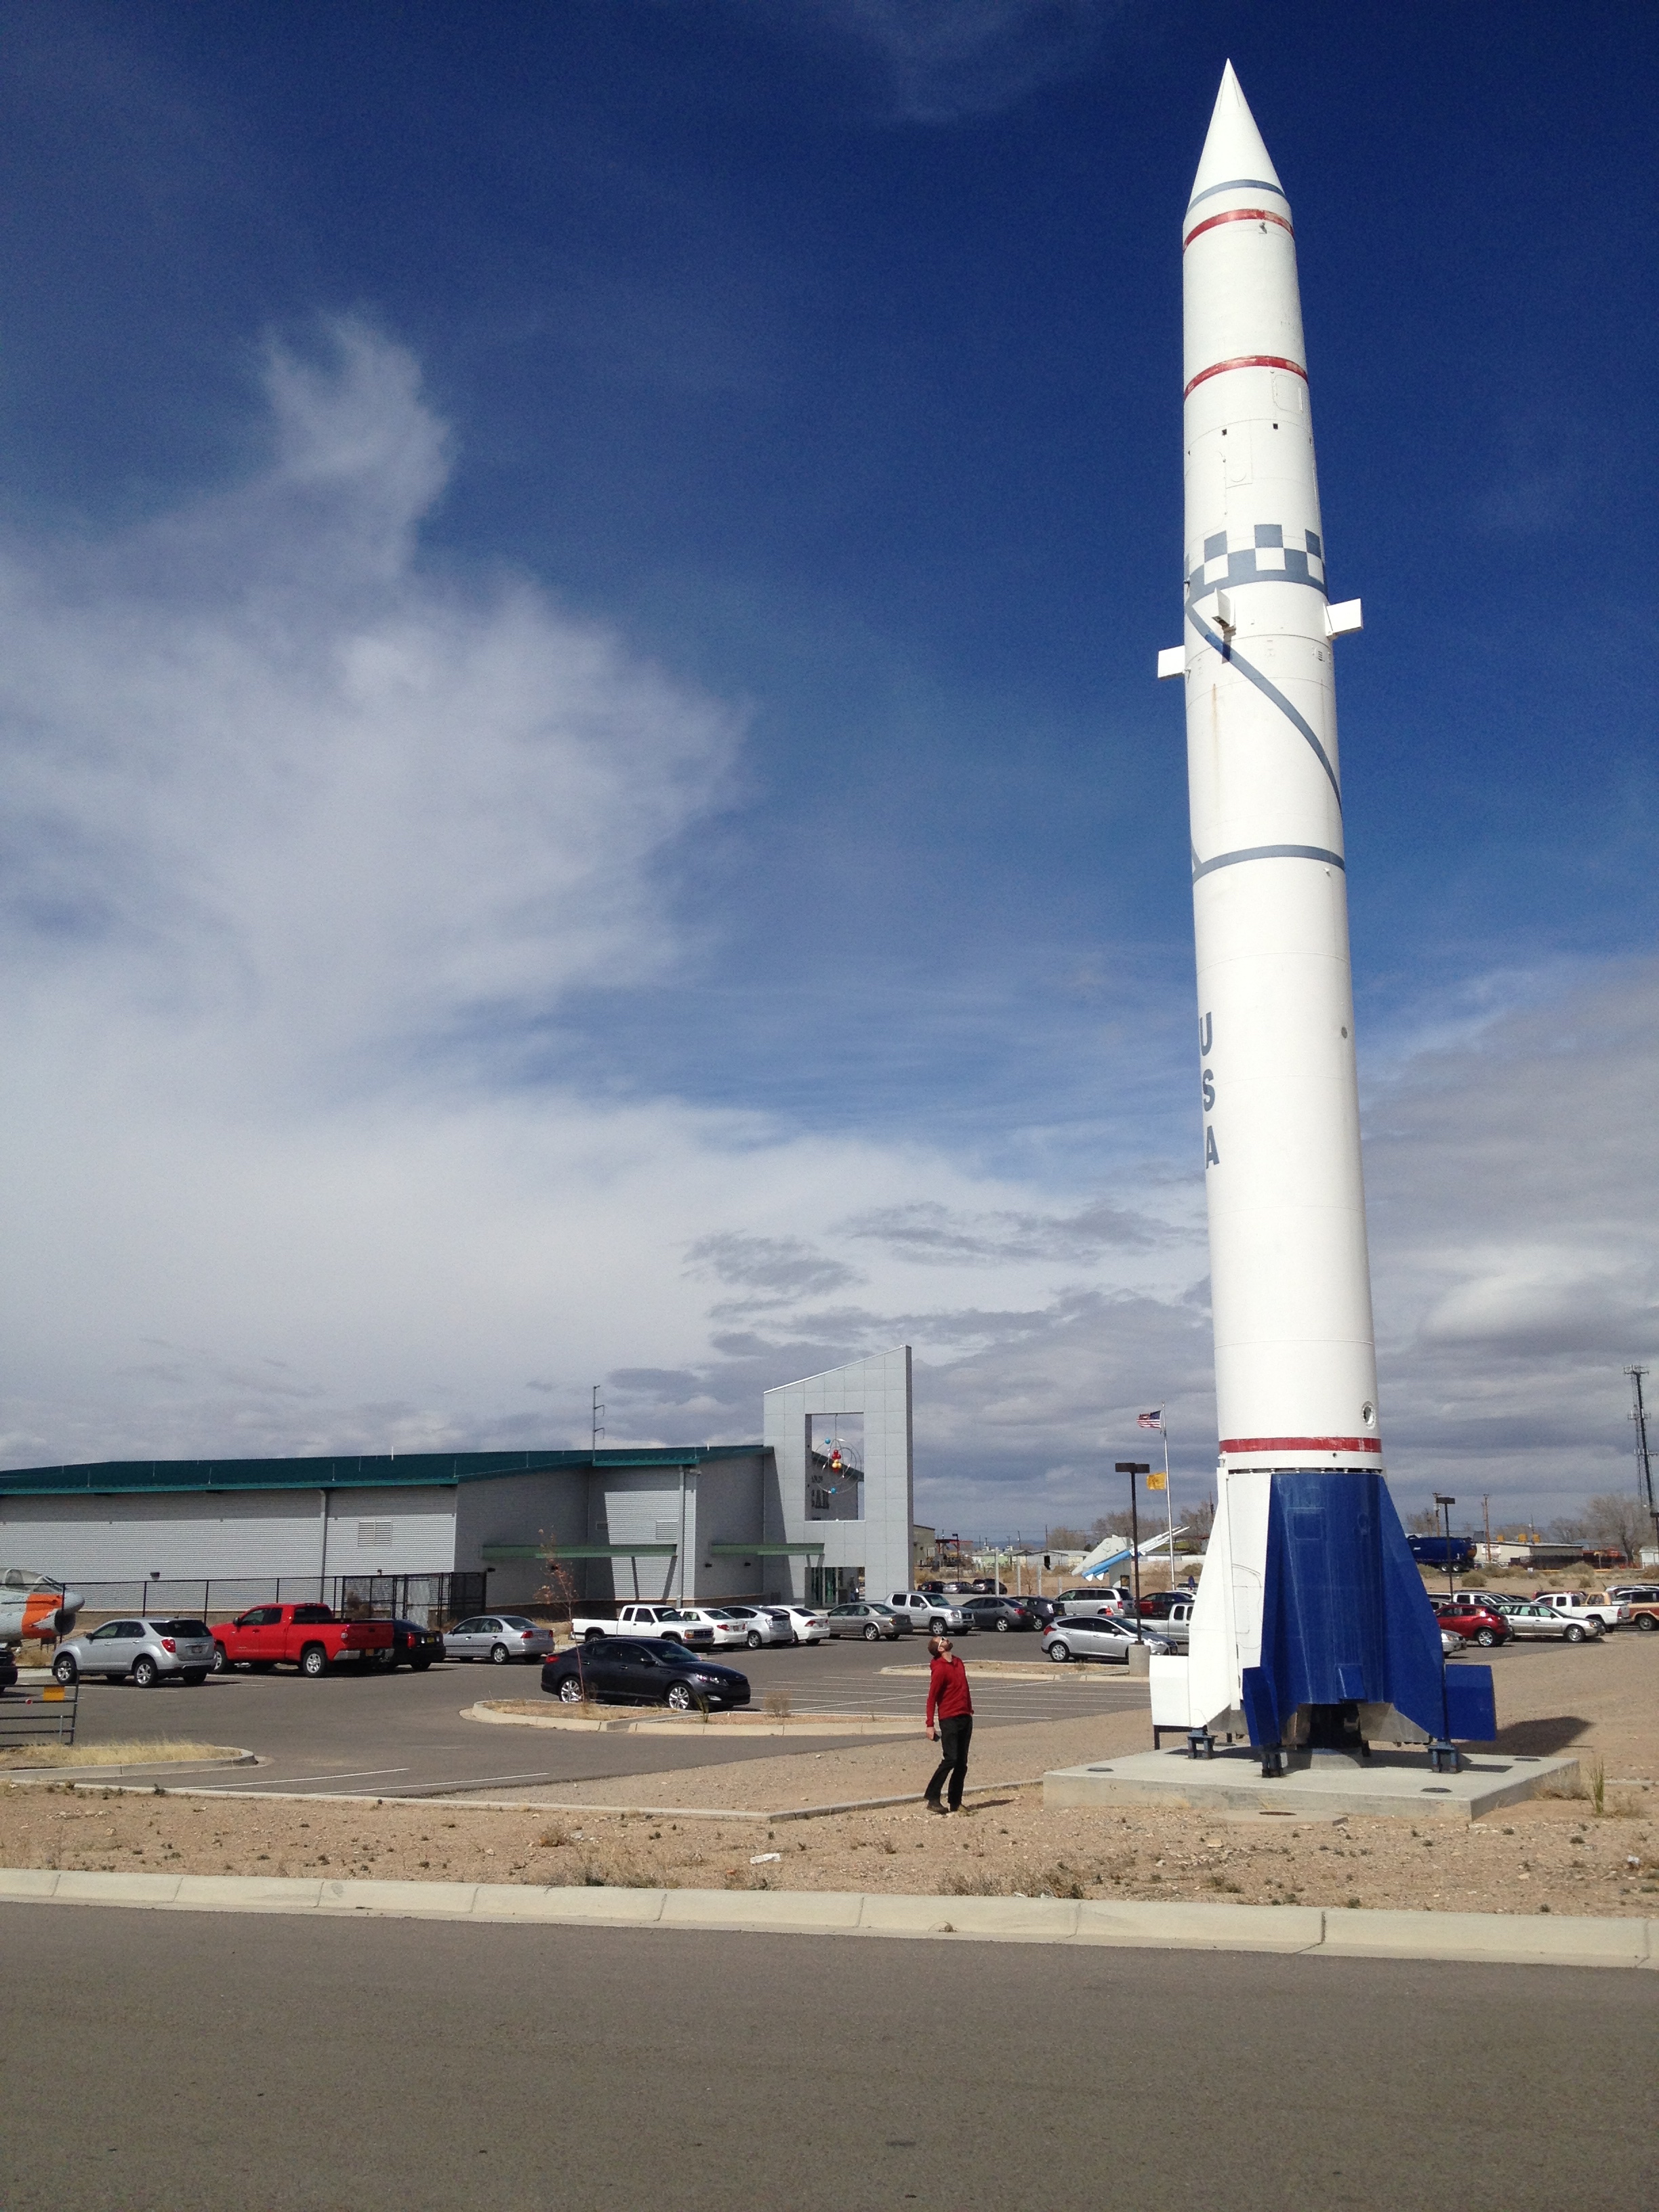
Back on the road we made a quick stop at Albuquerque’s National Nuclear Museum.
It would be a good stop for school aged children or adults interested in learning more about the domestic and military applications of nuclear energy. The 1950s uranium prospecting kits sold by Sears and other stores were the most interesting exhibits in my opinion (because I didn’t know much about that beforehand).
Another hole in the wall cafe provided some more nourishment and interesting people watching/hearing.
It’s probably not a bad idea to check fluid levels on an 11 year old car when you are taking it cross country.
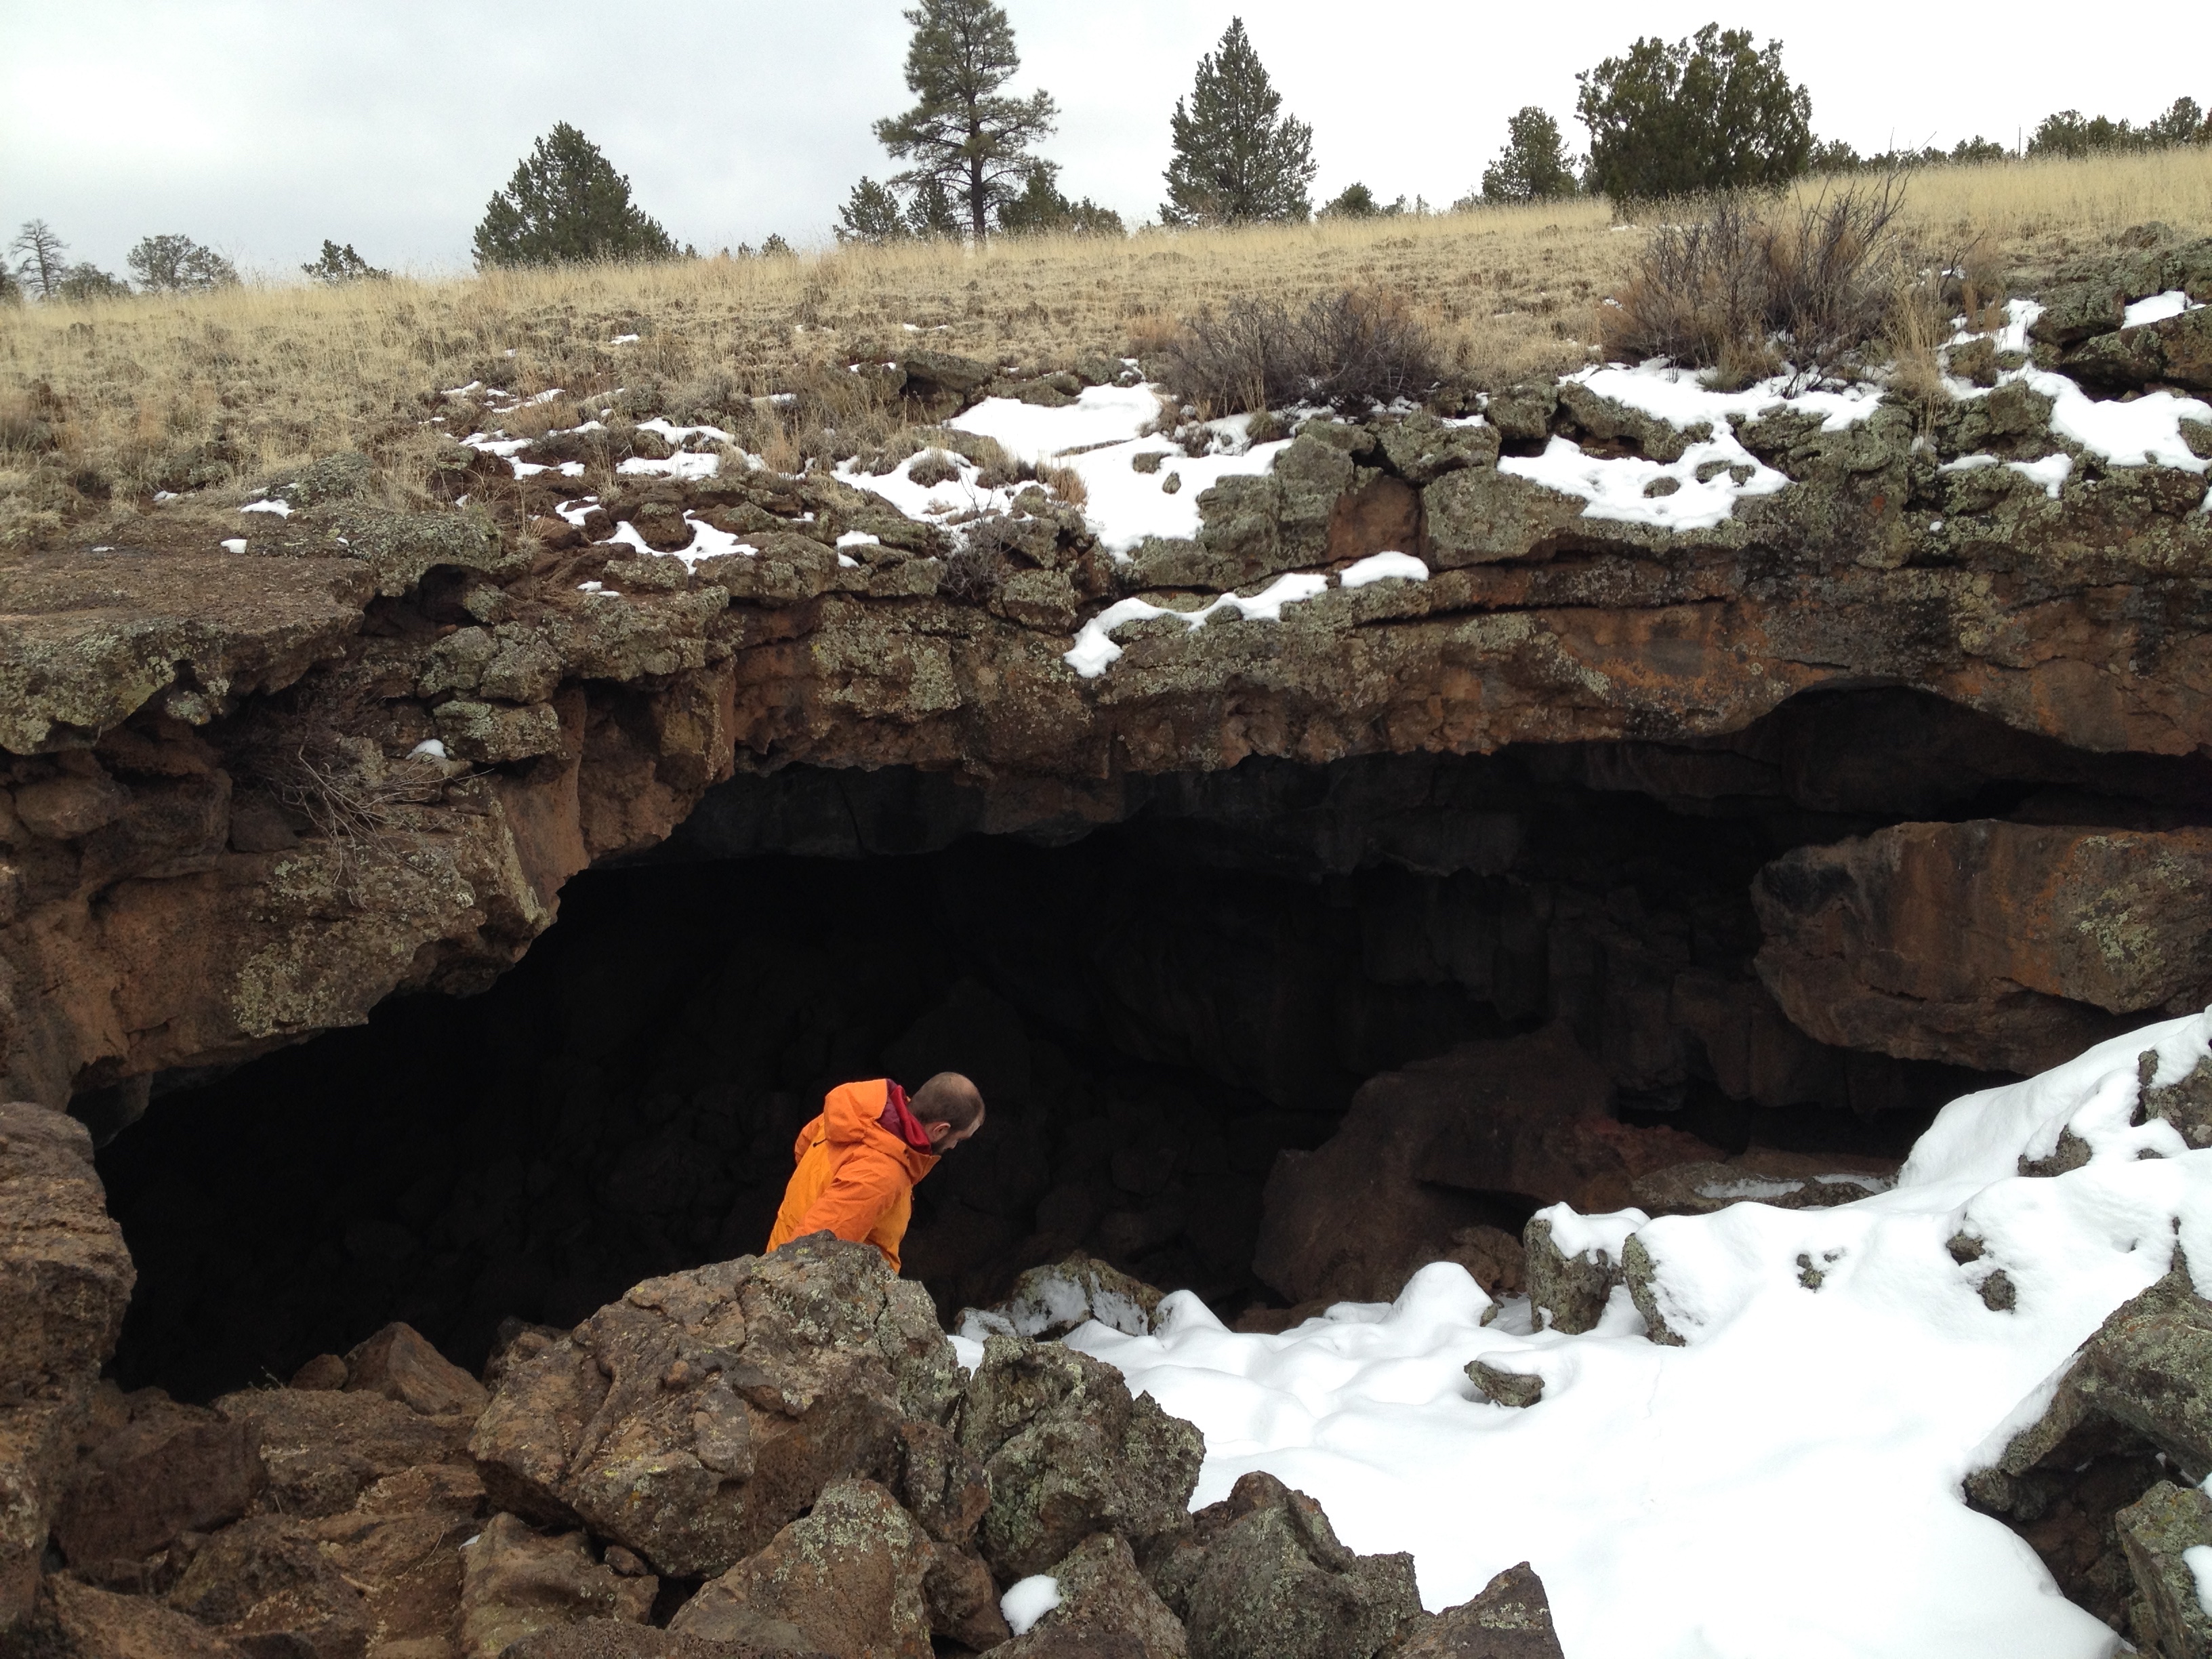
Forging further west, we made a short stop at El Malpais National Monument to stretch our legs and explore lava tubes.
The countryside around here just seemed so incredibly peaceful. I could have set up a tent and been content to sit and look out over the landscape but we had more driving to do.
Arizona, the last state on our Adventure rolled up on the morning of Day 4.
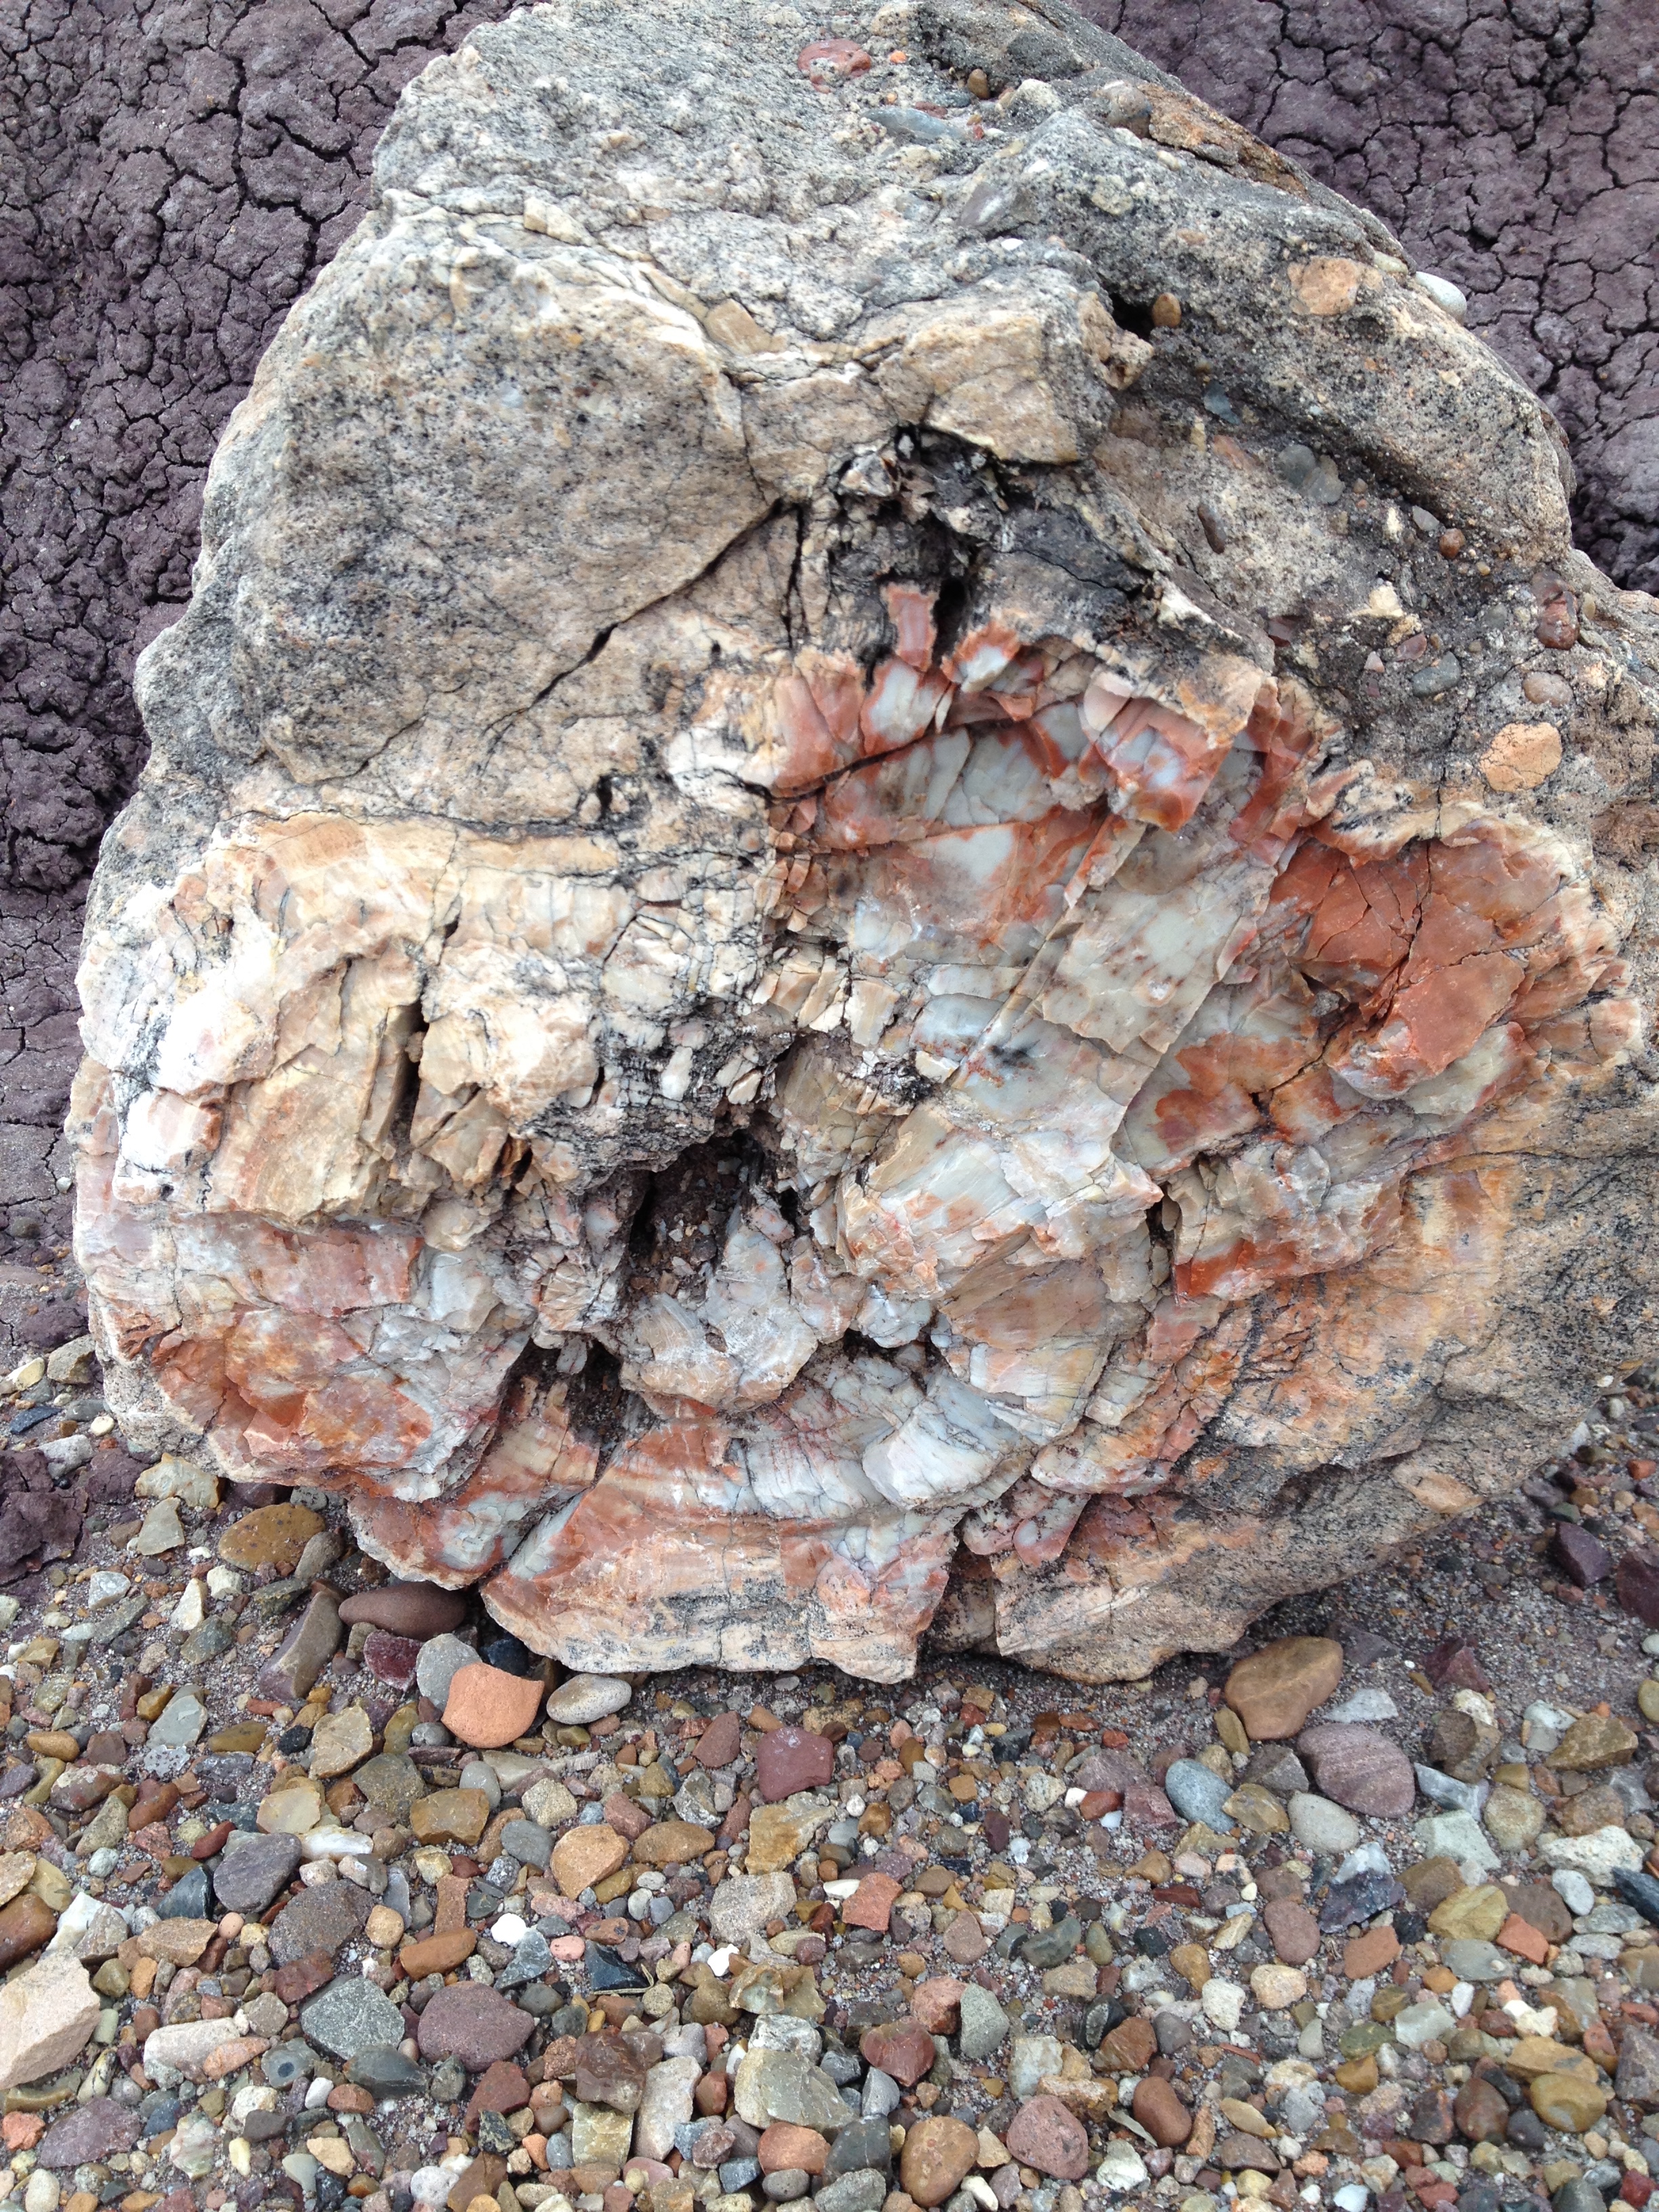
We stopped again to stretch our legs, this time at Petrified Forest National Park.
A long time ago a large forest thrived here before being covered up with mud and silt. The trees could not decompose because there was no oxygen available for bacteria to use to breakdown the wood. Over time, silica laden water replaced the wood fibers with rock. The end result is petrified wood.
The park is having a hard time with visitors illegally removing petrified wood. It is a crime to remove material from a National Park or Monument, so please don’t help yourself to a five finger souvenir.
After stopping in Flagstaff for lunch and an informal meeting, we reached our destination.
This was my fourth time to the Grand Canyon. The first time was when I was four years old and my family did a summer vacation to the north rim. I barely remember that trip. The next time was my senior year of high school spring break. I went with a friend and his family out to Phoenix and we made a short trip to the canyon as part of that trip. The third time was in college when I spent a week camping out on the south rim of the canyon with two other students.
I had never visited at this time of the year, so it was a different perspective, and much smaller crowds :-).
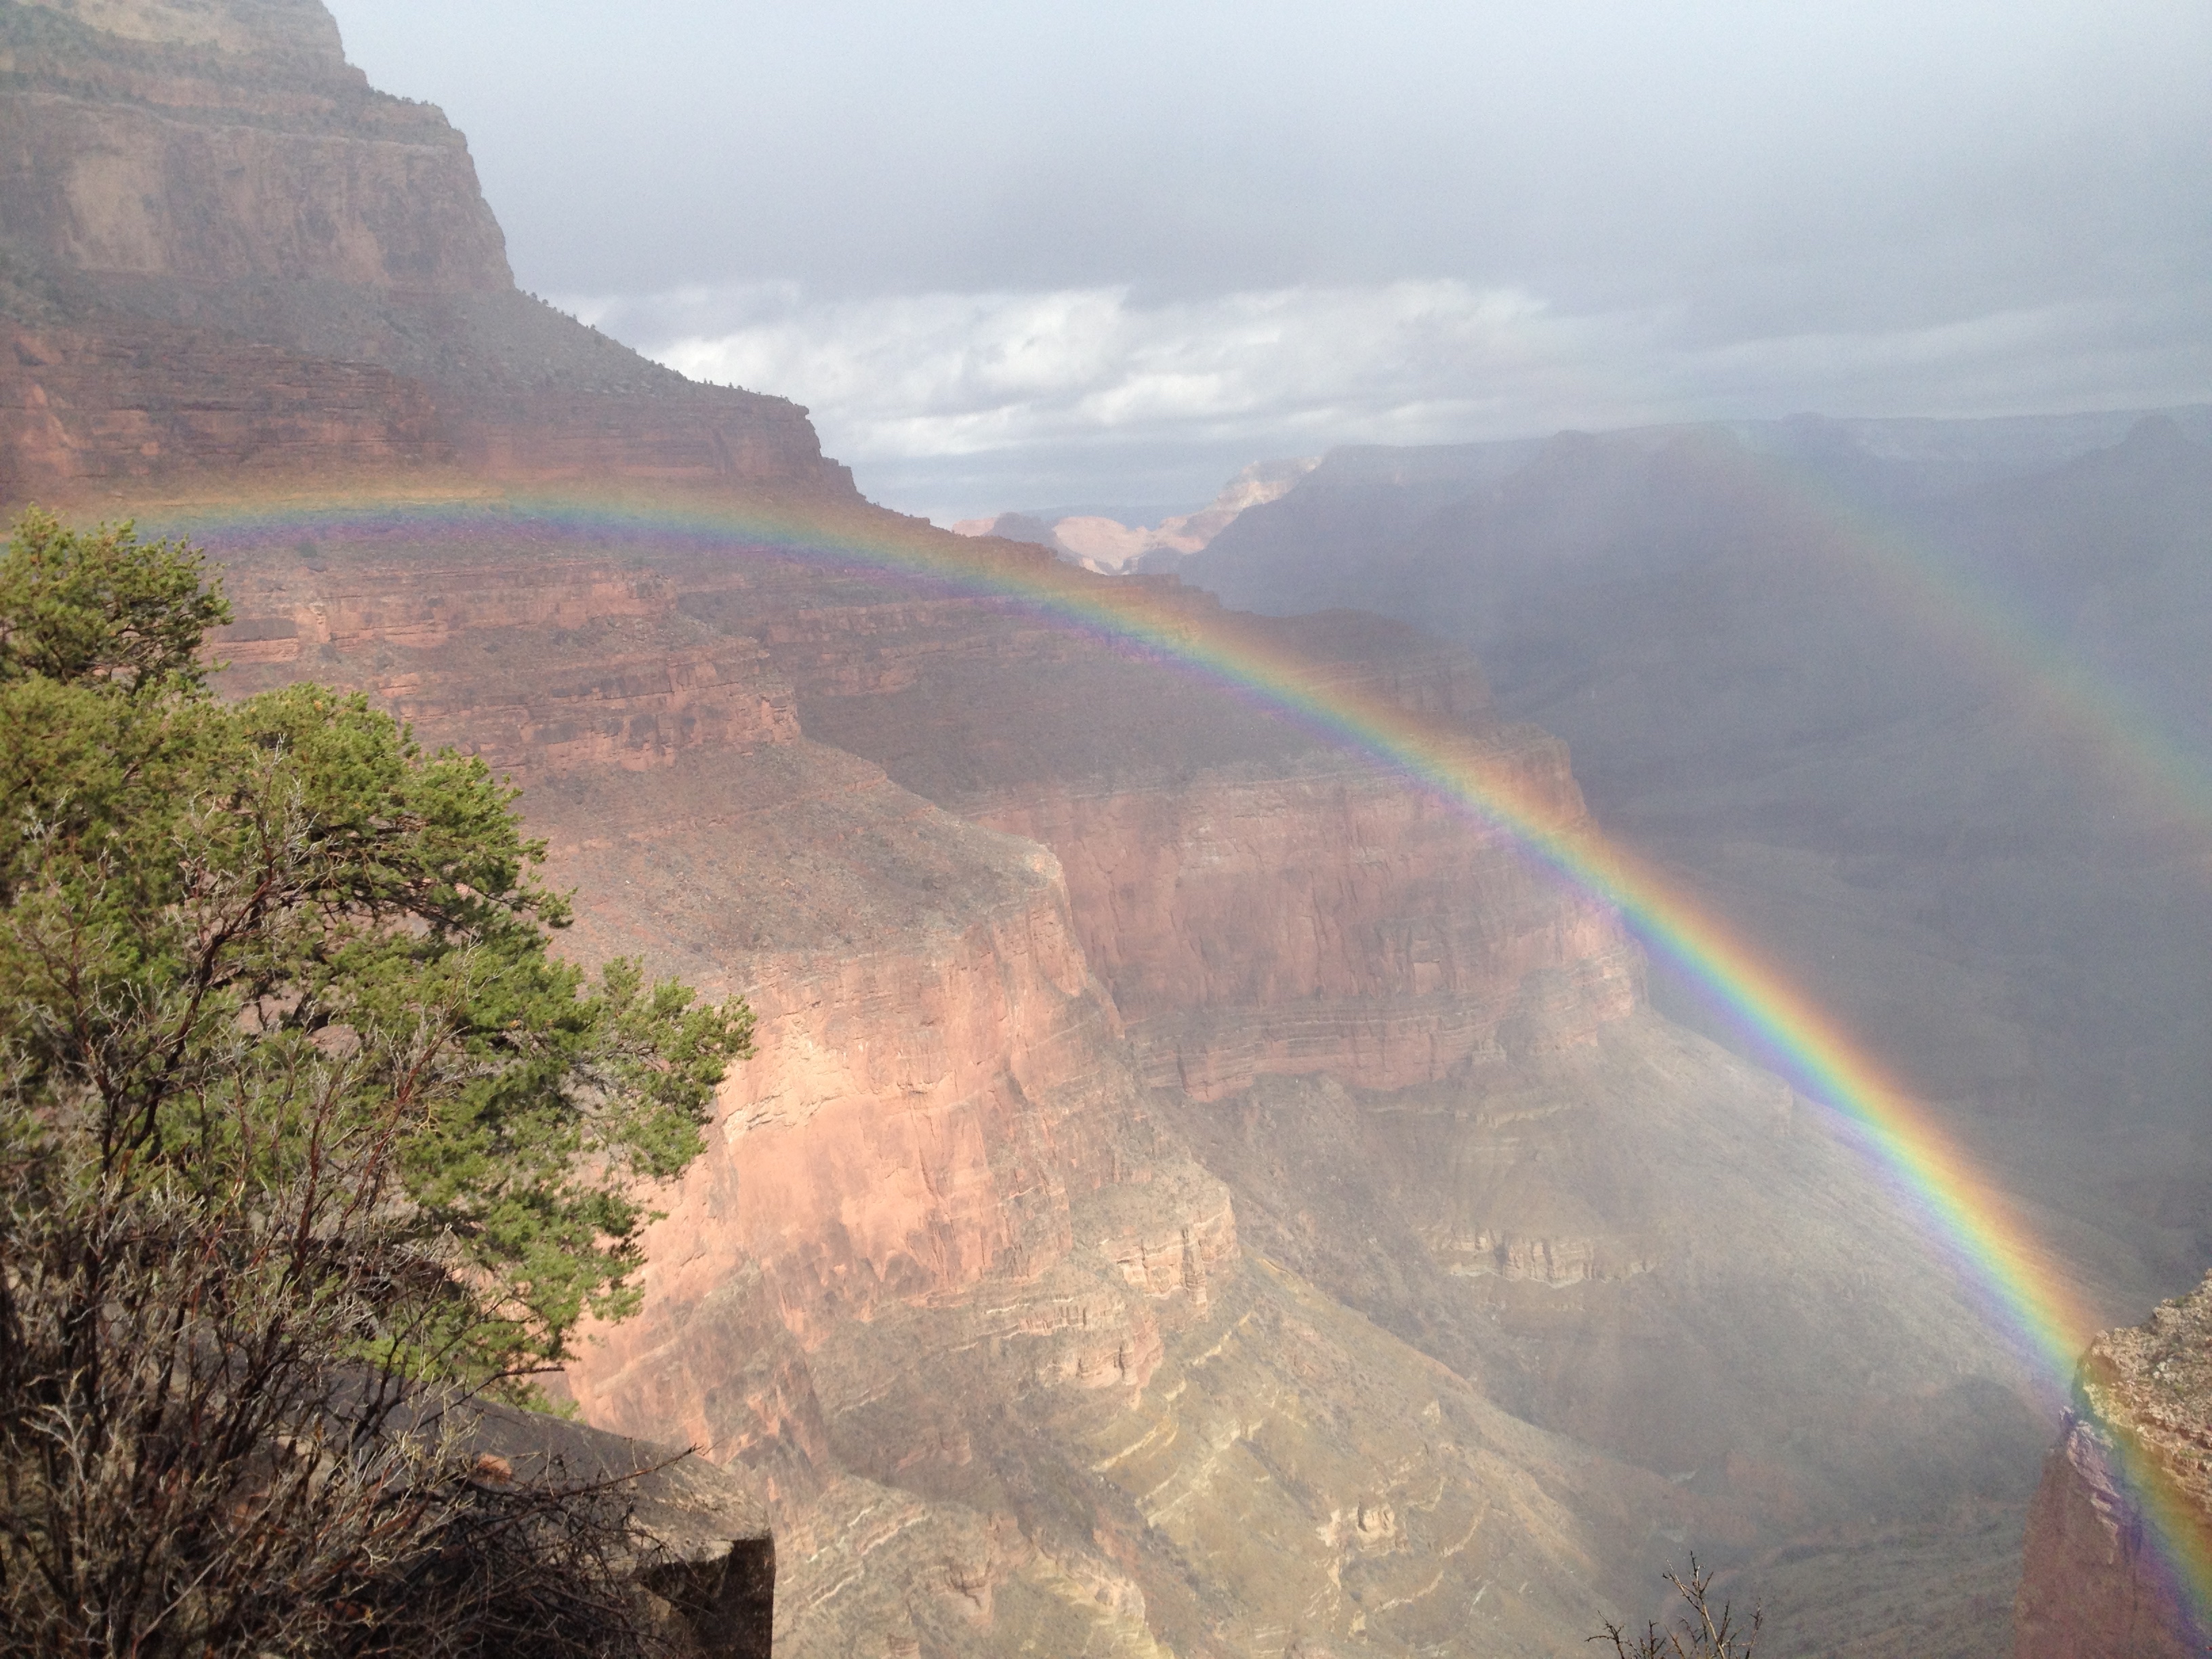
The view from the rim was extra spectacular on the night we arrived.
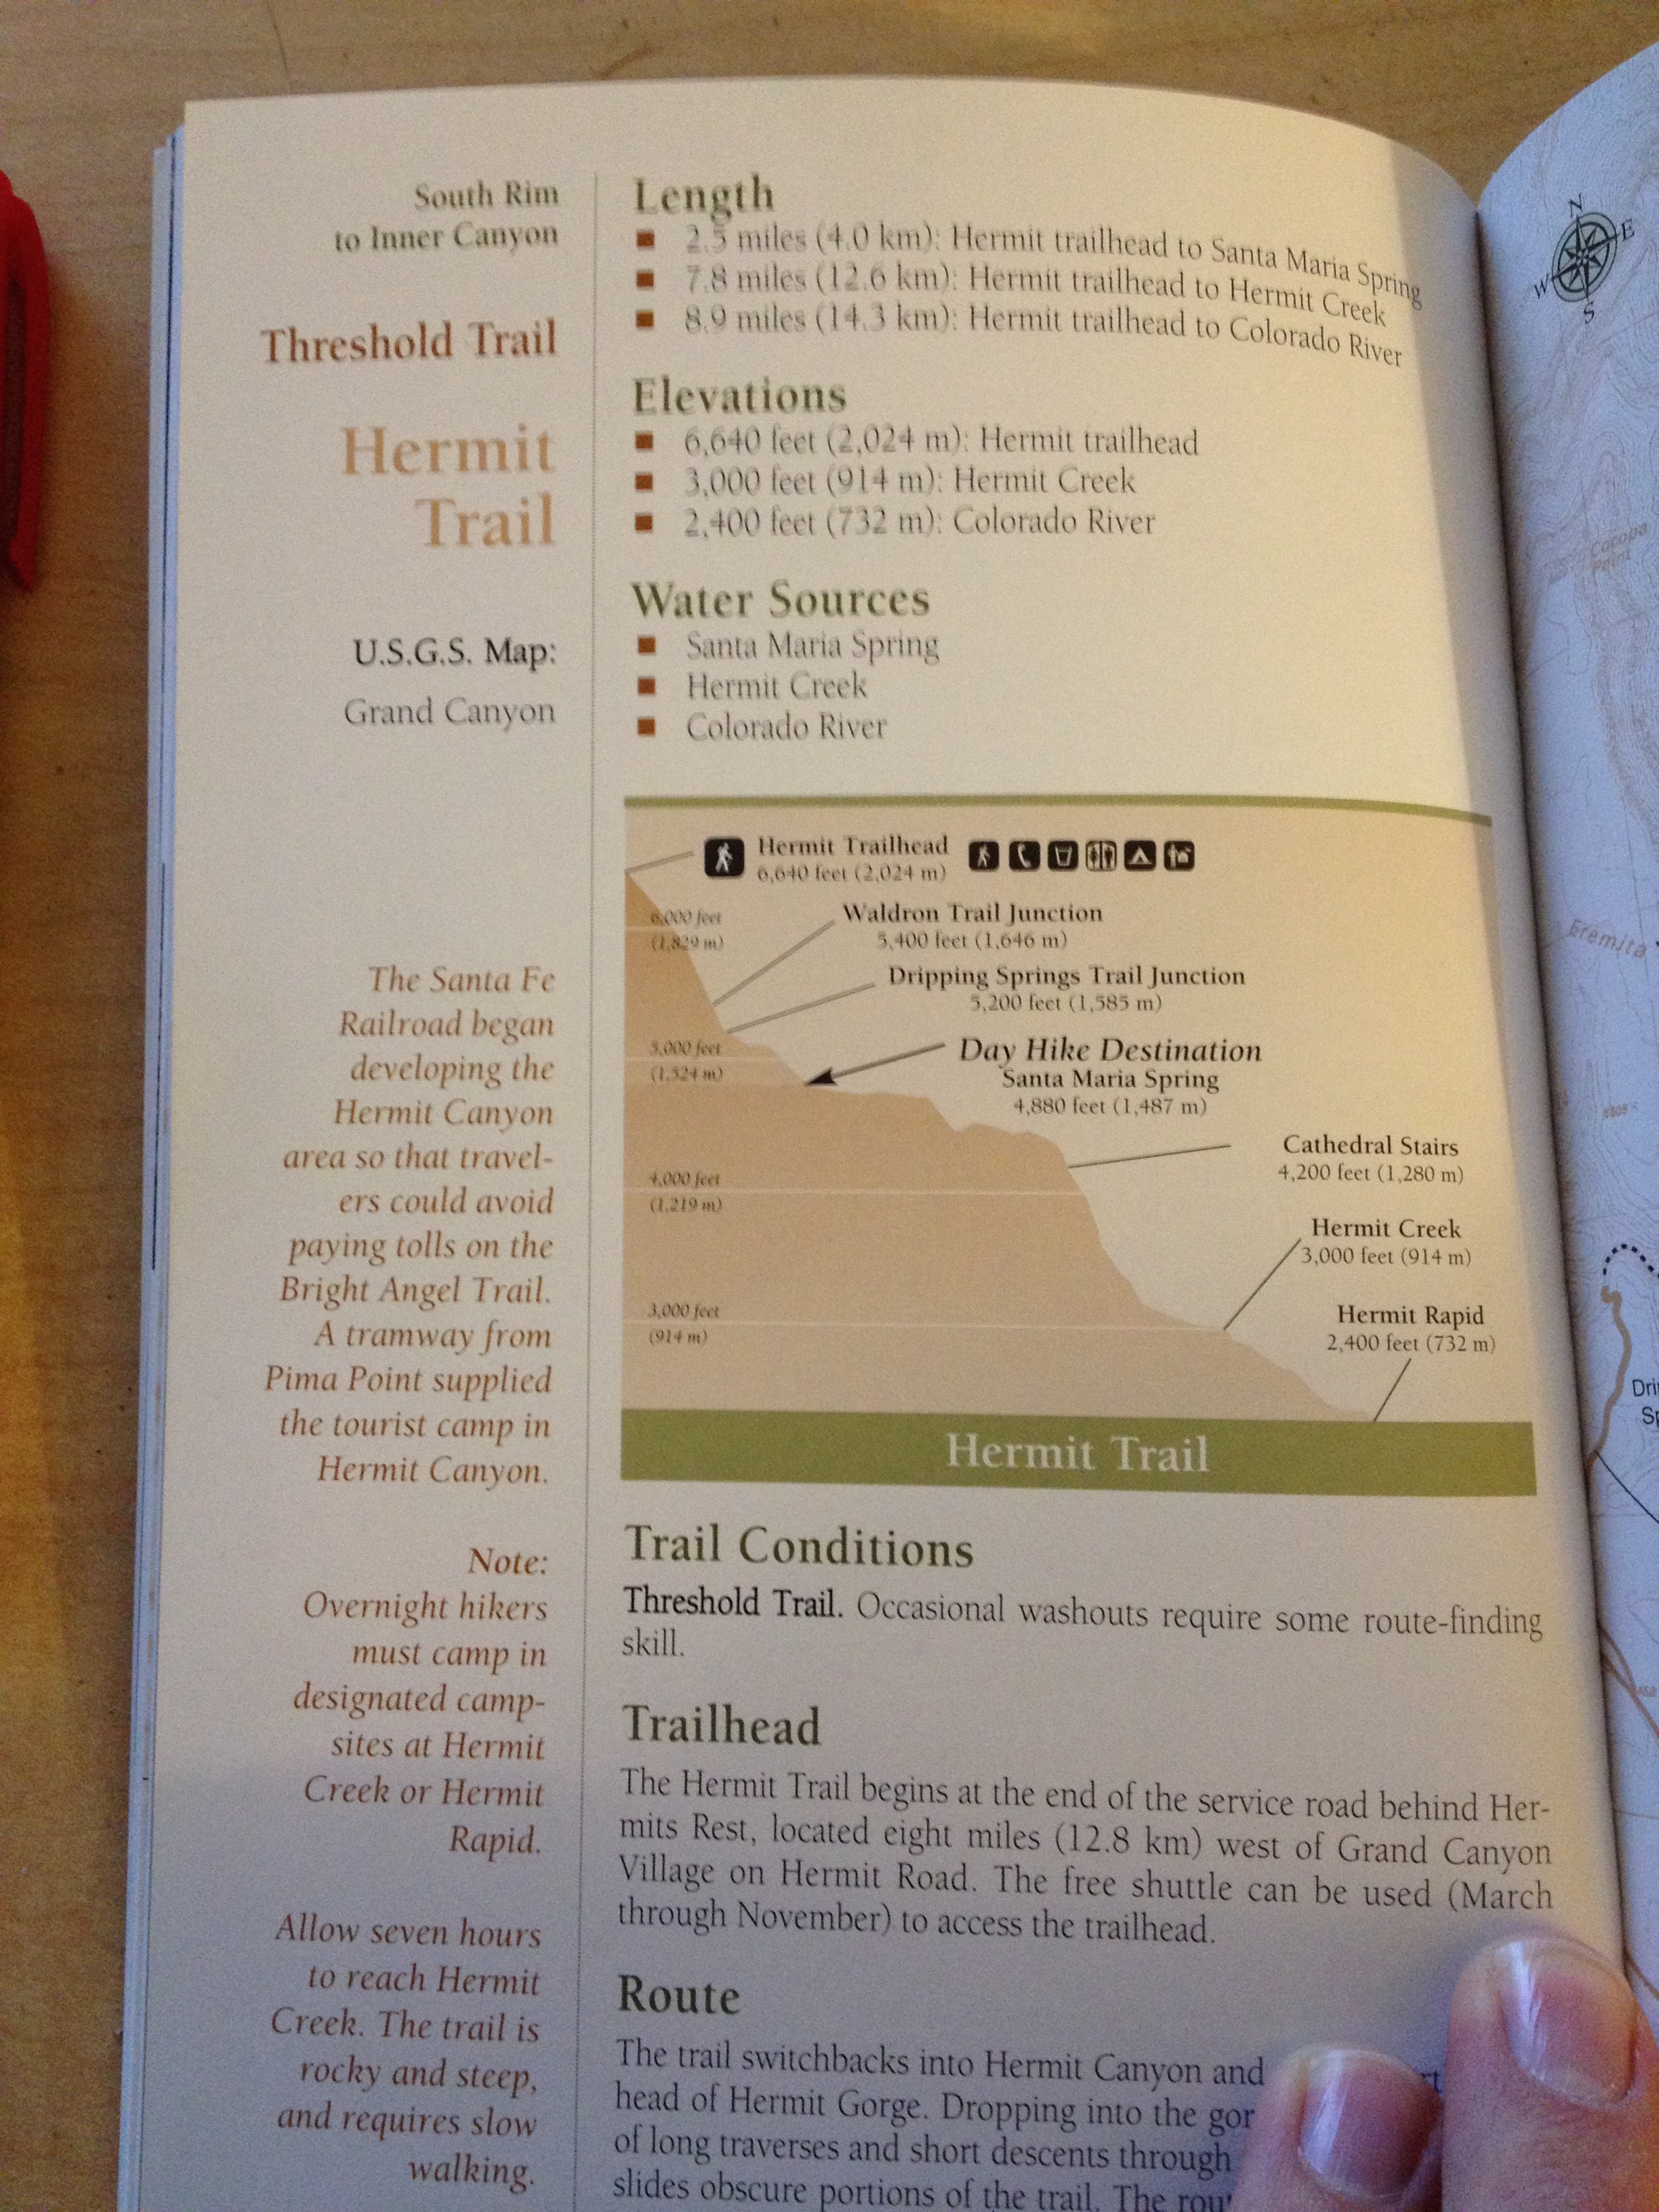
The next day we geared up for a hike down into the canyon. There are multiple trails down into the canyon and each one is no joke.
Proper footwear is an absolute must. We both had hiking boots with plenty of ankle support. Flip flops, crocs, or really any type of sandal are not acceptable foot wear for hiking into the Grand Canyon. You should also have a clear idea of where and how far you are going. Most trail maps will have a maximum day hike turnaround point. You should not venture beyond that turnaround point unless you know what you are doing.
Having a trail map is also important. We ran into one individual at Santa Maria Spring who was looking for the Dripping Springs Trail.
Dressing in layers is important. The temperature at the rim will be cooler than the temperature at the bottom of the canyon because of the elevation change. A waterproof, windproof outer layer should cover an insulating layer (like fleece or wool). We put on and took off clothes frequently to avoid shivering or sweating.
Finally, you will want to pack enough water and food to last your hike. Many of the trail maps have suggestions for how much of each you will need.
While hikes may be daunting, they are rewarding. There are some things that you just cannot see from the rim and experiences that cannot be had without getting a bit cold and wet.
I really liked this part of the trail. It reminded me of something you might see along the Mediterranean (granted I’ve never been there).
When we reached our turnaround point, I turned on my phone’s GPS tracking and recorded the hike up and out of the canyon. At one point, it didn’t get a satellite signal, so some of the data is missing.
The next day was near white out conditions, so it was a good thing we did our hike when we did.
After a day in Flagstaff shopping for groceries and household supplies, I parted with my brother so I could return to the Midwest.
In true frugal fashion, I had booked a red-eye flight from Phoenix to Chicago for $63. The downside of course was that it left at 1:30am. I made it to the airport around 11pm and went ugly early. By that I mean, I didn’t waste anytime going through security and staking out a good place to lay down and try to get some sleep. I looked for a relatively quiet area with low light and low foot traffic. By the time my alarm went off other travelers waiting for their red-eye flights had not been so fortunate. One college aged girl was attempting to sleep right by the entrance to a bathroom where people were constantly walking in and out of.
From Chicago I took the train back home, so I guess you could say it was a planes, trains, and automobiles ‘vacation’.
A big thank you to my mother-in-law who came down for a few days to help Shae out and watch Frugal Boy while I was gone. Also a thank you to my brother for inviting me along on a fun trip!


 What we thought was another loop trail ended up being an out and back. We tried to connect the two ends with a little creative hiking, but were thwarted by a deep stream.
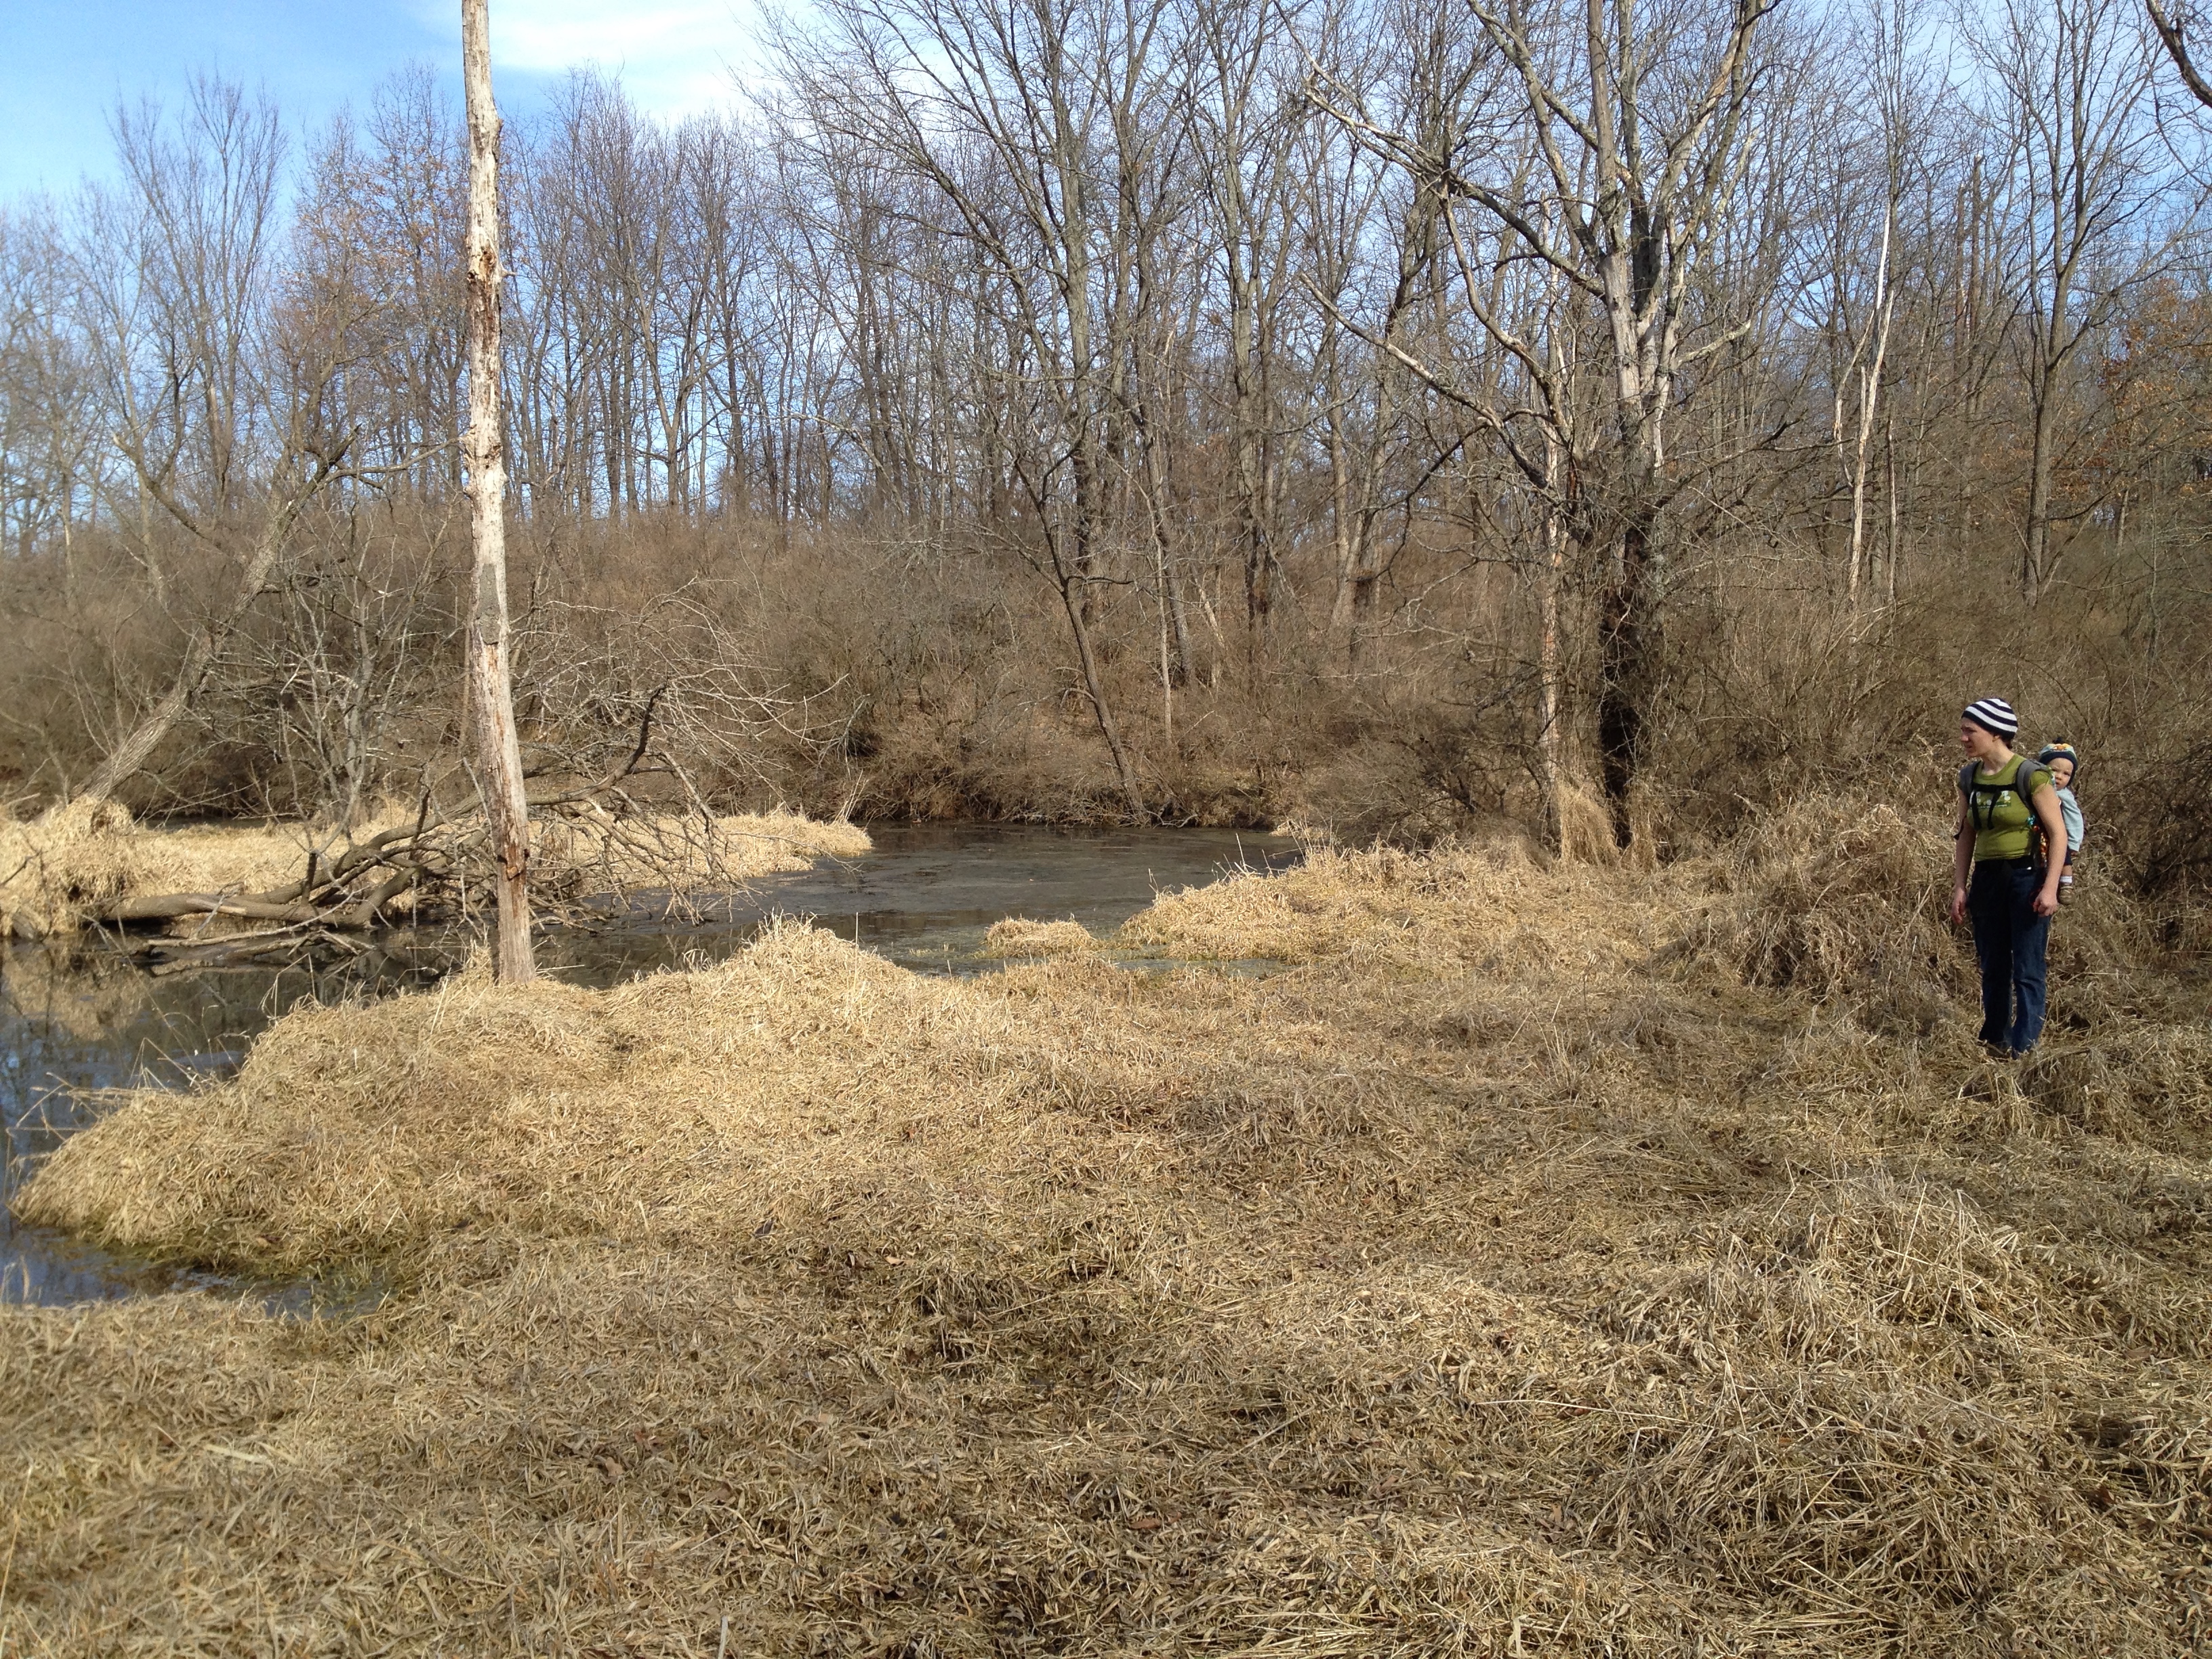 We trekked back to the car with muddy boots and started planning the next day’s grand adventure. Read about it in Part 2 (coming soon). 🙂