Nothing is Safe
It’s official, we have a climber!

It’s official, we have a climber!
I am 99% finished with a weekend home improvement project and it is only Thursday! Just don’t ask what weekend I started on. 😉
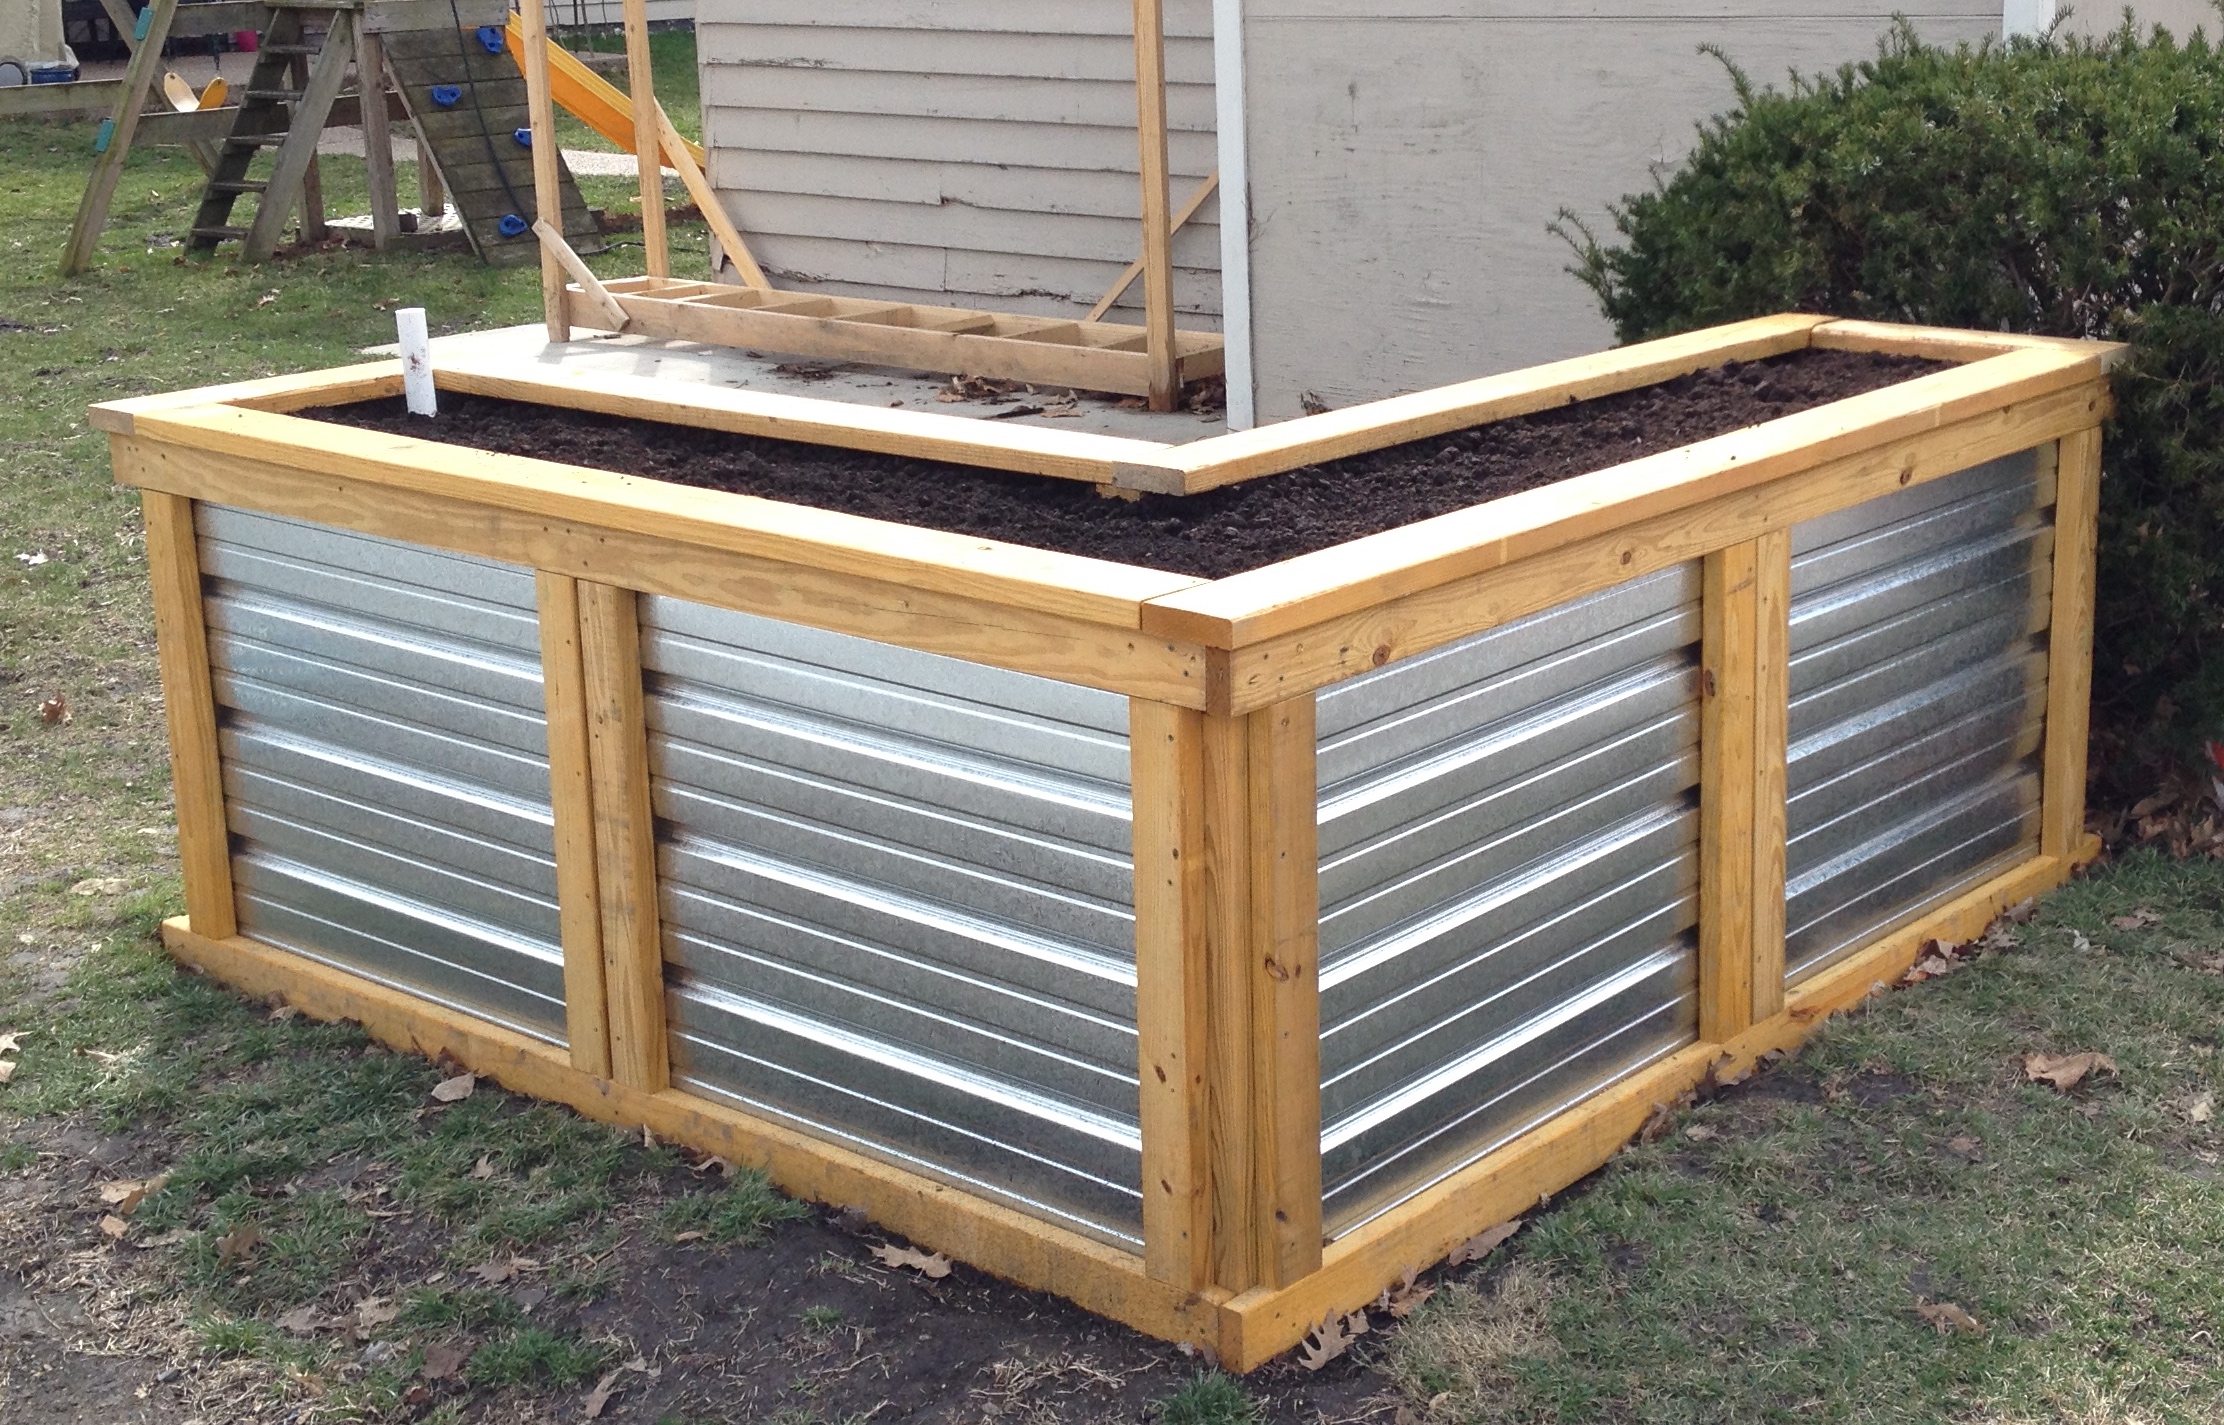
Shae and I have been talking for a while about building some kind of raised garden/flower bed in our backyard. I wanted something tall but affordable. Shae wanted low maintenance. Here is the almost finished product that has been erected in our backyard.

A view from the inside of the ‘L’
 and a view from the alley.
Every project of ours starts with a written plan. We often go through several iterations of a design before settling on ‘the one’. The first proposal was a simple rectangle and the site location for it was a completely different part of our backyard. It was only about a foot tall and made entirely from cedar.
Of course that didn’t really meet any of our specs. Cedar is an expensive wood, at least when compared to pine. The planter was only a foot tall and it wasn’t self watering. There had to be a design that would meet all of our requirements and eventually we started toying with an L shaped hybrid design that incorporated low cost treated, stained pine with galvanized sheet metal.
 Several revisions later and we had our bill of materials.

Menards was running an 11% rebate sale, that we took advantage of. We also rented one of their trucks ($22.50) for 75 minutes from when you leave the outdoor yard.

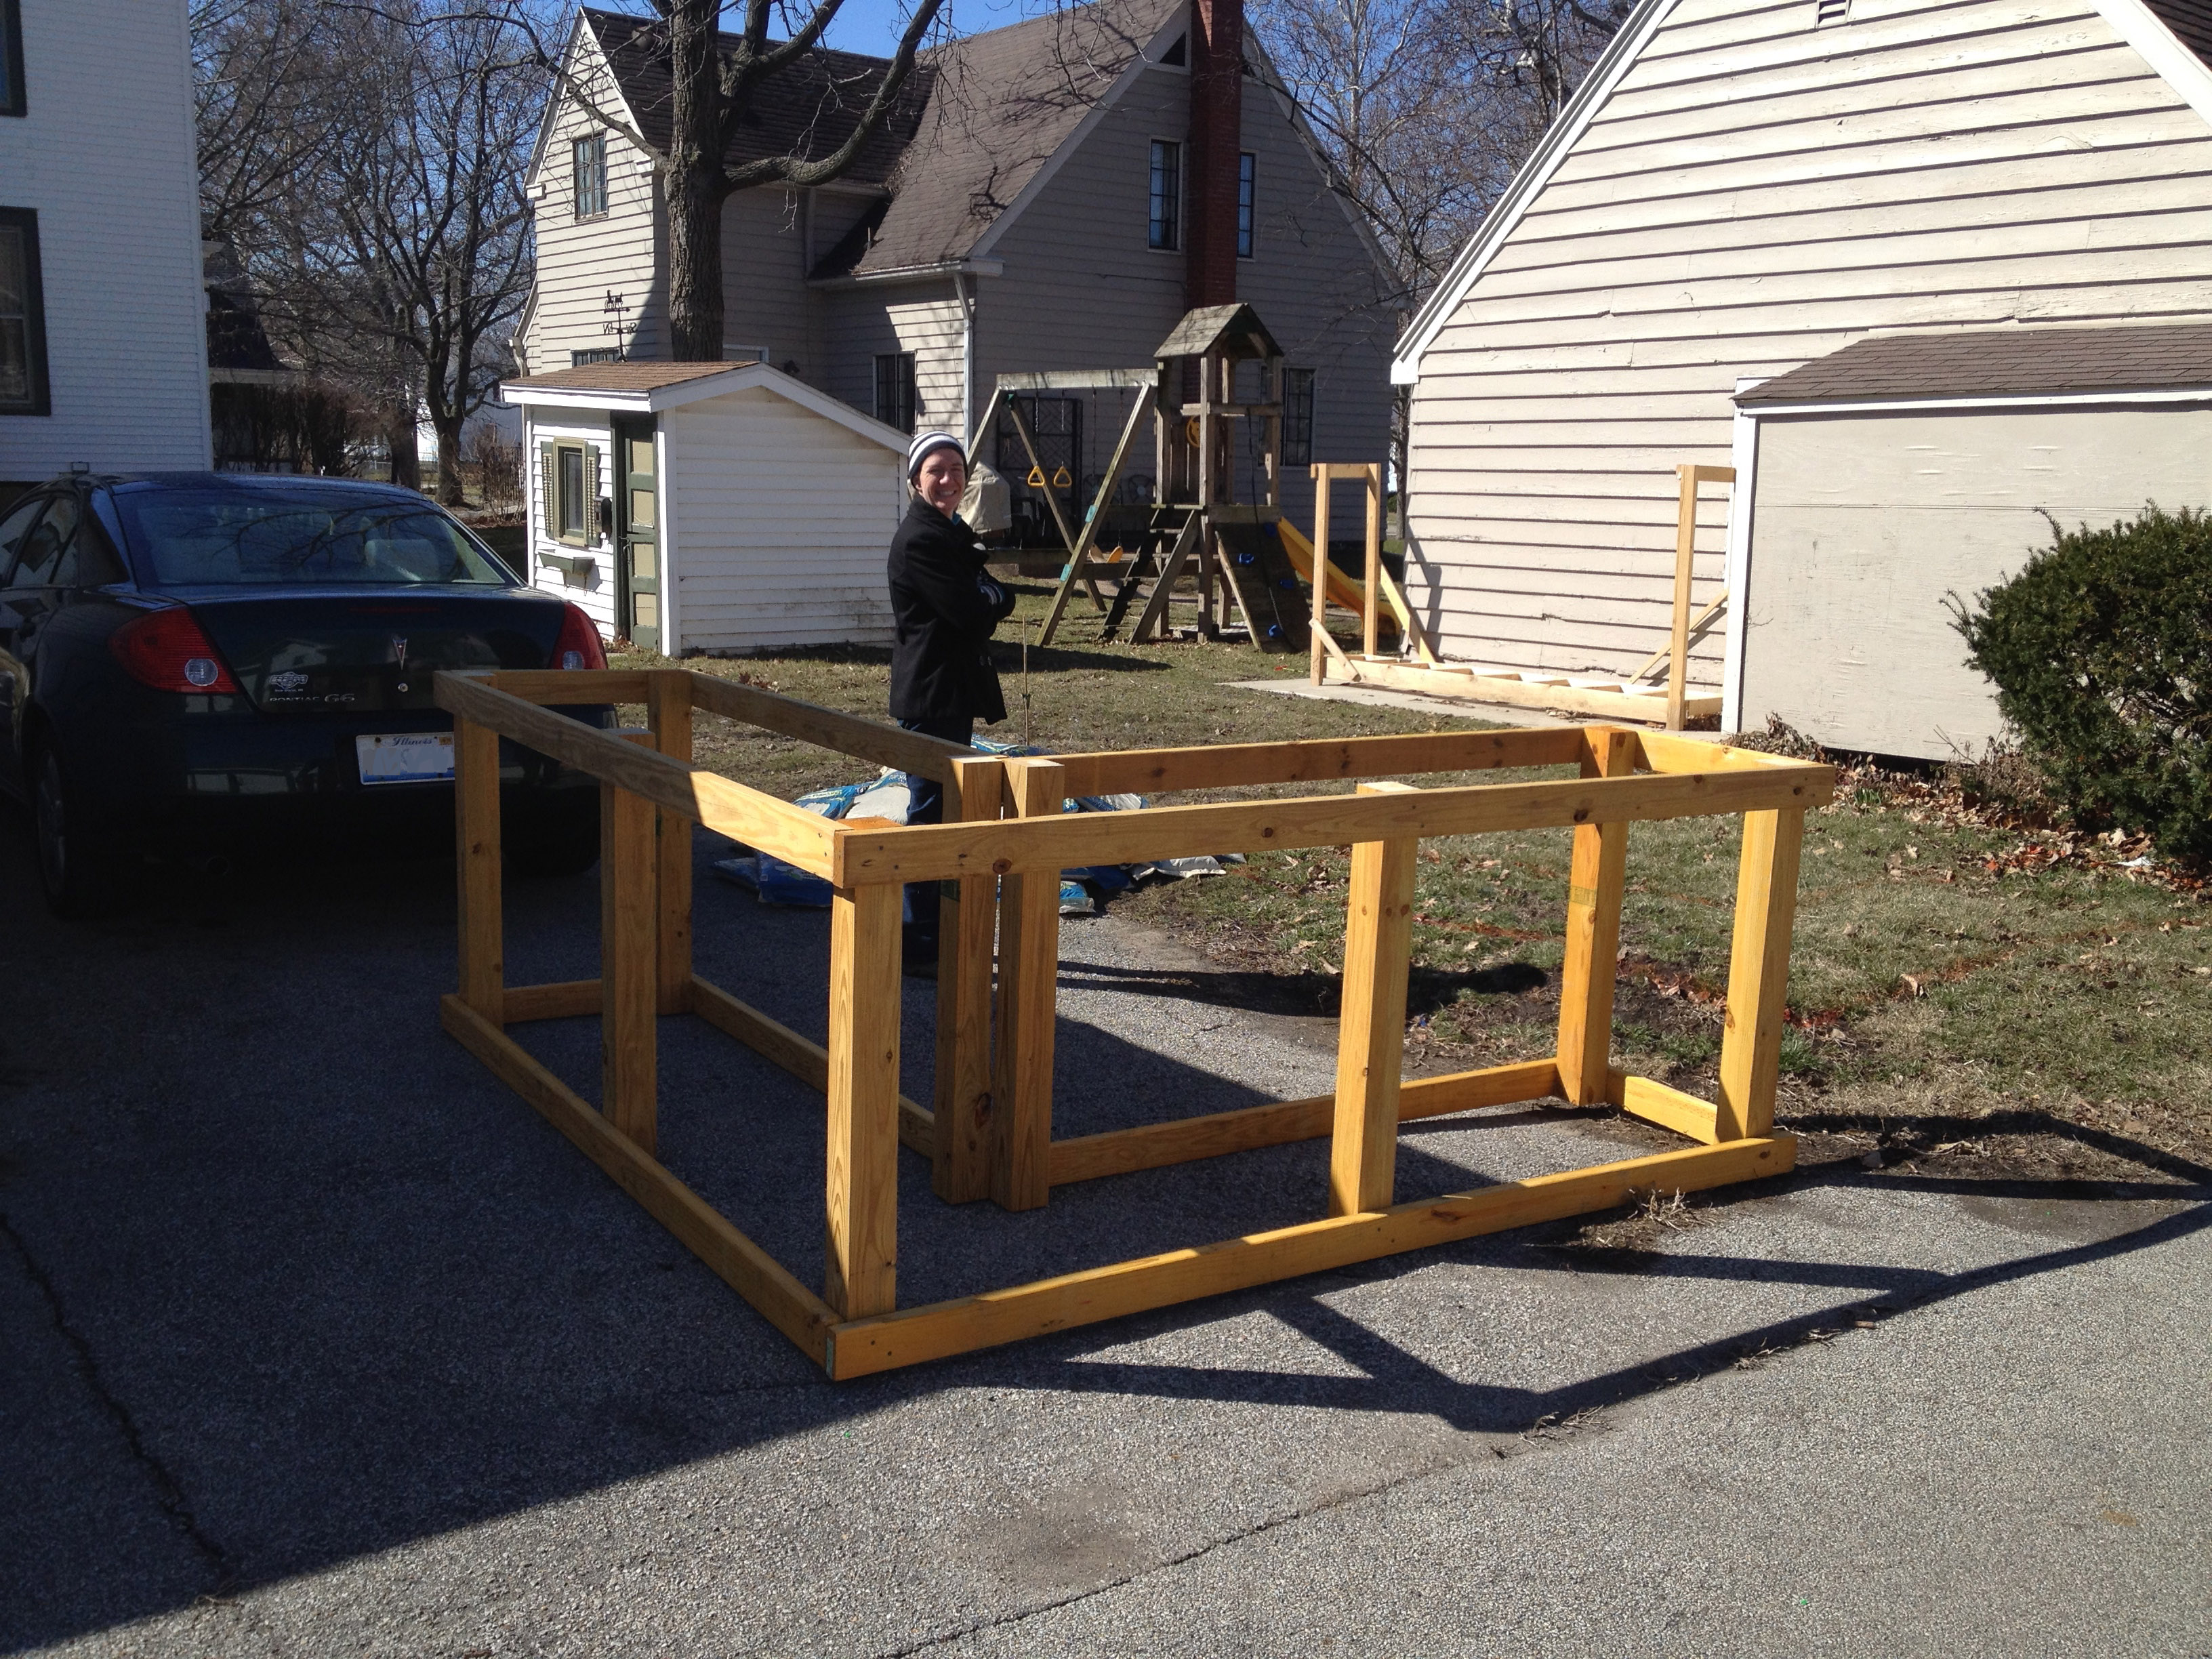
We unloaded all of the material minus the dirt into our garage for the evening. I posted the below picture to Facebook and asked friends to guess what I was building. People were very creative in their guesses, although most were spot on that it had to do with gardening. That night I started building the frame in the garage.

Saturday morning, Shae helped me drag the frame out of the garage and put it next to its final resting place. It was a bit taller than either of us anticipated!
Due to its weight, we decided that I would build the rest of it in place, so we marked out where it would go on the grass.

Then dug out and leveled the ground so the planter would sit evenly.

After dragging the skeleton into place and leveling it, I started fitting the metal panels.
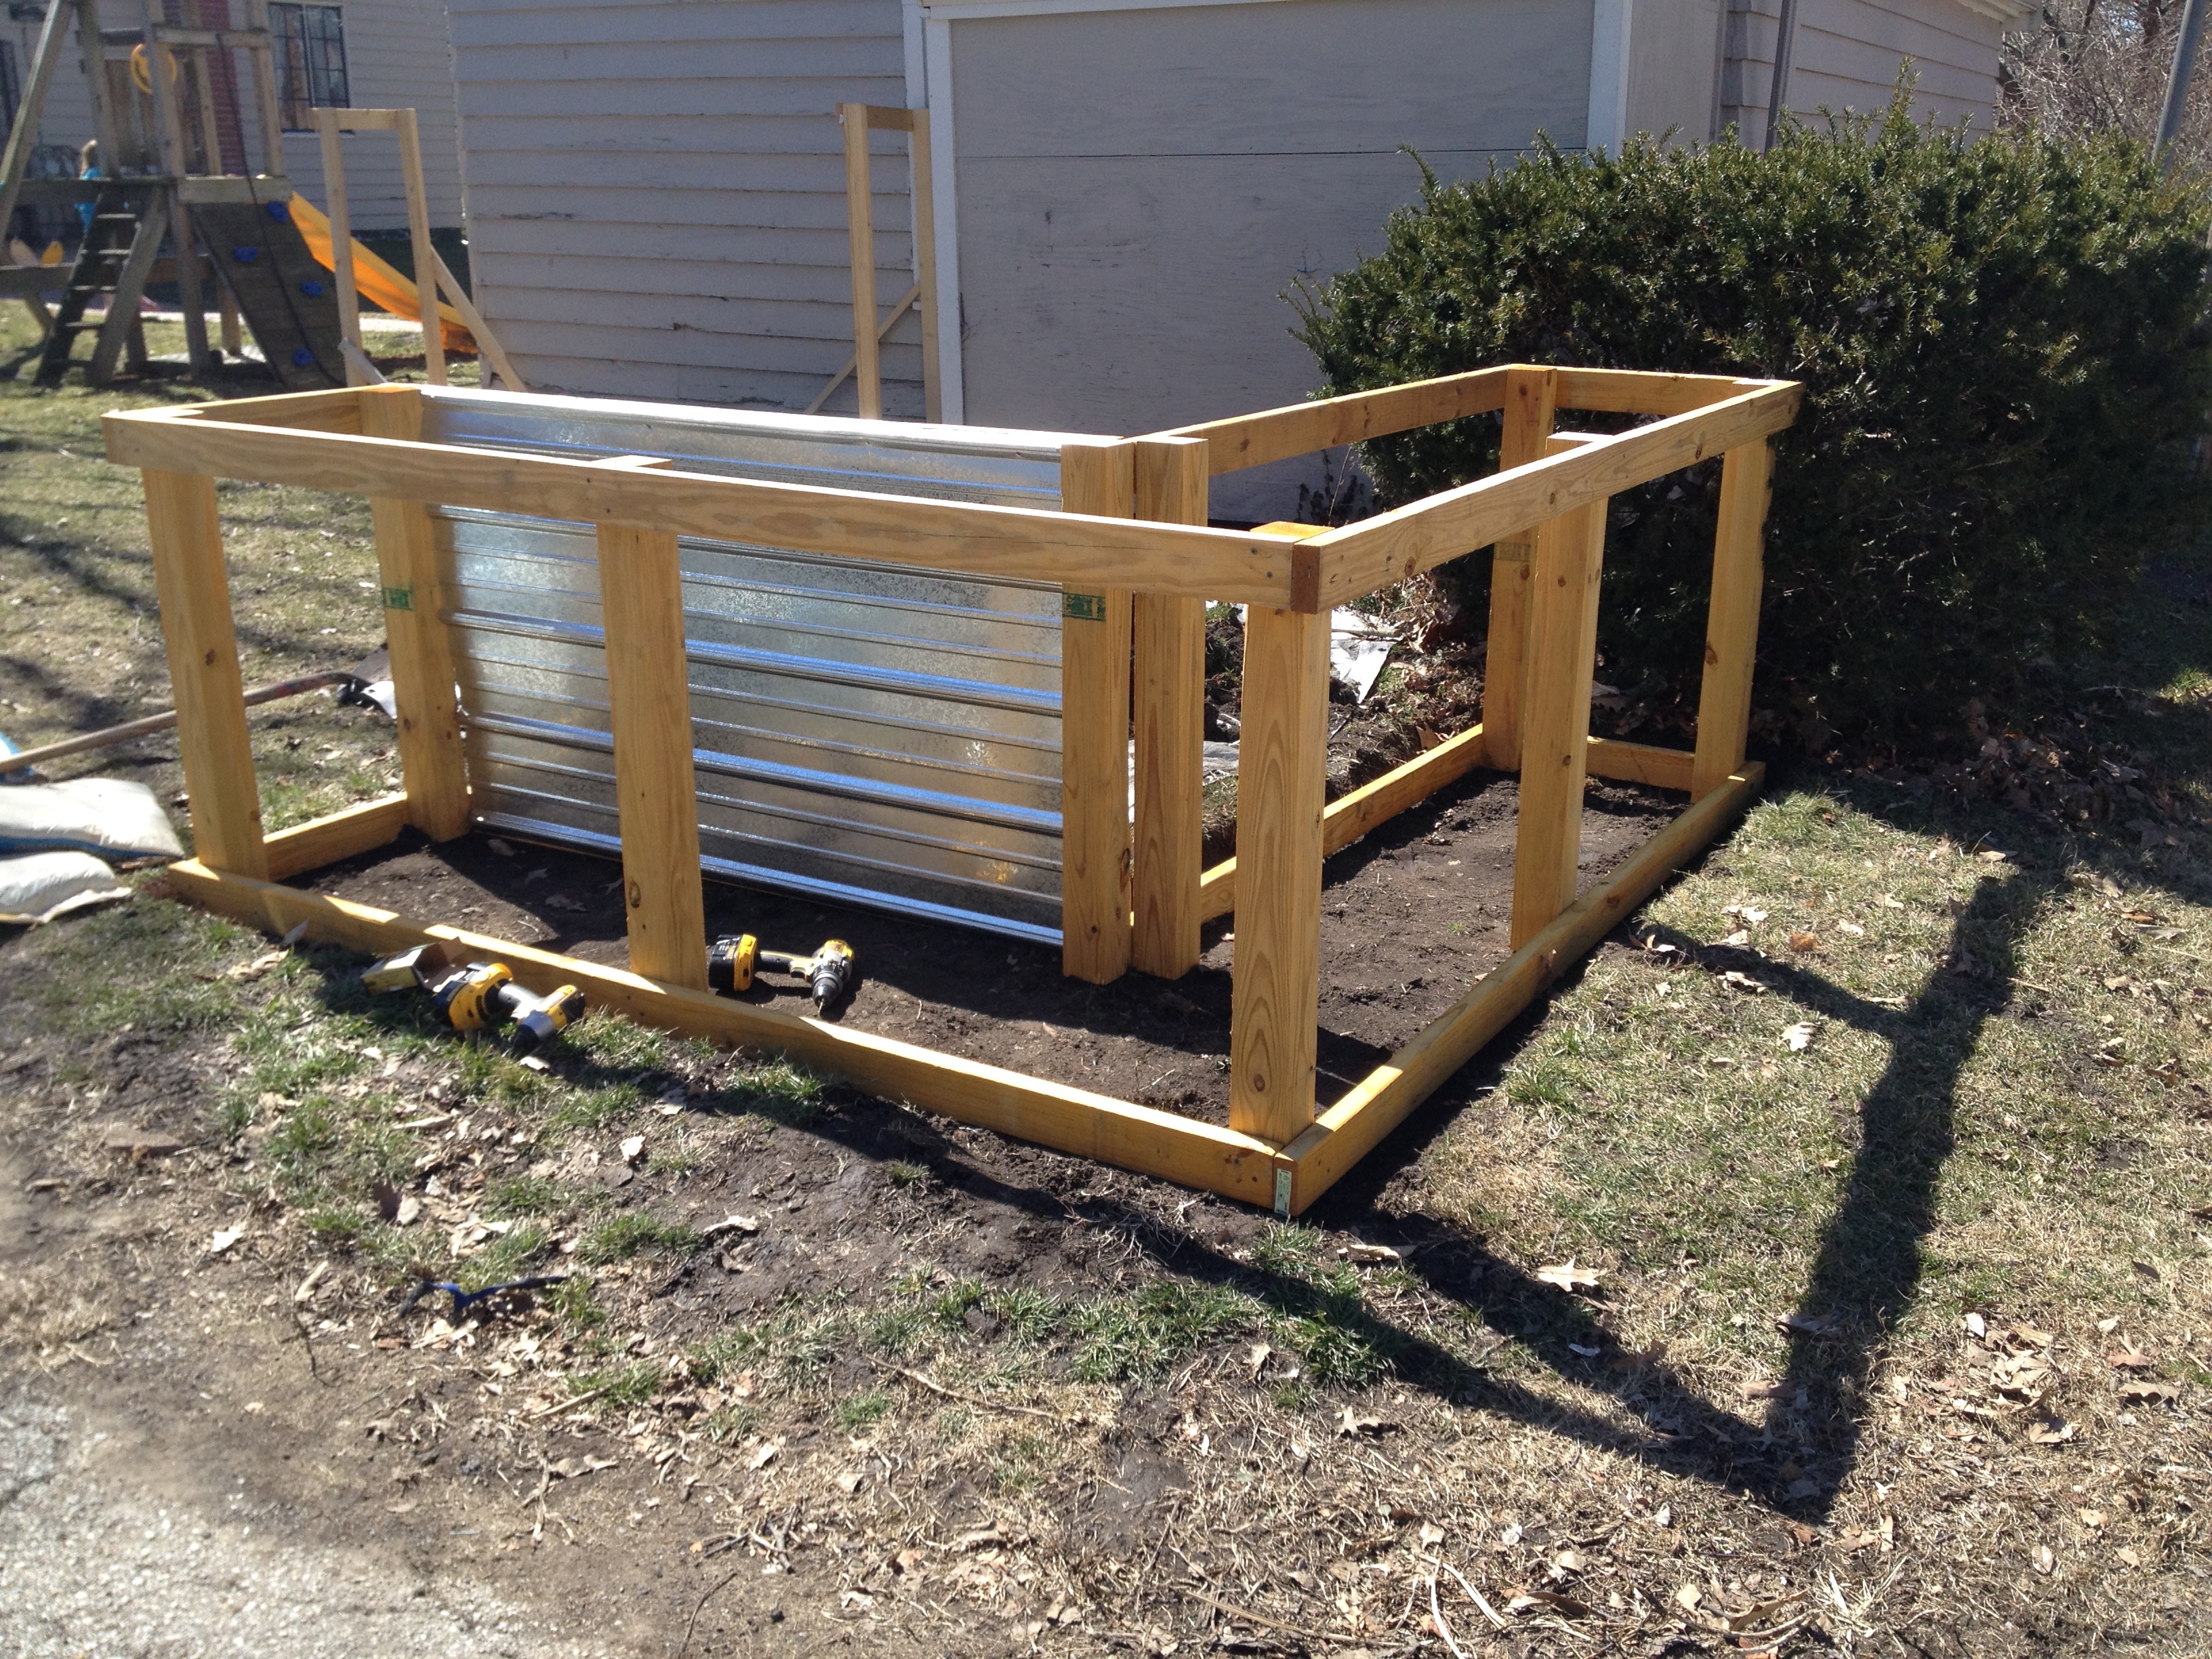
After fitting the first panel, I instantly knew there was a serious design flaw. My intention was to have the panel hold the dirt in, but with it only being secured at the top and bottom, it was far too ‘bendy’ and easily bowed in and out with the slightest amount of pressure. To resolve this, I bought three additional stained and treated 2x4s to brace the panels on the outside. I also had to buy an additional four regular treated 2x4s to replace the ones that had to be used for bracing.

Being able to screw the sides of each panel added much needed rigidity.

With the panels in place, I turned my attention to the inside of the planter. Instead of filling the entire planter with dirt, an expensive and back breaking proposition, we opted to instead build a raised internal floor. I secured treated 2×4 joists to the vertical 4x4s.

Treated 1x6s were cut to size and installed as planking. Frugal Boy enjoyed cruising along the inside.

Once all of the floorboards were installed, I grabbed some left over heavy duty plastic from when we lined one of our crawlspaces and carefully placed it into the planter to make a liner.

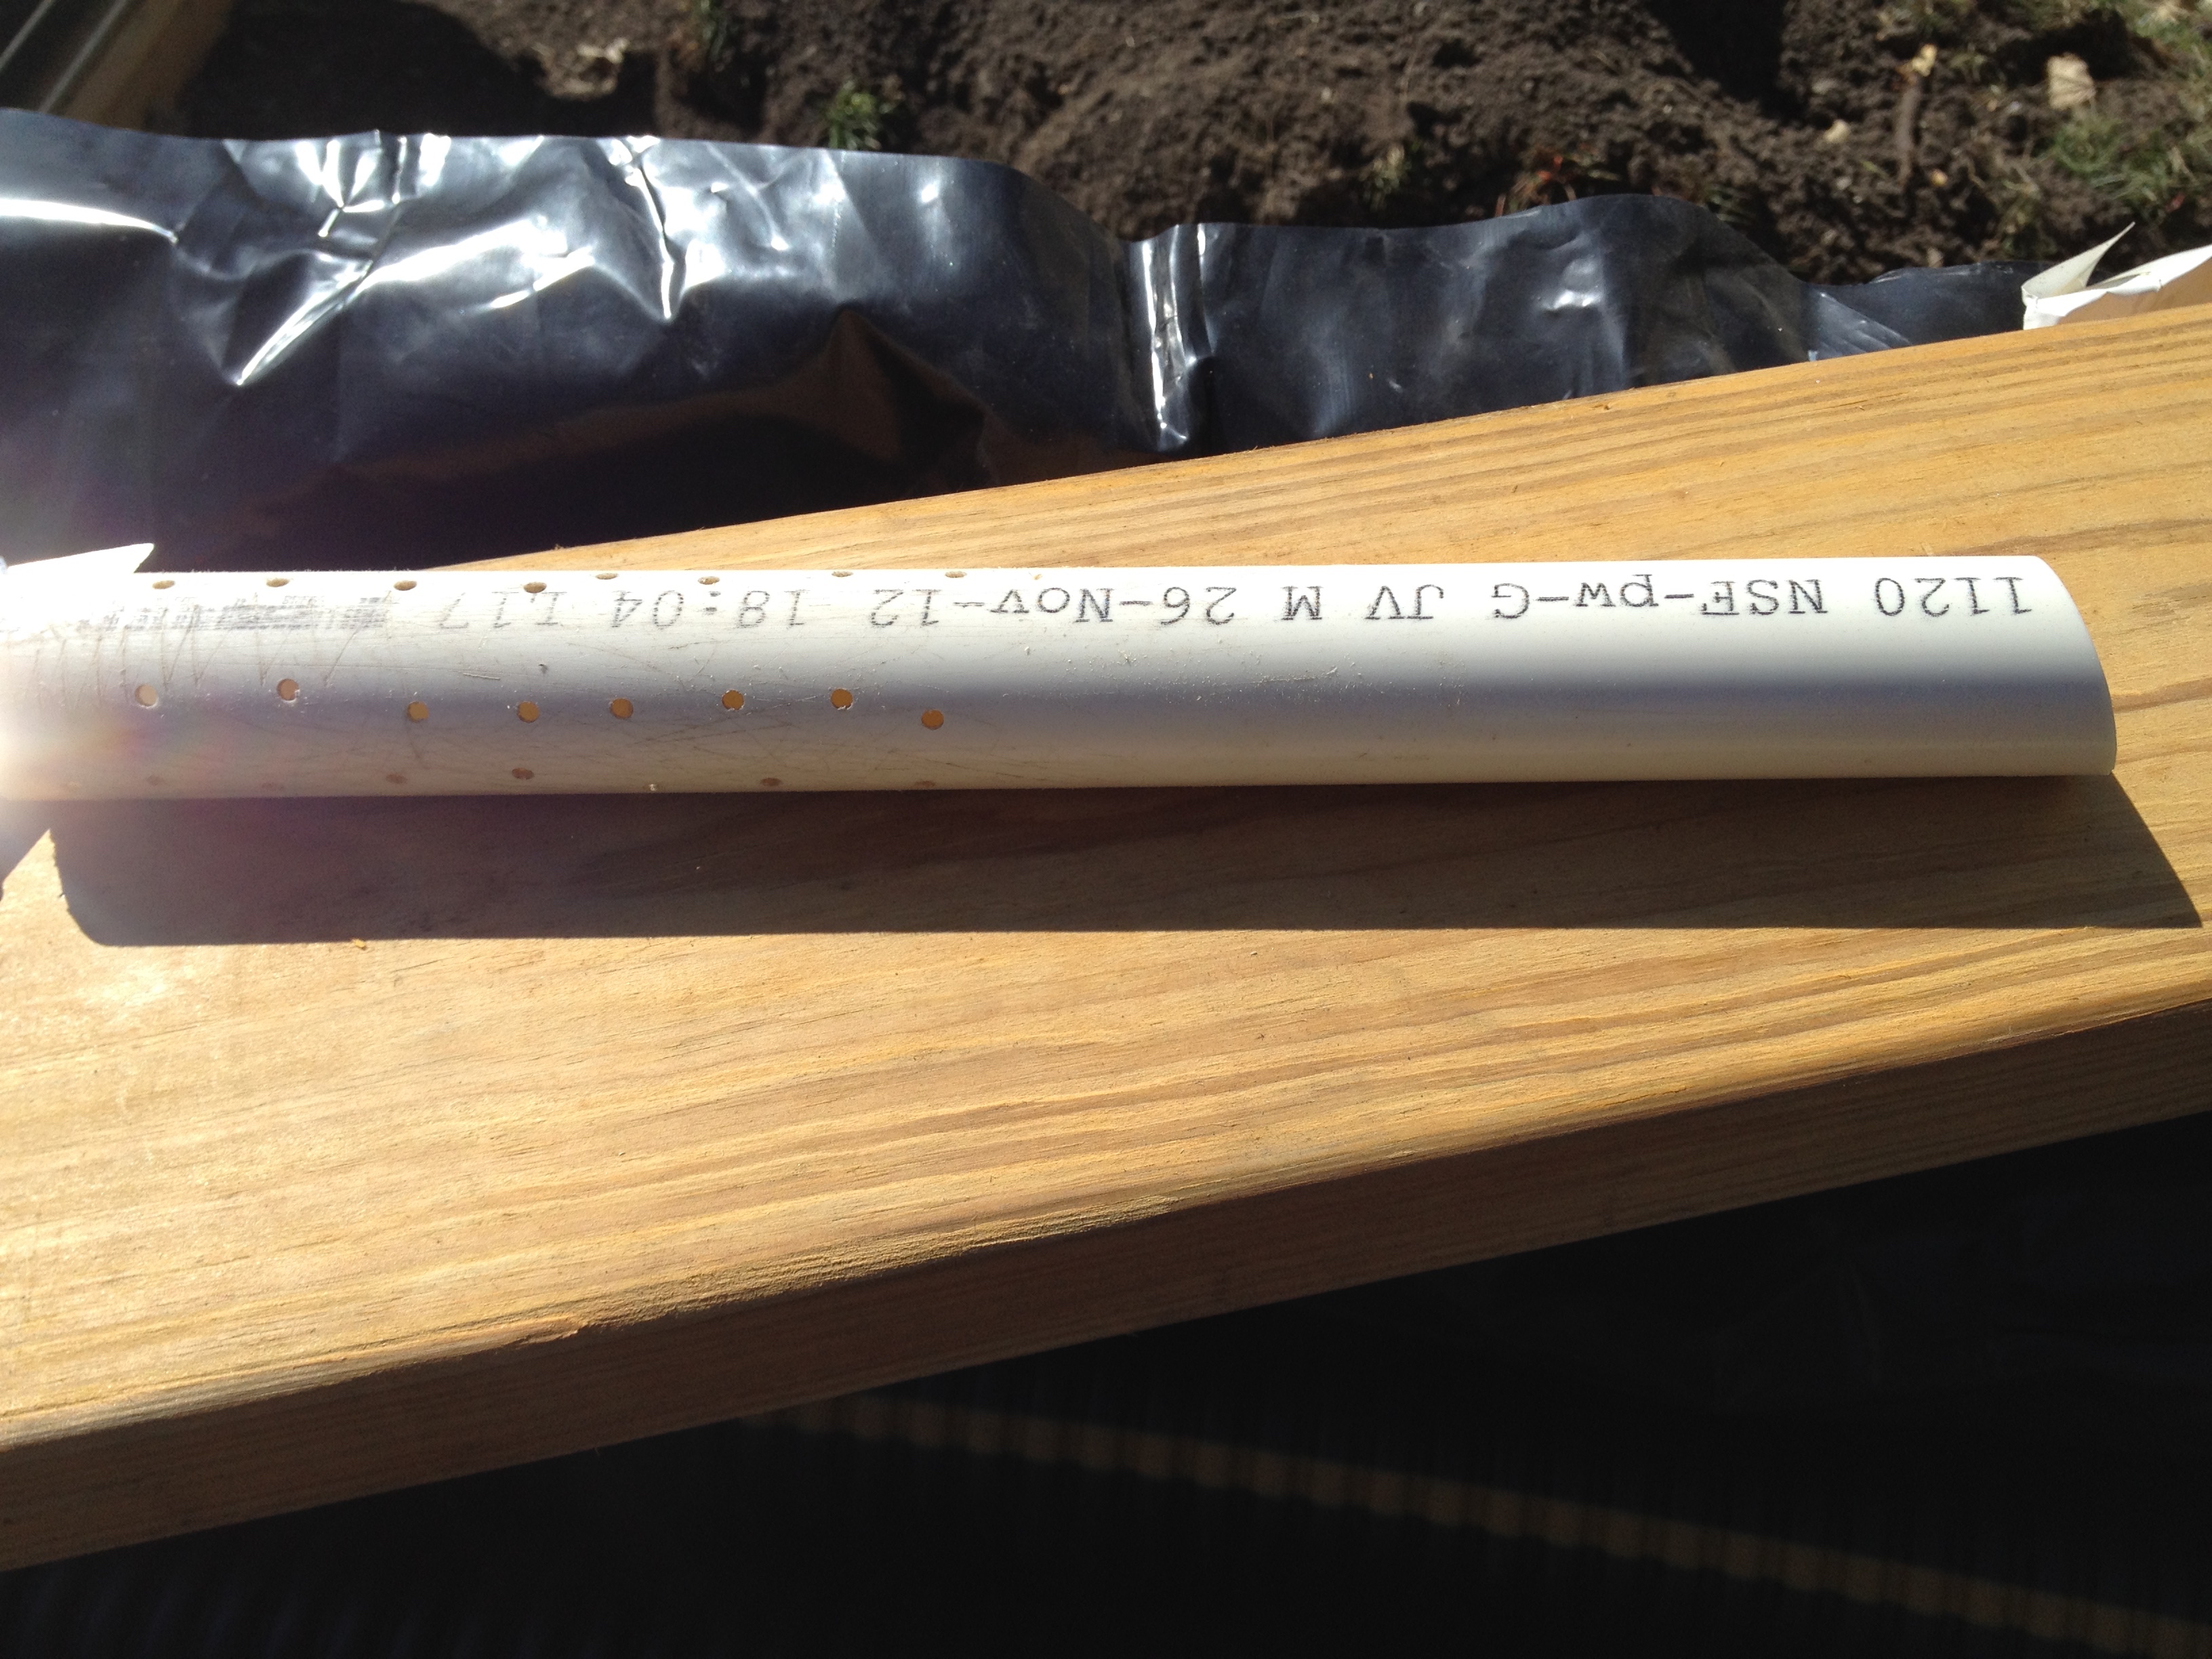
With the liner stapled to the top of the planter, I cut 3″ corrugated, perforated drainage tube to fit the bottom.
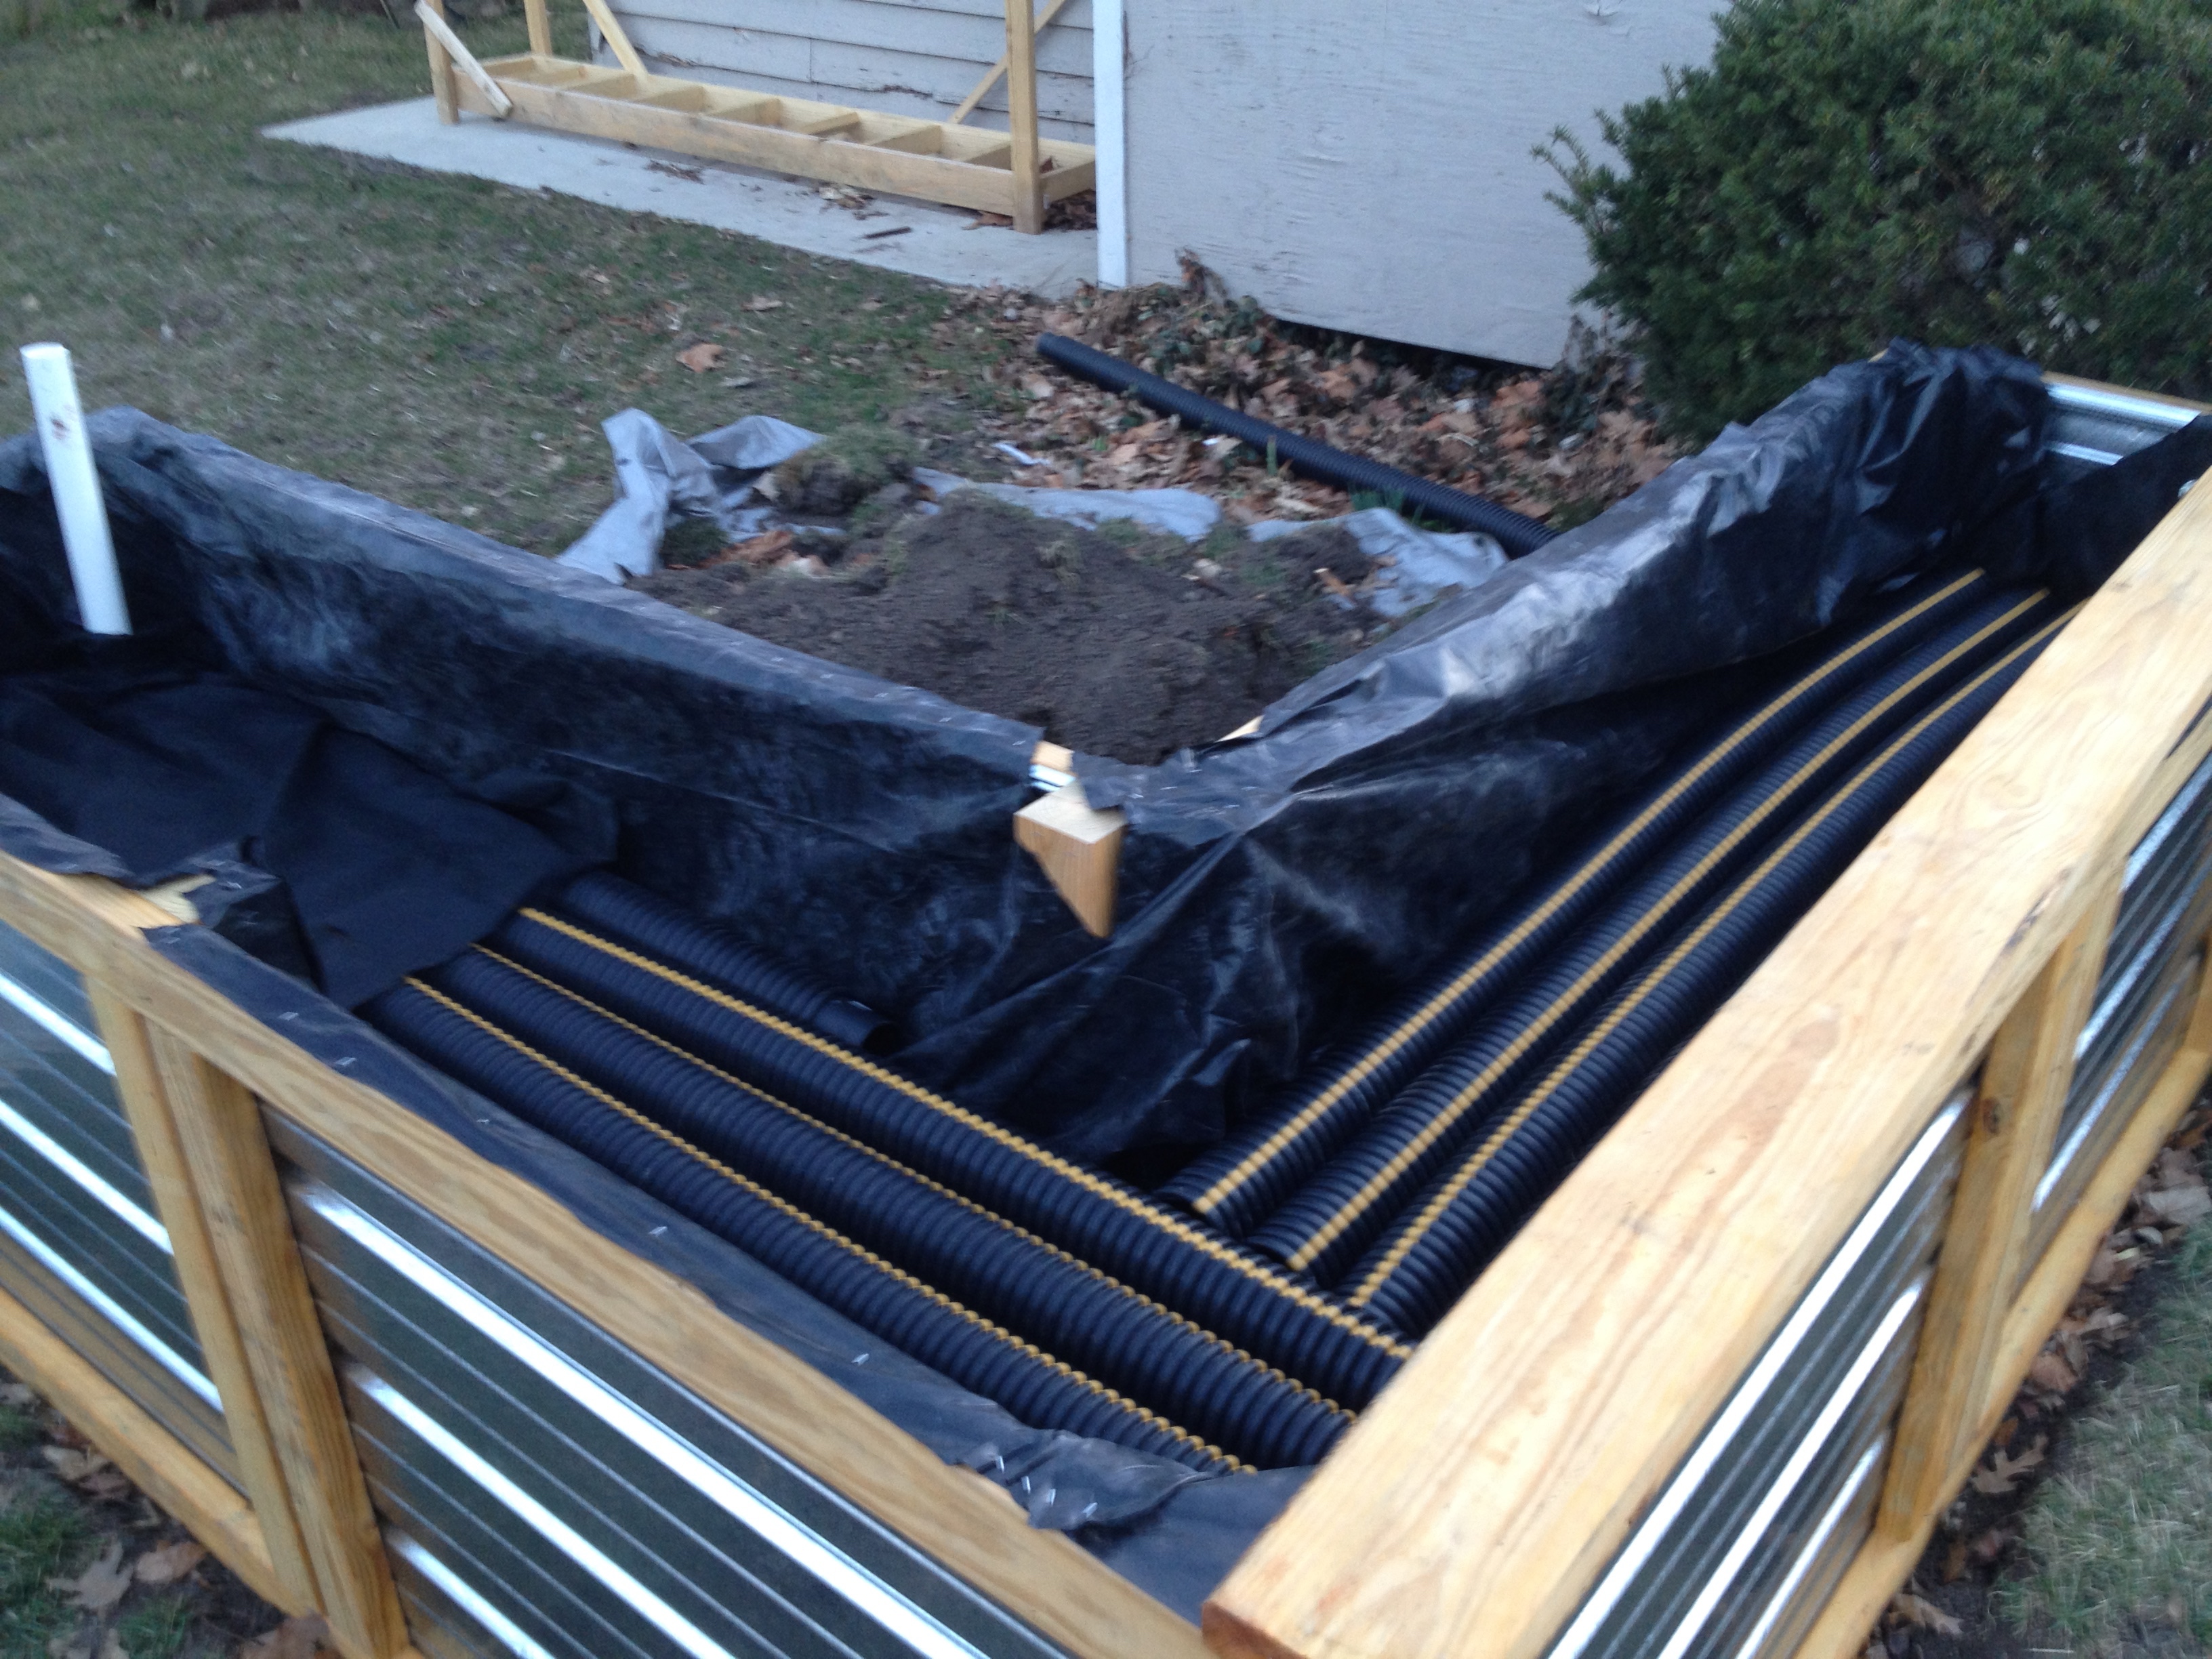
These tubes act as a water reservoir and form a critical part of the ‘self watering’ aspect of the planter. Of course, you need a way to add water to the reservoir and that is where this handy fill tube comes into play.

We also needed an overflow drainage pipe. I used a scrap piece of pvc and drilled a bunch of holes into it.
 I cut a hole in the planter side just above the corrugated pipe
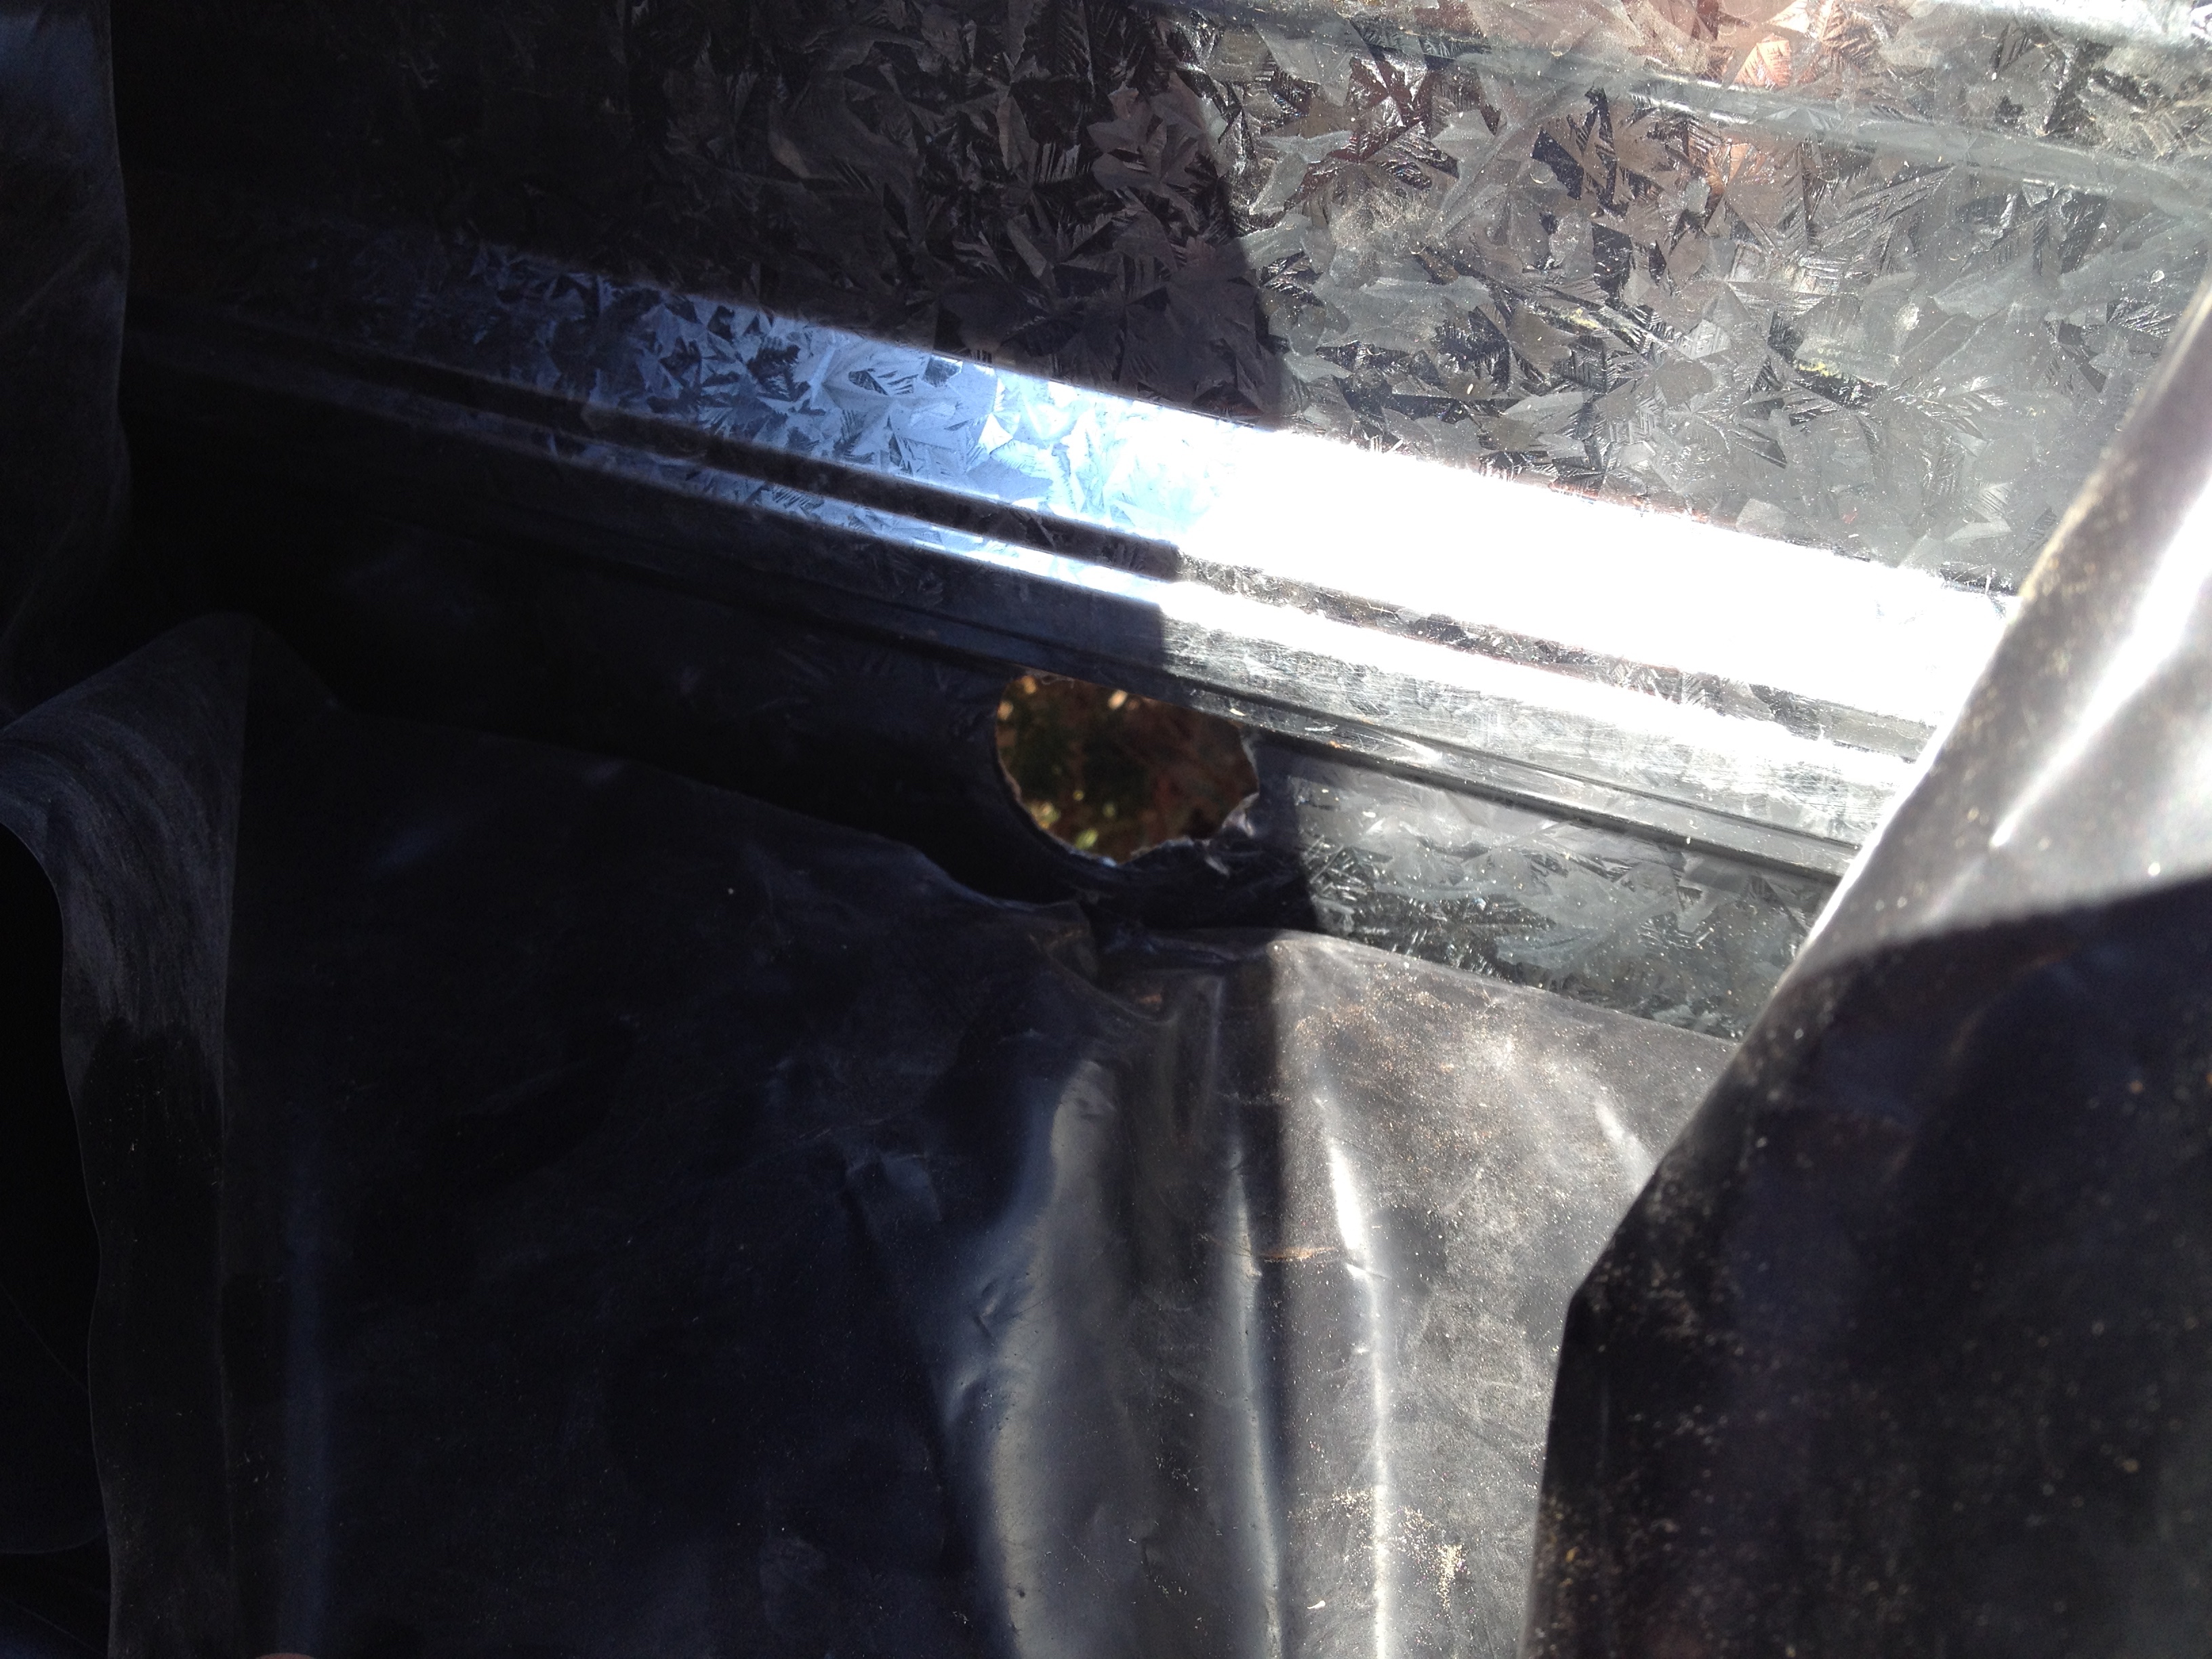
and inserted the overflow pipe.

The overflow is on the far side of the fill tube.
 All of the piping gets wrapped in landscape fabric to prevent dirt from falling in and filling/clogging up the watering system.
 Then it was time to add dirt! I started with some sand along the sides of the corrugated piping. I read somewhere that top dirt sitting in water will begin to stink as anaerobic bacteria goes to town.
 With the dirt added, the only major thing left was to add the edge cap. I used treated and stained 2x6s and secured them with screws from the underside to leave an unmarred top surface.

Besides sowing seeds, something that will have to wait until it gets a bit warmer, the only big item left to complete the project is to add gravel along the perimeter like so.
 I am putting down landscape fabric to keep weeds from popping up next to the planter. Holding that in place is river rock because it is cheap and attractive. I have to go back to the store for a few more bags of rock. I also need a PVC cap for the supply tube so mosquitos cannot breed in the underground reservoir.
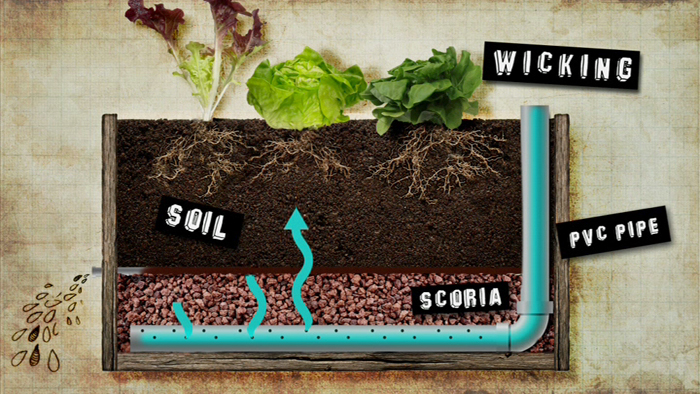
So there you have it! Hopefully the self watering system will work by wicking moisture from the reservoir to the root systems. We should only have to water once a week even during the hottest days of summer.
Shae has been deciding what she wants to plant and already has a few ideas.
Leave a comment with what you would plant! Who knows, maybe we’ll try it out ourselves.
Is your computer feeling sluggish? Are you contemplating getting a new one? If so, there is likely a cheaper option to make your computer run like new again. The cheapest option is to simply do a clean installation of the operating system (Windows 7 or Mac OS 10.10). Nine times out of ten, this free (albeit slightly time consuming) chore can make a noticeable difference in how your computer runs. You’ll need to backup your data first to a spare hard drive before starting.
What if you have already done that, or are certain that the hardware is just getting too old. We use an early 2009 Mac Mini as our home theater pc (htpc). It mostly just runs Netflix and Shae uses it for email and web browsing as well. Instead of buying a completely new computer, we just upgraded two components.
RAM, or random access memory, has long been one of the most recommended upgrades to breath fresh life into an aging computer. Adding more RAM is like adding more cabinets and counter space in your kitchen. RAM is storage for what your computer is actively working on and by having more RAM available to it the computer doesn’t have to run across town to the store every time it needs something.
Most modern computers ship with at least 4 GB (gigabytes) of RAM. Older computers might only have half that amount of RAM. We bought two new RAM modules that add up to a total of 8 GB of ram (about $60).
A solid state drive, or SSD, is a relatively new upgrade that will likely make a larger splash in perceived snappiness when upgrading a computer. SSDs store your photos, music, applications, and everything else on your computer. In Windows, it would be the C drive. In Macs it would be the Hard drive on your desktop.
Older computers shipped with platter based hard drives, meaning that there was a spinning disk that would rotate at 5400 rpm or 7200 rpm. These hard drives had a lot of storage space for the price and it isn’t uncommon to have a 500 GB or a 1 TB (1 Terabyte = 1000 Gigabytes) of storage. The downside is that they are sloooow and more likely to fail resulting in you losing all of your photos, music, documents, etc.
SSDs have come down in price and I was able to pick up a 250 GB SSD for about $90.
The very first step in upgrading is to backup your current hard drive. I use a Mac only tool called Carbon Copy Cloner. It creates a complete copy of your hard drive that is bootable.
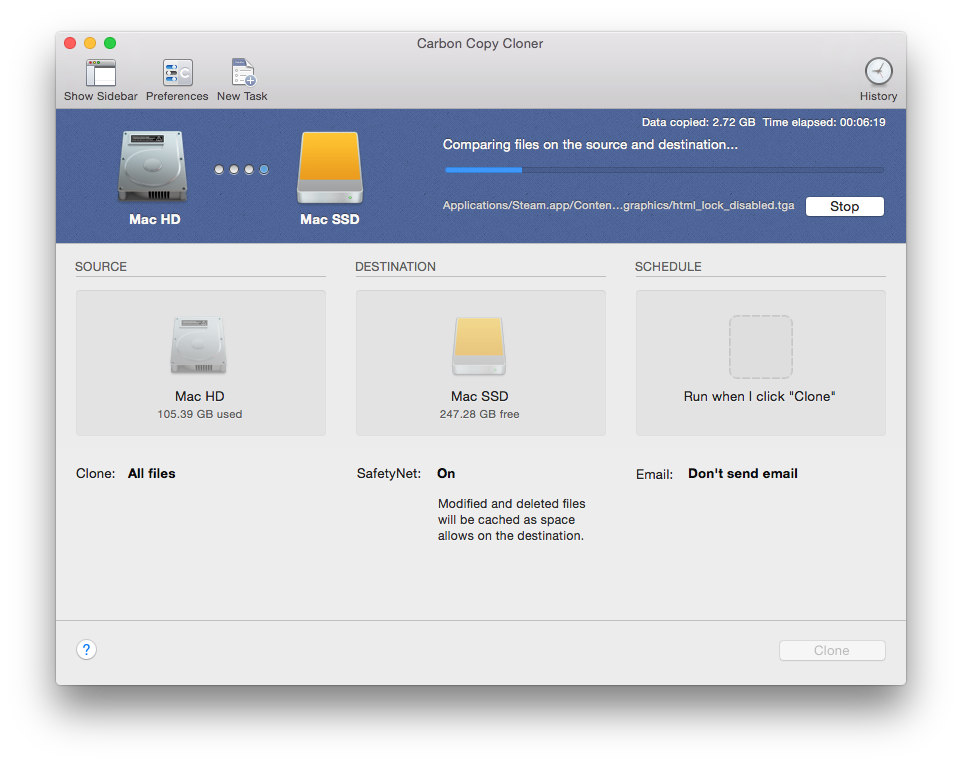
Depending on how much data you have to backup, this step can take several hours. I used a small external USB enclosure to house the new SSD so I could connect it to the Mini.

Once you have cloned your old hard drive onto the new replacement SSD you can power down your computer and unplug everything from it. You should use a good clean, static free workspace to do the upgrade.
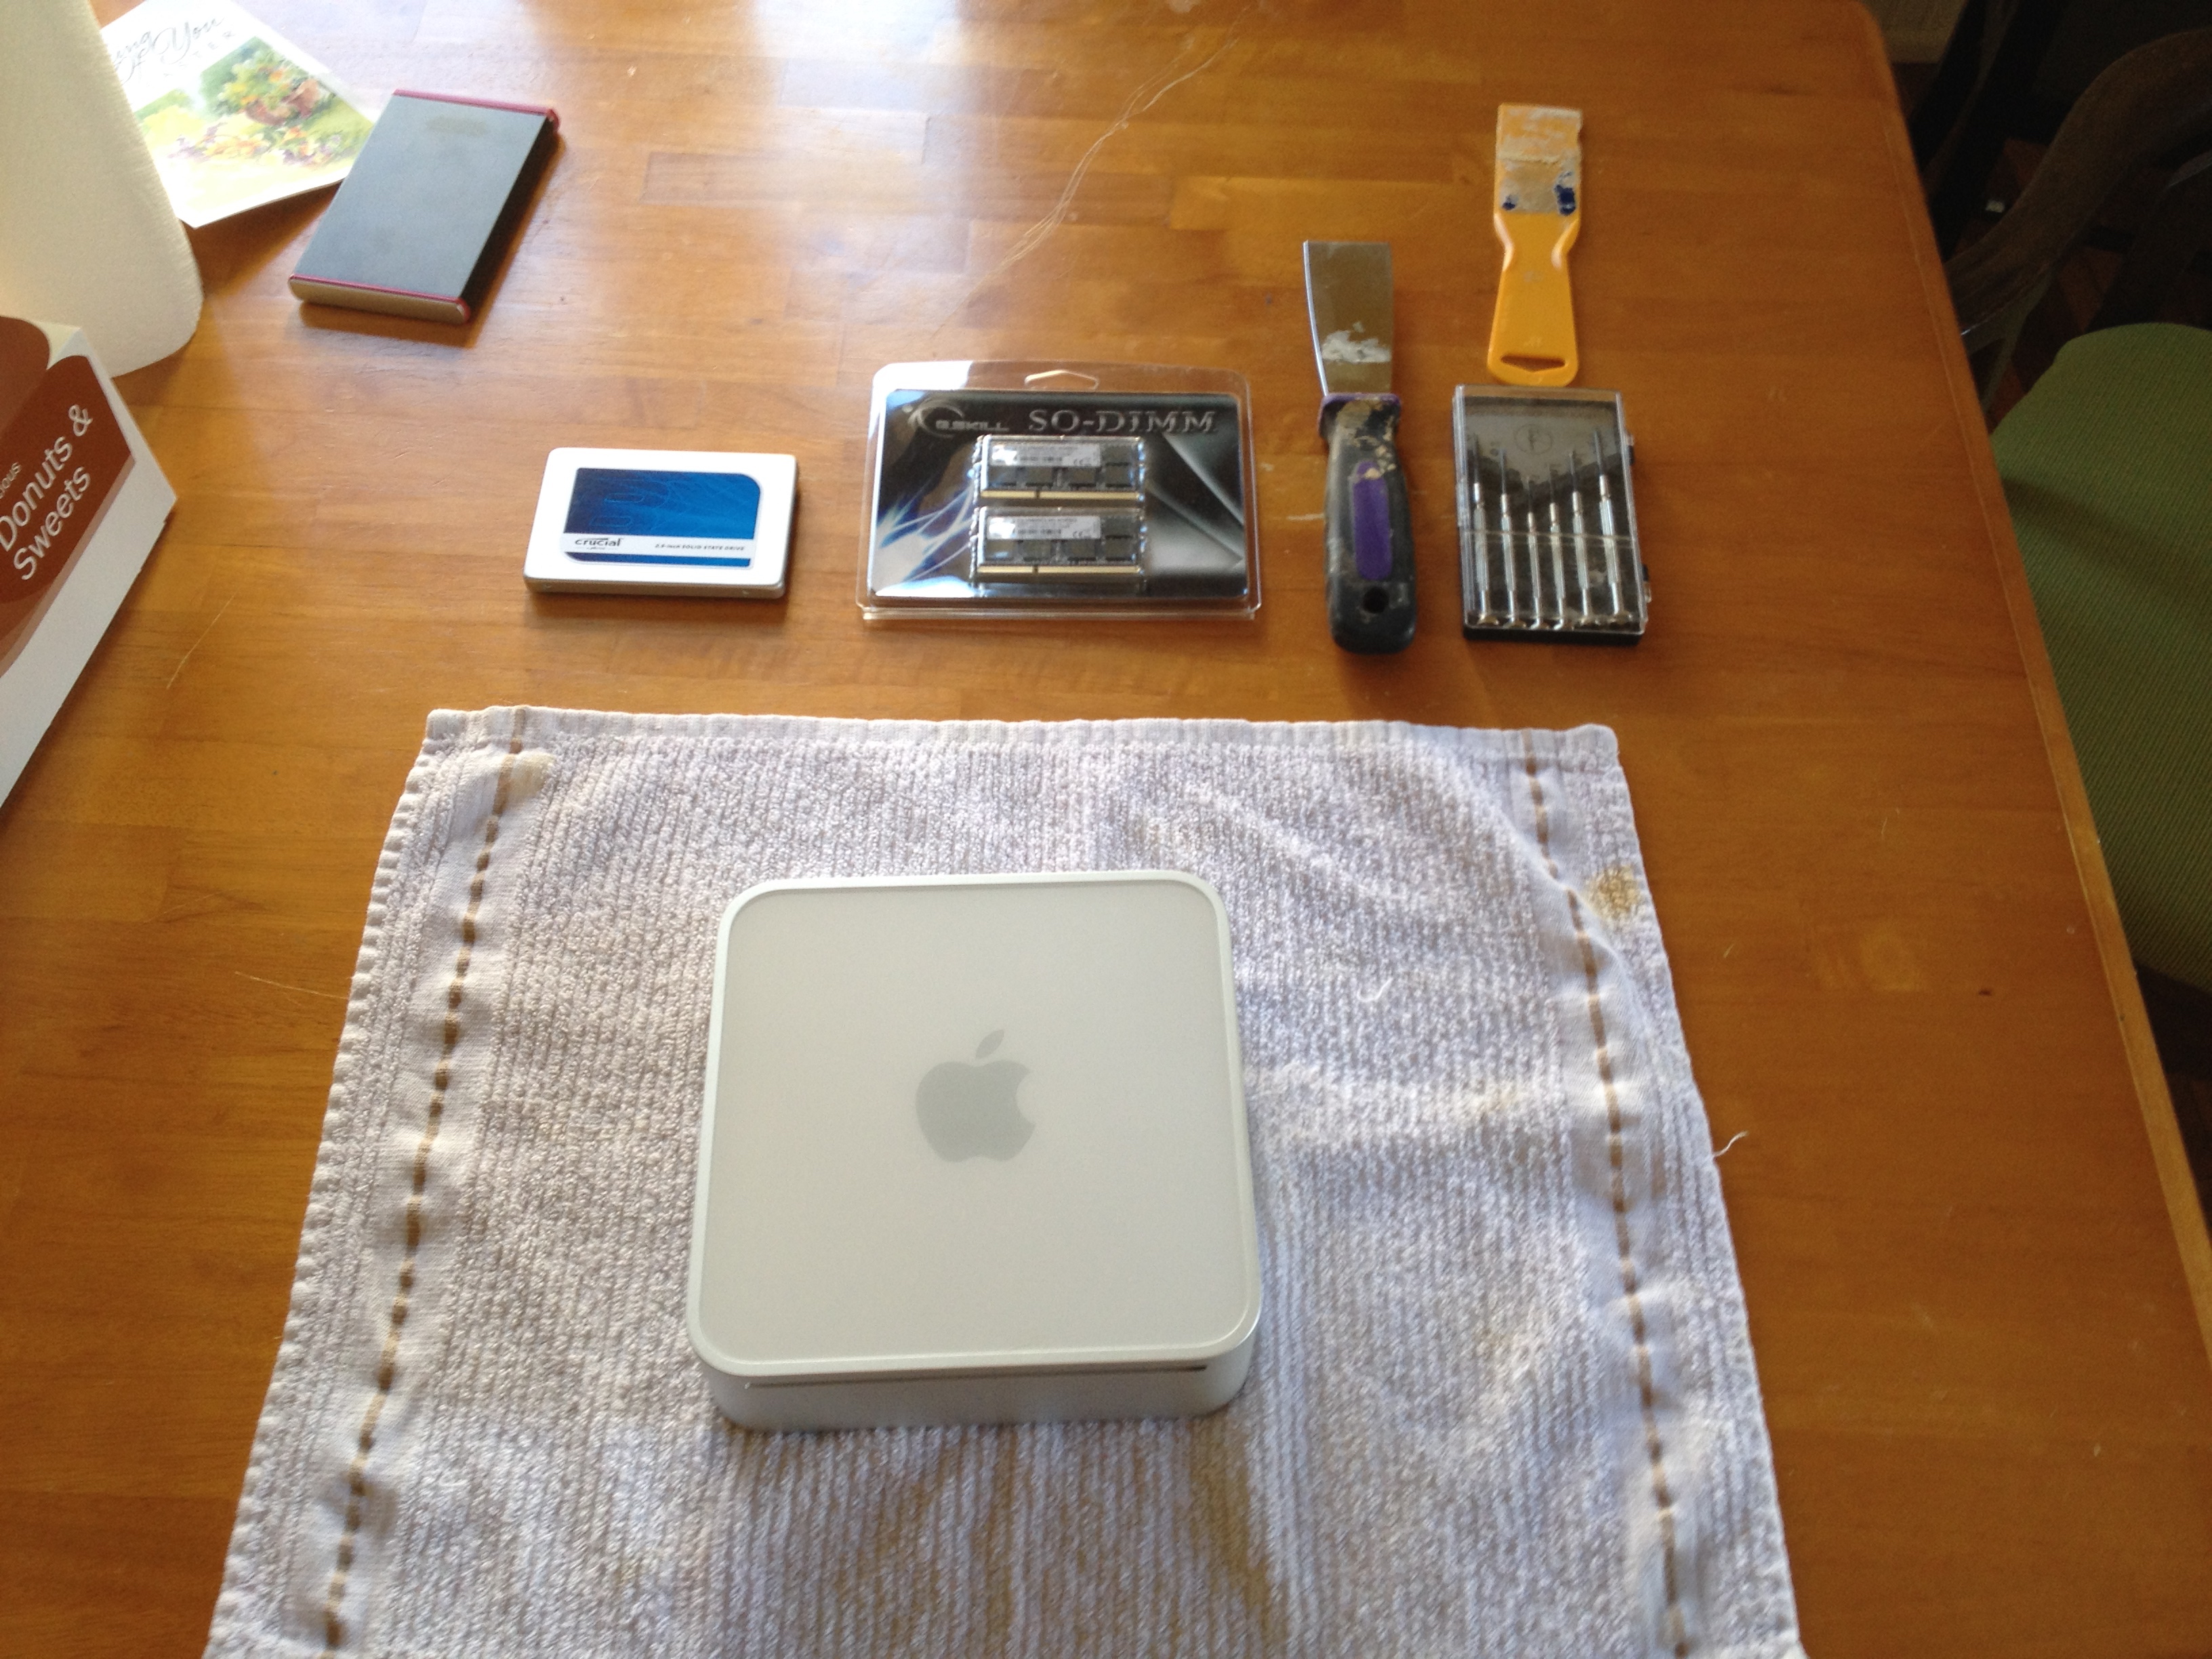
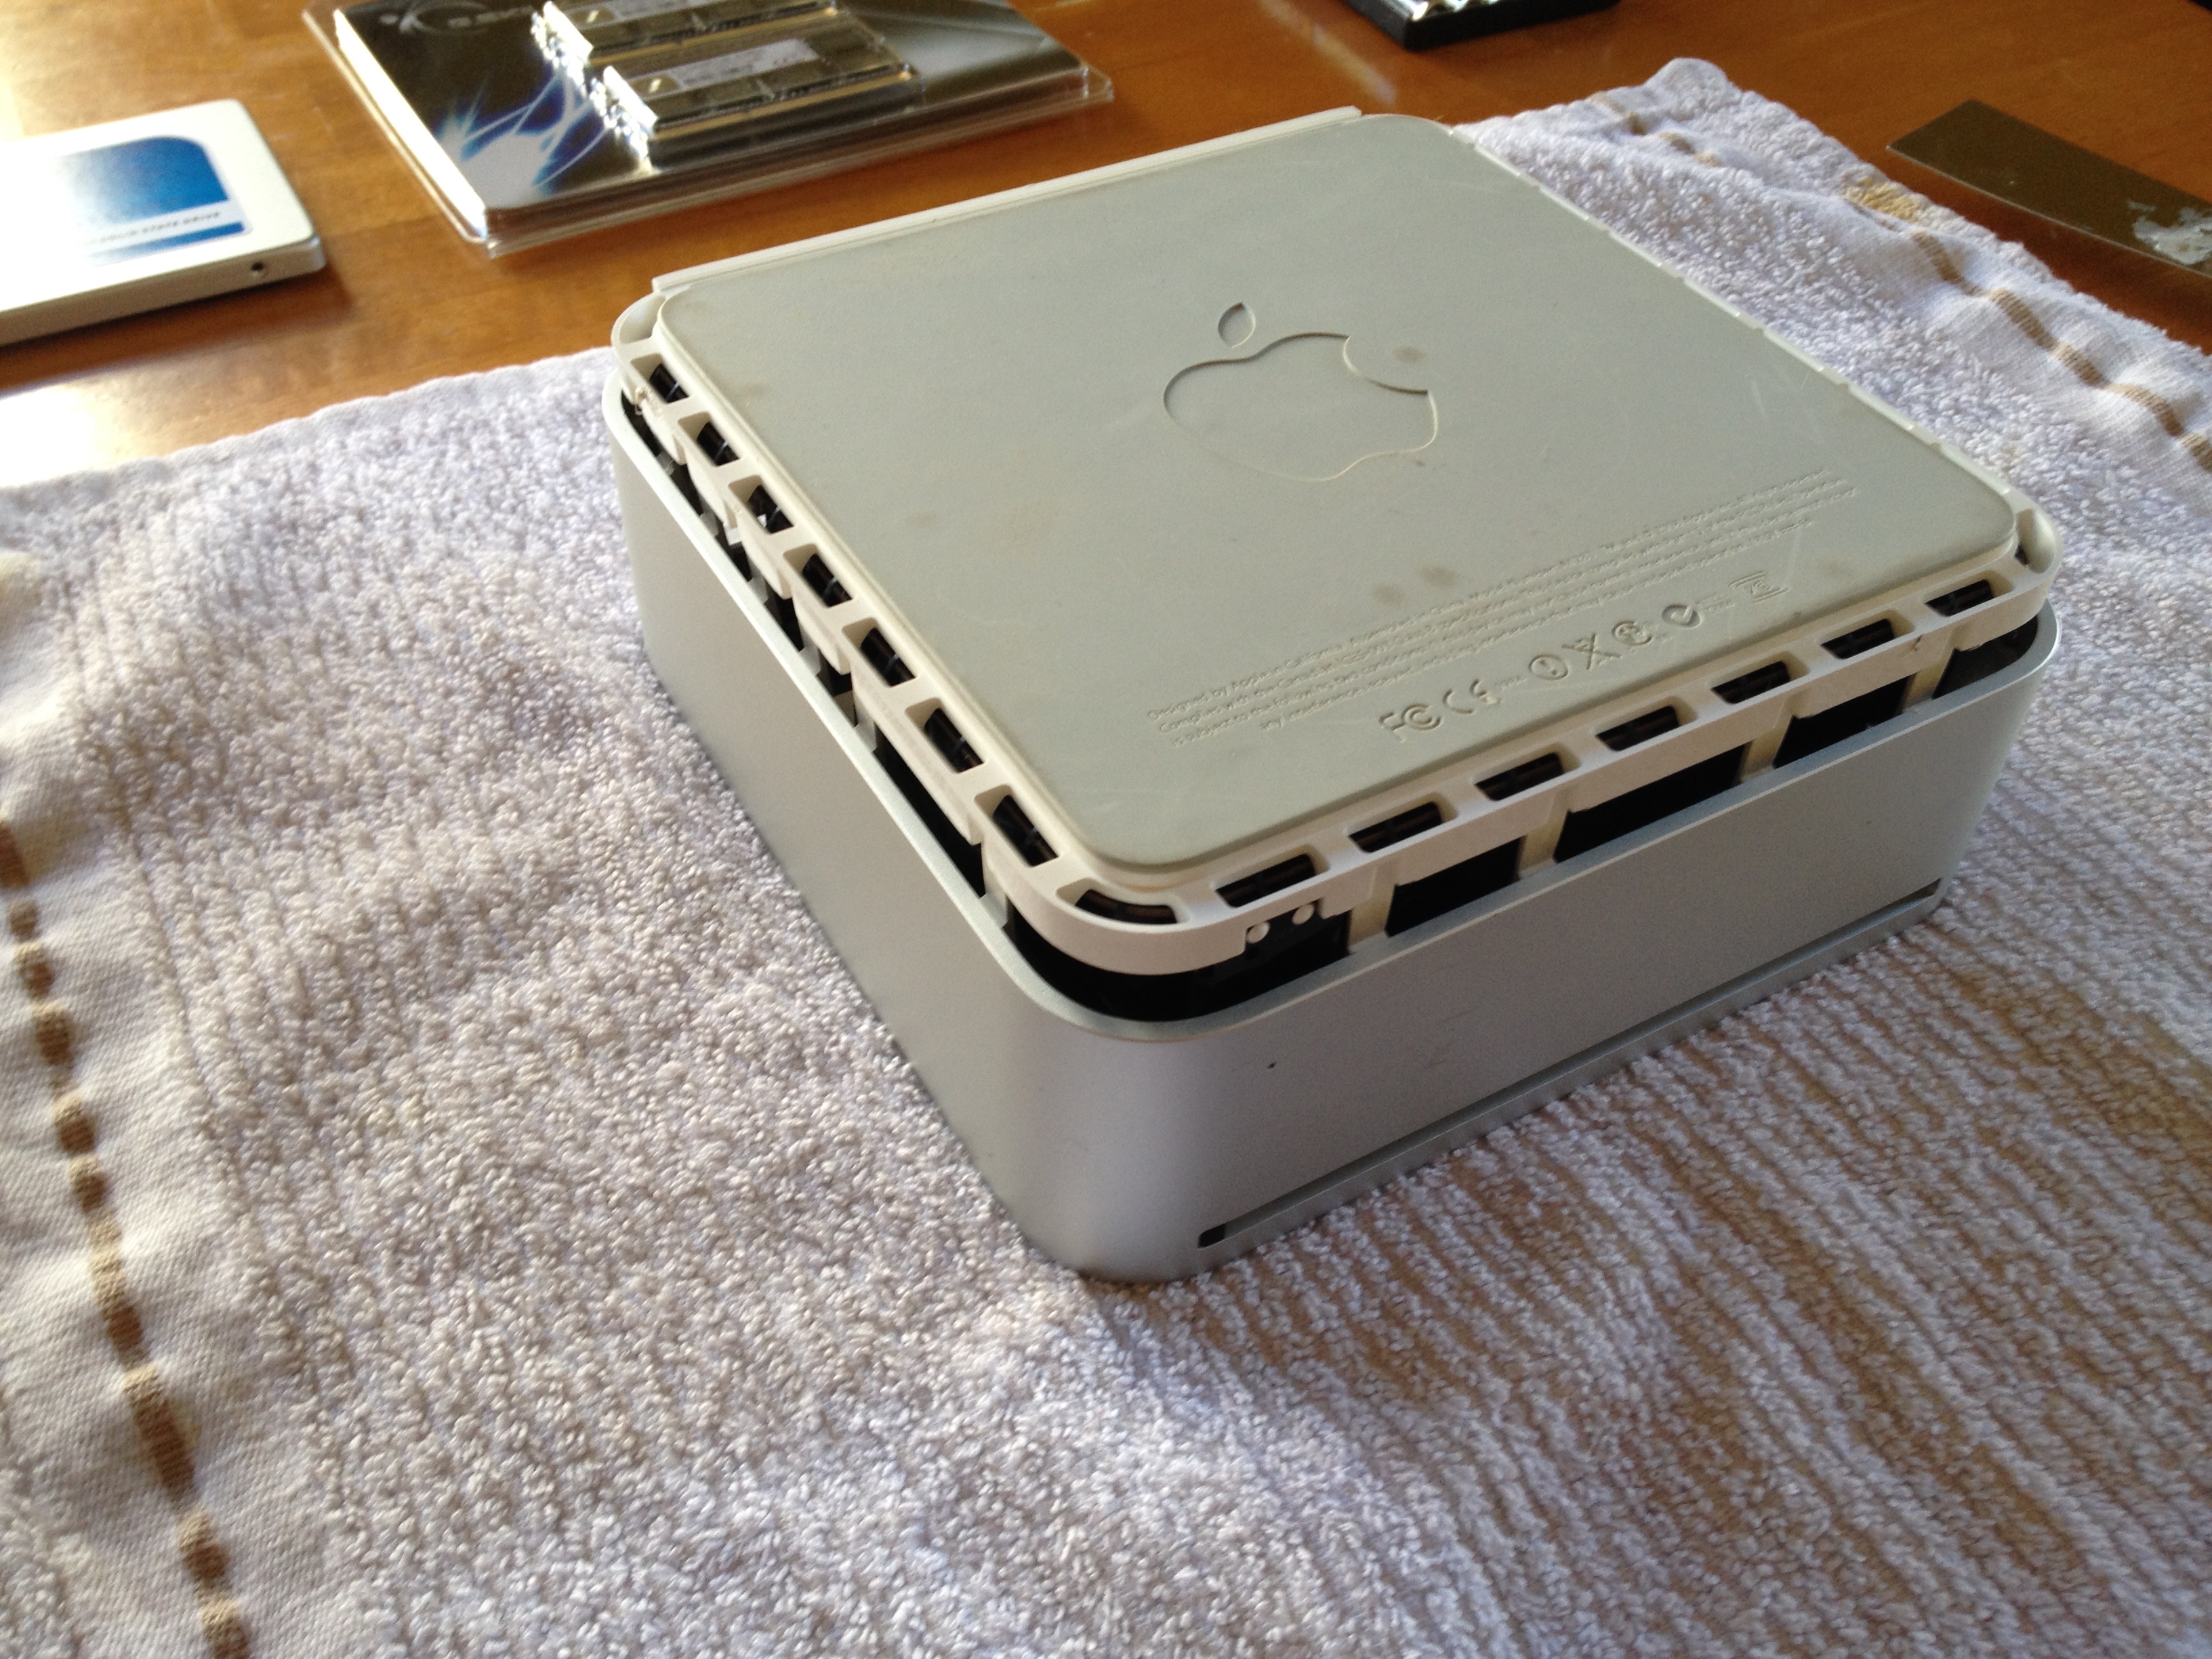
Flipping the mini upside down and using a putty knife opens up the case. Some computers are much easier and some are harder (especially laptops).
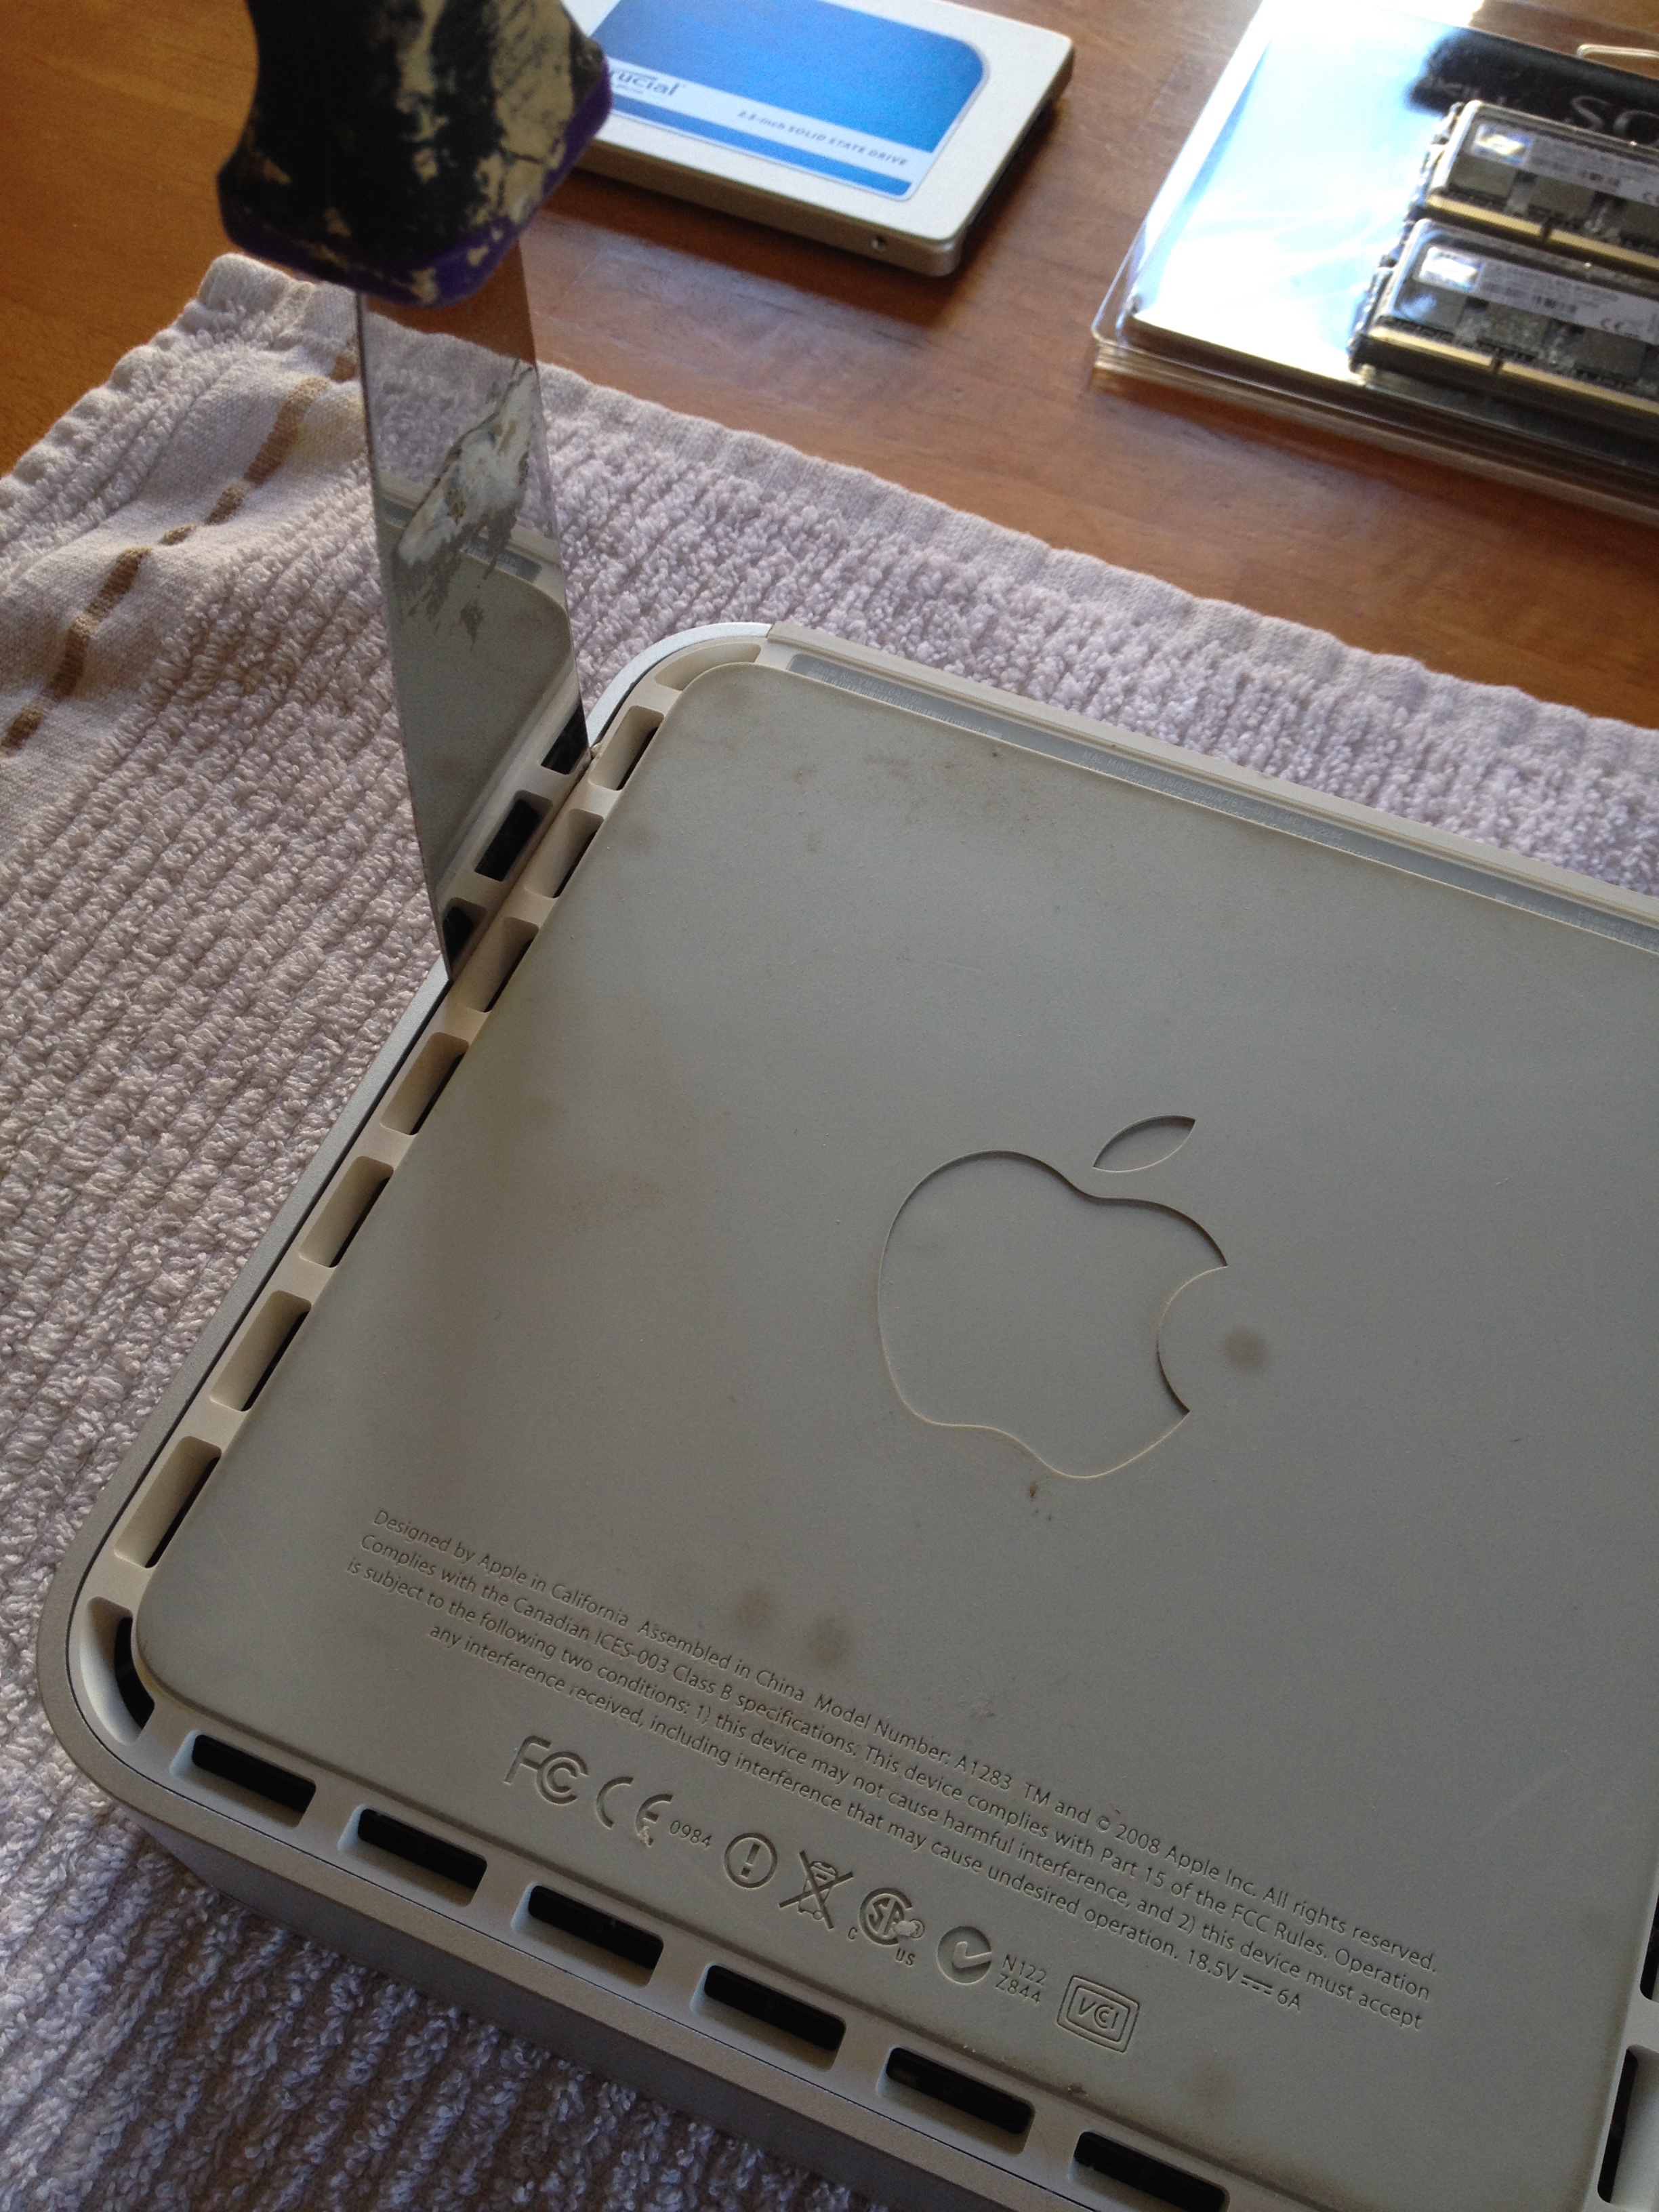
The case eventually pops off.
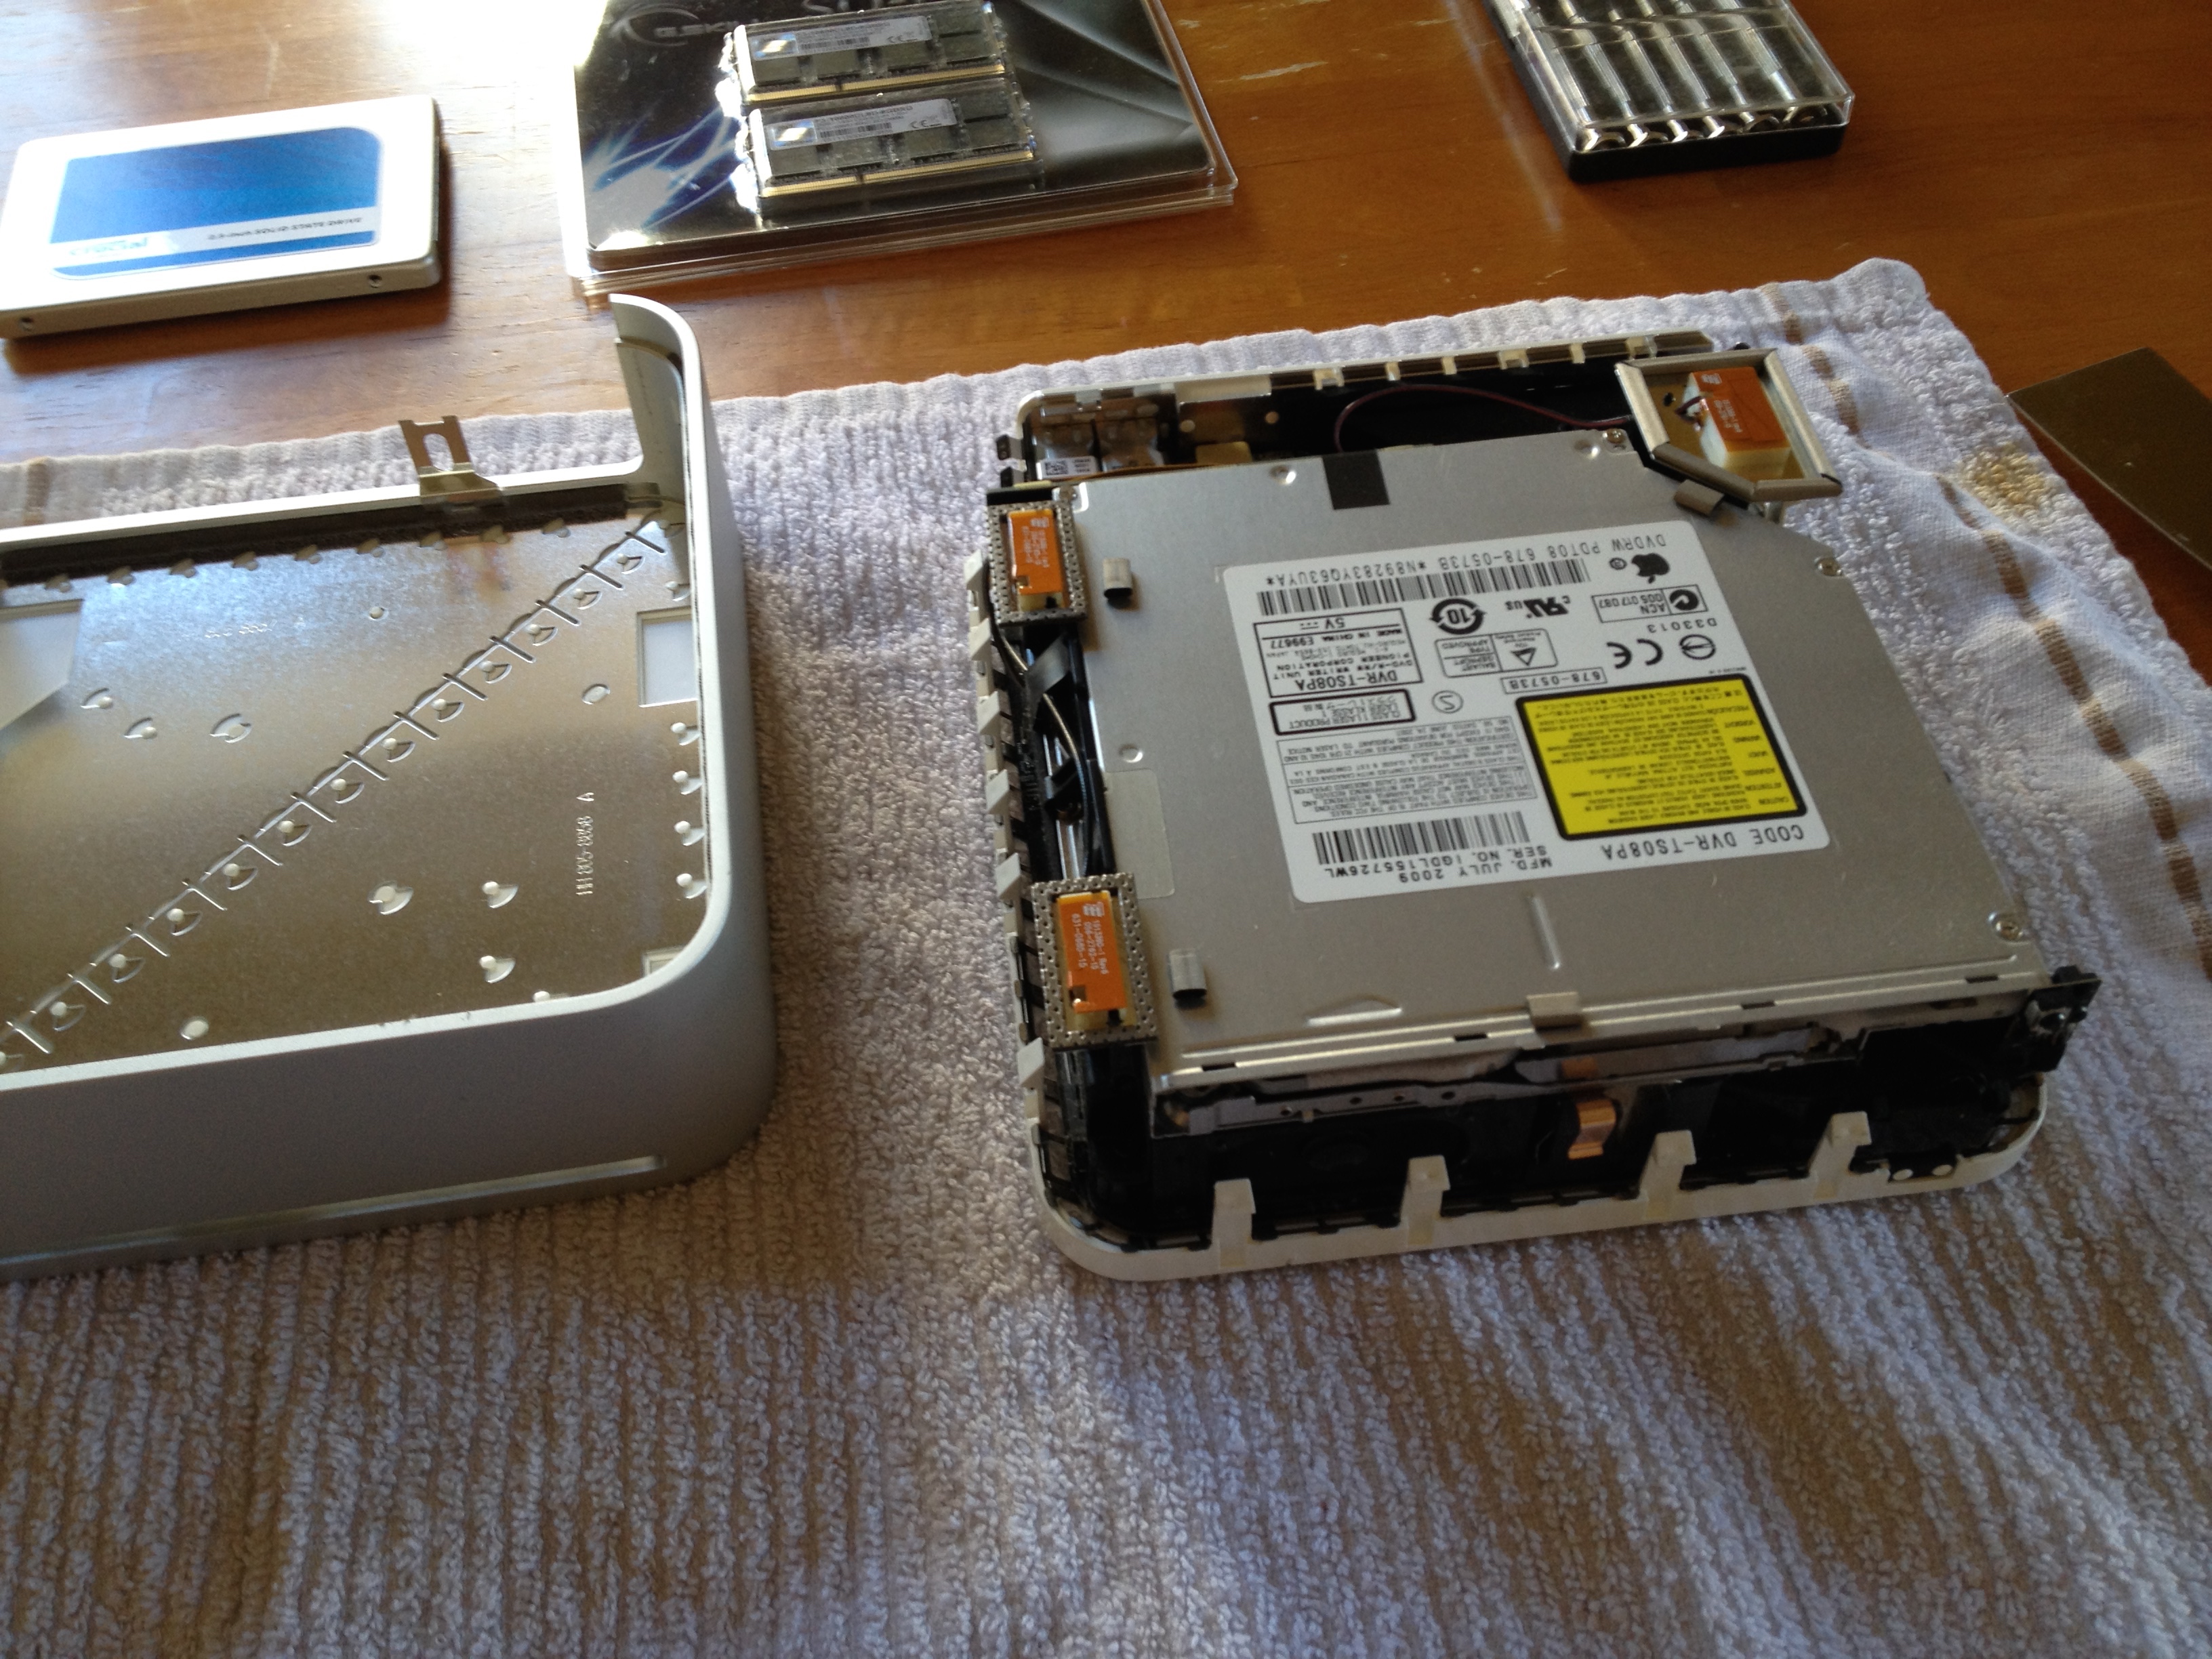
At this point, I need to unhook the three orange antennas and remove the drive bay assembly (silver thing).
With the drive bay unscrewed and unplugged from the motherboard I can remove it and expose the RAM modules.

This particular model has two ram slots. I removed each 2GB stick and replaced it with a 4GB stick (4GB -> 8GB).
 With the RAM replaced, it was time to do the slightly trickier hard drive replacement. Flipping the drive bay assembly upside down reveals the original 5400 RPM 120 GB hard drive.

There were four screws to remove, some anti-static bumpers, and a temperature sensor. Here are the two hard drives side by side.

Older computers, like ours may not be able to fully utilize the speed of new SSD hard drives. Our Mac Mini uses SATA II technology, but the SSD replacement drive is capable of SATA III. A long discussion about whether or not that matters can be found here. The short answer is that even older computers will still benefit greatly from a SSD upgrade.
The rest of the upgrade procedure is mostly in reverse and just a matter of putting everything back together again.

I have worked on this style of Mac Mini before so I knew my way around pretty well. With that said, I still consulted with a few youtube videos just to double check my work.
Upgrading your RAM to 4 or 8 GB and replacing your old disk platter hard drive with an SSD are two easy and relatively cheap upgrades that will keep your computer running briskly for several more years. I spent more time writing this blog post than actually doing the work (if you don’t count waiting for the backup to complete). The total cost was about $150 which is significantly less than the cost of a new computer. RAM was doubled from 4GB to 8GB and the hard drive capacity also doubled from 120GB to 250GB. The new SSD is also significantly faster than the old hard drive and that makes the computer boot up faster, apps open quicker, and files copy in a fraction of the time.
Some computers (especially laptops) do not have user upgradeable RAM or hard drives. Apple is particularly guilty of soldering in RAM modules so that they are not user replaceable. Do a quick internet search for your make and model to see what is upgradeable and the complexity of those upgrades. I am predicting that desktop and laptop computers will soon be like VCRs of old where it is cheaper to buy a new unit than to repair an old one. Until that day though enjoy tinkering around circuit boards!
The weather has been very Spring like lately. Some days it is overcast and cold and other days it is sunny and warm. We have been trying to get outside as much as possible to get some fresh air and vitamin D.
I have been keeping busy with a new project, one that I will be showing off on this blog once it is finished. Frugal Boy hangs around and plays in the dirt. Well, technically he eats it.
Mess… What Mess?


Yum! Microbes
Do you want to save $50-$100 bucks in five minutes? Of course you do! Keep reading to learn how.
Did you know that you can shop around and choose what company you buy energy from? That’s right, you don’t have to purchase your electricity or gas from the company that pipes it to your door. Our municipality just negotiated a new two year contract on behalf of residents for electric and after seeing the results of said negotiations I was left with more questions than answers.
The new two year fixed opt-out rate is for 5.6¢ per kilowatt hour (kWh) plus an additional 0.1¢ city imposed fee on top of that for managing the aggregation program. That rate is for raw energy, and that energy still has to get from where it is generated to your house, and that is the distribution charge that you pay to your electric company. In our case, we have Ameren. Ameren’s website has a list of suppliers that you can purchase from so I did what any good nerd would do and opened up a blank spreadsheet and got to work.
Here is the result of a lunch break’s worth of internet sleuthing (click on it for a PDF version).

Most of the suppliers were more costly than the negotiated aggregate rate. I would kind of hope that the collective bargaining power of 30,000+ households could beat an anonymous internet quote. With that said, there were two suppliers that offered better one year fixed rates than the default Homefield Energy.
MidAmerican Energy offers a 4.54¢/kWh one year fixed rate with no cancellation fee. Viridian Energy offers a slightly higher 5.49¢/kWh one year fixed rate with a cancellation fee. Both options beat the city negotiated rate.
I hear you saying, “Okay Andrew, this isn’t a very good comparison.” These lower rates are one year vs two year, and that is true. In order for it to balance out, rates in the second year would have to increase to 6.7¢/kWh for MidAmerican Energy. A number that is hardly even seen on the price matrix as of today. I would peg the probability of such a rate increase in one year’s time as very small.
“Well, what about the environment Mr. Smart Guy?!” Each energy supplier has their own breakdown of how their energy is generated (MidAmerican, Homefield Energy). Coal, one of the worst polluters is also one of the cheapest forms of electric generation. So how do Homefield Energy and MidAmerican Energy compete in terms of ‘greenness’?
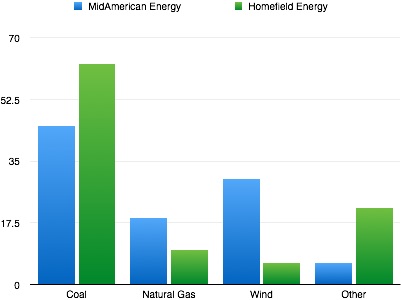
Taking coal and natural gas together (arguably the two worst polluters) pins Homefield Energy as the dirtier supplier with 72.33% of their electrical generation coming from those two sources. So in this case, it is not a matter of paying more to Homefield because they offer cleaner electrons. In fact, MidAmerican has about 30% renewable energy (in the form of wind) compared to Homefield’s dismal 6%.
So MidAmerican is cheaper and cleaner, but does it really matter to John and Jane Doe consumer? I mean, it is only 1.06¢ difference per kWh. According to U.S. Energy Information Administration, EIA, the average U.S. residential utility customer used 10,908 kWh in 2013. Multiply that usage by the cost difference between these two suppliers (.0106) and you end up with $115.62 in savings per year. Not too shabby for spending 5 minutes on an enrollment website. We personally stand to save about $58 based off our usage (5514 kWh) in 2014. Alternatively, we could spend an extra $50 and go with Viridian’s 100% renewable one year rate at 6.49¢/kWh.
At the end of my hour traipse through different electric supplier’s websites I am still left with the question of why our municipality agreed to the contract that they did. There are cheaper options available and there are greener options as well. Heck, for a cash strapped city that is always claiming to look for more revenue, it doesn’t take much creativity to set the opt-out rate at MidAmerican’s low price of 4.54¢/kWh and then add on a surcharge of 1.06¢/kWh to bring it up to their current contract rate. The city would pocket about 3.9 million dollars!!
34,131 households * 10,908 kWh (average annual usage) * $0.0106
The precedent for adding a surcharge is already there, they currently add one and nobody has raised a fuss. A spokesperson for one energy supplier said that less than 10% of customers opt out of aggregate contracts. Most people simply don’t care.
Perhaps MidAmerican couldn’t generate enough electricity for 30,000 households. That still leaves the possibility of using Viridian’s one year fixed rate @ 5.49¢/kWh. Not only is it 50% renewable, quite an improvement over 6%, but if the same money raking strategy was employed here the city would still be able to generate over $400k in revenue.
34,131 households * 10,908 kWh (average annual usage) * $0.0011
I may be missing a piece of the puzzle, but it seems to me that there is a drastically better solution available than the one that has been presented to the public. The current 0.1¢ surcharge to manage the aggregate program is estimated to generate about $370,000. I spent a lunch break and found a better rate.