Before Frugal Boy was born, I built a changing table slash dresser to store all of his clothing. That piece of furniture has served us very well for the past three years, but with the pending arrival of another child, we need more storage space. There is a little nook in the kid’s room that looked like an opportune location to place a cubby system.
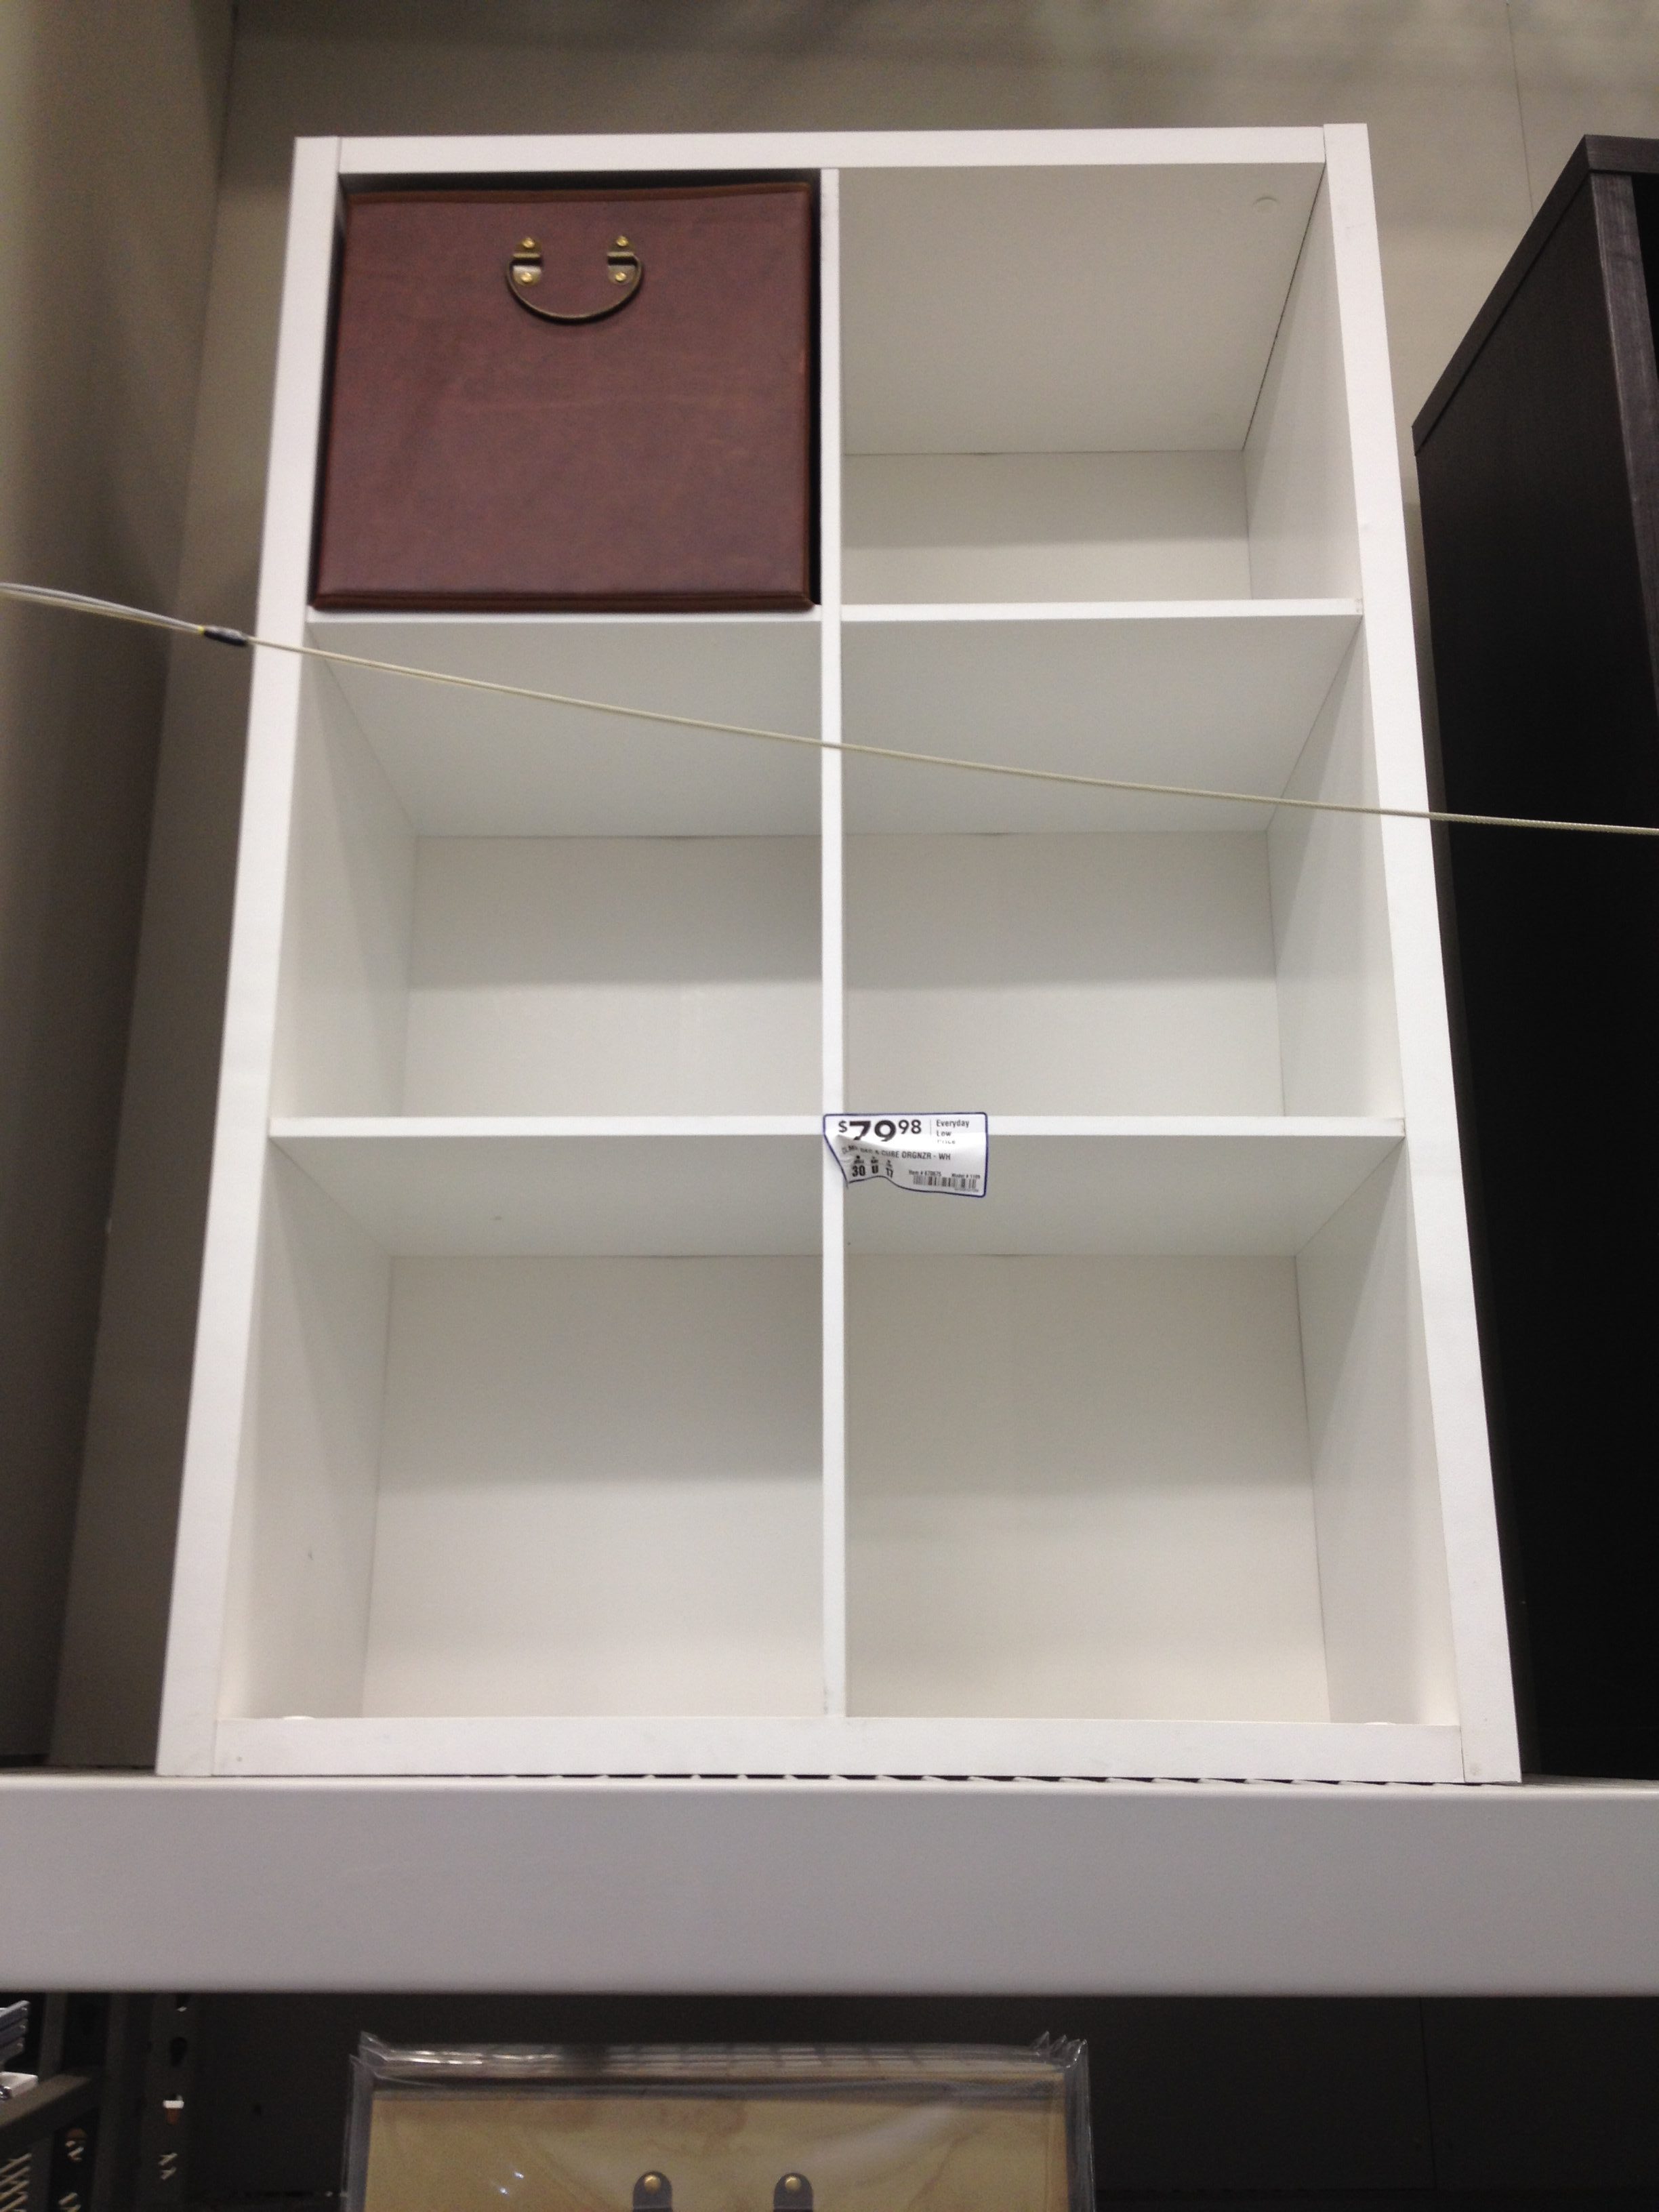
Shae and I looked around the big box home improvement stores at different storage systems, but the problem was that the dimensions were never right for the space. They were also quite pricey, to the tune of $80.
It became fairly obvious that we’d need to build something ourselves.
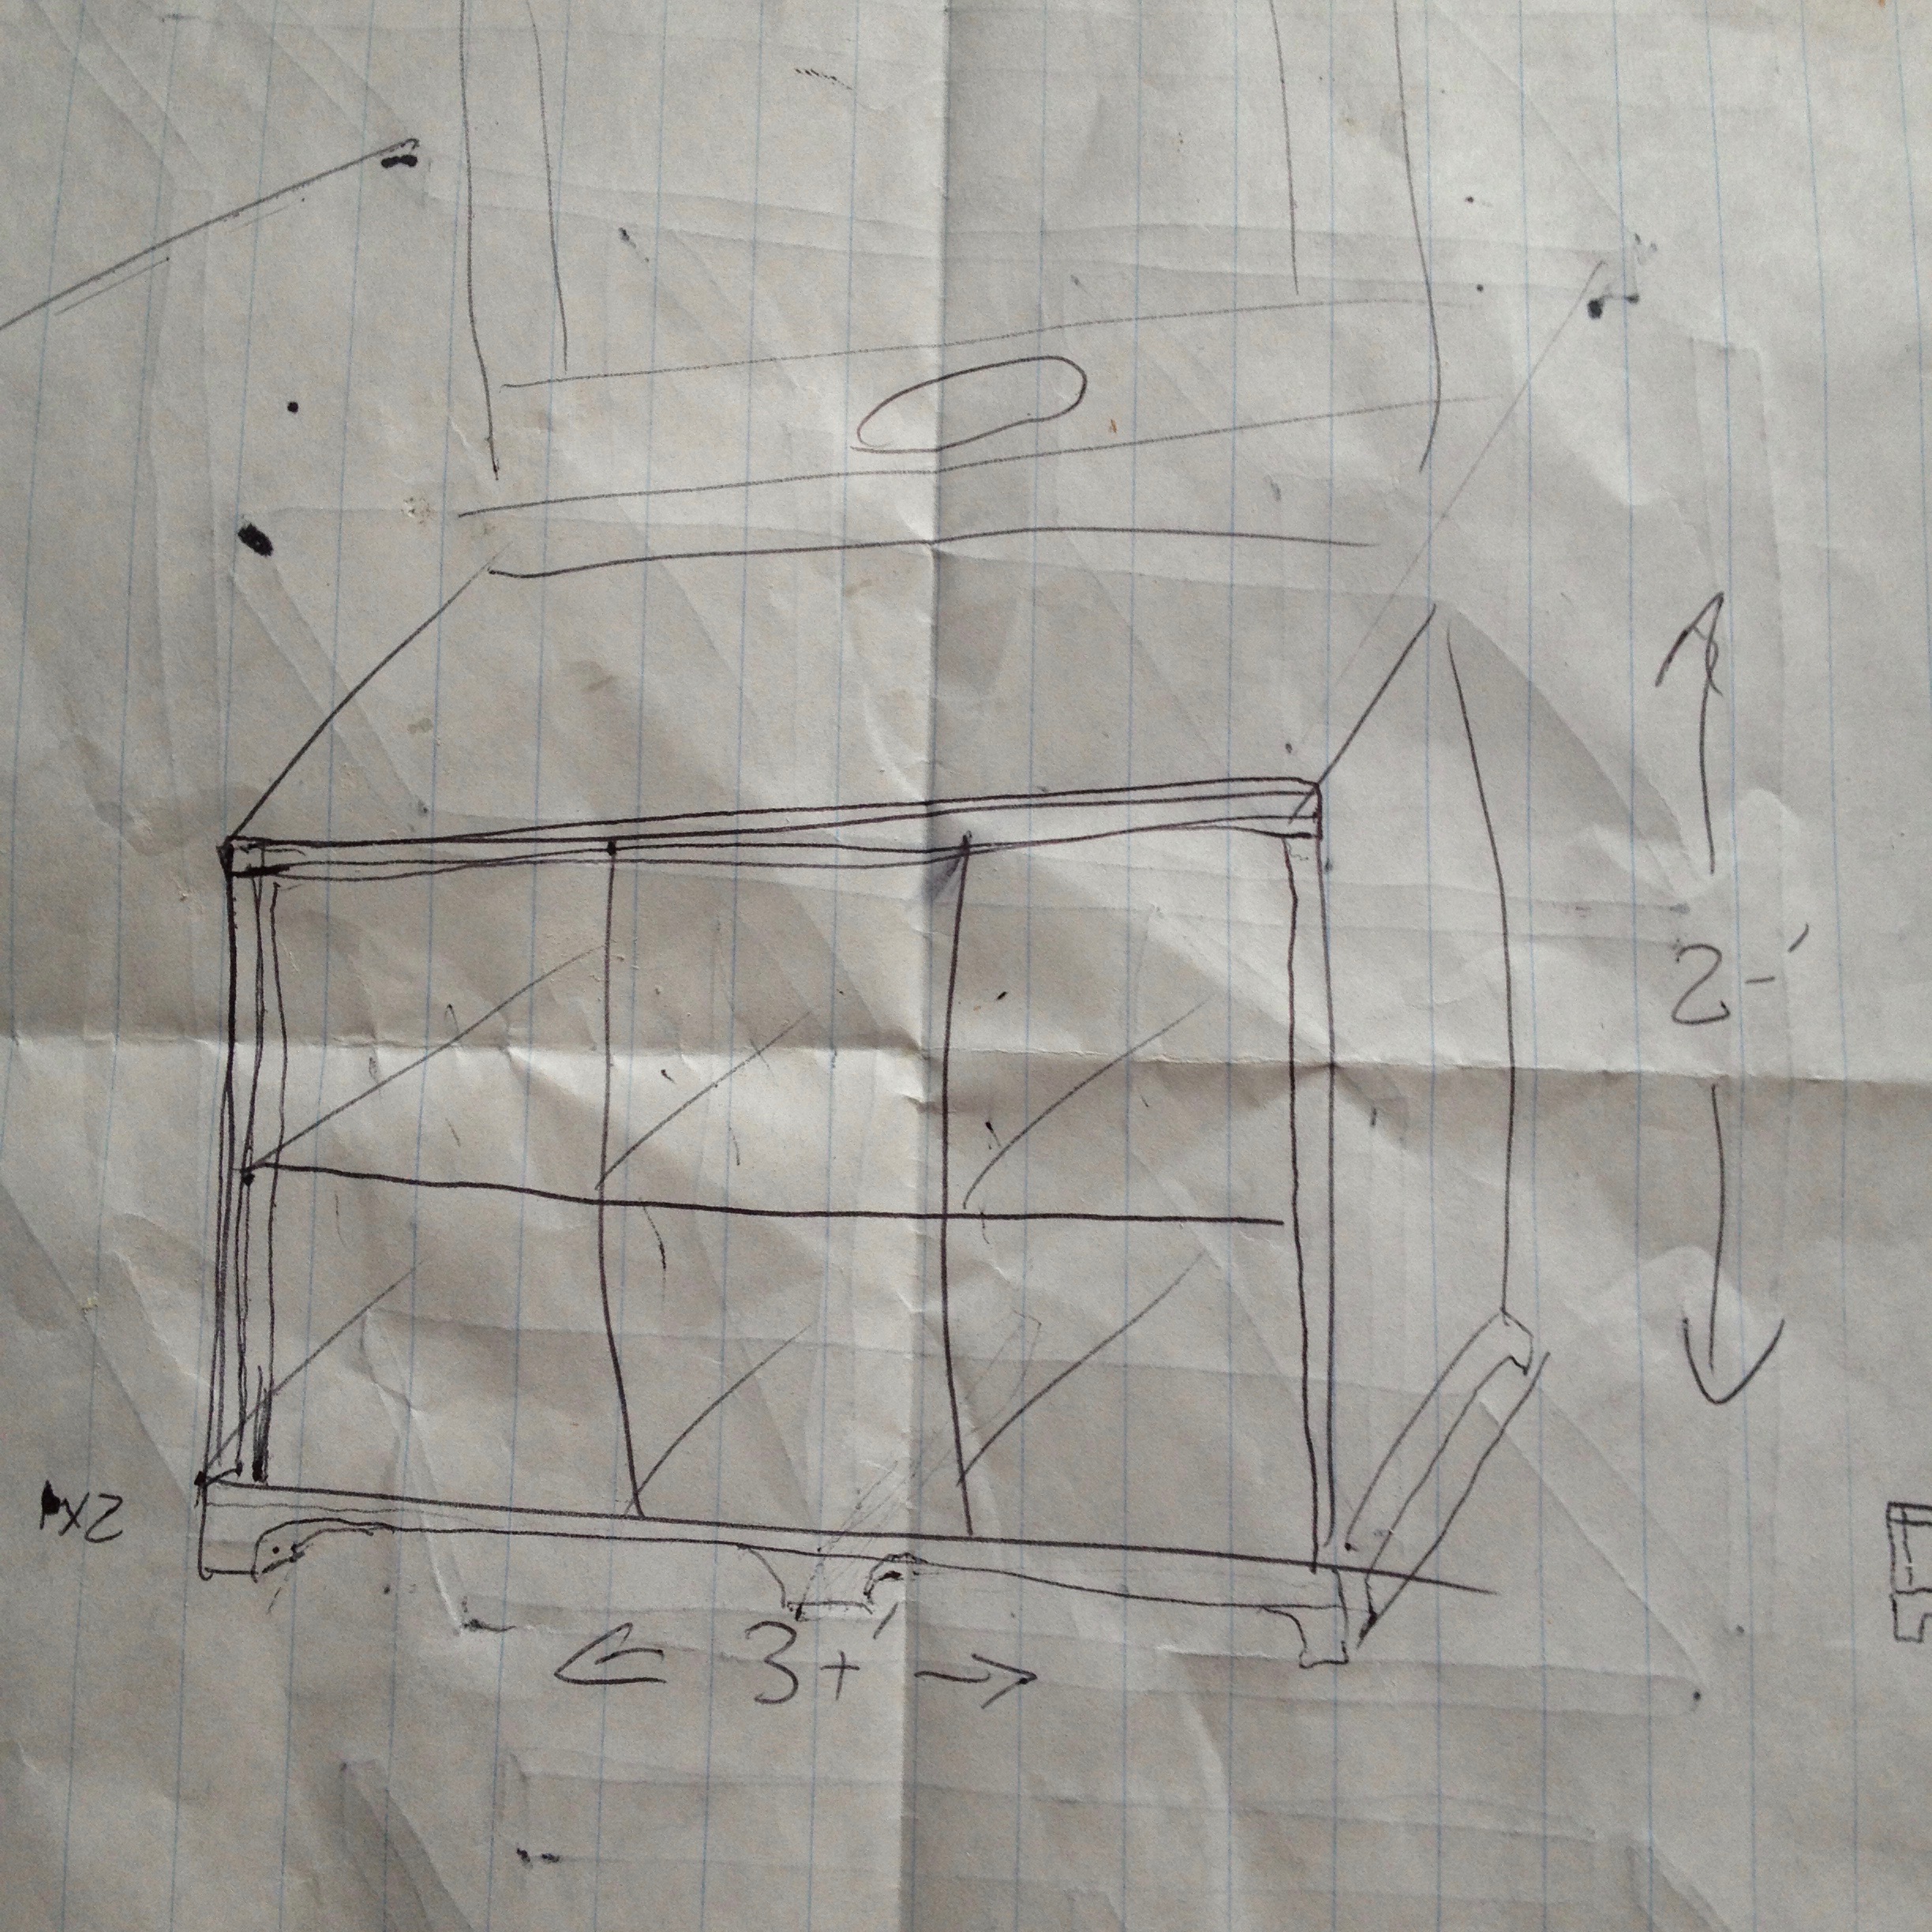
I sketched out a rough idea based off a simple height x width measurement that I made of the space.
Then, I went to Menards and picked up:
(2) 1×12-8′ #2 Quality Board
(2) 1×2-8′ Select Board
I already had:
wood glue
1 1/4 pocket screws
16 ga finish nails
1×3-4′ poplar board
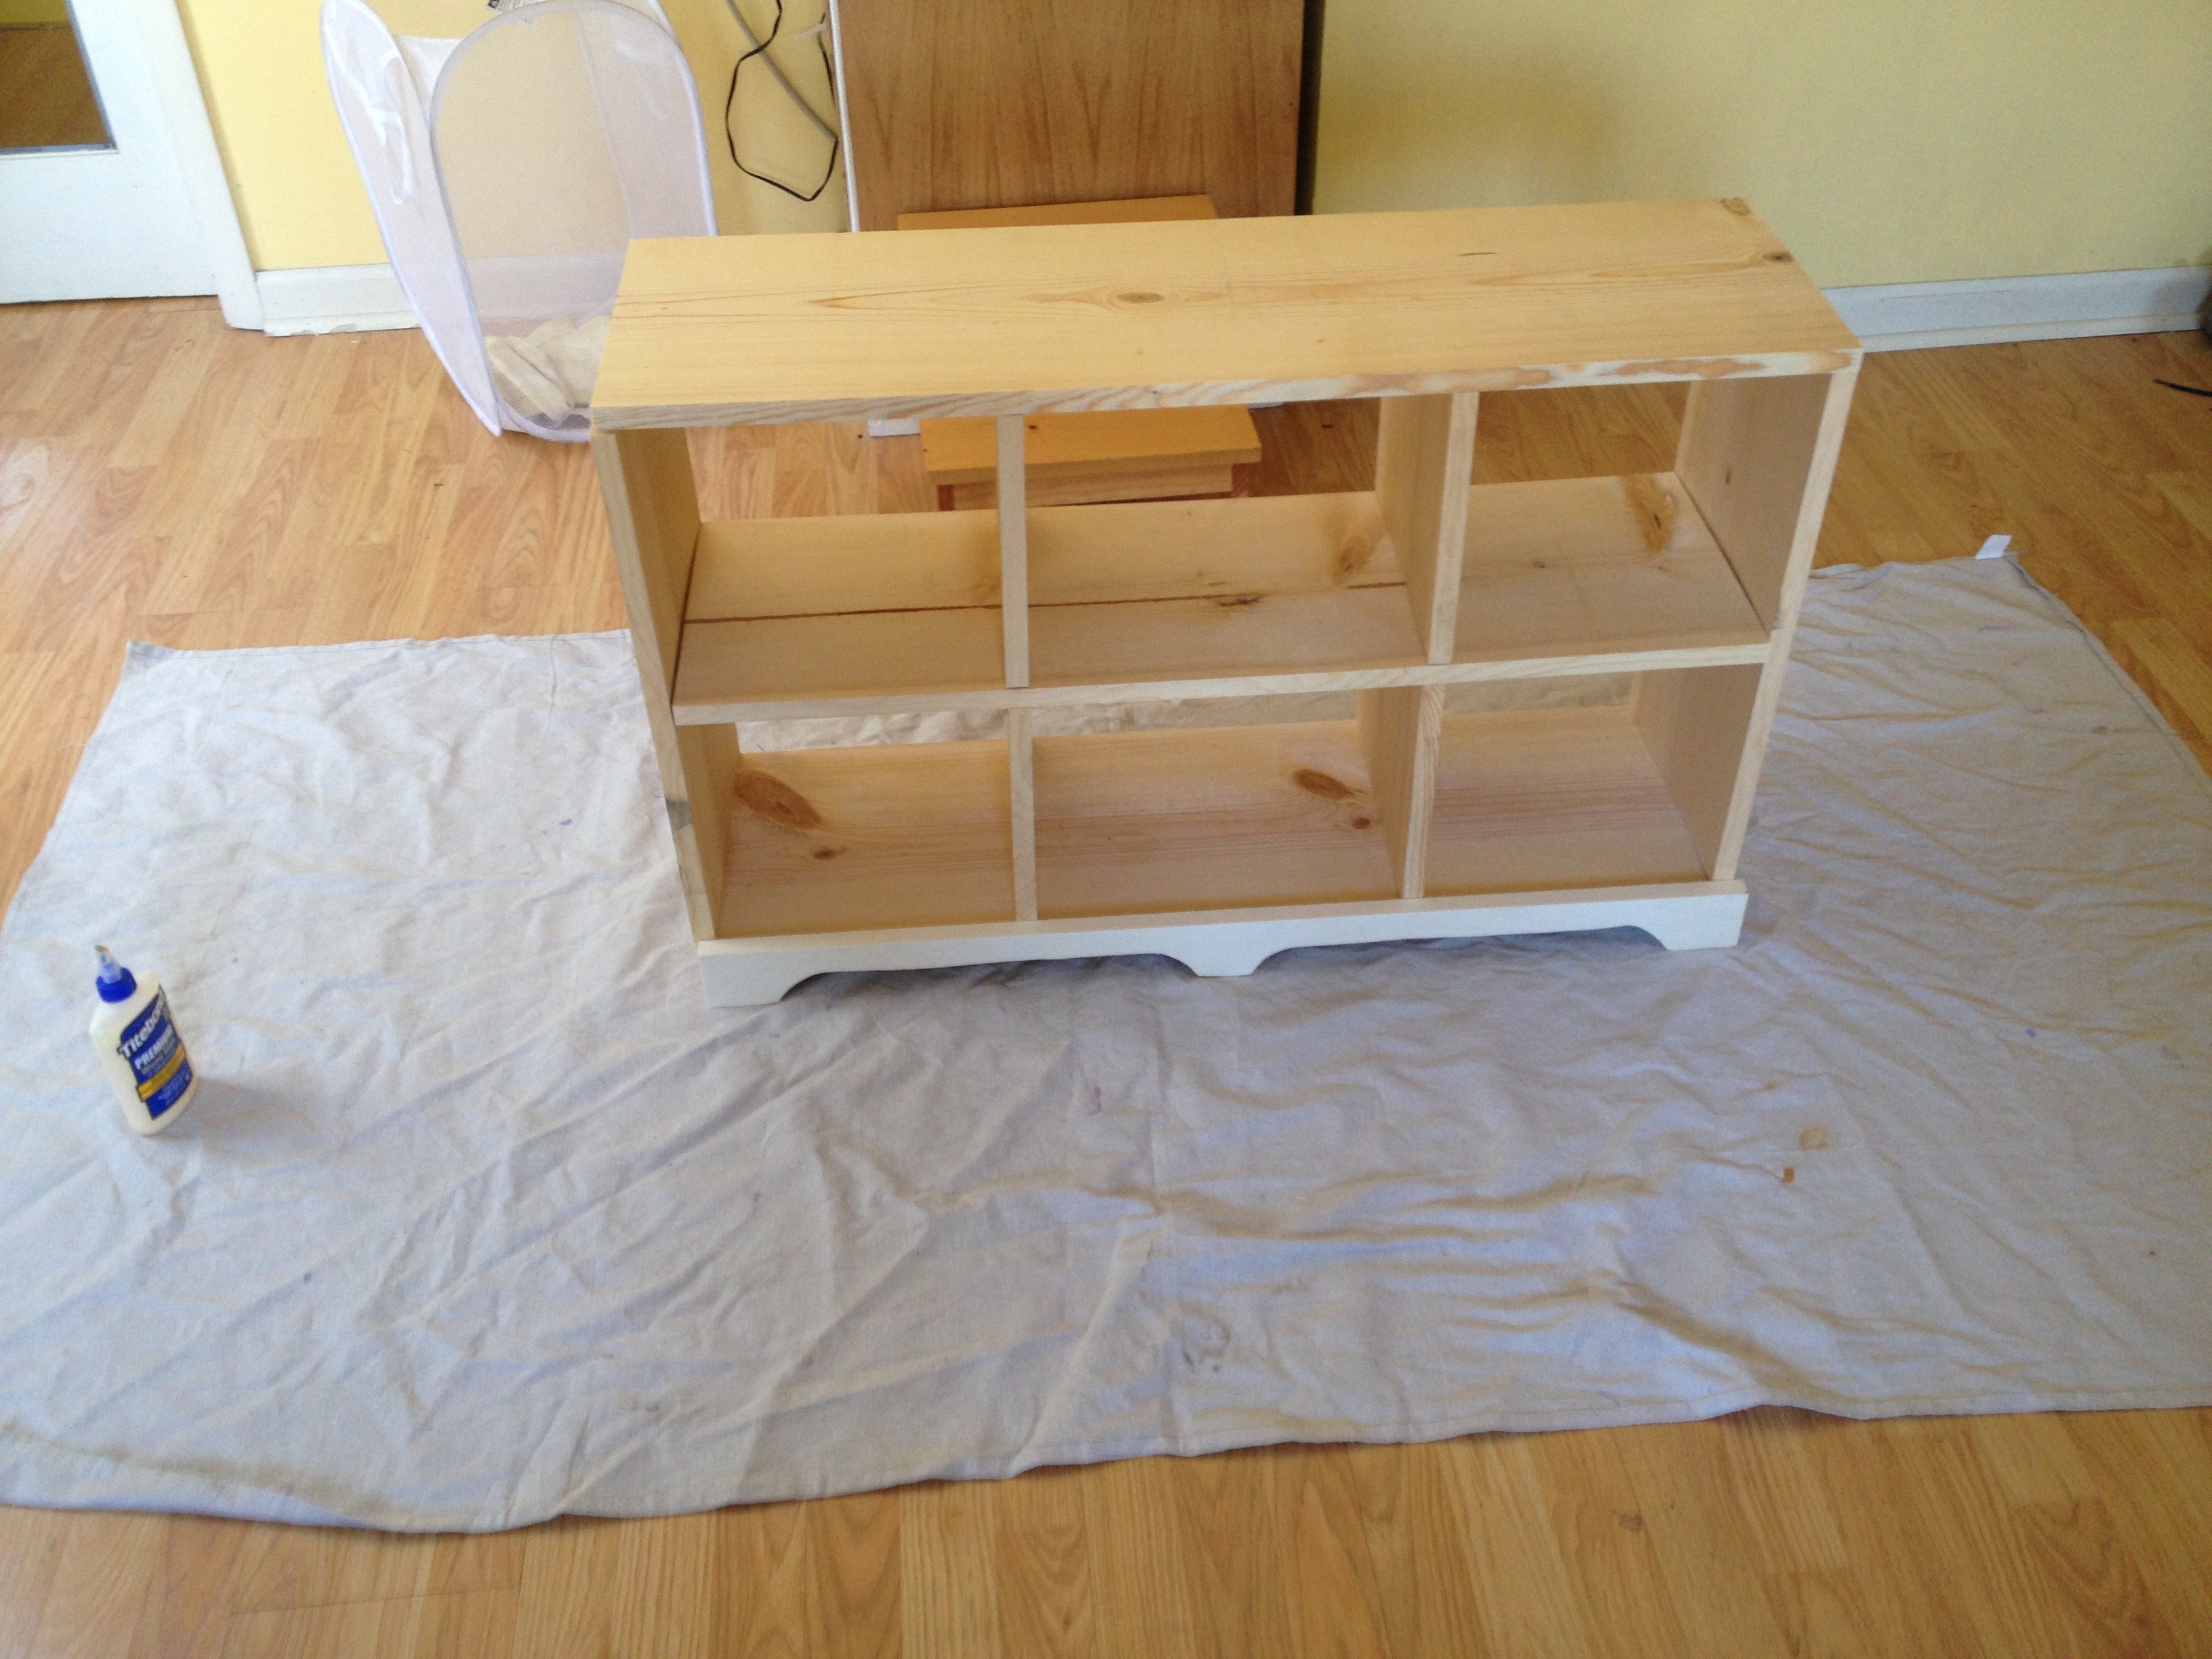
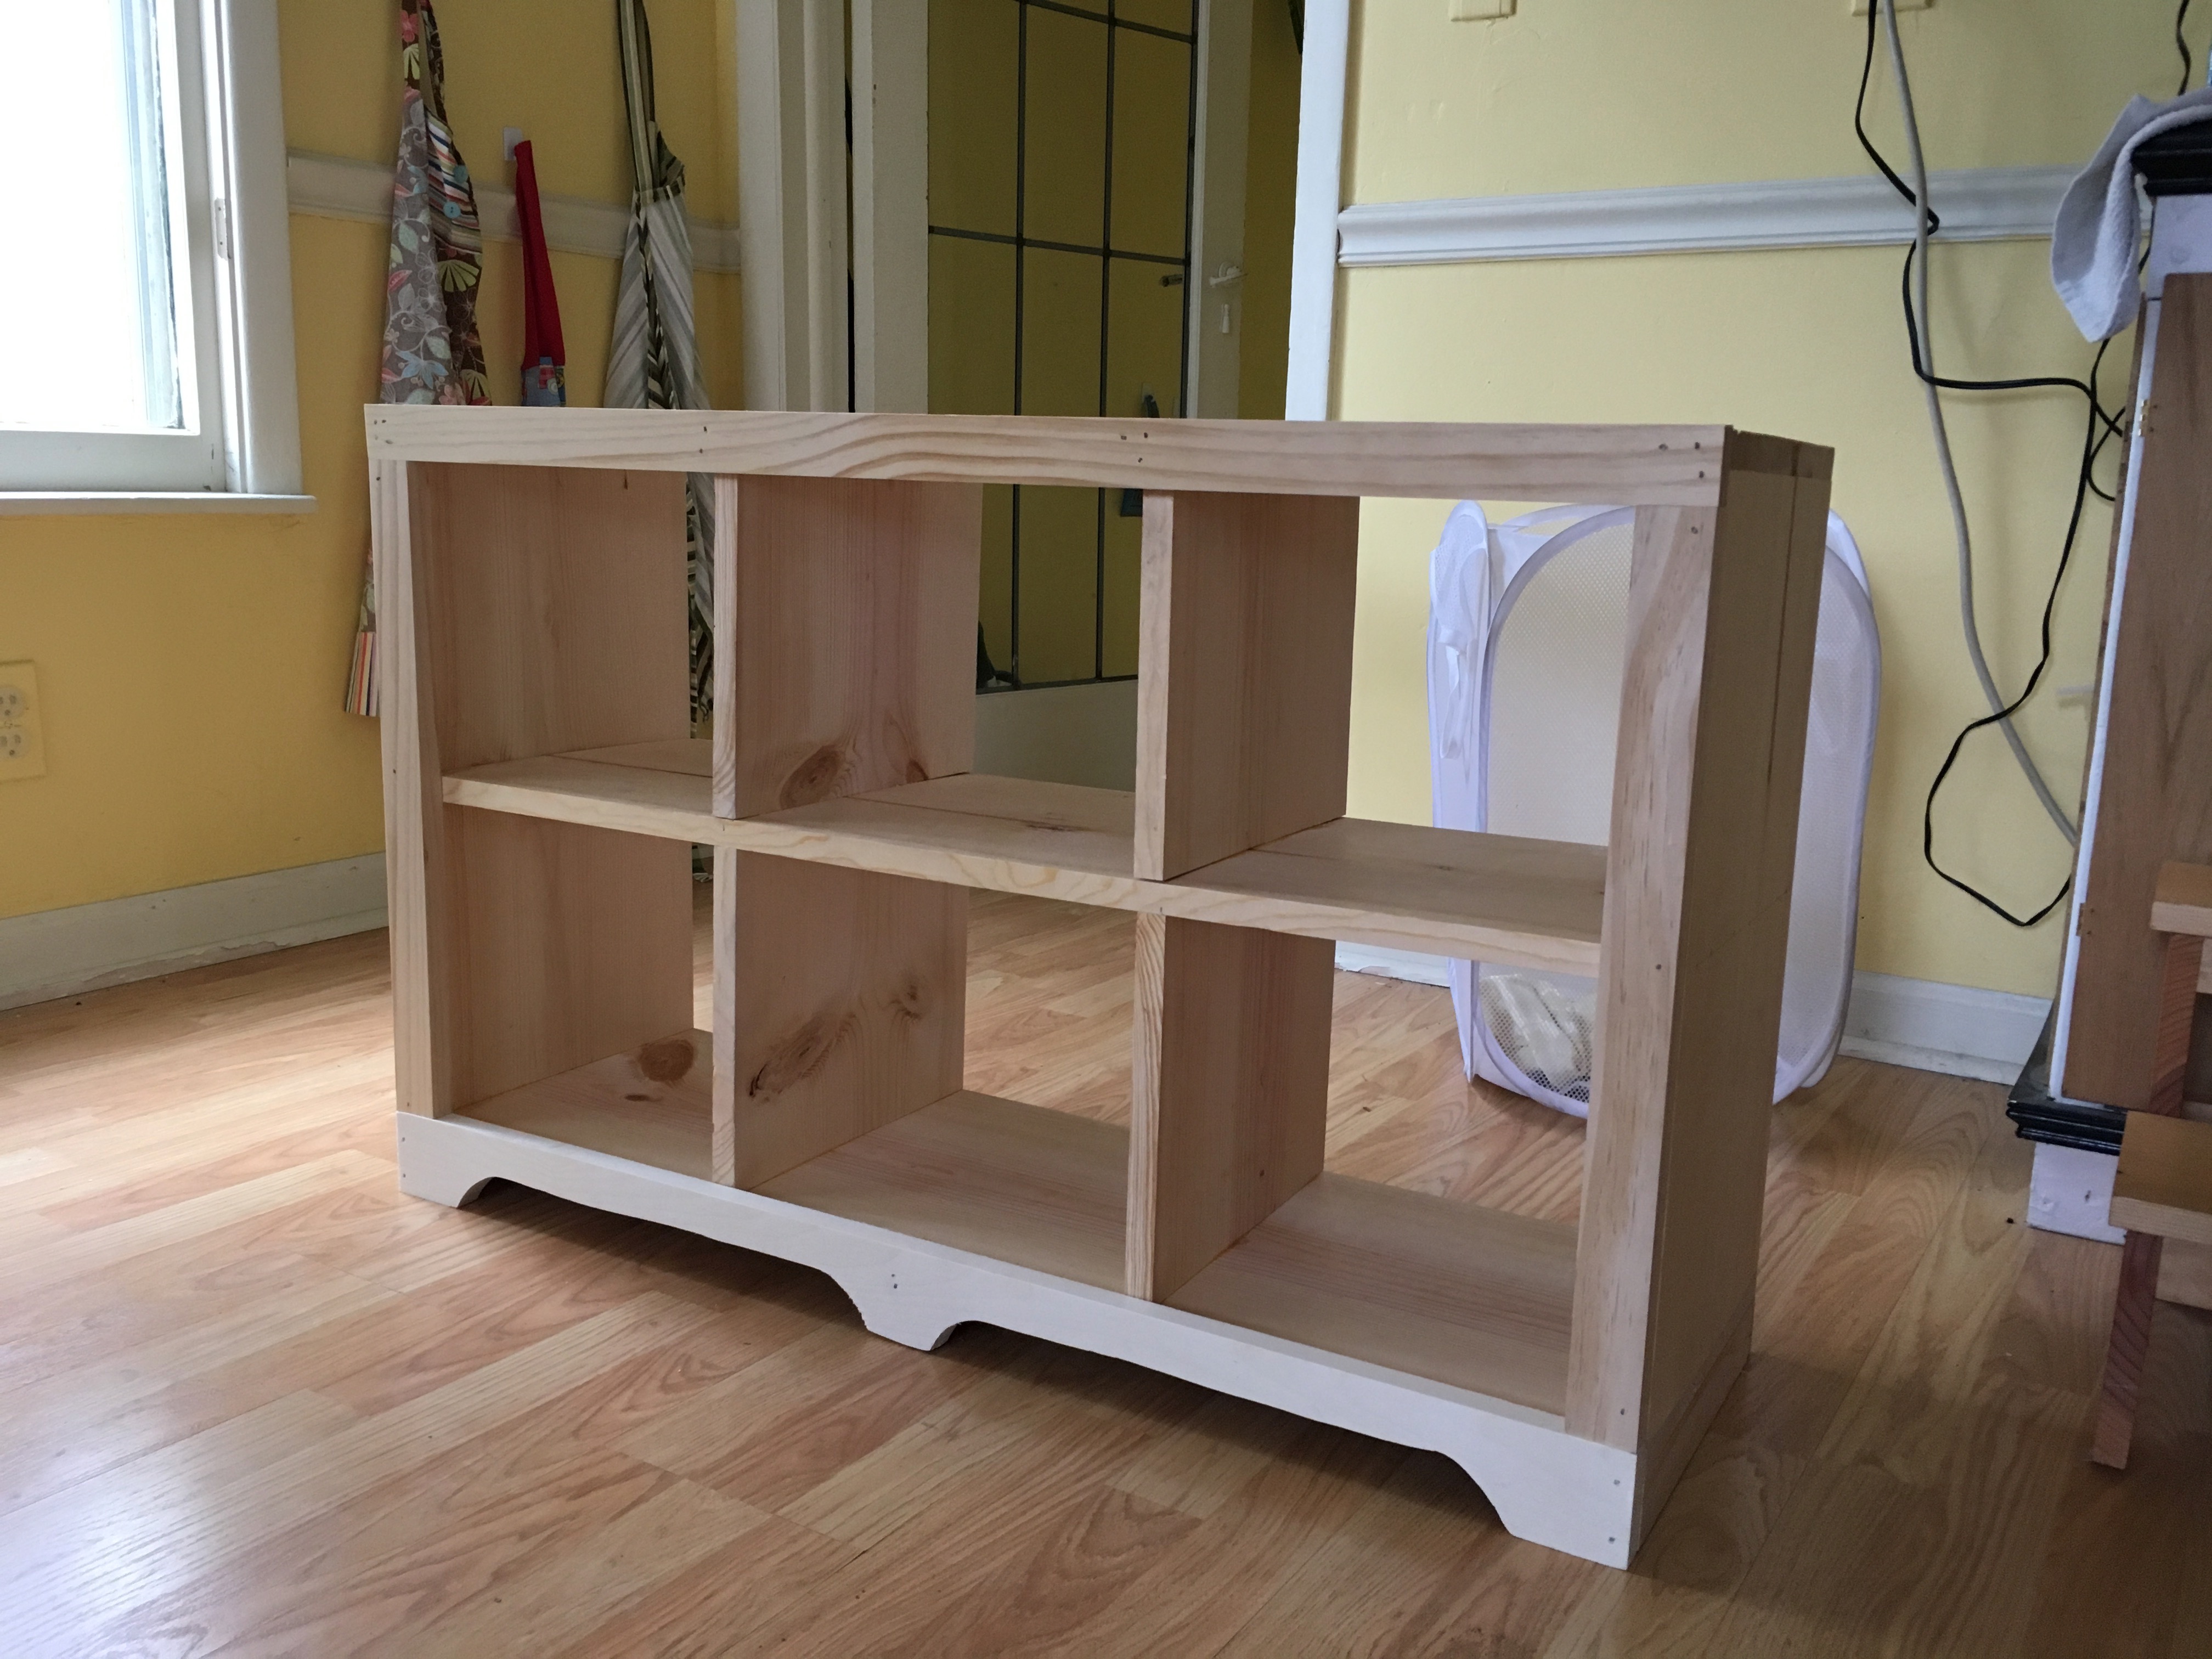
After making the cuts in the garage, I brought the pieces inside to assemble where it was warm. Here it is dry fitted (note some of the face boards are not present).
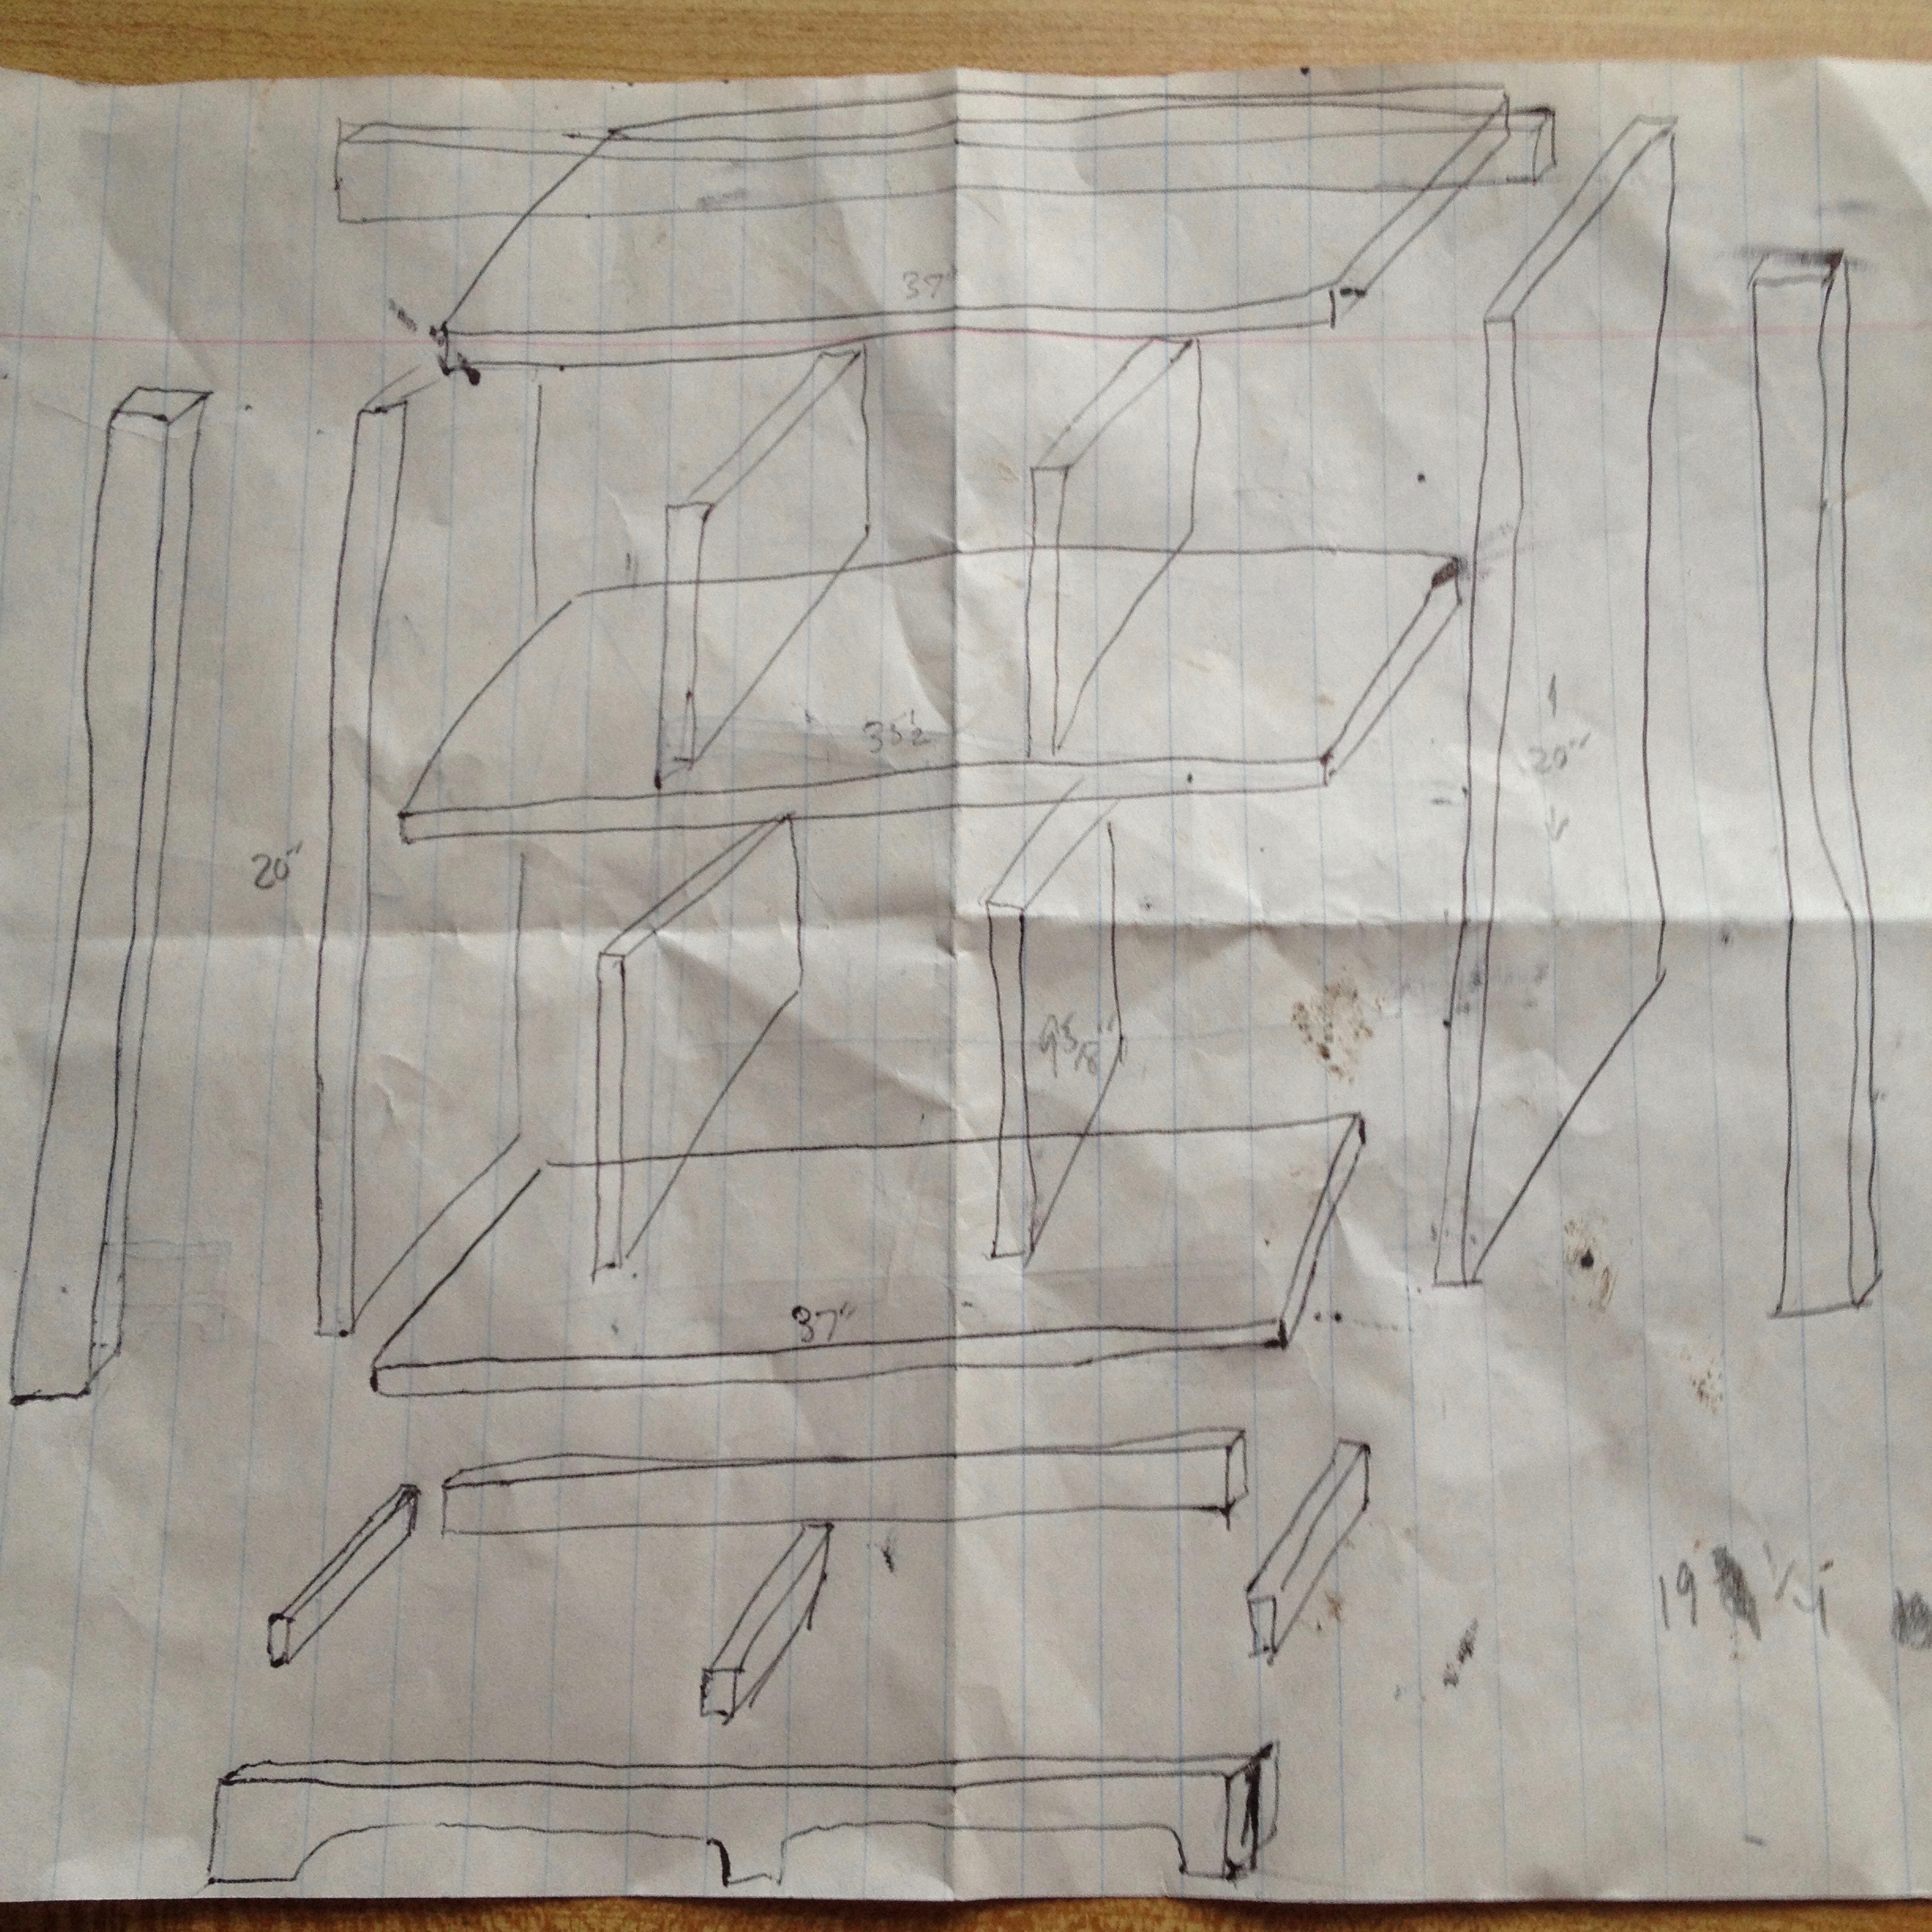
Here is the exploded view that I drew prior to making cuts.
The assembled end product.
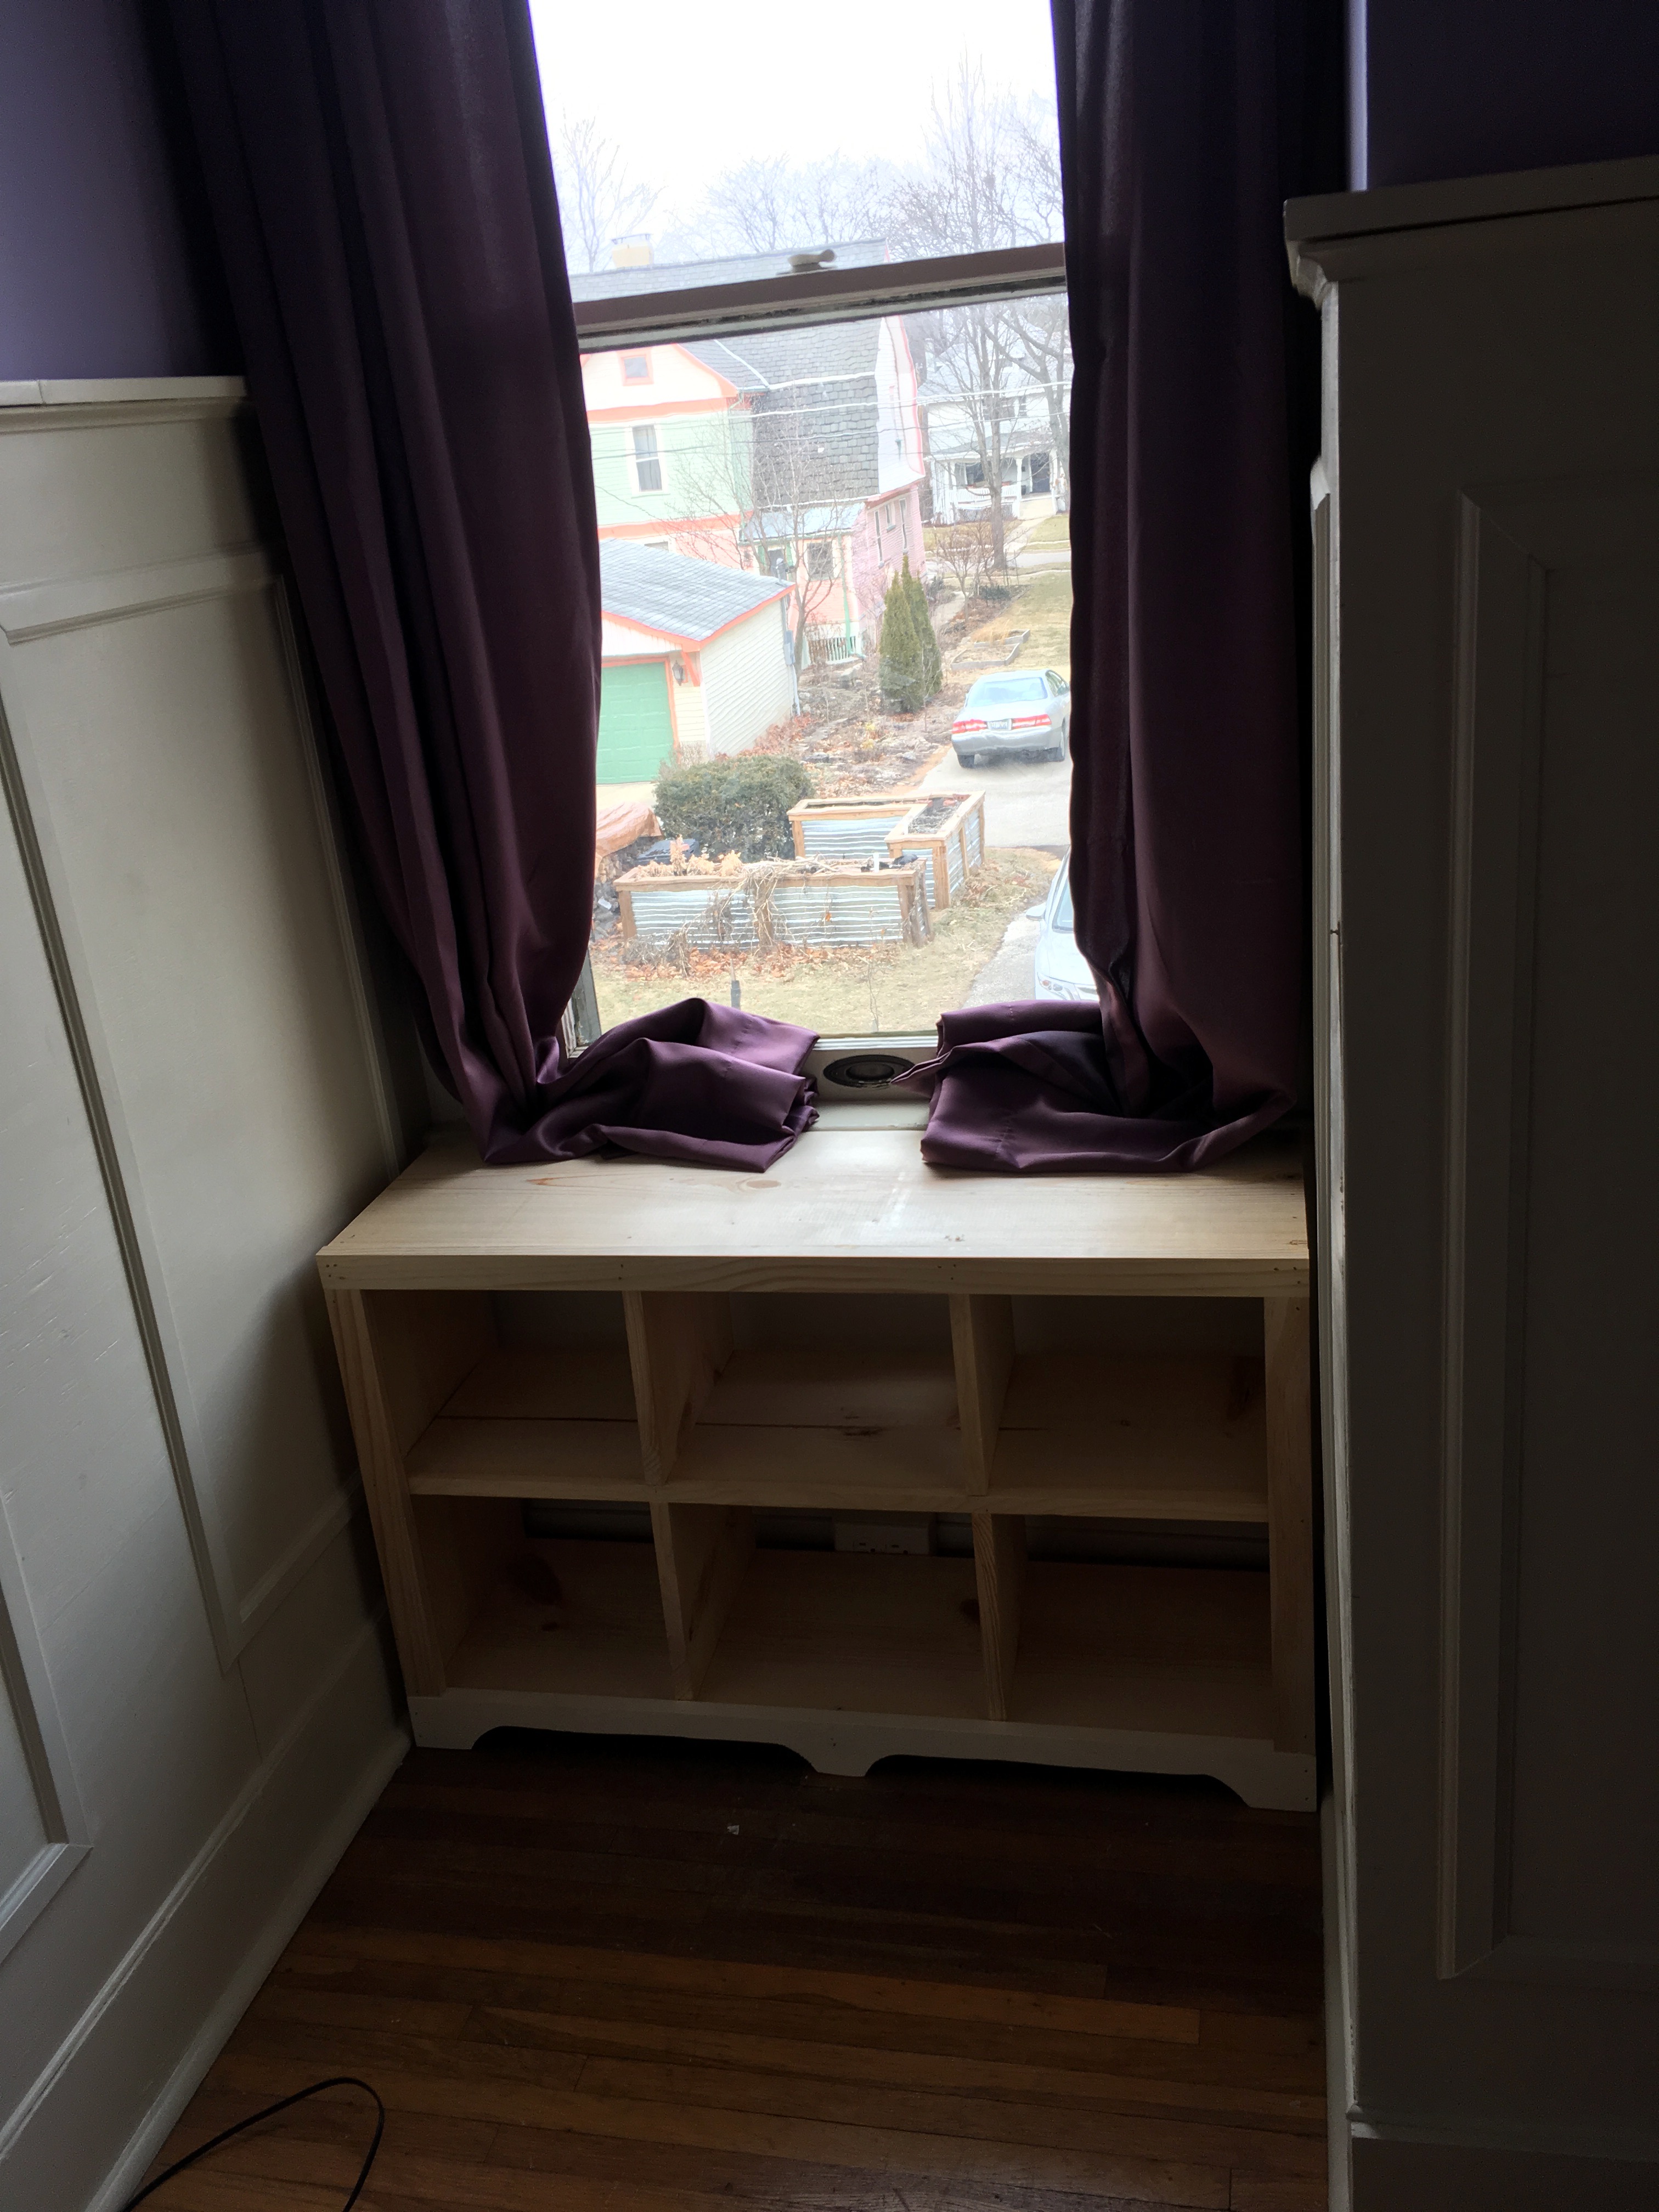
Finally, here it is in place. It looks so snug in that spot. If I get motivated I will paint it and add a seat cushion to the top.
The total cost of materials was $26 and it took me about 3 hours to put together from bringing home the material to putting it in place.
If you live in the Midwest, you probably already know about the home improvement store Menards and their fantastic 11% rebate sales. What you may not know, is that Home Depot has a double secret probation rebate match program.
https://www.homedepotrebates.com/11percentmatch/
Whenever Menards is running an 11% rebate sale, Home Depot also runs a corresponding “Rebate Match” sale. The only difference is that Home Depot does not advertise it in any way that I’ve seen.
This is the first time that I am trying to take advantage of the secret match program. Hopefully my submission results in success. I have read on various forums that Home Depot does limit this to areas where Menards exists, so if you aren’t in the Midwest you might still be screwed.
You may have heard of Moore’s law, in simple terms it was an observation made 50 years ago that computers would become twice as fast every two years. For the most part, this ‘law’ held true for the past fifty years thanks to scientific and manufacturing advances in semiconductor technology. Companies such as IBM and Intel were able to cram more transistors onto a silicon wafer by shrinking down the transistor size.
Over the past few years, Moore’s Law has been proclaimed dead or failed a dozen times by pundits. The real laws of physics seem to have caught up with transistors and they simply cannot be shrunk down any further before the electrons traveling inside start to do funny things, like teleporting. The result is a stagnation in computer CPU performance.
For example, consider the 2010 Macbook and its 2016 descendent. According to benchmark tests, the 2010 laptop scores 1536. By Moore’s Law, every two years, that score should double. You’d expect the 2016 to score 12,288, but it actually only scores 3221. So a six year difference only amounts to a doubling in CPU performance.
So why would you bother buying a brand new laptop if it is not leaps and bounds faster than a six year old machine? Well, typically because other components are leaps and bounds better. The two biggest areas are in Random Access Memory, RAM, and storage space, i.e. hard drives. Usually, both of these items are user upgradeable, so you can take that six year old machine and make it very competitive with a brand new machine.
The 2010 Macbook comes with 2 GB (gigabytes) of RAM, and a 250 GB spinning disk hard drive. For $100, you can upgrade that to 8 GB of RAM and a 250 GB solid state hard drive (SSD). A solid state hard drive is faster, lighter, and more robust than the traditional spinning platter hard drives of old. The computer will boot up faster, apps will start quicker, and the whole feel of the computer will be ‘snappier’.
Doing these upgrades on a 2010 Macbook is extremely simple. Use a philips screwdriver to undo the bottom cover screws.
You can see the blue RAM chips in the right side of the picture. The silver hard drive is in the bottom right corner.
The two RAM chips will pop right out from the motherboard. The hard drive has a couple additional screws holding it in place. Installation is the reverse.
After replacing RAM, it is generally a good idea to run a test. MemTest86 is a free piece of software that will do an exhaustive battery of tests. The setup instructions are a little technical, but once you have made up the flash drive or CD, the test itself is incredibly easy to run.
TADA! You now have a cheap laptop that is almost as good as a brand new expensive one. What a great deal for an ‘obsolete‘ machine.
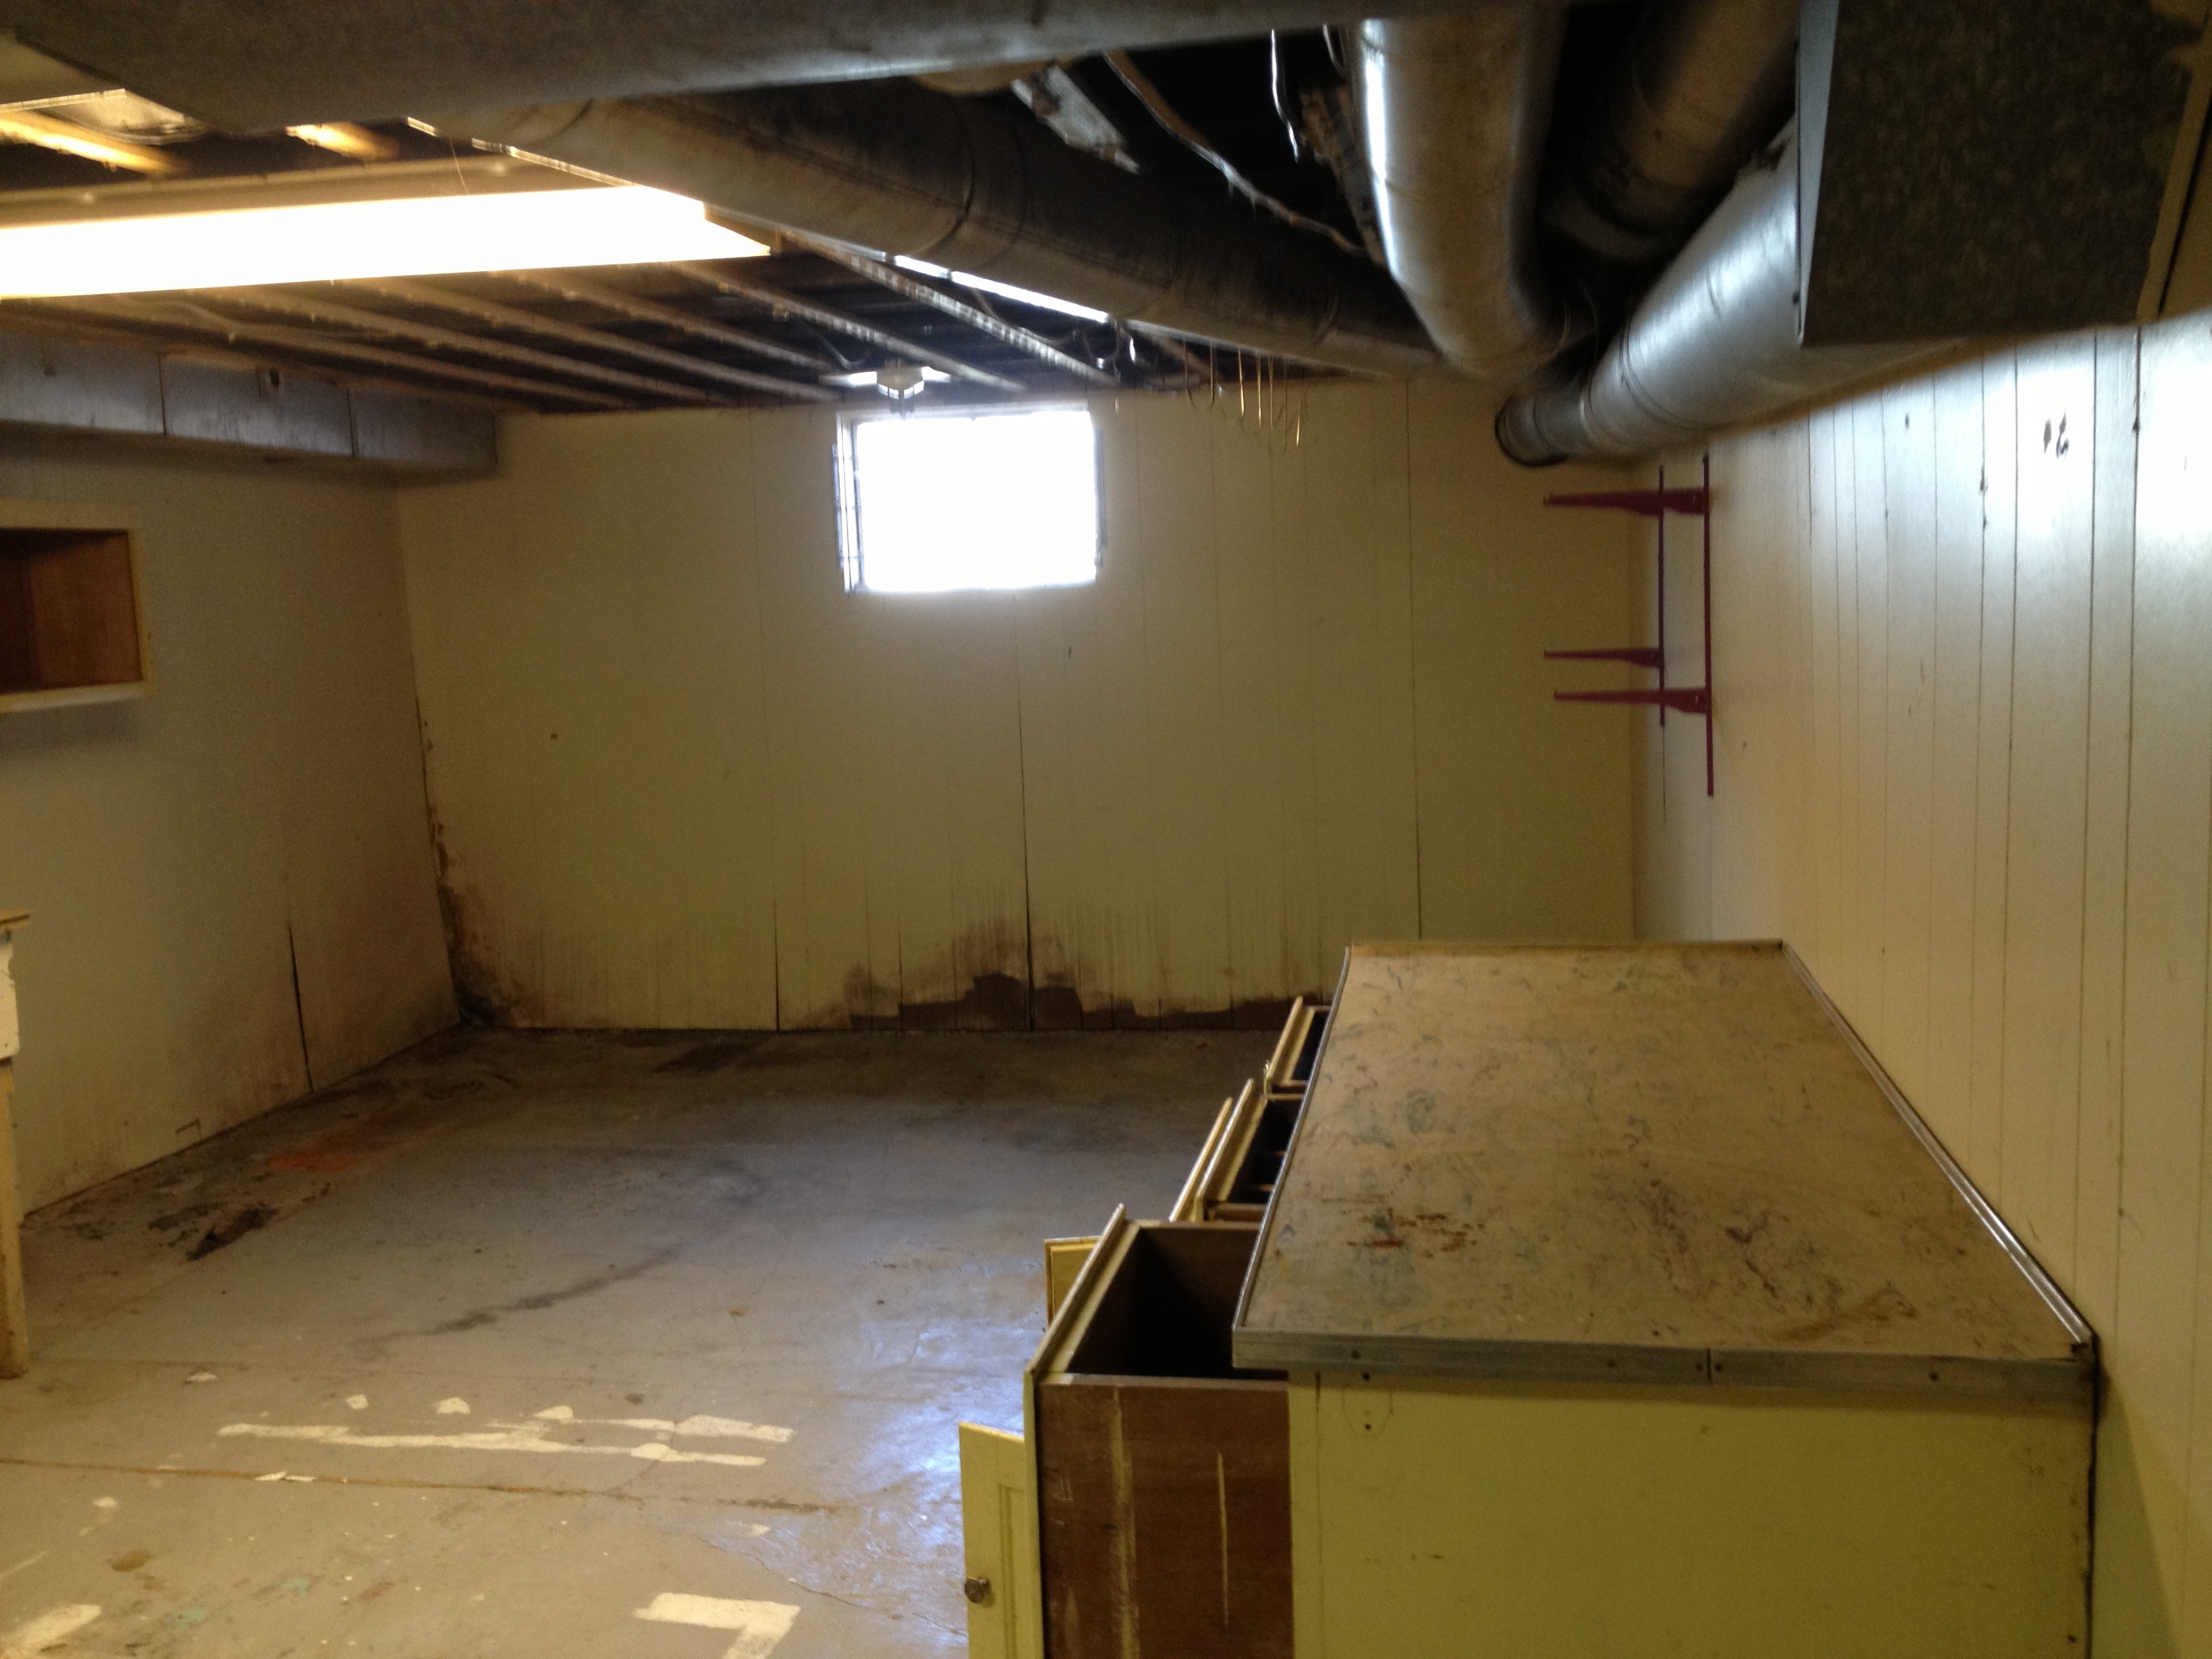
Shae, Frugal Boy, and I have been working tirelessly on redefining half of the basement into a second living room. When Shae and I toured the house almost four years ago, the space was for lack of a better word, gross.
70’s wood paneling covered the walls. Some sort of black mildew or mold was growing on the walls along the floors and corners. A finished ceiling had been half ripped out, but the furring strips remained. The singular window had bars over it. Our house isn’t in a rough neighborhood, so it seemed very out of place. The remaining windows, while visible from the outside had been covered up from the inside. There was only one electrical outlet for the entire room and that room was labeled “Play Room” on the electrical panel. Maybe at one time it was a fun play room, but it had certainly degraded past that point years ago.
Fast forward almost four years and below is a picture of the space now.
It is not finished, but it looks so much better. The best part, by combining a barge full of sweat equity and a penchant for using other people’s rejects, we didn’t break the bank doing this renovation.
In previous years we tore down paneling, repaired/replaced windows, and repointed the brick mortar. That gave us a clean slate to start rebuilding the room. The first item of business was insulation.
We used reclaimed polyiso rigid board insulation sheets that had been removed from a commercial building roof.
2″ thick 4×8 polyiso boards such as these normally retail for around $30 a sheet. I was able to pick them up second hand for $14/ea. That is a $16/sheet difference. Multiply $16 by the 12 sheets that we used to insulate and you end up with a cost savings of $192.
The next big cost savings we scored was by using factory seconds porcelain tile. One of the big current trends/fads in floor tile right now is large format, wood-like, porcelain tile. This tile often comes in 8×36″ or 8×48″ and features an ink jet printed surface that looks like real wood grain because it comes from pictures of real wood grain.
This type of tile normally runs around $4/sqft at big box stores. You may be able to find a sale and get it for less. We bought 336 square feet of factory seconds tile at $1.30/sqft for a total of $437. Buying the same thing from a big box store would have cost us $1344. By taking factory rejects, we saved a whopping $907.
While laying the tile floor was hard work, it only took about a week to get it all done working nights and weekends. Looking around the internet, pegs porcelain tile labor costs at around $5/sqft. That is another $1680 saved by rolling up our sleeves and taking a couple of ibuprofen before bed.
Sometimes the savings are smaller. For instance, I bought a snap tile cutter for $20 at Lowes to install this floor. Our neighbor was throwing out an old cutter and offered it to us for free. It worked ‘well enough’ to get our job done. We saved $20 by using an older, less-than-perfect tool.
I rejected the notion of buying a projector mount and opted to make my own instead. $10 in hardware was adequate to mount our slickdeals.net projector deal to the ceiling.
We saved $5 on the DIY mount and $80 on the projector.
Getting furniture into the room is very difficult because of the narrow stairwell. We barely fit the water heater down four years ago.
We finally found an interesting deal on a futon through Craigslist.
For $180 we picked up a brand new, in the box futon that normally retails for $290 + $24 in tax. The craigslist seller was running an interesting side business of buying RETURN lots at auctions and then reselling them.
The general gist of the business is that people buy furniture at Walmart or other retailers, get it home, open it up, and realize that it is broken, the wrong color, or just not what they wanted. They return it to the store where they bought it from, but the store doesn’t want it. The instruction booklet even has a big STOP printed on the front telling customers NOT to return it to the store. Instead, unhappy customers should call the manufacturer, often DHP or Ameriwood. So the store is left with a box that they cannot readily resell. They load it up on the next outgoing truck and it ends up at a processing center. All these rejected returns are then bundled up into a lot and sold off at pennies for the dollar at auction.
A middle man can then buy these rejects and sell them in their own store or eBay or craigslist. A thrifty shopper like myself would buy it, realize that a part is damaged and then get a replacement part for free from the manufacturer.
The craigslist reseller gave us two options. She could request the replacement part, or we could do it ourselves and she’d knock off $20 from the price. We chose to do it ourselves. The process could not have been simpler, and it was FREE.
Not only is our new sofa well traveled like us, but we also saved $134 by following simple replacement instructions.
We bought a media cabinet as well from the same craigslist reseller. It had no damage.
We paid $50 for it when it retails for $74+tax. $30 saved.
You think that would be the end of the post, but wait, there’s more!
We saved $20 by buying a refurbished 4th generation Apple Tv.
It streams content just as well as a brand new one.
For those of you keeping score at home, the total savings of buying rejected second hand material for this project and doing the tough tiling work ourselves comes out to a humongous savings of $3068. That doesn’t even take into account all of the other sweat equity that we put into the room including, demolition, framing, electrical, drywall, painting, and trim. Taking some time to shop around and look at alternative sources can really pay off. You don’t always have to buy things brand new or from traditional retailers. There are a lot of little resellers that can often cut you a much better deal on the same material.
I gave Shae a new Fitbit Charge HR for Christmas last year. By this summer,the band was already starting to delaminate. She wrote to their customer support asking how to fix it, and their response was, “throw the old one away, here is a brand new replacement”. It seemed like a waste to throw away a mostly working product, so I started using the old delaminating product. Over the next several months, the band delaminated more and more until one day it completely fell off.
I didn’t have much to lose, so I found some old super glue gel I had laying around the junk drawer and proceeded to clean off the fitbit module surface and band surface as best as I could. Then I carefully applied a bead of super glue to the module, refit the band to it, and left it to cure for a couple of hours. Later that day, the fitbit was fixed. I have been using it for about two weeks now and there are no signs of bubbling or peeling. I am not sure if this factory adhesive failure was isolated to this unit or if it affected a larger batch of production. The fix is incredibly easy however.