• About Me
  • Contact Me

Frugal Living

Indulging in life, financially responsible

Author: Andrew

The Original Happy Meal

August 7, 2014 by Andrew Leave a Comment

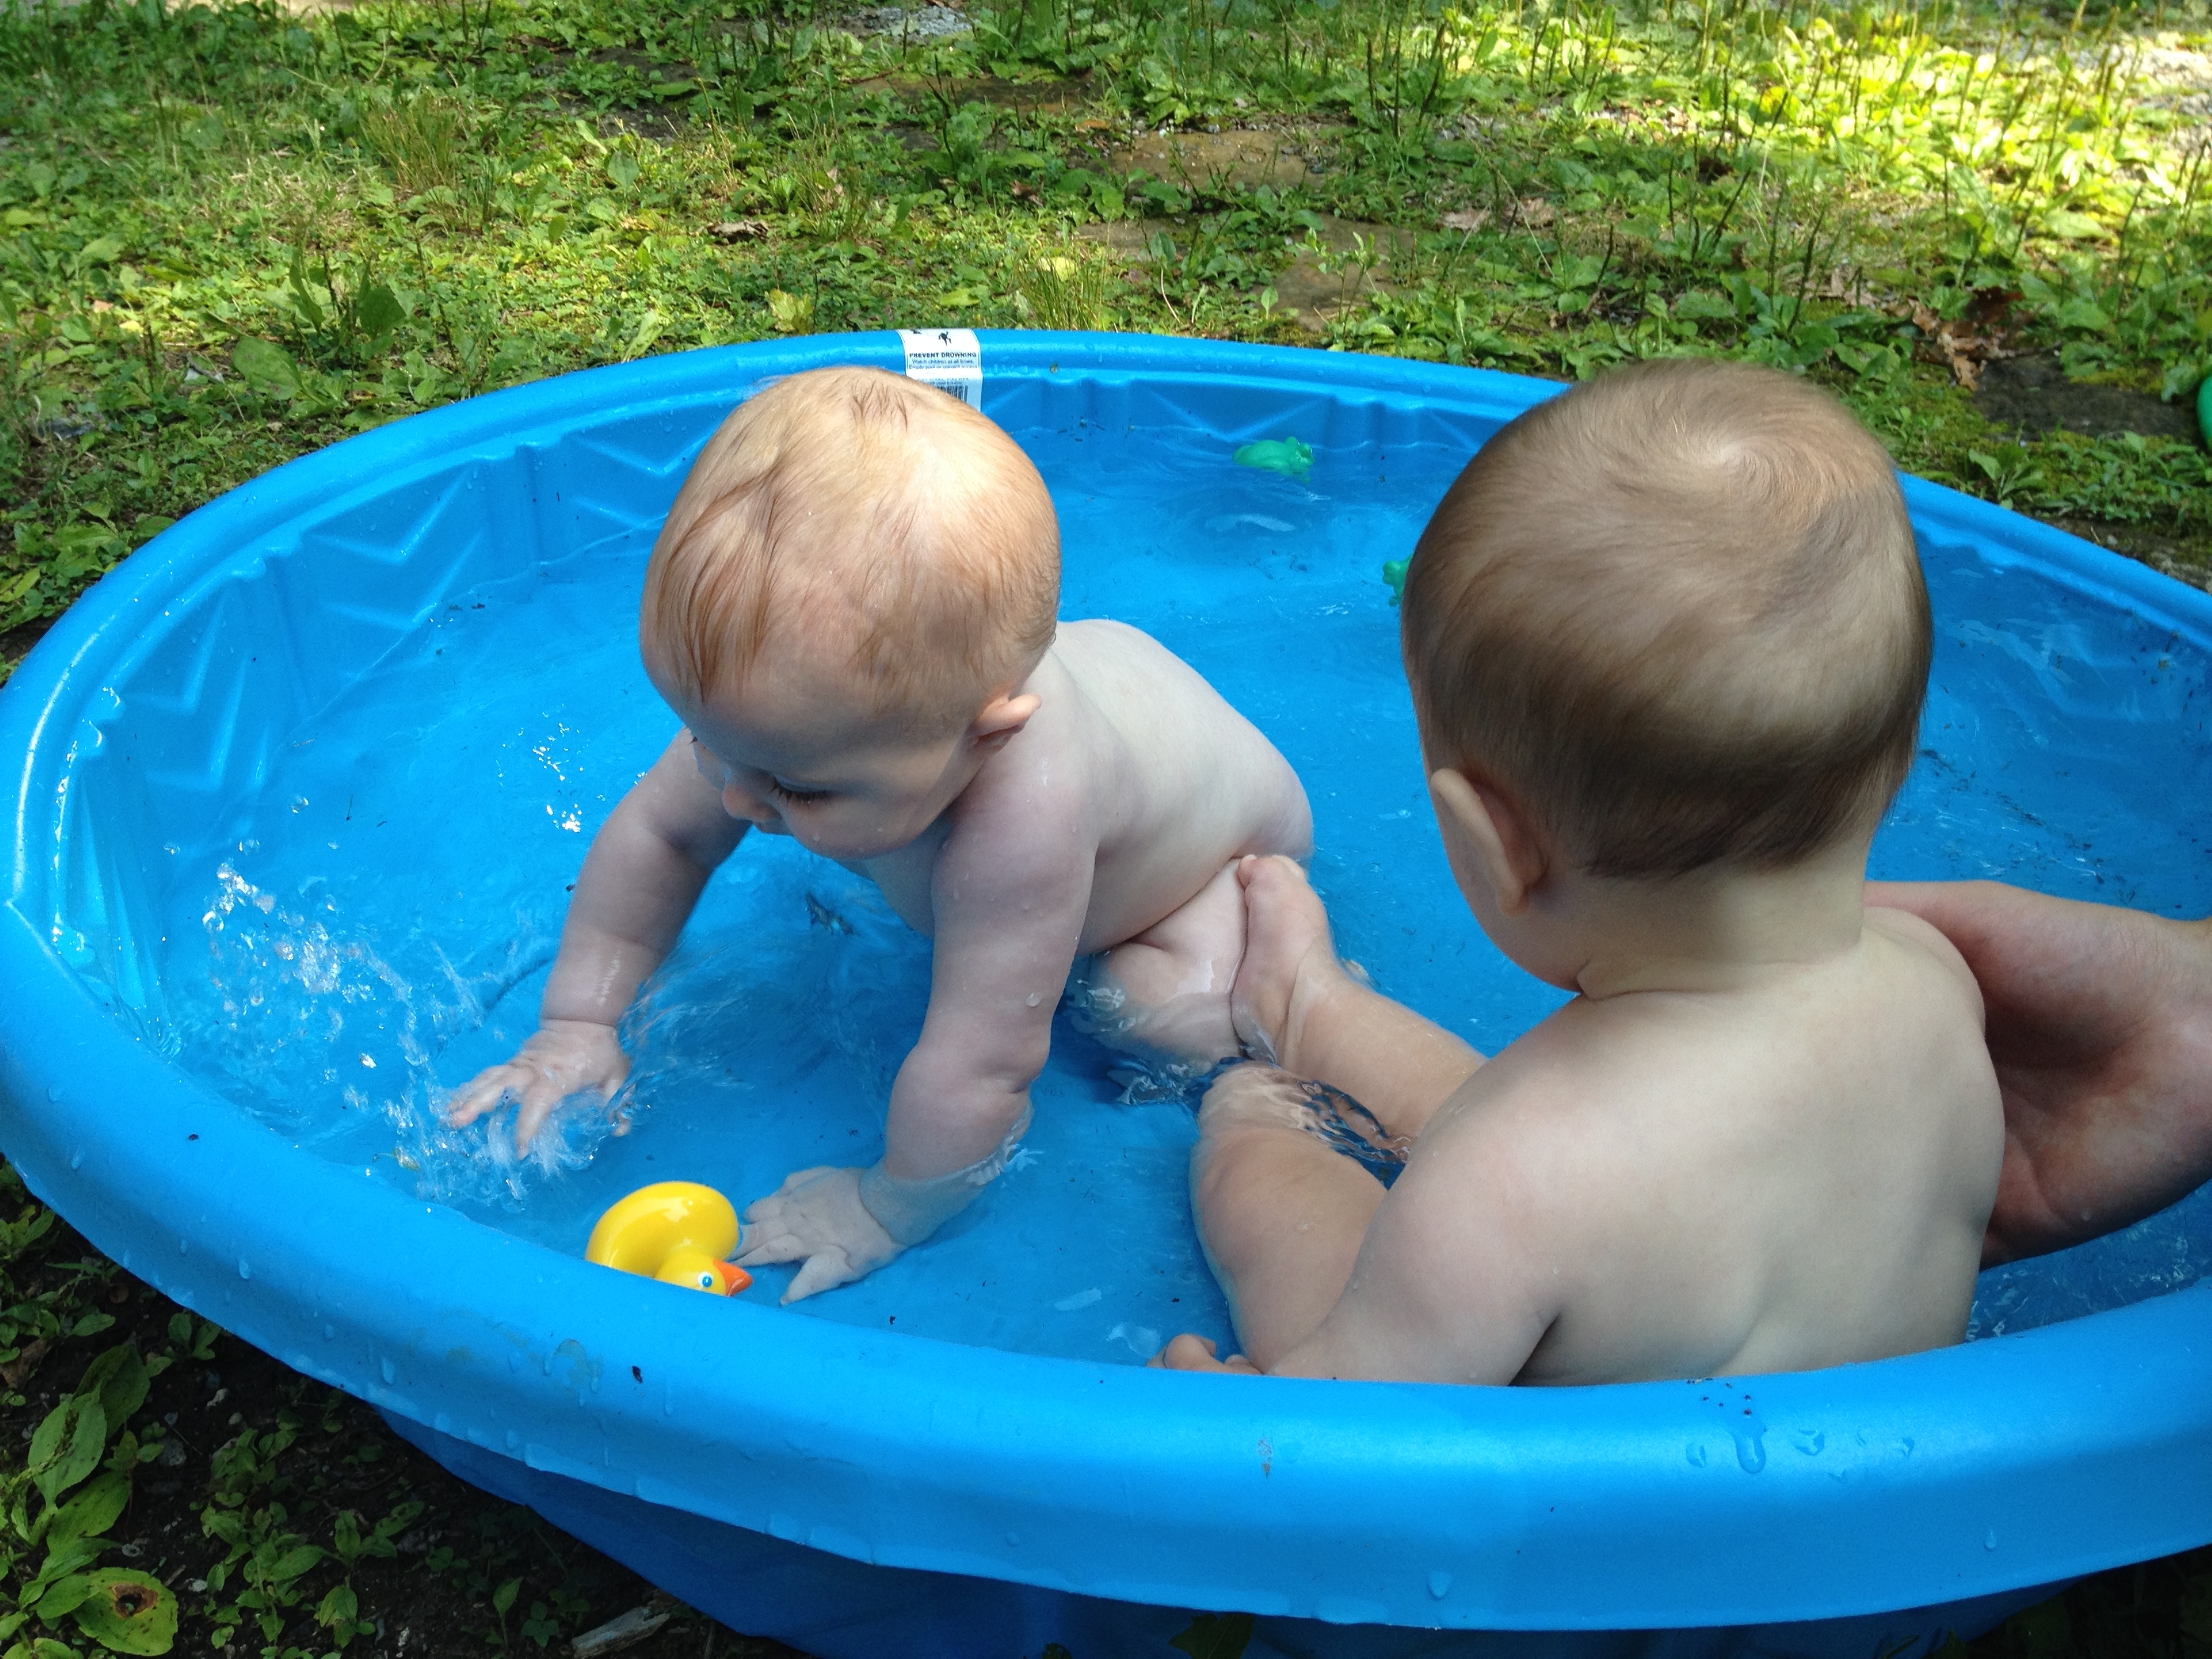
August is National Breastfeeding month and we have our own little duo that is happily participating.

IMG_4148

The American Academy of Pediatrics, or AAP, recommends exclusively breastfeeding for the first 6 months and then continuing to breastfeed with the possibility of supplemental foods until 12 months of age.

According to the CDC’s 2014 report card, the average number of American babies that are breastfed at any point in their lives is 79.2%.  By 6 months of age, the likelihood that a baby is being put to the breast at any time of the day reduces down to 49.4%.  At 6 months the number of exclusively breastfed babies, those that eat nothing but breast milk, is a little less than one out of five (18.8%).

Clearly there is a bit of a gap between the AAP recommendation of 100% for EBF, exclusively breast fed, and the actual reported number of 18.8% and that in my mind is the point of having a breastfeeding month.  Formula companies have an advertising budget and can run tv spots, boobs can’t.  So consider this post our advertisement for the original happy meal.

For starters, it helps to move past some of America’s prudishness.  Boobs, boobs, boobs, boobs, boobs!!!  There, I said it.  Women have them for two reasons.  1.) to signal that they can bear and raise children, and 2.) to feed the children that they bear.  Thankfully my wife has no such prudishness and will happily feed our son when he is hungry despite where we may be.  Take this park bench for example!

IMG_3296

Or how about the backseat of a car (don’t worry, it was parked)

IMG_3332

Hike or no hike, it doesn’t matter.

IMG_3387

What about when moms not around?  Here is our stash of pumped milk before Shae’s maternity leave ended.

IMG_3574

Three months later and that supply has been all used up so now we are toeing a fine line of pumping supply and demand.  Frugal Boy hasn’t quite reached 6 months yet, so the chances that we will start giving one or two feedings a day of formula are creeping up.  Will we make it into that elite club of 1/5 that EBF to the recommended age of 6 months?  Not likely, but we got pretty close.

Even partial breastfeeding confers a myriad of benefits including enhanced brain development and decreased sickliness.  It was very tempting to throw in the towel at the hospital when Frugal Boy was hungry and the milk supply hadn’t kicked in yet.  Another period of difficulty was when maternity leave ended and we had to transition to bottle feeding breast milk.  In my opinion those are probably the two biggest traps that grab 4/5 moms.

Now that Frugal Boy is closing in on 6 months and has his first tooth, we have experimented a bit with solids.  Here he is having baby oatmeal for the first time.
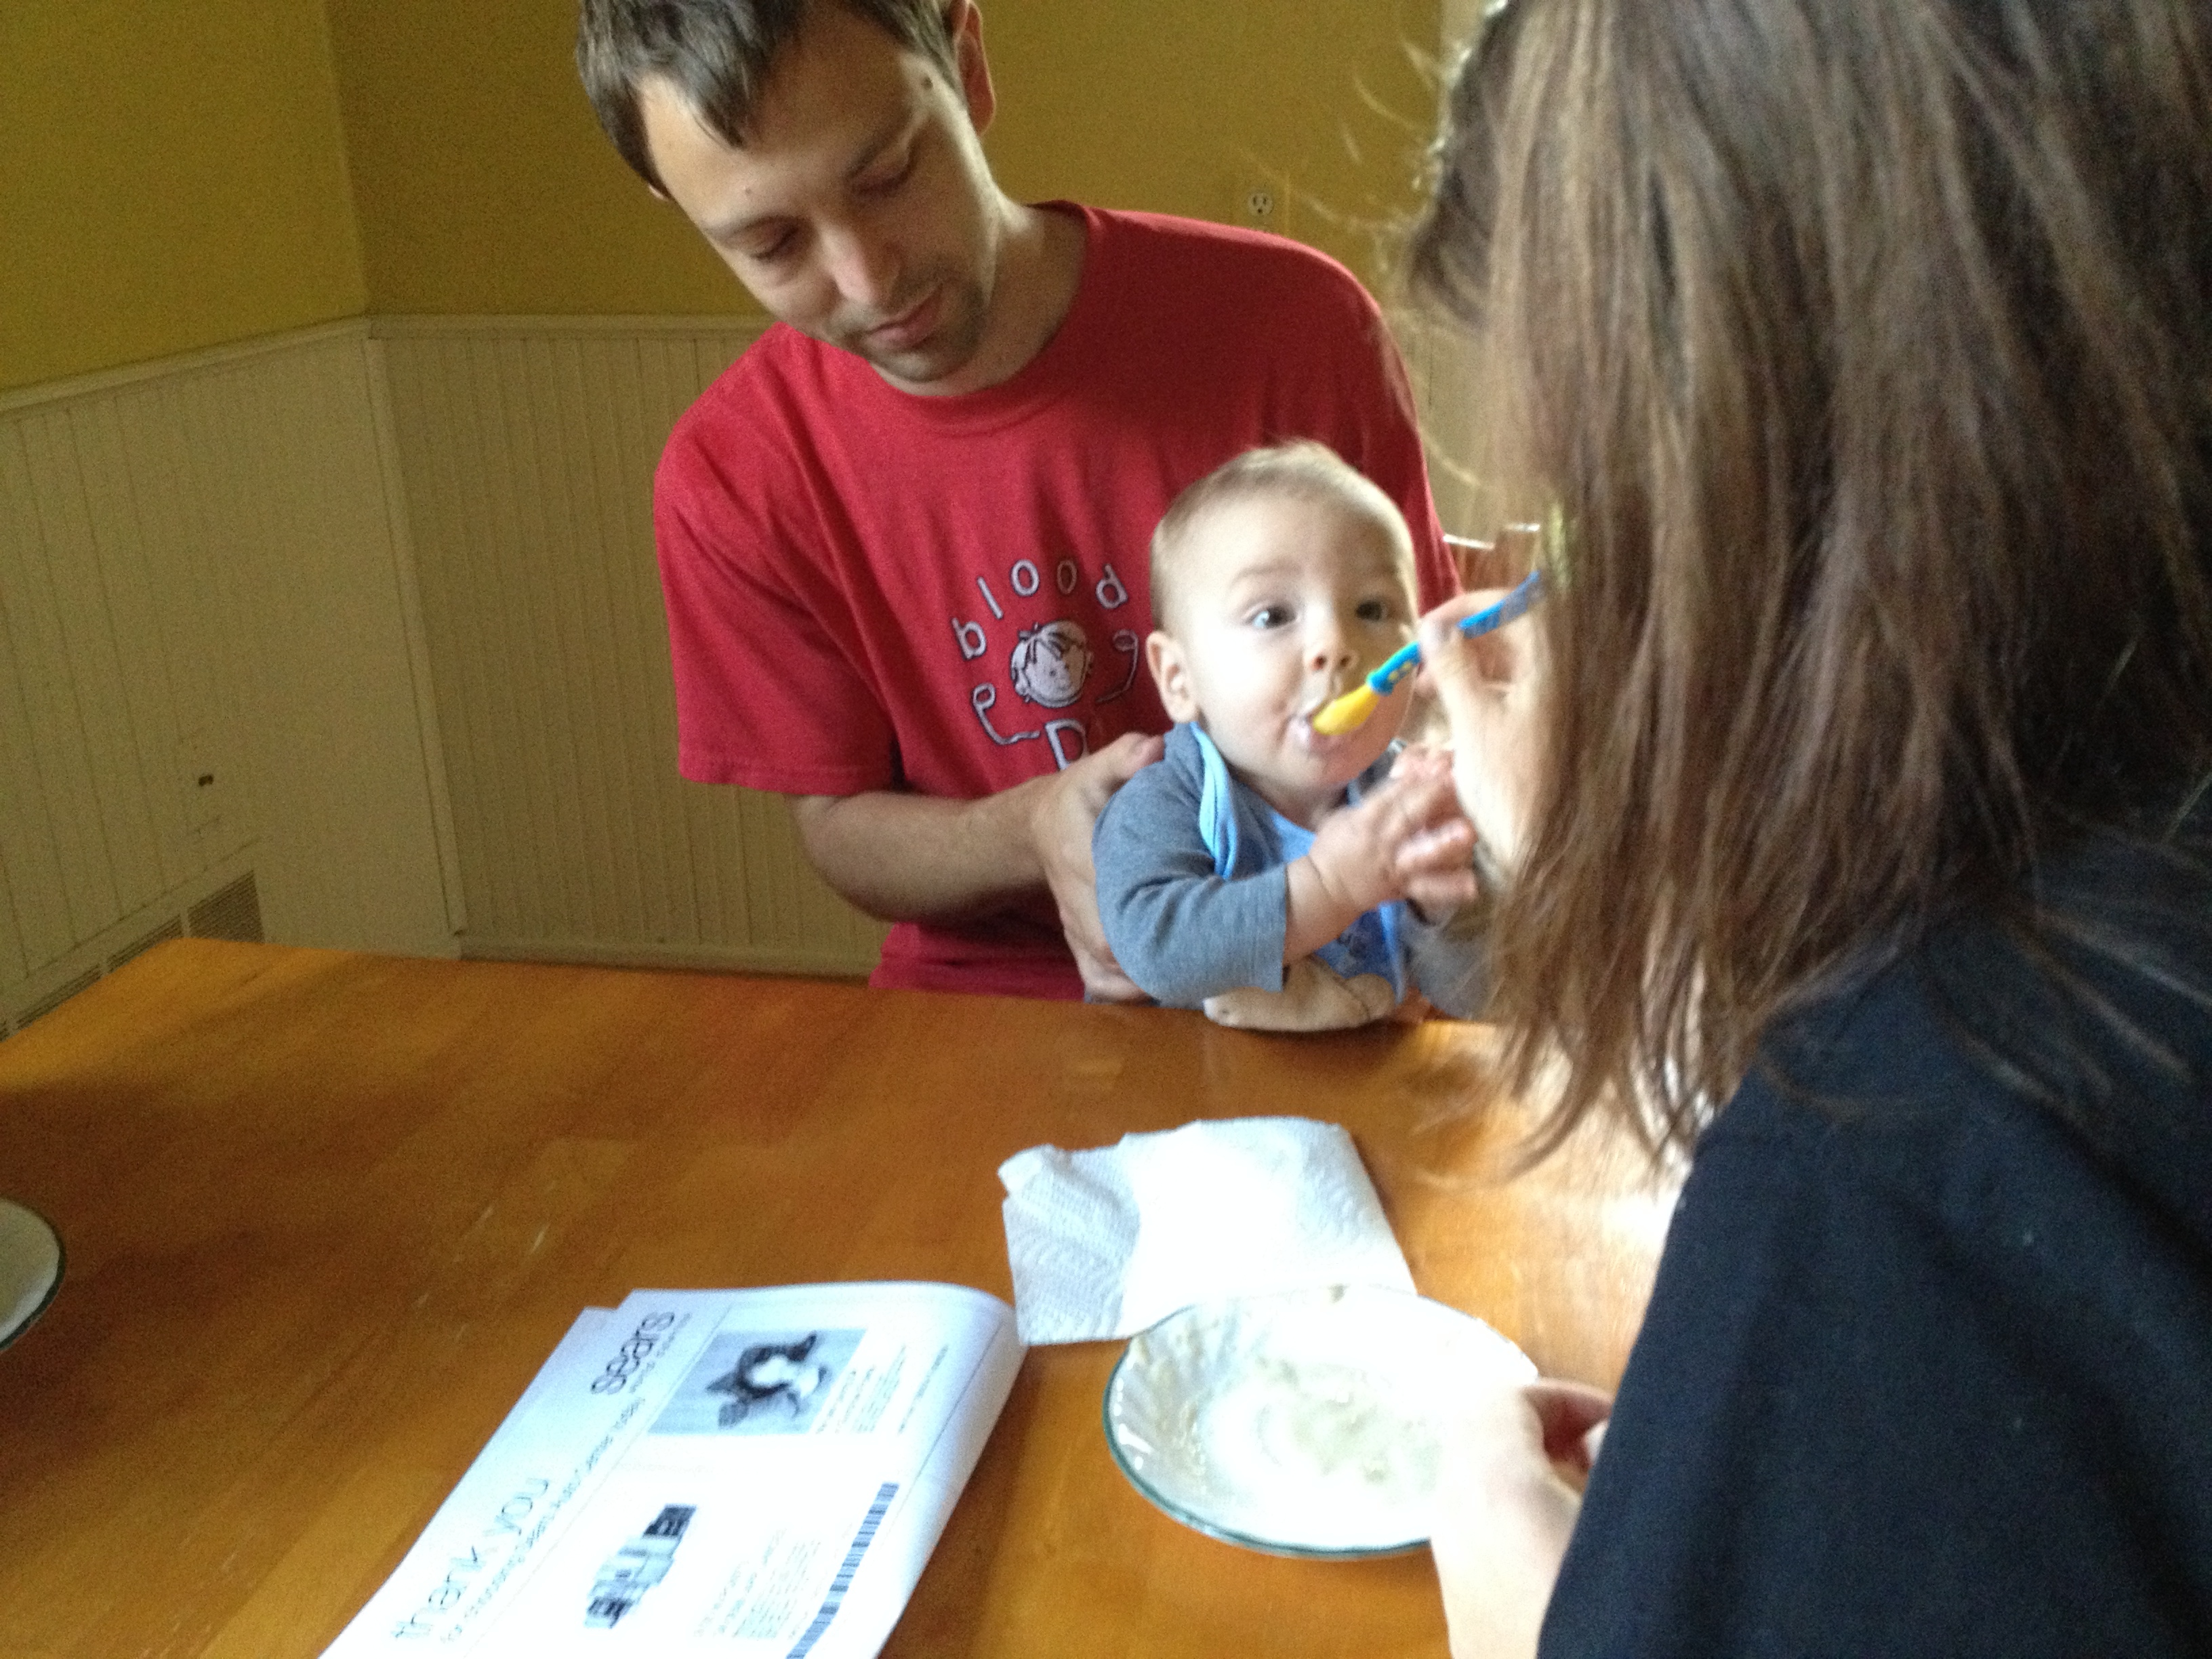
IMG_4057

Mmmmm

IMG_4055


We still haven’t given him a daily feeding of solids and he doesn’t seem to mind.

A little while back one of our friends proudly stated that their one month old baby slept 7 hours straight that night.  I can guarantee you that baby is formula fed.  Breast milk is easily digestible and no sooner is it in that little tummy it is being processed and used up.  The result is that Frugal Boy still wakes several times every night to feed.  So why do we sacrifice so much sleep?  For starters, Frugal Boy weighed in on the bathroom scale this morning at 19.4 pounds.  That is the equivalent to an A or A+ for his age.  He is a very happy and intelligent boy.  Finally, we are saving a ton of money by not buying formula.  Do formula fed babies score A’s on growth charts and developmental milestones, sure they do!  Is that something we want to do?  Absolutely not if we can avoid it.

If you breastfed your babies thank you!  If you are currently breastfeeding, keep it up!  If you tried and switched, thanks for giving it a go!  If you weren’t considering it at all, learn more about the benefits to both mom and baby!

IMG_4151

Posted in: Frugal Boy, Parenting, Savings Tagged: breastfeeding

Start’em Young

July 31, 2014 by Andrew Leave a Comment

20140731_073524   Thanks Great Uncle Greg for the peddle tractor!  Now if I can just get Frugal Boy to level out that mound of dirt in the background.

Posted in: Frugal Boy

Left Right Straight – Car Steering 101

July 30, 2014 by Andrew 1 Comment

A little while back, I replaced the front struts on our 15 year old car.  While I was doing that work, I noticed that several other parts in the wheel well were looking past their prime.  It is recommended that you have your car aligned after replacing struts so in the interest of only having to do that once, I decided to replace some other parts that would also need an alignment.

The first item on the list was new inner and outer tie rods.  Tie rods push and pull the wheels in and out, or in other words make the car turn left or right.  They are also one of the parts that is adjusted during an alignment.

IMG_3901The red arrow points to the outer tie rod.  The outer tie rod is the most common and easiest part to replace of the entire steering arm.  The green arrow points to a lock nut.  This nut is used to adjust how far or close the outer tie rod sits from the center of the car.  Mechanics will adjust this nut as part of your alignment.  The blue arrow points to the inner tie rod.  Sometimes it is called a steering rod and it threads onto the rack and pinion.  The purple arrow shows the dust boot that keeps the inner tie rods connection with the rack and pinion clean.

image008

First things first, we’ll need to remove the outer tie rod.  In my case, it was so rusted onto the inner tie rod and I already was planning on replacing the inner that I simply cut it off with an angle grinder.

IMG_3905

Here you can see the old outer tie rod next to a new one.  One of the main reasons that you would need to replace an outer tie rod is because the rubber boot protecting the ball bearing is cracked.

IMG_4041

Once that is cracked, grit can get into the bearing and it will quickly wear out.  I was able to find the exact same tie rod end for $7/pc on RockAuto.com.

Taking off the dust boot gives you access to the inner tie rod.  I had to borrow a loaner tool from the auto parts store to remove the inner tie rod.

IMG_4039


The inner tie rod has a ball joint where it hooks up to the rack and pinion.  This ball joint should be firm, but the ones I removed could easily be moved around with my pinky finger.

IMG_4038

Assembly is the reverse and fairly easy.

Moving right along, the next part that I wanted to replace on both sides was the lower ball bearings.  Unfortunately, for this car, you have to replace the entire control arm with the bearings already pressed in.  Here is a picture of the whole control arm.

IMG_3903and this is the lower ball bearing that connects the control arm to the steering knuckle.

IMG_3908

Like the outer tie rod, once the protective rubber boot cracks and opens up, the bearing is doomed.  These parts are so close to the wheel and road that they are subjected to a constant barrage of grit and grime.

In order to remove the control arm, you must also disconnect the stabilizer bar link (sometimes referred to as a sway bar).

IMG_3902

The sway bar runs underneath your car and connects the left and right control arms together.  When you’re speeding down the road and make a hard turn, this bar will transfer some of the suspension load from one side to the other.  I found new links for $15/pc.

Removing the control arm was pretty difficult for me.  There are 4 connection points to the car (including the sway bar link).  The connection to the steering knuckle was the hardest because there is only room for a crescent wrench and the nuts were severely corroded.

The other difficult step was removing the 3 bolts that secure the rear bushing of the control arm.  Red loctite was used on at least one of the bolts.  Loctite is a special kind of glue used to hold bolts in place.  It comes in two common varieties, red and blue.  Blue can be removed with hand tools, but red has to be heated up to 550° F.  My 300 ft lb impact wrench was no match for the red thread locker so I had to use a propane torch and heat it up (I only caught the lubricating/penetrating oil on fire twice).

After all of the blood, sweat, and smoke I finally ended up getting the old control arms out.

IMG_4047

This was the part that I really wanted to replace.

IMG_4048

Install is the reverse.  Here is one of the new sway bar links installed.

IMG_4046

The lower ball bearing looks much happier now.

IMG_4045

Here you can see the tie rods, control arm, and sway bar linked installed.

IMG_4044


All of the parts set me back $174.

Screen Shot 2014-07-30 at 11.44.09 AM

Labor was the biggest expense as it probably took around 8-10 hours.  I also had to use some special tools including:

  • Impact Wrench
  • Propane Torch
  • 27 mm socket
  • 22 mm socket
  • Inner Tie Rod Tool (free loaner tool from car parts store)
  • 7/8 ” Crescent wrench
  • PB Blaster (penetrating oil)

Would I do all of that work again?  Probably not.  It was a good learning experience, but we will most likely be selling this car within the next six months.

Posted in: DIY Tagged: Car

A Weekend Getaway

July 29, 2014 by Andrew Leave a Comment

This past weekend we loaded up Frugal Boy in the car and visited family in Kentucky.

IMG_3970

It’s nice having some cousins his age because it lets us parents share supplies and advice.  Thanks Aunt Sarah for looking after Frugal Boy for awhile!

IMG_2194

Here is a slightly younger cousin.

IMG_3982

I keep trying to turn Frugal Boy into a water baby, but he still hasn’t gotten excited about pools.

IMG_2203


Visiting family means a whole new set of toys to play with.  The Little Mermaid was a short distraction.

IMG_2207

The audience grew

IMG_2209

and grew some more!

IMG_2214

Frugal Boy lost the somber competition.

IMG_4020

but he did score some Grandma time.

IMG_4025

The drive there and back was pretty good (even better than the trip to Missouri).  Frugal Boy had some new toys to keep him entertained.  The string on this clip was almost as good as the pacifier itself.

IMG_2220

Who needs a cuddly teddy bear when you can hold a stainless steel water bottle?

IMG_2227

Thanks to all of our family members that made food and entertained Frugal Boy.  It was a nice break from the daily grind!

Posted in: Frugal Boy, Travel Tagged: Car, Kentucky, road trip, summer

A Little Scare

July 15, 2014 by Andrew 1 Comment

I was driving down the alley last week to pick up Frugal Boy from the babysitter when out of no where a loud boom emitted from the front end of the car.  Shocked, I hit the brake and put it into park, then quickly turned the ignition off.  A couple of framing carpenters working nearby had also been startled and one of my neighbors who happened to be out came running over.  Together we looked underneath the car to see what had fallen off or what was dragging.

Our cursory glance did not reveal any smoking gun, only a piece of curved metal that had sheared/snapped off, and since I still needed to pick up Frugal Boy, I decided to try and get the car back into its parking space.  The car shaked and shuttered while in slow reverse but it covered the short distance.

Later that evening after letting the question simmer in the back of my mind I had an idea of what it might be.  A quick check later and I had found the culprit.

IMG_3849

The front driver’s side spring coil had blown out.  The giant metal spring works along with the strut to form a critical component of a cars suspension system.  That suspension system turns pot holes and speed bumps from jarring impacts to soft bumps.  A common misconception is that shocks and struts are the same thing.  While they perform the same function, smoothing out your ride, they work slightly differently.

shock-strut-infographic

Some cars have struts on the front and shocks on the back while others have struts or shocks on the front and back.  Either way, you have to replace A with A and B with B.

strutDiagram


Shocks and struts should always be replaced in pairs.  Since the front drivers side broke, I also needed to replace the intact (I wouldn’t go so far as to say “functioning”) passenger strut.

IMG_3854Removal was surprisingly easy.  Not including the wheel lug nuts, there were a total of 5 bolts to remove for each strut.

IMG_3853

sorry for the blurry photo, it was starting to get dark outside.

One of my neighbors was impressed that I knew how to do the replacement.  I let him in on my little secret.  I watched the first 4 minutes of this youtube video.  https://www.youtube.com/watch?v=LEaevAxA8Gc

While the video goes on and on about coil compression and the possibility of maiming yourself, I opted for the safer and easier route and just purchased a preassembled strut+coil.

IMG_3896

To my astonishment, the cheapest retailer that I found for the two preassembled struts wasn’t my local NAPA store, or Autozone, or Advanced Auto Parts.  It was Amazon! By waiting 5-8 days for free shipping, I was able to save $120 over NAPA, the only brick and mortar in town that had the part in stock.

The grand total was $200 in parts ($100 per side) and after using an Amazon gift card and some credit card points I had knocked the out of pocket cost down to $166.  Labor took me a total of 4 hours, two to disassemble and two to reassemble.

IMG_3899

For a little comparison, back in January of 2013 I took our other car into a nationally operated chain garage to replace the struts (on the front) and shocks (on the rear).  The front ended up costing us $467.  $112 of that was labor and the other $355 was parts.  Amazon has those same parts for $258.  If I had done that job myself, I would have saved the labor and price part difference for a total of $209.  For those of you saying your time is worth a lot, in my case it worked out to $28/hour and that’s because I am an amateur and have to waste time finding the tool I just put down.

Conclusion

By diagnosing and fixing the problem myself, I saved about 45% vs giving up and calling a mechanic.  The difficulty level is low and the amount of tools needed is also fairly simple.  I used a

  • jack
  • two jack stands
  • two ratchet wrenches
  • 3 sockets sized 15mm, 17mm, and 19mm?
  • a cheater bar (basically a really long wrench to give you leverage)
  • a pair of needle nose pliers (to help with a brake line clip)

The biggest and most important tool in your toolbox is confidence.  A great way to gain confidence is to start with smaller, simpler jobs such as filling the windshield wiper fluid, replacing wiper blades, and changing the oil.

Posted in: DIY, Savings Tagged: Car, mechanic
« Previous 1 … 53 54 55 … 69 Next »

Recent Posts

  • Min/Maxing Car Sale for Highest Value and Lowest Headache
  • Buying a Car with Data Driven Decision Making
  • Hot Lunch
  • Baking with Dad
  • Winter Nights

Financial Goals

Recent Comments

  • suwaidi online on Building a New Desktop Computer
  • James Spurr on Building a Self Watering Raised Garden Bed
  • suwaidi online on Total Cost of Ownership – Inkjet vs Laser Printers
  • bcimechanical on Troubleshooting a Gas Furnace
  • g on Troubleshooting a Leaking Whirlpool Dishwasher [UPDATED]

Archives

  • December 2020
  • December 2018
  • July 2018
  • May 2018
  • April 2018
  • March 2018
  • February 2018
  • January 2018
  • December 2017
  • November 2017
  • October 2017
  • September 2017
  • August 2017
  • July 2017
  • June 2017
  • May 2017
  • April 2017
  • March 2017
  • February 2017
  • January 2017
  • December 2016
  • November 2016
  • October 2016
  • September 2016
  • August 2016
  • July 2016
  • June 2016
  • May 2016
  • April 2016
  • March 2016
  • February 2016
  • January 2016
  • December 2015
  • November 2015
  • October 2015
  • September 2015
  • August 2015
  • July 2015
  • June 2015
  • May 2015
  • April 2015
  • March 2015
  • February 2015
  • January 2015
  • December 2014
  • November 2014
  • October 2014
  • September 2014
  • August 2014
  • July 2014
  • June 2014
  • May 2014
  • April 2014
  • March 2014
  • February 2014
  • January 2014
  • December 2013
  • November 2013
  • October 2013
  • September 2013
  • August 2013

Categories

  • Business
  • DIY
  • Finance
  • Frugal Boy
  • Frugal Girl
  • House
  • Misc.
  • Parenting
  • Reading
  • Recipes
  • Savings
  • Technology
  • Travel
  • Uncategorized

Meta

  • Log in
  • Entries feed
  • Comments feed
  • WordPress.org

Copyright © 2026 Frugal Living.

Omega WordPress Theme by ThemeHall