• About Me
  • Contact Me

Frugal Living

Indulging in life, financially responsible

baking

Learning How To Bake Week 2 – Baked Alaska

February 23, 2016 by Andrew Leave a Comment

The extent of my baking knowledge up until now has been to follow the instructions on the back of the ready mix boxes.  Come along with Shae and myself as we embark on a six week baking challenge where we push our comfort zones and try baking recipes we have never done before!

Week 2 – Baked Alaska

1e273698f825476ebccb926ee9e9c12e

Think of an ice cream dessert.  Now set it on fire.  That is the magic of baked alaska!  Baked Alaska consists of three main parts, a cake base, an ice cream core, and a meringue shell.  The meringue shell helps to insulate the cold ice cream inside so you can do dramatic baking acts such as taking a blow torch to it, pouring flaming alcohol on top of it, or even pulling an ice cream dessert out of the oven!

The recipe that we followed was here, but I wouldn’t recommend it because the cake base was way too sweet.  It was basically fudge, so if that is what you like then go for it, but next time we make baked Alaska I will opt for a less sugary base.

So let’s get baking shall we!  We spread it out over two days.  The ice cream needs time to freeze hard if it has any hope of surviving the heating process.

Shae started by mixing up the cake batter.  Frugal Boy was content getting the chocolate mixing bowl leftovers.

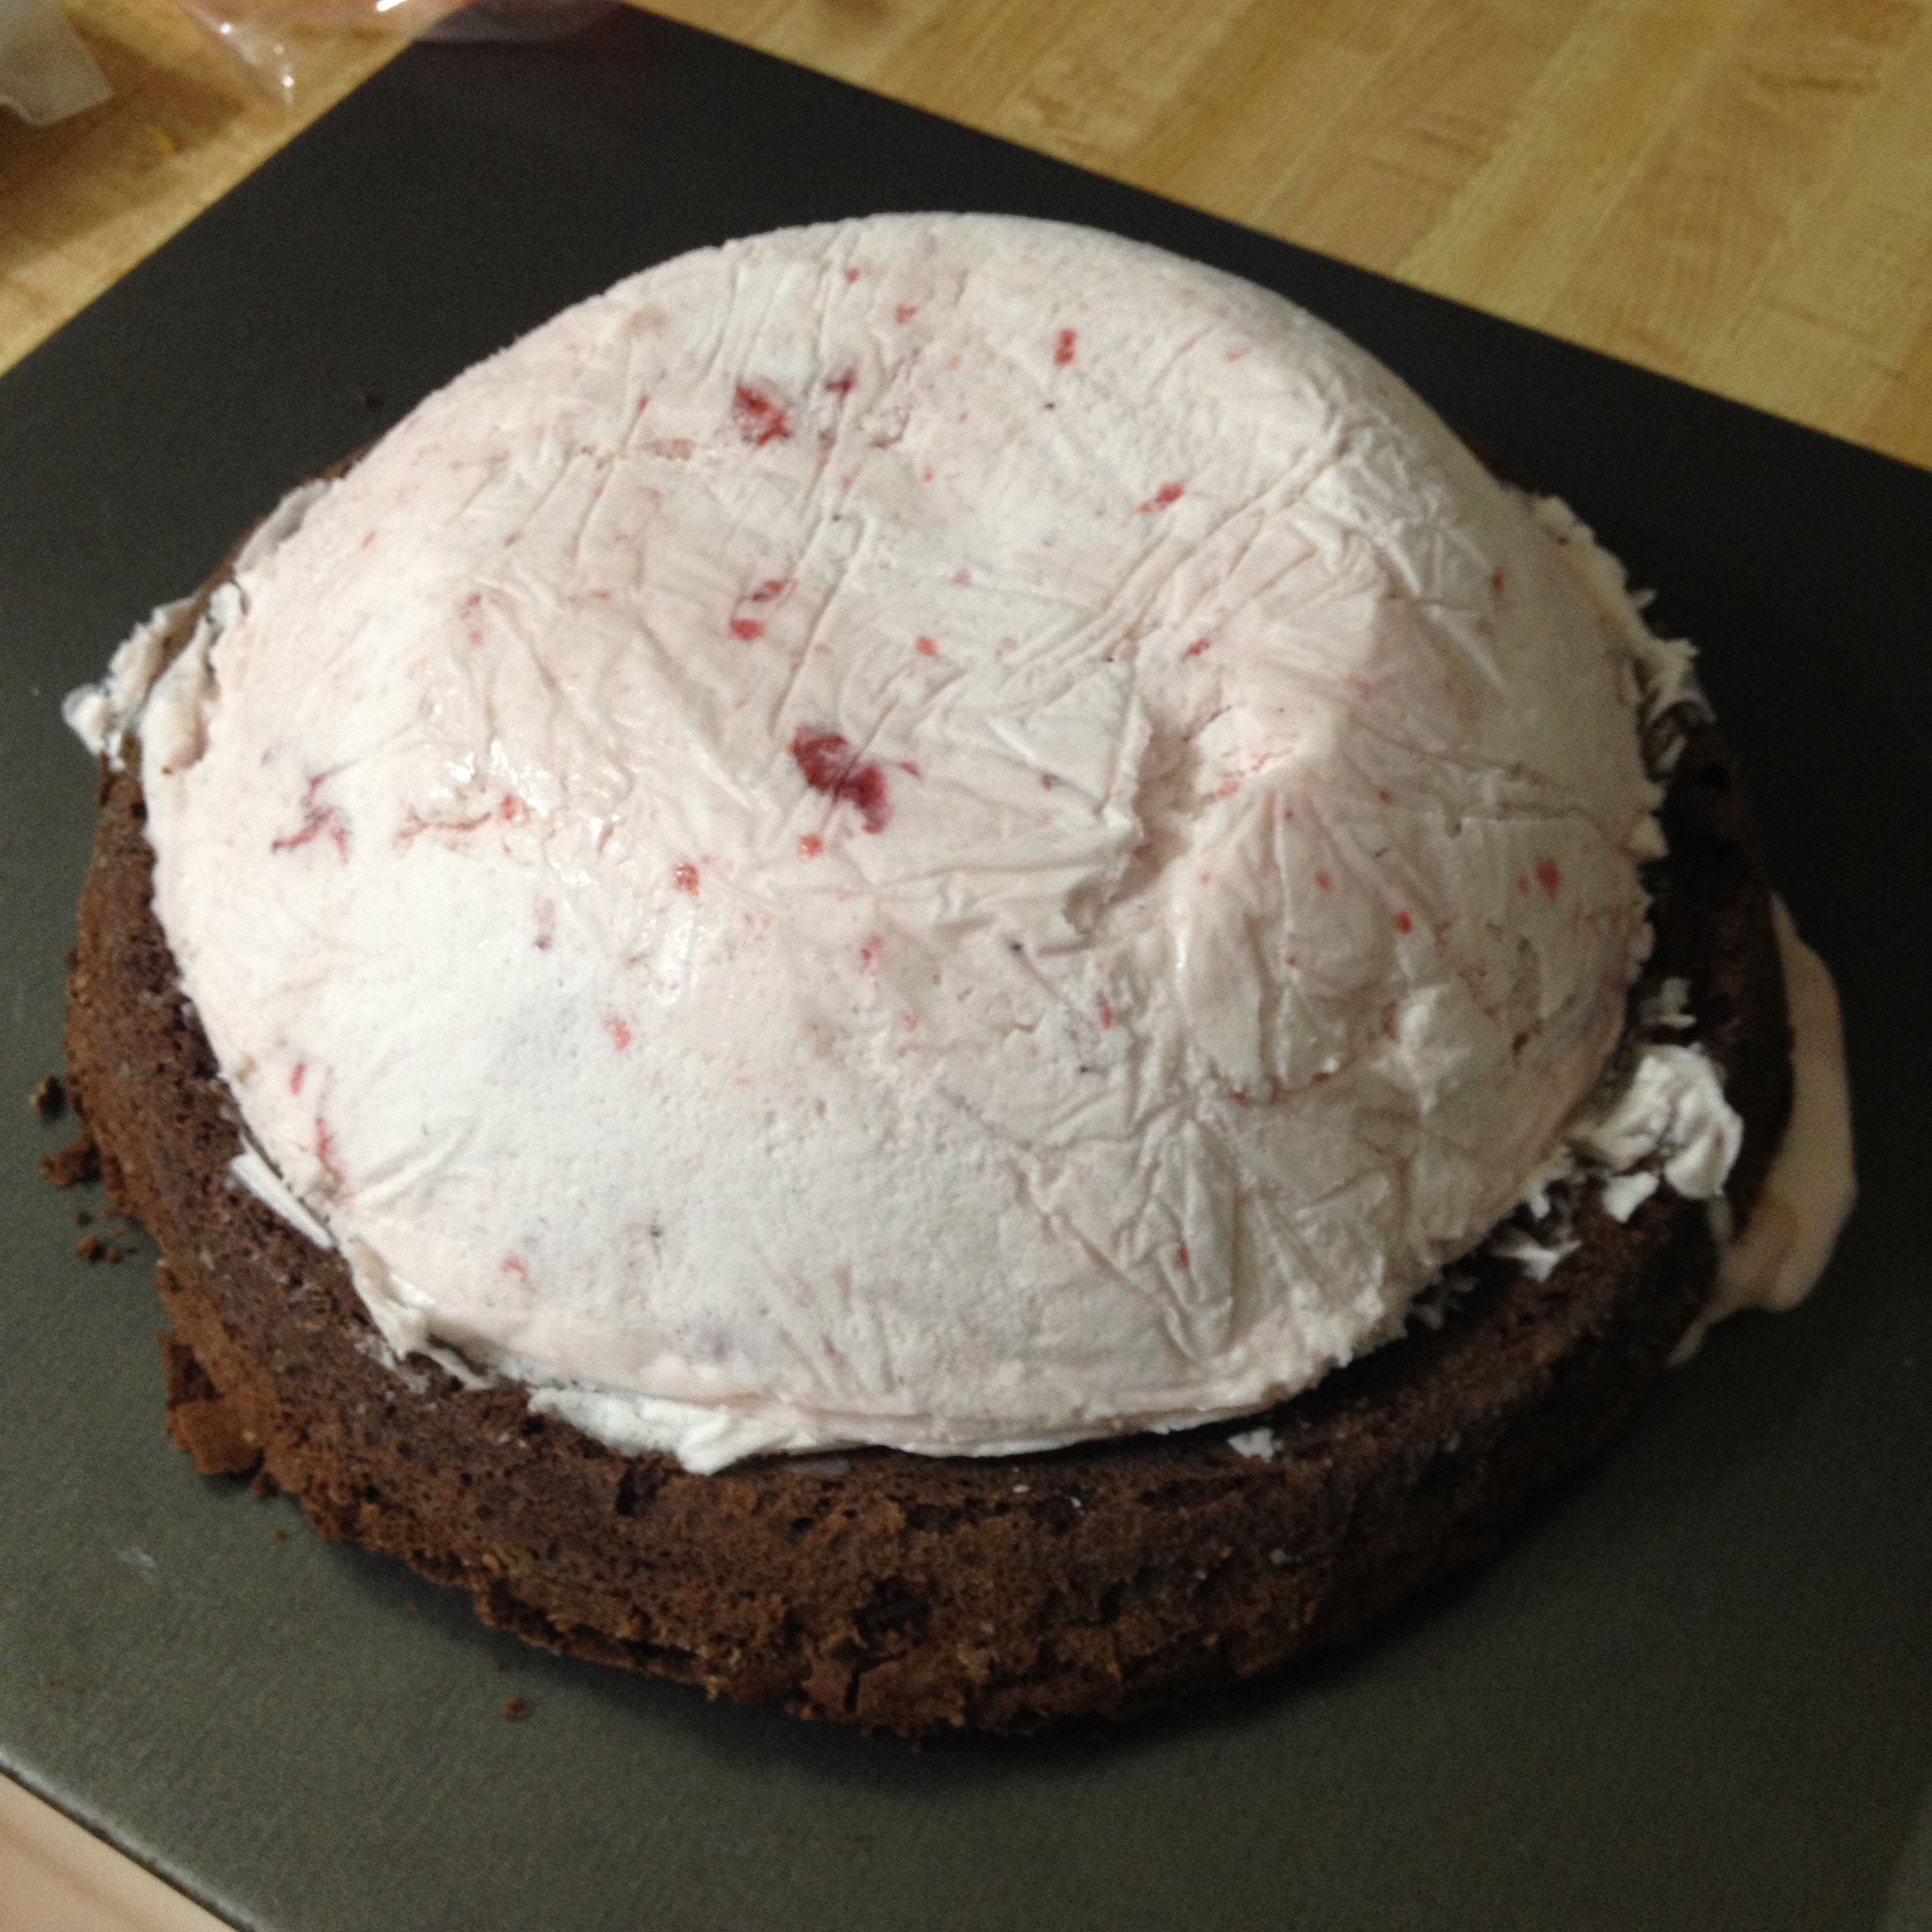
I had the really hard job.  I lined a metal mixing bowl with plastic wrap and then dumped a half gallon of store bought strawberry ice cream into it.  By pressing the ice cream down into the bowl it made a nice dome shape.  Once the cake was finished baking and had cooled, we simply flipped the ice cream on top of it and stuck the whole thing back in the freezer to keep cold.

IMG_8865

That night we set about making the meringue.  There are different meringues, French, Swiss, Italian, and so forth.  Meringues are to my knowledge all made with egg whites and sugar.  The difference is how and when you combine those ingredients.  We opted to use a Swiss meringue.  Swiss meringue is pasteurized, so it is completely safe from salmonella.  To make up the meringue, you combine your egg whites and sugar in a mixing bowl over a pot of steaming water.  The steam will pasteurize the egg whites, and the sugar in the mixture will keep the eggs from turning into scrambled whites.  The next step tricked us up a couple of times.  You need to beat the mixture a lot.  Beating the mixture adds air and that air gives it a billowy, fluffy, white appearance.  The egg whites puff up, and the sugar gives it stability so it doesn’t immediately collapse down.  The trick with Swiss meringue is that since the sugar is added from the get go, it is very difficult to beat in air.  Our first attempt used a hand mixer and after 10 minutes or so it was still a runny mess.  Our second attempt we got out the stand mixer and just let it run on high speed with a whisk attachment.  Eventually the meringue will firm up and hold stiff peaks.

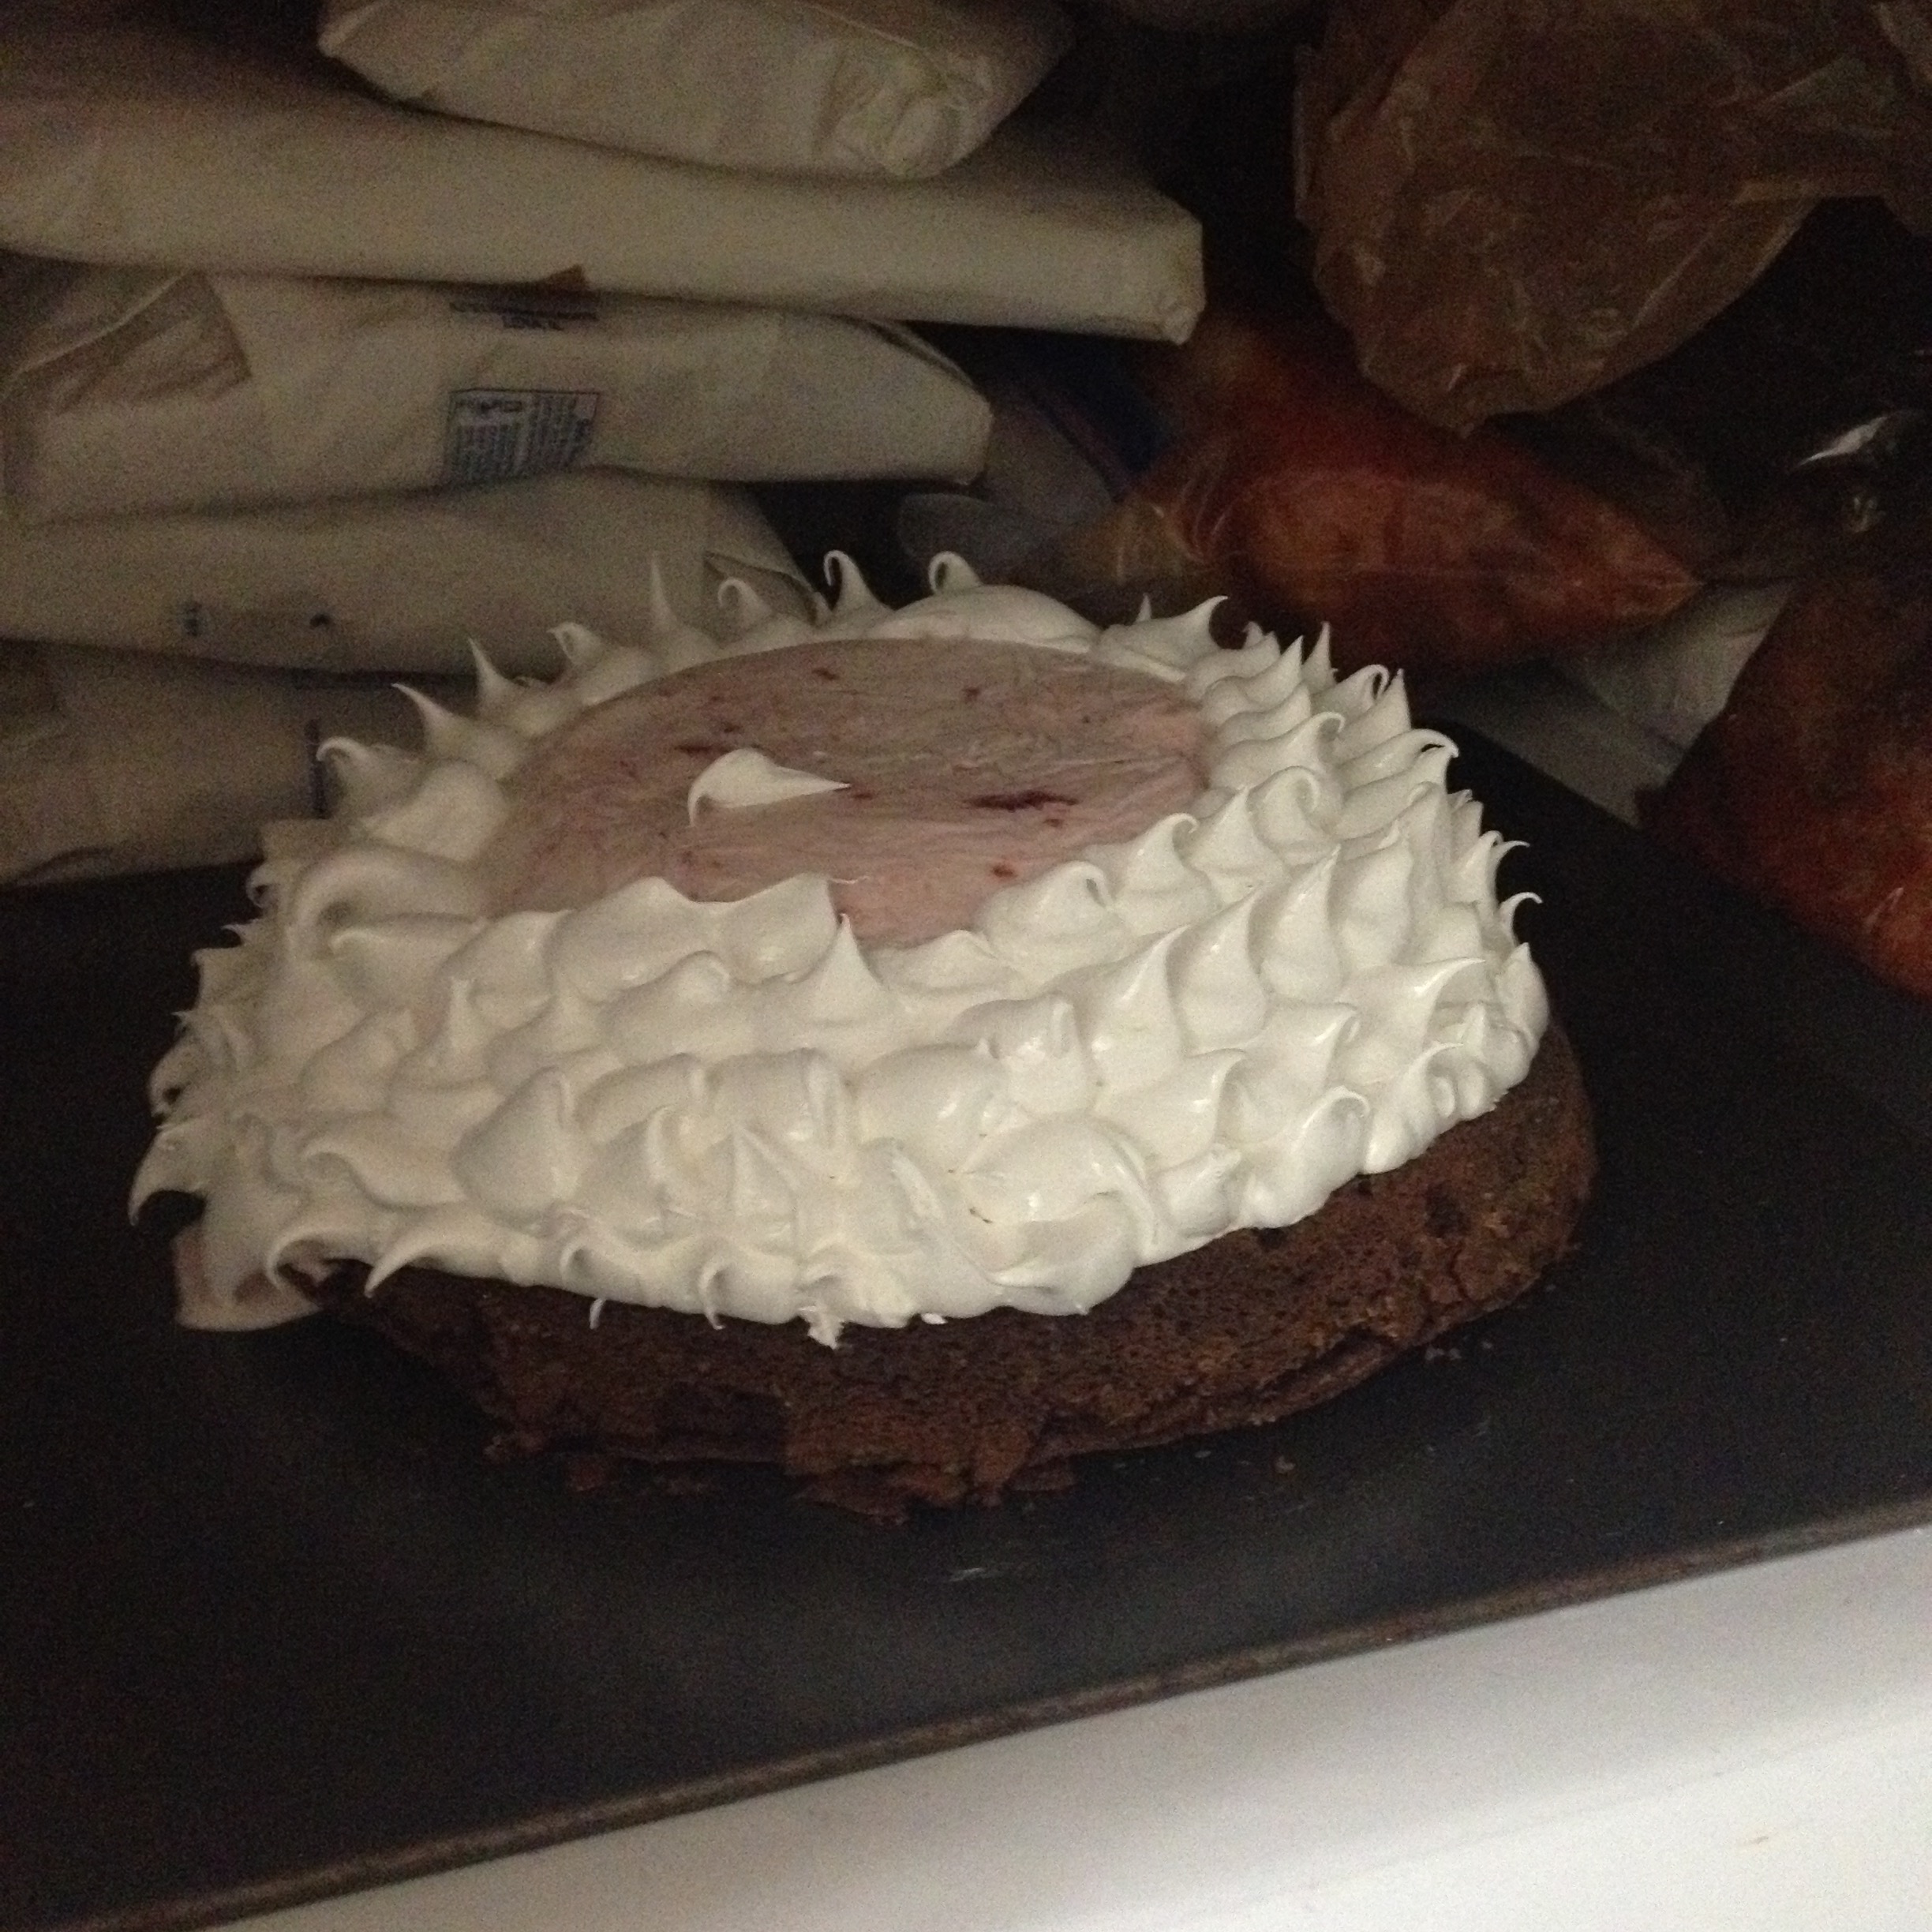
Using a ziplock bag with the corner cut off, I piped on meringue to cover and insulate the ice cream.

IMG_8867

Unfortunately, I ran out of meringue before I finished, so I had to stick the cake back in the freezer while I made up a 3rd batch.  You can see how the ice cream had already started to melt a bit just from the short time of being out!

IMG_8868

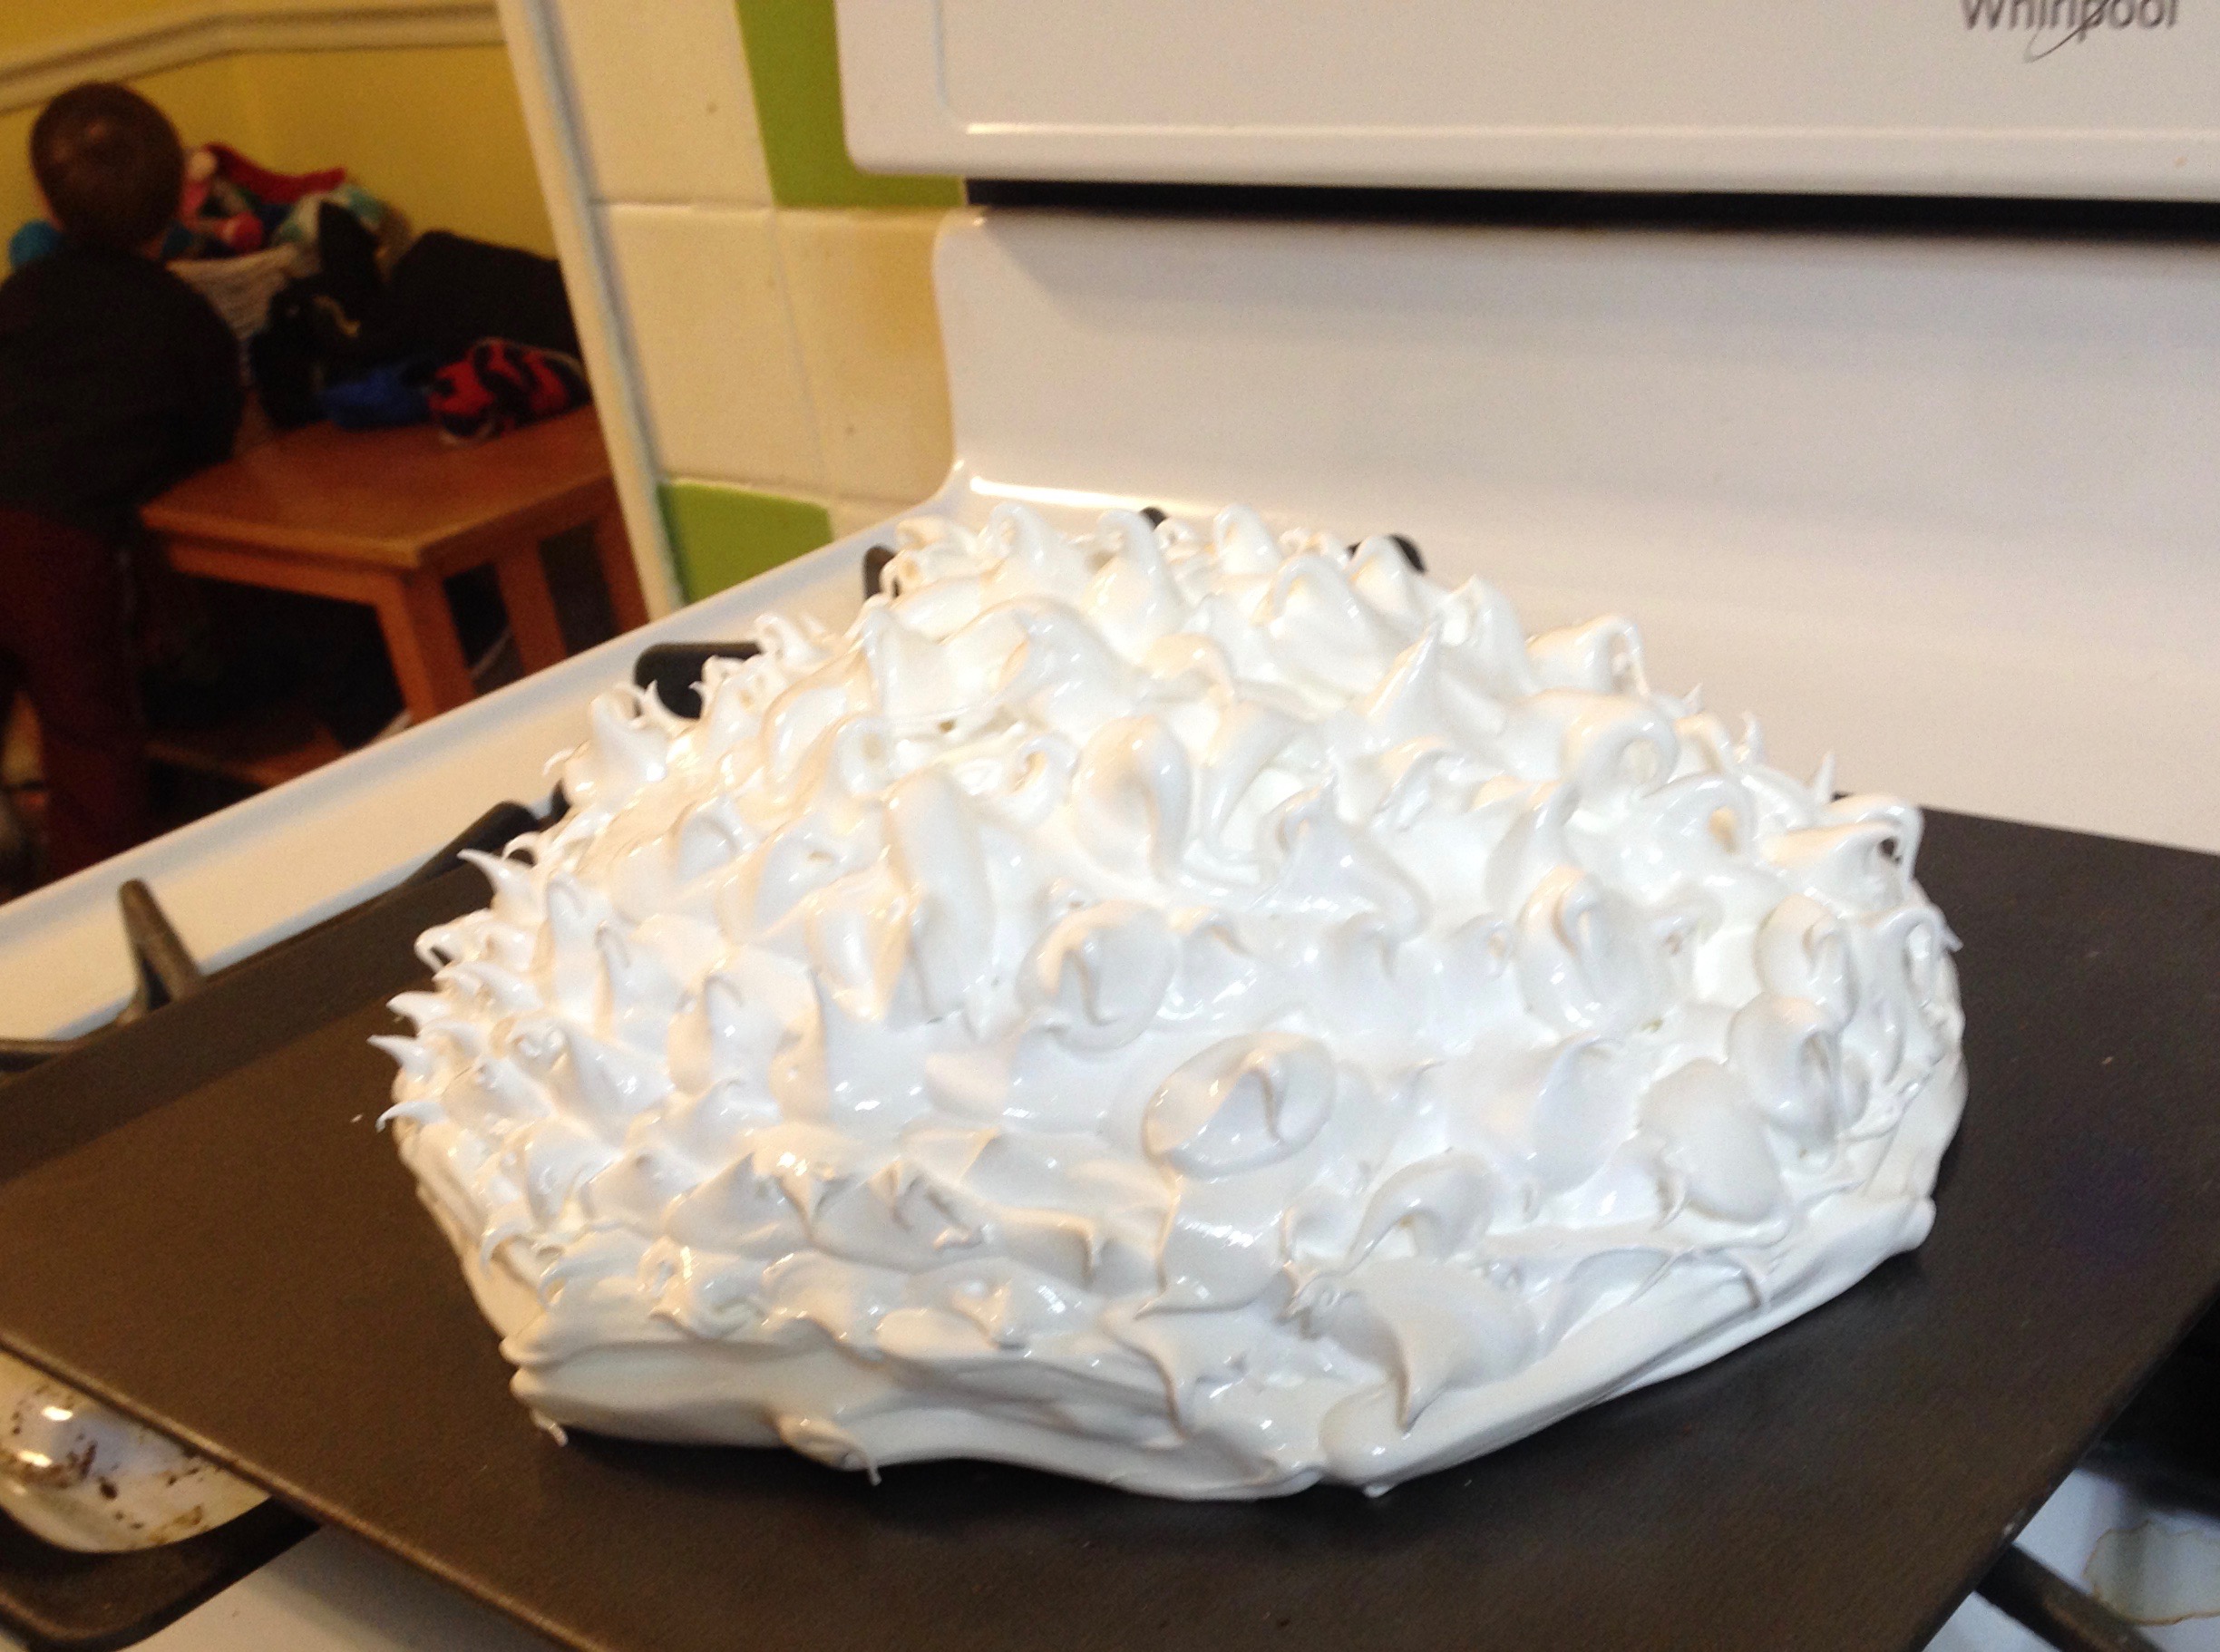
The next day we were ready to finish up our baked Alaska.  Here it was before the dramatic finale.

IMG_8880

Armed with a propane torch, I caramelized the meringue.

IMG_8883

This gives it a nice golden color.  The bruleed meringue tastes quite a bit like toasted marshmallow.  The consistency is similar as well.
IMG_8897

Here is the finished product.  The ice cream survived the blow torch!

IMG_8900

This dessert is very good, but also very rich.  I kind of wish that we had made it when company was around so they could help eat it.  Having a flaming alcohol presentation would be very grandiose and perfect for a birthday or other special occasion.

All in all, baked Alaska is a fairly simple dessert to whip up because you can cheat quite a bit with store bought ice cream and even a store bought cake mix.  I would like to experiment with a key lime pie styled baked Alaska.  Perhaps a graham cracker type crust/base with a lime flavored ice cream.

Next week, some sort of savory quick bread.

Posted in: Recipes Tagged: baking

Learning How To Bake Week 1 – Eclairs

February 16, 2016 by Andrew Leave a Comment

The extent of my baking knowledge up until now has been to follow the instructions on the back of the ready mix boxes.  Come along with Shae and myself as we embark on a six week baking challenge where we push our comfort zones and try baking recipes we have never done before!

Week 1 – Eclairs

horizontal-web

photo credit: frostingandasmile.com

Eclairs are a filled pastry dessert topped with icing.  I don’t think I had ever even eaten an eclair before trying to make one, but they couldn’t be that hard to make, right?

Armed with a photo tutorial from frostingandasmile.com we set to work making our custard filling the night before.  We have been watching a lot of the Great British Bake Off show, a lighthearted amateur baking contest.  One of the big advantages of working at home is that we have a lot more time.  Anyway, back to the custard.  It is all cooked and then needs to be chilled before it is injected into the pastries.  Did I mention that it is delicious?

IMG_8803

The next day we set about making our choux, pronounced shoo, pastry dough.  This very wet dough is piped onto baking sheets and when it bakes the moisture in the dough turns into steam and puffs the dough out.  This leaves the inside semi-hollow and that is where you put the custard filling.  We used a $1 piping kit from dollar tree to pipe the dough out.  You could use a ziploc bag with a corner cut off.  I did the first batch with a small tip (too small of a tip in hindsight).

IMG_8806

Shae opted for no-tip with her batch and they came out to be just the right size.  Here they are after coming out of the oven.

IMG_8810

The recipe calls for using parchment paper, but parchment paper is quite expensive.  We have ordered reusable silicone baking mats for the future.  Some of our eclairs were a little burned from leaving them in too long.  Oops!

Once the baked pastry has cooled down you need to inject them full of custard.  Using a decorating tip, stab one or both ends and squeeze filling into the choux until it starts oozing out.  Our custard was quite thick so this was a good hand workout.

Here comes the fun part, the decorating!   We started by making up the chocolate ganache.  That is a fancy way of saying heated up cream poured over chocolate chips and then melting and mixing the whole thing up to make a slowly hardening glaze.  Working quickly, we dunked the top of each eclair into the ganache to coat it.  Eventually the ganache will cool completely and re-solidify.

IMG_8811

The last step is to add some white chocolate drizzle.  The drizzle is simply white chocolate chips melted and drizzled on.  They re-solidify once they cool.  This seemingly simple step took me three tries!  Argh!!  I kept burning the chocolate in the melting process.  Eventually I got a batch that was melted enough to decorate with but wasn’t burnt.

IMG_8815

Tada!  Eclairs are best eaten fresh.  Otherwise stick them in the refrigerator.  Ours tasted pretty good but wouldn’t win any bake offs.  I learned a lot about chocolate and how best to pipe choux pastry onto a baking sheet.  We also got to spend some quality time together as a family.  Yes, Frugal Boy did plenty of taste testing.  🙂

Next week’s challenge: Baked Alaska

Posted in: Recipes Tagged: baking

Recent Posts

  • Min/Maxing Car Sale for Highest Value and Lowest Headache
  • Buying a Car with Data Driven Decision Making
  • Hot Lunch
  • Baking with Dad
  • Winter Nights

Financial Goals

Recent Comments

  • James Spurr on Building a Self Watering Raised Garden Bed
  • suwaidi online on Total Cost of Ownership – Inkjet vs Laser Printers
  • bcimechanical on Troubleshooting a Gas Furnace
  • g on Troubleshooting a Leaking Whirlpool Dishwasher [UPDATED]
  • Christie on Building a Self Watering Raised Garden Bed

Archives

  • December 2020
  • December 2018
  • July 2018
  • May 2018
  • April 2018
  • March 2018
  • February 2018
  • January 2018
  • December 2017
  • November 2017
  • October 2017
  • September 2017
  • August 2017
  • July 2017
  • June 2017
  • May 2017
  • April 2017
  • March 2017
  • February 2017
  • January 2017
  • December 2016
  • November 2016
  • October 2016
  • September 2016
  • August 2016
  • July 2016
  • June 2016
  • May 2016
  • April 2016
  • March 2016
  • February 2016
  • January 2016
  • December 2015
  • November 2015
  • October 2015
  • September 2015
  • August 2015
  • July 2015
  • June 2015
  • May 2015
  • April 2015
  • March 2015
  • February 2015
  • January 2015
  • December 2014
  • November 2014
  • October 2014
  • September 2014
  • August 2014
  • July 2014
  • June 2014
  • May 2014
  • April 2014
  • March 2014
  • February 2014
  • January 2014
  • December 2013
  • November 2013
  • October 2013
  • September 2013
  • August 2013

Categories

  • Business
  • DIY
  • Finance
  • Frugal Boy
  • Frugal Girl
  • House
  • Misc.
  • Parenting
  • Reading
  • Recipes
  • Savings
  • Technology
  • Travel
  • Uncategorized

Meta

  • Log in
  • Entries feed
  • Comments feed
  • WordPress.org

Copyright © 2025 Frugal Living.

Omega WordPress Theme by ThemeHall