Removing Ads from Words with Friends Permanently

I admit that I enjoy playing the mobile game Words with Friends 2 by Zynga but my goodness is it chock full of ads.  Banner ads along the top and bottom, full screen interstitial ads after every single turn, and to add insult to injury no way to pay to get rid of ads.  No, I do not consider their $10 in-app purchase to remove ads for 30 days at all reasonable.  This is Frugal Living, there is a better way!

Seriously?! $10/mo to have an ad free experience. That is as much as my phone bill!


Introducing AdBlock

I will show you how to install an ad blocker on your phone or tablet that can not only eliminate ads in Words with Friends, but also every other app including your browser!

There are many different ad blocker apps available on the App and Play stores.  I personally chose AdBlock by FutureMind (iOS $2).  The important thing to find is one that offers VPN, virtual private network, or DNS, domain name services.

Setting Up AdBlock

There are two ways to utilize AdBlock.

  1. As a Safari (browser) content blocker
  2. As a system wide ad blocker

Both of these can be used at the same time.  Here is how to setup #1.

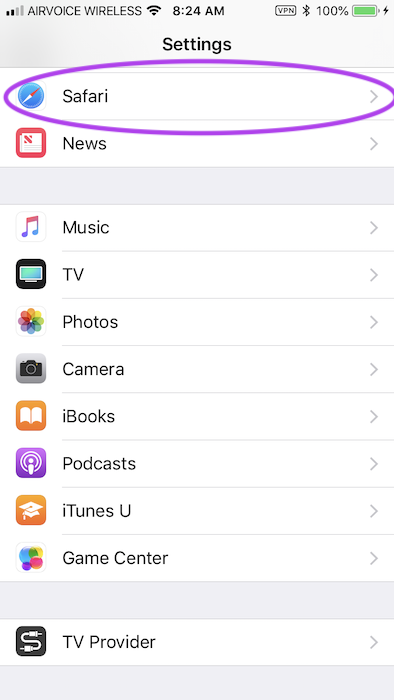
Open the Settings app on your home screen.  Scroll down until you see Safari.  Click on that and scroll down to “Content Blockers”.  Finally switch on AdBlock.

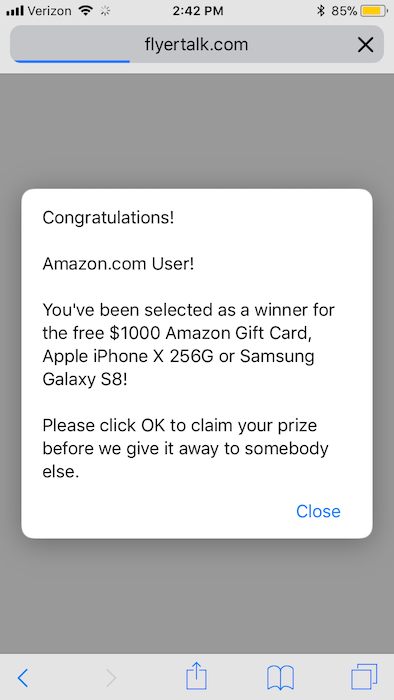
Tada!  Safari browsing should be greatly improved.  This should also eliminate the ultra annoying hijacking ads that look like this:

Setting up AdBlock to block ads system wide, including inside apps such as Words With Friends, takes a little more work but is still pretty easy.

Open the AdBlock app > Settings

Turn on “Enable DNS Logging”

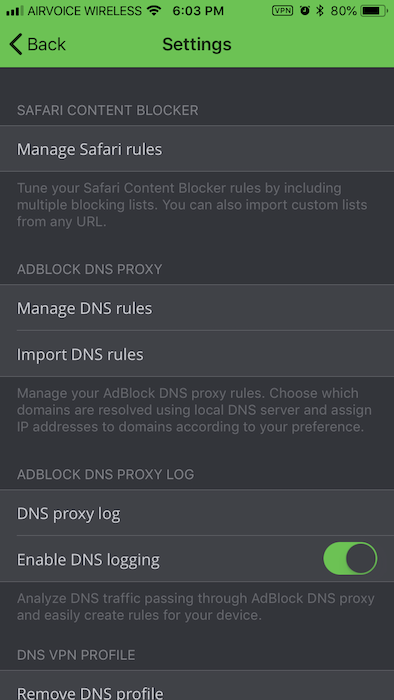
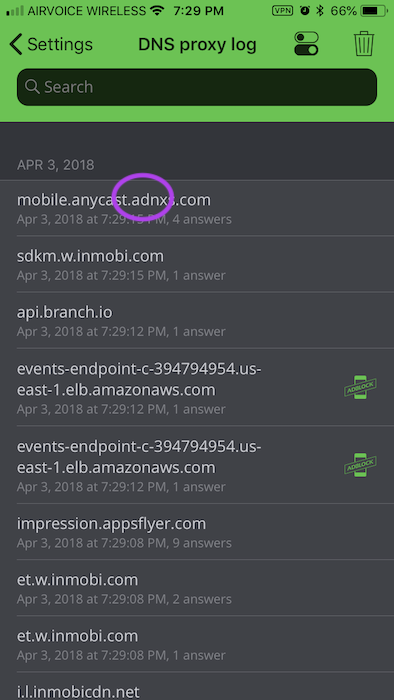
Exit the AdBlock app and go play some Words With Friends.  You will still see ads, but not for long.  After you have seen a few ads, exit Words with Friends and return to the AdBlock app > Settings.  This time click on “DNS proxy log”.

You will see a long list of URLs that your mobile device has contacted.  This includes all of the URLs that the game has contacted including ad servers!

Click on any entry that includes the word “ad” in it.

Then click on “Create Rule”

A list of domains will appear from most specific to most general.  DO NOT SELECT A TOP LEVEL DOMAIN such as “com”, as that will block ALL traffic to any website ending in “.com”.

Click on “done” to create the new rule.  Apps and games will no longer be able to access the domain that you just selected.  If an app breaks or doesn’t work right, then you can undo it by going to AdBlock > Settings > Manage DNS Rules.

After you have done a few you can start to see AdBlock working.

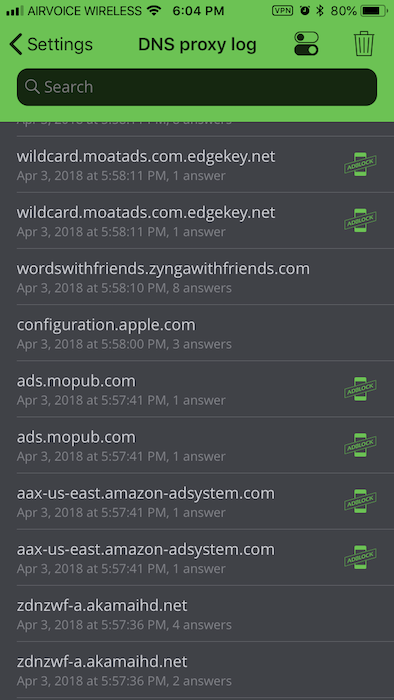
You can see that I did NOT block “wordswithfriends.zyngawithfriends.com” as that would likely break the game.  I also did not block non ad servers such as “configuration.apple.com”.

Final Thoughts

AdBlock occasionally turns off.  I think that happens when I move from Wifi to cellular data or vice versa.  It is easy to see when the blocker is active because a little “VPN” icon appears in the status bar.

If it does turn off, I just reopen the AdBlock app and it will turn back on again.

I have also discovered that after setting up or turning on AdBlock I do need to force close the ad-laden app and restart it to get the ads filtered out.

In the good news department, I hardly ever see ads in Words with Friends now.  If I do, it is usually because the VPN has turned off.  Now when I complete a turn the screen goes black with a white spinning wheel in the middle for about half a second and then it returns to the game.  The top and bottom banner ads are gone and the entire UI looks much cleaner.  Oh, and I’m not spending $10/mo for that privilege.

One final word of caution.  While there are many Ad Blockers available, I would recommend sticking with a well known one even if it does cost a bit of money.  Preferably pick one that uses DNS filtering.  There is a fine line between a useful ad blocker and a malevolent piece of spyware that monitors all of your network traffic.

How to Stop Telemarketers & Scam Phone Calls on Your iPhone

While this post is written for iOS/iPhone there is likely a similar feature on Android.  I do not know the step-by-step process for that system, but if you do please leave a comment.

Ugh… telemarketers and robocalls are the worst.  You have just drifted off to sleep or sat down to eat when your phone goes off.  You don’t recognize the area code, it must be a telemarketer.  If you are like me, you find it infuriating, but what can you do?

I have had my phone number for about eight years now.  I shouldn’t have to change my number to avoid getting called two or three times a day.

Do Not Call Registry

“The National Do Not Call Registry gives you a choice about whether to receive telemarketing calls”

This government run consumer protection program lets you register your phone number with the FTC.  Legitimate telemarketers will check the government list and avoid calling your number if it is on there.  You can check if your number is registered or not by going to donotcall.gov

I checked my registration while typing this post and it said I registered on 9/2/2009, but the screenshot I posted above with all those telemarketer/spam calls was taken just this week.  So what gives?

How to Block Robodialers and Scammers

While the Do Not Call list is great for stopping respectable companies, it does nothing to stop unscrupulous scammers.  If you block one number they just call from a different one.  You need some way to only allow known good numbers through.  We can do that by setting up a whitelist.

Here is how I put an end to scammers on my iPhone 4S running iOS 9.

First, go into Settings > Do Not Disturb

Then turn on “Manual” and set “Allow Calls From” to All Contacts.

Scroll down and set “Silence” to Always.

There.  Now only numbers in your address book can call you and make your iPhone make noise.  All other phone numbers will be silenced automatically.

That is all well and good, but what if you need to get a phone call from someone not in your address book?

Extra Bonus Step

Let’s say that you are selling something on Craigslist and you want strangers to be able to text or call you.  How can they, if you don’t know their phone number to add it to the whitelist?

The answer is pretty simple.  We just need to setup a free Google Voice number that forwards to your phone.  While that may sound tricky it isn’t too complicated.

Create or login to your Google account.  Go to https://voice.google.com

From there you can setup a new Google Voice phone number.  Then you link your existing phone number and set the Google Voice number to forward calls and messages to your existing phone number.

Finally, add your new Google Voice number to your address book on your iPhone.  Now you can hand out your GV number to strangers without risking your primary phone number.  The best part is that GV includes a spam filter.

If you ever do start getting bombarded with scammers on the GV number and Google doesn’t automatically filter them out, you can change your GV number for a small fee.  Your family and friends will always have your primary number which won’t have to change.

How many scam calls do you get a day?  Have you found any other solutions to getting rid of them?  Leave a comment.

Upgrading a 2010 Macbook’s RAM and Hard drive

You may have heard of Moore’s law, in simple terms it was an observation made 50 years ago that computers would become twice as fast every two years.  For the most part, this ‘law’ held true for the past fifty years thanks to scientific and manufacturing advances in semiconductor technology.  Companies such as IBM and Intel were able to cram more transistors onto a silicon wafer by shrinking down the transistor size.

Over the past few years, Moore’s Law has been proclaimed dead or failed a dozen times by pundits.  The real laws of physics seem to have caught up with transistors and they simply cannot be shrunk down any further before the electrons traveling inside start to do funny things, like teleporting.  The result is a stagnation in computer CPU performance.

For example, consider the 2010 Macbook and its 2016 descendent.  According to benchmark tests, the 2010 laptop scores 1536.  By Moore’s Law, every two years, that score should double.  You’d expect the 2016 to score 12,288, but it actually only scores 3221.  So a six year difference only amounts to a doubling in CPU performance.

So why would you bother buying a brand new laptop if it is not leaps and bounds faster than a six year old machine?  Well, typically because other components are leaps and bounds better.  The two biggest areas are in Random Access Memory, RAM, and storage space, i.e. hard drives.  Usually, both of these items are user upgradeable, so you can take that six year old machine and make it very competitive with a brand new machine.

The 2010 Macbook comes with 2 GB (gigabytes) of RAM, and a 250 GB spinning disk hard drive.  For $100, you can upgrade that to 8 GB of RAM and a 250 GB solid state hard drive (SSD).  A solid state hard drive is faster, lighter, and more robust than the traditional spinning platter hard drives of old.  The computer will boot up faster, apps will start quicker, and the whole feel of the computer will be ‘snappier’.

Doing these upgrades on a 2010 Macbook is extremely simple.  Use a philips screwdriver to undo the bottom cover screws.

img_1298

You can see the blue RAM chips in the right side of the picture.  The silver hard drive is in the bottom right corner.

The two RAM chips will pop right out from the motherboard.  The hard drive has a couple additional screws holding it in place.  Installation is the reverse.

img_1301

After replacing RAM, it is generally a good idea to run a test.  MemTest86 is a free piece of software that will do an exhaustive battery of tests.  The setup instructions are a little technical, but once you have made up the flash drive or CD, the test itself is incredibly easy to run.

img_1303

TADA!  You now have a cheap laptop that is almost as good as a brand new expensive one.  What a great deal for an ‘obsolete‘ machine.