• About Me
  • Contact Me

Frugal Living

Indulging in life, financially responsible

apartment

How to Patch Drywall Holes – Explained By a Non Professional

March 31, 2017 by Andrew Leave a Comment

If you own a house chances are good that at some point you’ll be looking at a hole in the drywall where there shouldn’t be a hole.  If you own an apartment building, you’ll be looking at lots of holes in the drywall.  Thankfully with a few simple tools and a little confidence those holes are easy to patch up.

The Tools

There are probably 3 ‘specialty’  tools that you absolutely need to do drywall work.

  1. A drywall jab saw.  It looks like a big steak knife and makes short work of cutting drywall.
  2. A 5-6″ mudding knife (see picture below).  It doesn’t really look like a knife, but that’s what it is called.  It’s main job is to spread drywall mud around.
  3. A mud pan.  Usually these are stainless steel and come in a small size (what I have below) and bigger professional sizes.

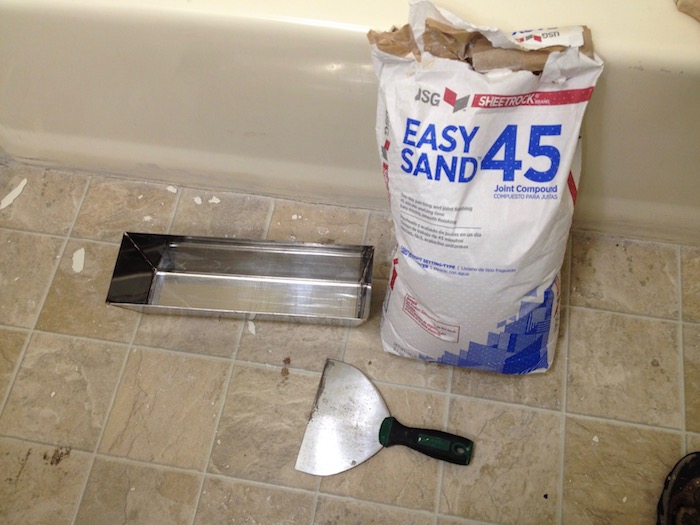
Raw materials that you’ll likely need would be drywall screws, a dry mix joint compound.  Get something like Easy Sand 45.  The number is an approximate amount of work time that you have before it stiffens up and you have a mud pan full of rock.  The pros will use 5-20 minute, but I like to use 45.  You may also want to pick up a 5 gallon tub of premixed compound.  Get something with a blue top.  Those are easier to sand.

While it might be tempting to skip the dry powder stuff, hot mud, and just use the premixed, try not to.  The premixed mud is much weaker and will be more likely to crack if hot mud isn’t used first.  Premixed is the frosting, it’s just there to make it look pretty.

Finally you’ll need some drywall scrap sheets.  Every big box home improvement store that I have visited has had 2’x2′ or 2’x4′ panels of scrap drywall for $1-3 a piece.

Here are a few different holes and associated techniques that you may encounter or find useful.

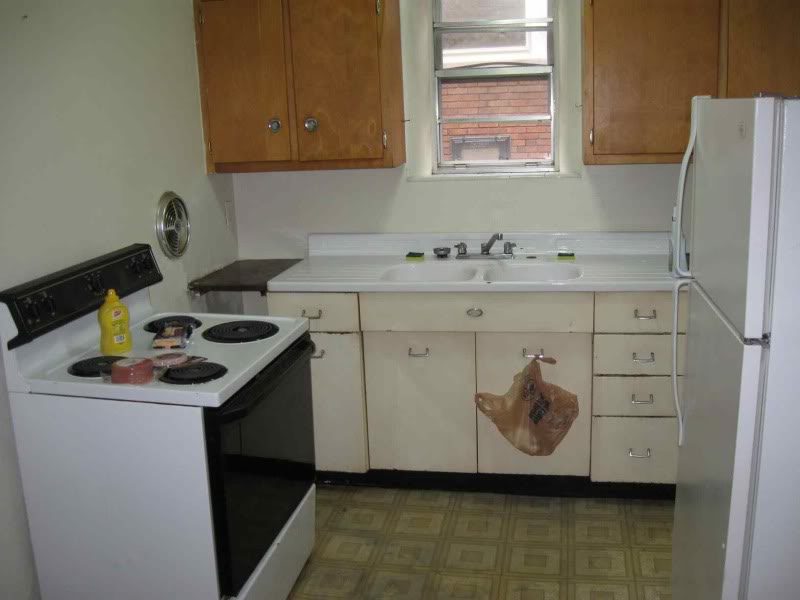
The Emperor’s New Clothes

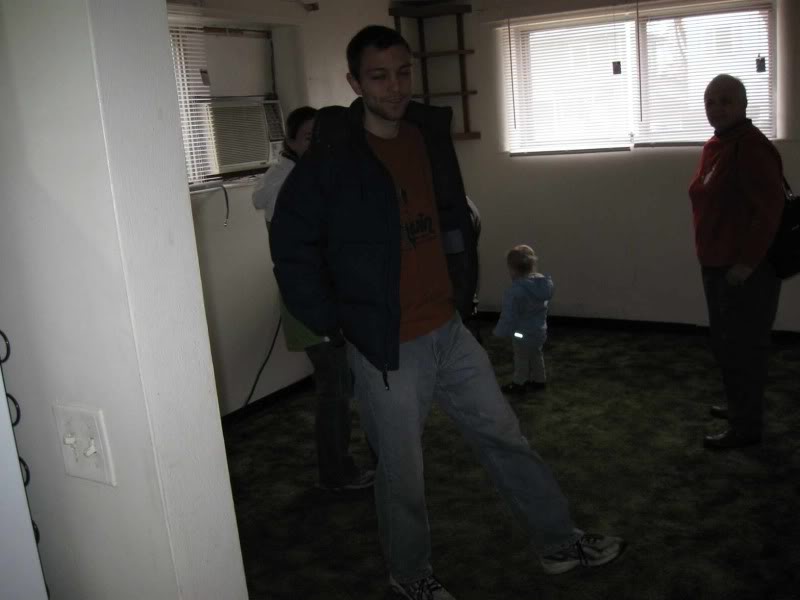
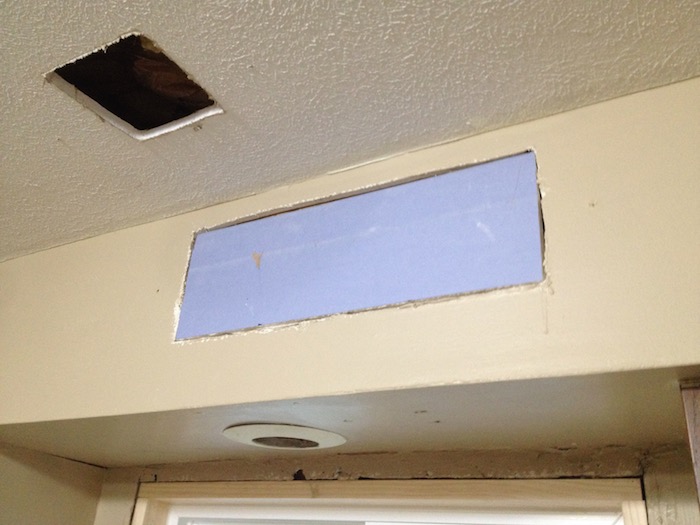
Do you see the holes?

What about now?

Yes.  Somebody decided that it would be easier and or look better to cover up these two gaping holes with ductwork vents.  Spoiler alert, there are no ducts in either of those cavities.

The correct fix probably costs less money.  For the big hole, add in some scrap wood to act as a backing.

Then cut your replacement to size using a utility knife to score and snap and/or use the drywall saw.

Then add screws straight into the backing material.  It’s important not to do the screws at an angle, and also not to break past the paper facing of the drywall.  With the screws in, use a fiber tape to bridge the gap between old and new material.  Try not to overlap the tape on top of itself.

For the ceiling patch, I chose to do the blocking a bit differently.  I cut two pieces of scrap wood that were longer than the hole.

Then screwed through the existing drywall to hold them in place.

Then the patch gets screwed and taped in place.

Now you’ll need to mix up your hot mud (dry powder) in your mud pan.  Add water to the pan first!  If you do powder then water it is going to be a PITA.  You only need a quarter inch of water.  Now add powder and mix until you get the consistency of soft serve ice cream.  It is important to have it well mixed and no ‘boogers’ in there.  Boogers, or technically clumps of dry powder, will smear across the work surface and make it really ugly.

Use the mud pan and the taping knife to spread the mixture across your patches.  The goal is to completely cover your tape so it isn’t poking through, while trying to avoid any huge humps, bumps, or ridges.  Experiment using different amounts of pressure and try feathering out the edges.  Don’t overthink it, this is just something that takes practice.  Your first patch won’t be a work of art.

This first rough coat will take a few hours to set up and harden.  Go watch some tv or take a nap while you wait.

We’re almost done.  Yay!  Now that the first rough coat has hardened, knock down any high ridges with your taping knife.  Ideally, you’ll go up a size or two in knives with each successive coat.  With the mud coat on, it’s time to break out the pre-mixed icing.  Slather it on just like the first round.

For the ceiling texture, I found that an old paint roller gave a pretty good result.

GOOAALL!!

The soccer hole is when you get really excited and kick a hole through the drywall.

Another common variation is the doorknob punch where you throw open the door and the knob punches through the drywall.  For these types of holes, I like to use a ‘California Patch’.  What is nice about the California patch is that it requires zero screws or tape.  Use a drywall saw to square up the hole.  Yes, make the hole bigger.  Once you have a rectangular hole, use a utility knife to score a piece of replacement drywall that is 2 inches wider and longer than your hole.  You may also need to use the drywall saw to cut your replacement piece.  Now, carefully score the back side of the replacement piece with 1″ margins.  Then carefully peel away the margins.

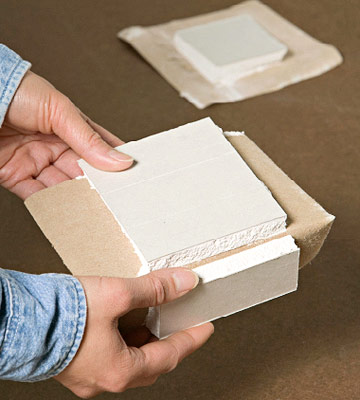
photo credit DIYAdvice.com

With your patch with paper margins ready, smear up the backside of the margins with mud and place it into the hole.  Use your drywall knife like a squeegee and squeeze out all the excess mud from behind the paper.  Then use a bigger knife to apply a finish coat of ready mix mud to cover up the patch.  Wait for it to dry (24-48 hours) then sand smooth.
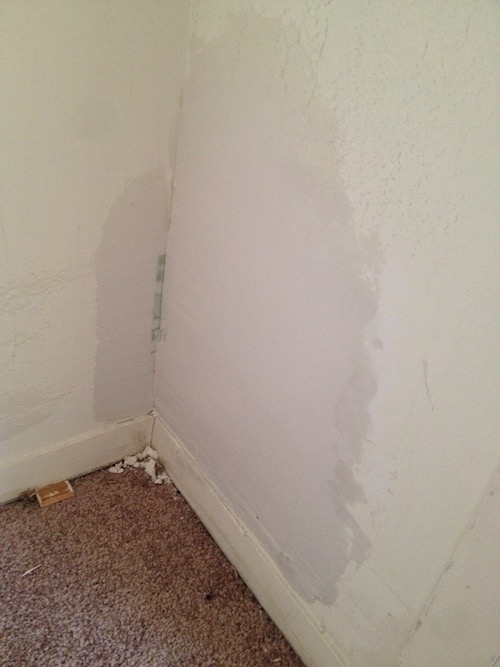
The Mouse Hole

I’m not really sure what caused this.  Perhaps it was a pet, a child, or critter, but regardless it patches up just like GOOAALL.

Enlarge the hole using a drywall saw to make it rectangular.  Then create a California patch for that hole.  The scratches in the wall will fill in with mud nicely.
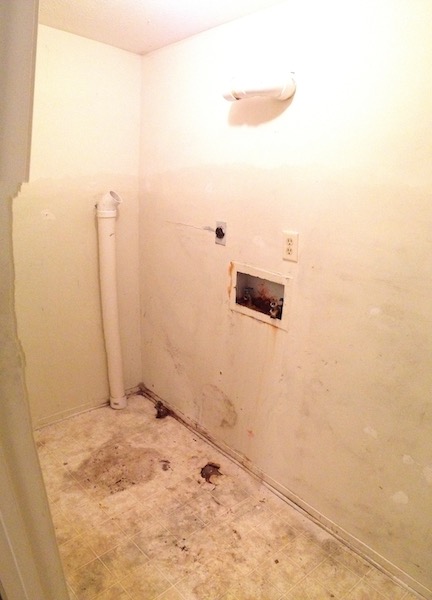
The Leaky Plumbing

Sometimes you have to make the hole in the wall to fix something else.

Patching drywall isn’t too difficult and it is quite cheap to boot.  Of course, the best way to make drywall look nice is to not knock holes in it in the first place.  Prevention, prevention, prevention!

Posted in: DIY Tagged: apartment

Lifestyle Inflation

January 21, 2015 by Andrew Leave a Comment

Investopedia.com defines lifestyle inflation as

Increasing your spending when your income goes up. Lifestyle inflation tends to continue each time someone gets a raise, making it perpetually difficult to get out of debt, save for retirement or meet other big-picture financial goals. Lifestyle inflation is what causes people to get stuck in the rat race of working just to pay the bills.

Not too long ago we were broke college students with hardly any income and student loan debt.  The only places we could afford to live were dumps.  Dumps with roommates to be more precise.

The first place that we lived outside of the college dormitories was a rented house with four other housemates.  The rent was divided six ways for a five bedroom house (a love triangle of suicidal lesbians lived together in a very unpredictable fashion).  The small arts and crafts bungalow was an improvement in many ways from the dorms in terms of both space, e.g. a full sized kitchen, and financially.  We each paid $250/mo in rent and took a share in the $300-500/mo outrageous utility bill.  Our housemates were very wasteful.  Even so, it was a cheap place to live for the six months that I was there and the twelve that Shae resided.

Determined to keep my living expenses low and remain close to my sweetheart, I rented my first solo apartment a few blocks away until Shae could finish up her college degree.

zIMG_4255

This had to have been the worst place that I have ever lived.  The single bedroom, garden level, apartment cost $300/mo plus utilities.  Now that I was on my own, utilities were quite a bit cheaper as I could control the thermostat and the laundry was coin operated (aka not run constantly by housemates washing A pair of pants or A shirt).

I did not have cable, a landline, internet service, smart phone, or satellite tv.  I walked to work and only drove to buy groceries.  Shae and I only ate out when her parents visited.  The lifestyle inflation was small if at all present.  If homelessness was rock bottom, the months spent here were akin to resting on a pad of paper that sat on the rock.

That first apartment is the source of most of my horror stories.  The entire place was infested with cockroaches and the landlord, a real scum ball, was too cheap to pay for an exterminator.  On more than one occasion, I would wake up at night to feel one running across my bare torso.  It took several years to undo that complex.

IMG_3496

My bedroom had an “exterior” door that opened to the utility/laundry room communal area.  It was not uncommon for other tenants to start laundry at 11pm.

The kitchen had cracks in the floor that seeped water when it rained (probably why the roaches loved the place so much).  Yes, that is a typical lunch laid out on the stove (bologna, cheese, and mustard).

zIMG_4250

The living room had a window that was busted out and a piece of plywood had been wedged in.  I plastic’d the window up in the winter time and it would bellow in and out as the wind whipped around outside.

zIMG_4252

As part of living on the ground floor in a locked building, strangers would often ring my doorbell or knock on my window to be let into the building.  If I tried to ignore them, they would become belligerent and if I told them to ring the proper doorbell they would become belligerent.  The police would often use me as the doorman whenever they came to check in on someone upstairs.  I felt more inclined to helping them.

My office was only two blocks away and I would often walk out my backdoor and take the alley to get there.  In the warmer months, a bum could often be spotted sleeping in the alley bushes in old army fatigues.  Another example of the fine living establishments that I was enjoying was when the mailman joked to me that I was living in the terrorist apartment.  It turned out it wasn’t a joke.  The former tenant was a convicted terrorist and tried to blow up the state capitol building.  I received a large box from a prison one day with random ratty possessions including some shower sandals, handwritten notes, and a grungy wife beater.  I chucked it all in the dumpster.

So why in the world did I live in such a shitbox?  Primarily for love, it kept me close to Shae, but also for money.  The place was magnitudes cheaper than anywhere else that I could have rented.

Moving Up In the World

Shae eventually graduated and we hightailed it out of our respective housing situations to find greener pastures.  Since my work could easily follow me around, we moved to a city that hosted employers looking for Shae’s talents and skill set.  It was 2010 and the impact of the recession was still being felt by the cautious hiring of the time.  Shae could not get into her dream job right away and had to start applying to 2nd and 3rd tier companies.  As a result of being unemployed, landlords would not rent to her and she had to temporarily move back in with her folks.

With my still fledgling business and even smaller income I was able to rent a ‘nice’ two bedroom apartment.  The neighborhood had several other rentals operated by the property management company, and when Shae secured a menial grunt job a couple of weeks later she was able to move into her own two bedroom apartment across the street.

I paid $525/mo plus electric and she paid $545 plus electric.  Our apartments were close enough that we could share an internet connection with a powerful wireless router.  Each of us rented out our second bedrooms to graduate students to cut our housing expenses to about $262.50 + 1/2 electric + 1/4 internet.  The neighborhood provided plenty of characters with one that expanded our vocabulary and another that sat out all day in a lawn chair to break change for ‘friends’.

IMG_0236

IMG_2252

It didn’t take an overqualified Shae long to move on from her gruntling GED requirement job to an associates job.  Along with the safer, non physical labor, job came a bump in pay.  Uh oh, here comes the lifestyle inflation!

It’s true, as my business grew and Shae moved up the job ladder/pay scale we did experience lifestyle inflation.  Those bologna, cheese, mustard lunches turned into turkey, cheese, lettuce, tomato, pickle, and mustard sandwiches.  Dinners transformed from chicken to beef.  Fruits and vegetables could be found in our pantries and going out to eat was not just when parents visited.

Triple Life Changes

For the next year, life continued on with both of us paying half rent and working our respective jobs.  We even scrounged up enough spare money to take a cruise in the Bahamas.

100_2667

The summer of 2011 was a perfect storm for lifestyle changes.  Shae started a new job with her target company, I landed a lucrative contracting job, and we got married.  Without looking at the numbers I would guess that our combined income doubled.

We decided that I would move into her place as it was slightly nicer and had coin laundry in the building, working AC, and a dishwasher.  Gone were the days of roommates and being able to split our internet bill four ways.  As a newly married couple we *needed* some nice pots and pans, those plastic cups *had* to be replaced with glass, and pyrex containers replaced leftover lunch meat containers to pack lunch in.  Too tired to make dinner that night, let’s just order take out.  We bought his and hers smartphones on contract and shelled out over $100 a month because that’s what well earning married people do!  Right?

IMG_1316

Looking back at it and seeing the relatively minor bump in net worth in 2012, I cannot help but think of the song And the Money Kept Rolling In (And Out) in the hit musical Evita.

When the money keeps rolling out you don’t keep books
You can tell you’ve done well by the happy grateful looks
Accountants only slow things down, figures get in
the way

The song describes wealth redistribution and corruption in 1950s Argentina but I think it can also apply to poor personal finance.

Part of the problem was that we were busy house searching at the time and held almost all of our wealth in negligible interest rate savings and checking accounts.  What money we did have saved up was not working for us.  It was lazy money.

First Time Homebuyers

In 2013, after two years or searching, we found a house and moved.

IMG_2075

Our cheap rent was replaced with a mortgage, property tax, homeowners insurance, repairs, all utilities, and furnishings.  Mortgage + PTax + Utilities + insurance run about $850/mo.  An increase of approximately 50% from our renting days, but with the advantage that the principal of our mortgage payments come back to us as equity in the house.

IMG_2152

2013 we also started to get serious about retirement, investing, and trimming expenditures.  All three helped us get ahead of the rat race that is lifestyle inflation.

Pay Yourself First

One of the best actions we took and I wish we started doing it earlier was diverting 25% of gross pay to tax advantaged retirement accounts.  After 401k contributions, tax withholding, health insurance, and automatic taxable investments our take home pay was/is only about half our gross income.  From there we skim off quadruple mortgage payments (paying ourselves in house equity).  That leaves about 25% of our income to cover all other expenses (groceries, auto insurance, childcare, eating out, utilities, property taxes, entertainment, etc.).

Paying yourself first, especially with a % 401k contribution helps directly fight lifestyle inflation.  If we get a raise a chunk of that raise never makes the paycheck.  It is hard to miss something that isn’t there.

A Look Back

In 2012 our net worth increased 16%.

In 2013 it went up by 24%

2014 saw a whopping 41% gain (thanks in large part to the stock market)

Net Worth Over Time-redacted

While a 16% increase in 2012 isn’t bad, it could have been much more if we had been more cautious about lifestyle inflation.  Mobile phone contracts alone wasted over $1200 that year.  Leaving money sit around in 0.01% interest accounts also hindered growth.  While it was likely the most prudent way to keep our down payment safe, you can see how the following years benefitted from aggressive investments and keeping a bare minimum in anemic checking accounts.

Should we go back to eating plain bologna, cheese, and mustard sandwiches or living in a roach infested apartment to save money?  No.  Lifestyle inflation per the definition is when your net worth (the green line) remains flat.  As long as your net worth is trending upwards, you are beating lifestyle inflation.  How much it is trending up is probably a good indication of how much LI is in your life.  With that said, it is far easier to go up the lifestyle ladder than go down.  Starting in the dump gave us plenty of room to grow.

Remember, a dollar saved is a dollar earned.  The next time you get a raise, consider paying yourself first.  Your future self will thank you.

Posted in: House, Misc. Tagged: apartment, renting, tbt

Recent Posts

  • Min/Maxing Car Sale for Highest Value and Lowest Headache
  • Buying a Car with Data Driven Decision Making
  • Hot Lunch
  • Baking with Dad
  • Winter Nights

Financial Goals

Recent Comments

  • James Spurr on Building a Self Watering Raised Garden Bed
  • suwaidi online on Total Cost of Ownership – Inkjet vs Laser Printers
  • bcimechanical on Troubleshooting a Gas Furnace
  • g on Troubleshooting a Leaking Whirlpool Dishwasher [UPDATED]
  • Christie on Building a Self Watering Raised Garden Bed

Archives

  • December 2020
  • December 2018
  • July 2018
  • May 2018
  • April 2018
  • March 2018
  • February 2018
  • January 2018
  • December 2017
  • November 2017
  • October 2017
  • September 2017
  • August 2017
  • July 2017
  • June 2017
  • May 2017
  • April 2017
  • March 2017
  • February 2017
  • January 2017
  • December 2016
  • November 2016
  • October 2016
  • September 2016
  • August 2016
  • July 2016
  • June 2016
  • May 2016
  • April 2016
  • March 2016
  • February 2016
  • January 2016
  • December 2015
  • November 2015
  • October 2015
  • September 2015
  • August 2015
  • July 2015
  • June 2015
  • May 2015
  • April 2015
  • March 2015
  • February 2015
  • January 2015
  • December 2014
  • November 2014
  • October 2014
  • September 2014
  • August 2014
  • July 2014
  • June 2014
  • May 2014
  • April 2014
  • March 2014
  • February 2014
  • January 2014
  • December 2013
  • November 2013
  • October 2013
  • September 2013
  • August 2013

Categories

  • Business
  • DIY
  • Finance
  • Frugal Boy
  • Frugal Girl
  • House
  • Misc.
  • Parenting
  • Reading
  • Recipes
  • Savings
  • Technology
  • Travel
  • Uncategorized

Meta

  • Log in
  • Entries feed
  • Comments feed
  • WordPress.org

Copyright © 2025 Frugal Living.

Omega WordPress Theme by ThemeHall