Andrew left Friday for a week-long adventure with his brothers and a couple of uncles up to his uncle’s lake house. This is his first kid-free trip in a long time and my first time watching both Frugal kids alone for an extended period. 🙂
Before he left Andrew put a load of laundry into the washer so it’d be ready for the dryer by the time I got home from work, getting a jump start on the weekend chores. I walked into the house that afternoon and was greeted by the chirping of the washer. Unfortunately it wasn’t the happy “I’m done” kind of chirping. Nope, it was the “Houston, we have a problem” variety. After getting Frugal Boy’s dinner ready and making sure Frugal Girl was content I headed down to the basement to see what the problem was. E01 F09. The LED panel blinked flashed the error code over and over. We occasionally see E01 F08 – water supply problem – due to the undersized supply lines in the house (can’t run anything else while the washer is trying to fill) but this was something else – a drainage issue. The error had appeared a few days earlier but canceling out the cycle and restarting seemed to work fine. No such luck this time. After a couple cancels and a couple attempted restarts I was resigned to pull out sopping wet laundry and bail out the remaining water the best I could with a bucket.

Still water left
As you may recall we use cloth diapers with Frugal Girl. One of the weekend tasks is to wash said diapers but a broken washer puts a damper on that job. What to do? My options were:
- Call a repair person ($$$)
- Leave the diapers sit, put Frugal Girl in disposables, wait for Andrew to get home in a week and have him fix it (no AC in the house means those diapers are going to get mighty stinky)
- Wash the diapers by hand (bucket and plunger oh boy!)
- Drag the diapers to the nearest laundromat and sit for 2+ hours with a fidgety 3 year old and a four month old (did I mention Andrew took our only vehicle with him? We’re walking or hailing an Uber this week)
- Beg to borrow a neighbor’s washer (regular clothes sure, diapers in the washer for whatever reason seems to make people squeamish)
- Fix it myself
We’re going with the last one.
Google indicated that the most likely culprit was a clogged coin trap. Like the name implies, this handy part catches all the coins, bobby pins, screws etc. that you do not want traveling to and damaging the drain pump. Some machines are conveniently designed to have an access door right by the trap for regular cleaning. Our Maytag Maxima does not have this nice feature; you have to take off the whole front panel instead. Thanks Maytag. Well, those diapers aren’t getting any fresher so let’s get cracking.***
The first step in any appliance diagnostic and repair job is to unplug the machine. Might seem like common sense but as Grandpa would say “common sense is a gift not a given.” Once no more power is flowing it was time to remove the top panel of the washer. Yes, you read that right – the top panel has to come off before the front panel. I didn’t take any photos but on the back of the machine there are 3 screws along the top edge. Undoing those let me slide the top towards the back of the machine and reveal two screws for the electronics console panel. These are the same type of screw on either side of the machine in the corners. Once those are out don’t try to tug off the console just yet as you have to remove the dispenser and reveal even more screws.
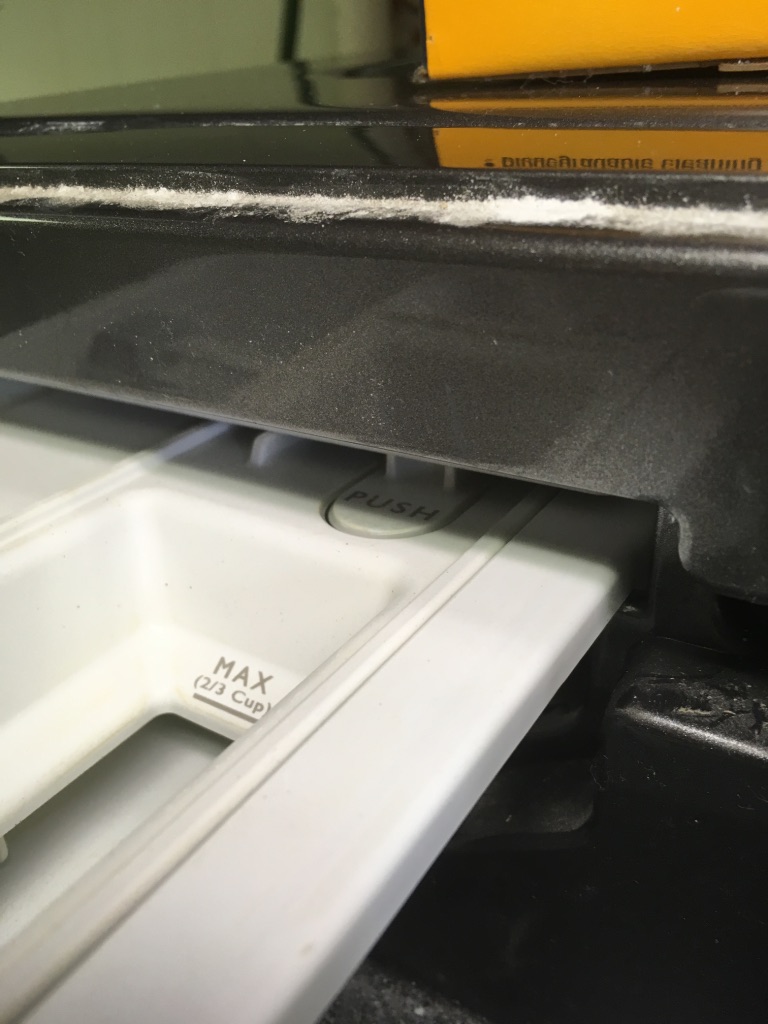
Push the button and the dispenser will slide out.
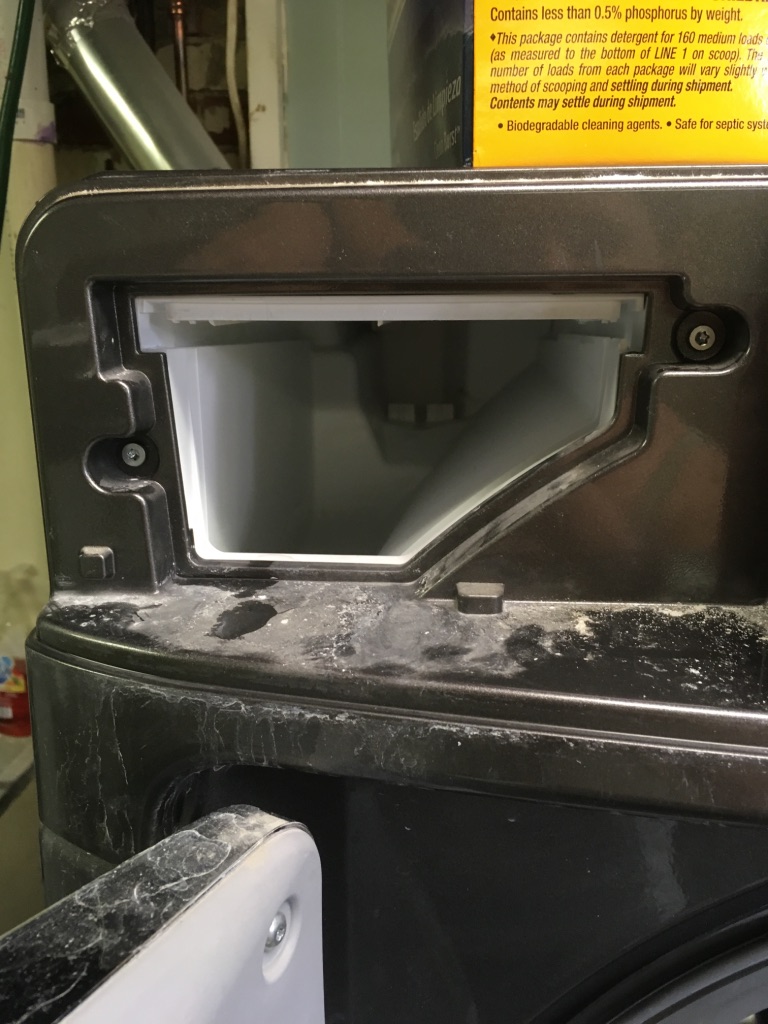
Of course these two screws have completely different heads from before requiring a different tool.
7 screws down and more to go! I was able to very gently lift off the electronics panel at this point and set it on top of the machine. It’s still connected to the main machine via wires so you can’t just rip it off or you’ll have a much more costly problem on your hands.
With the top and electronics panels removed I could now start tackling the front panel removal. But of course it’s not going to be that easy. The center of the front panel is connected to the tub of the machine by a rubber gasket/boot. This is held in place by tension using a wire and spring. There’s a tool that professionals use to extend the spring but I don’t have that. I made do by sliding pliers into the loops (being careful not to rip a hole in the rubber) and pulling in opposite directions. This extended the spring and loosened the wire just enough to be slipped off the gasket. I then unhooked the gasket from the front panel and shoved it towards the inside of the machine and out of the way.

We’ll revisit this pain in the butt again later.
9 more screws to go. There were four screws along the bottom edge of the front panel. Most tutorials on the web had you tilt the machine back or lay on the floor to access them. Our machines are on a custom made pedestal and with a rachet extender I was able to take them out without having to try and move the heavy machine myself.

Thank goodness for small fingers
There were three more easily accessible screws along the top of the panel (with a different head from either of the two previous types) that came out and I was able to start lifting the panel up and off the hooks holding it in place. I got the panel clear of the pedestal when I was stopped by more wires attached to the door latch. Two more screws and the front panel was off.
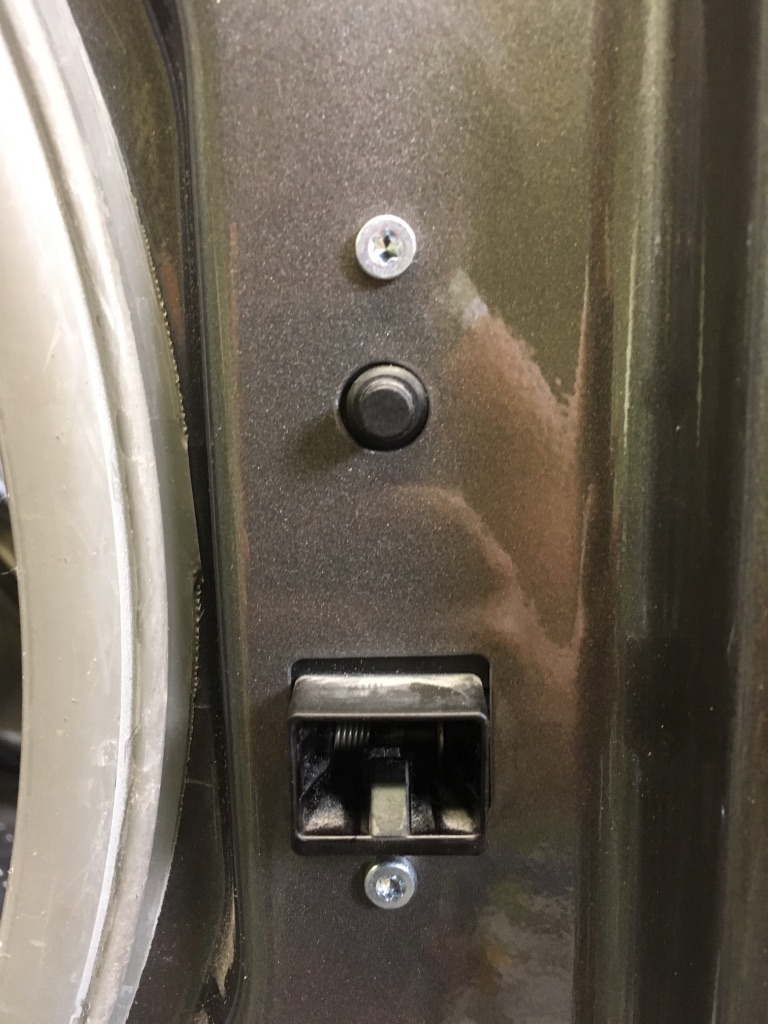
The latch and sensor button stayed with the machine not the door panel.

Front panel gone!
I was surprised how relatively empty it was inside. The white piece in the bottom center of the above photo is the coin trap and drain pump. Here’s a close up.
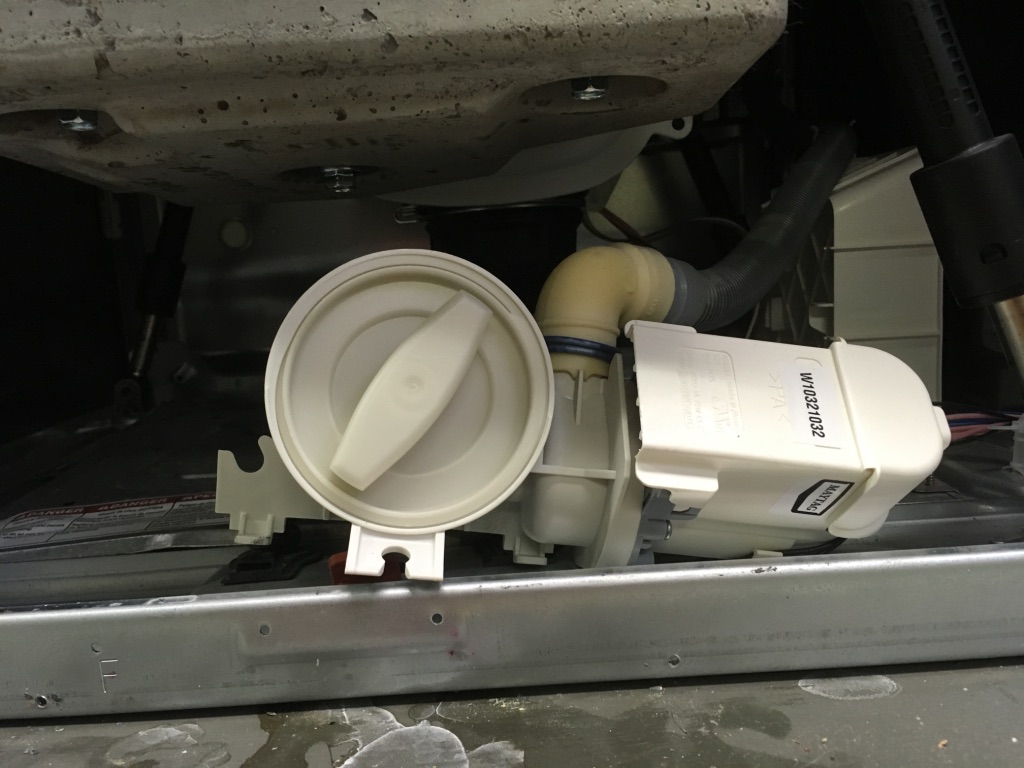
The parts are held in place by rubber feet that slipped into tabs. I removed the rubber feet to have more room to maneuver a bucket underneath the trap and started unscrewing the coin trap lid. Be happy that smells can’t be transmitted over the web yet as a gallon of foul smelling water poured out as well as the clogged trap.

Yes it was as gross as it looks.
Youtube and the like recommended sticking your finger into the drain pump and trying to spin impeller a bit to make sure there are no clogs there either. Ours was clear and I was free to clean out the trap and start putting the machine back together.

This is what it is supposed to look like.
The reassembly was pretty much the reverse of the above and smooth sailing with two exceptions – both rubber boots. I made the stupid mistake of taking off the rubber boot that leads from the outer tub down to the coin trap. I had felt something in there and turned out to be an intentional hard plastic ball. The tough tension combined with a restricted work space and an odd angle resulted in numerous attempts to get the darn thing back on. Once it was back on I poured a couple gallons of water into the drum to make sure we weren’t going to have any leaks (and subsequently have to take the machine apart again).

Seriously, don’t take this off unless you’re a masochist.
The other problem came when trying to reattached the door gasket to the front panel. Remember that wire and spring? It’s a hard thing to put back on. If you happen to have an extra set of hands to hold it in place it’d probably make the job a lot easier. The tension in spring kept forcing the wire off. I ended up having to hold the gasket top in place with my shoulder, pull the spring as hard as I could using a pliers in one hand, use a putty knife in the other hand to work the wire back into place, and send Frugal Boy to watch Paw Patrol in the other room so he wouldn’t learn new words. An hour later an the machine was back together and ready to be tested out.
So what was the culprit?


I did not heart the slime.
Those heart shaped pieces of fabric are washable nursing pads. I had lost them when I was nursing Frugal Boy…18+ months ago. I thought they were somewhere in the sea of baby clothes. I guess not. I was tempted for a second to bleach them for use but my senses got the better of me and they were thrown into the trash instead (like I said only a second). Three wash cycles later and I’m happy to report the machine is draining well and no signs of leakage yet. Start to finish it took me about 5 hours split between Friday evening (researching and starting to disassemble the machine) and Saturday morning (cleaning everything out, reassembling and testing). If this happens again the fix should go much faster. The kids pretty much let me work in peace. Frugal Boy was happily entertained by Saturday morning cartoons and Frugal Girl thought the back of her eyelids were more interesting than watching me work.

Obligatory photo for the grandparents. Also before you start worrying Grandma and Aunties, that towel is clean just stained.
Hopefully nothing else will break in the next few days until Andrew gets back. 🙂
***Note: I am not a professional appliance repair person. I am a software developer (aka professional googler). You follow what I did at your own risk. I am not responsible for any damage to your machine or you.
Woohoo, way to go, Shae!
Thank you for this. Maybe it’s becsuse I’m not a professional, but my google search yielded no results for this specific machine – except your page. No way I coulda done this without it. Still cursing though.
Shae, you are my hero tonight! I spent 90 minutes searching the internet and found nothing on my model and problem. About to give up. Then I found your article. I followed it to a tee and you were right on. What I found in the pump filter was a bunch of lint and three bra pads! What a terrible design by Maytag to clean a filter.
Thank you.
I saw all the videos on YouTube shows how to clean the drain trap the same way just like above . However , I found a much easier way … PULL OUT THE WASHING MACHINE AND REMOVE THE BACK PANEL ( just several screws) YOU CAN THEN GET TO THE DRAIN TRAP.
I did this and it worked so well. Much faster then taking front off. Thank you!
There is a much easier way to do this. Power off the washer. Tip the washer back onto the wall behind the washer. I would block the front so that the washer cannot fall on you. Remove the bottom plate (2 screws and 2 plastic fittings). With a pair of pliers pinch the plastic wire hold downs and remove them from the bottom plate. Thru the access hole move the entire pump assembly forward and up on the three rubber mounts. The pump and drain trap will fall down towards you into a perfect position to remove the trap and drain the contents into a pan or bucket. With a little trial and error you can easily get the 3 rubber mounts and pump back into the slots. Reattach the electrical fittings and reinstall the bottom panel. The only tricky parts are the 3 rubber mounts and the 2 plastic fittings the attach the bottom panel. I agree with the above. Note to Maytag: Lousy design for something that needs to be cleaned periodically, and and whats wrong with four screws for the bottom panel. Those two plastic fittings are a royal pain. I did this in about 30 minutes. IF I had to do it again I could probably do the entire clean out in 15 minutes or less. -roger-
Roger your tip to set it up saved me blood sweat and time. Thanks.
I took off the 4 hex head screws on the bottom of the front panel. The panel had enough play to reach in and take out the filter. Just had to move the dryer out of the way and lay on the floor to reach it. Placed towels around washer to catch draining water. Place something (short 2X 4’s, bricks whatever) to clean wet area under washer.
Agreed Mike, I as well took out the 4 hex head screws in front and had enough play to get the front panel out about 4-6” and put a pair of pliers in between to keep open while I twisted and removed screen housing cartridge. Yes there was some water which drained out, so yes, please have towels/rags ready to catch draining water…..which will not smell all that great, my unit has the pedestals so the drawer actually contained majority of water and easily cleaned up thankfully. Thanks for this saved a lot of time/effort not taking back/front and or bottom panels off to get at.
How thorough. Great job! I have a Maytag Maxima MHW5100DW0 that is doing the same thing that yours did, F9 E1. No where in the Use and Care Guide Manual does it say anything about cleaning out water drain pump filter. There is no access door, nothing. Obvious Maytag did not want consumers to clean it out themselves. Please, tell me the model # of yours. This way if it is the same, or at least similar, I will know what to do.
Thank you sooo much, Shae!! My Maxima model is W10007190. Your instructions worked great to remove a massive memory foam mess. I did access the drain through the back panel as my dryer is stacked on top of the washer and had no safe way get the washer top off.
Thanks again, for posting this info – you saved me a lot of time and money!
I followed these instructions and now my washer works great. Before I put it back together, I carefully measured and then cut a six inch round hole in the front cover. Now I can just reach in, unscrew the filter and clean the screen in a few minutes.
Thanks for they help!
Did cutting the hole work I have been thinking of doing this
Thank you, Thank you, Thank you!!!! We were looking everywhere on how to do this, and your how to was perfect!!!
AWESOME tutorial! Thank you! YouTube produced zero useful videos (abnormal!) but your walk through and struggles made it so easy!
Thank you again!
Thank you very much. Mine is hidden behind the lower front panel and had never been cleaned. It didn’t smell too bad but had $5.69 worth of change. Probably not a record but a good start.
I tried what Mel said and found it quite easy to do by removing the back panel. You are removing the drain plug by touch as it faces the front. You can unscrew the plug by hand, clean the basket of debris and tighten by hand. Have a towel on hand at the plug area as you loose a little water. It took about an hour from start to finish.
Take the back panel off way easyer
Thank you! We have 8 dogs 3 cats and 8 birch trees (seeds). My old 59 year old self who just got my 2nd Covid shot was able to do this and not lose it! Kudos!
You saved me 3 hours today (I had help putting that wire spring back)… cant believe there was nothing else online about this specific model and so happy I found your blog after opening the back, then opening the front but couldn’t figure out why it wont work (I would have never thought of opening the top!!!)
God bless you and frugal boy!
I watched you YouTube on cleaning out the coin catcher drain filter on the Maytag maxima xl front load washer. You do not need to disassemble the front and go through those problems, You can access the drain filter through the back. You take off the back panel and remover the drain house fromthe filter housing. You have easy access to clean it out from the backside.
Thank you for posting.
Looking through YouTube on how to clean my filter.
I did open up the back of the washer but the freakin filter is up front of the was to far up for me to access it.
Just FYI. I have this same washer. If you tilt back the machine and pop out the rubber feet that holds the entire pump and catch filter assembly you can then disconnect the hoses and pull it from the back without having to disassemble the washer front.
Removing the back panel won’t help if the pump is facing the front of the machine: there’s no way to reach that far to unscrew the trap. Maybe going through the bottom (tilting the machine on its rear) is the easiest option. Shame on Maytag for this awful design.
Thank you for posting this! Saved me a ton of work in getting my abomination cleaned out! And yes, I did get my fill of The Smell