The extent of my baking knowledge up until now has been to follow the instructions on the back of the ready mix boxes. Come along with Shae and myself as we embark on a six week baking challenge where we push our comfort zones and try baking recipes we have never done before!
Week 3 – Soda Bread
We all know that there are two types of bread, leavened and unleavened. Leavened breads incorporate some type of rising agent such as yeast or bicarbonate, where as unleavened breads do not.
This week, I attempted a leavened soda bread. The bread gets its rise from the chemical reaction of bicarbonate (a base) with lemon juice (an acid). When bases and acids mix together they fizz, and it is that fizz that gives the soda bread its air pockets and rise.
Soda breads are a part of the quick bread family. They only take about an hour to prepare and cook because you do not have to wait for the yeast to break down sugar and ferment.
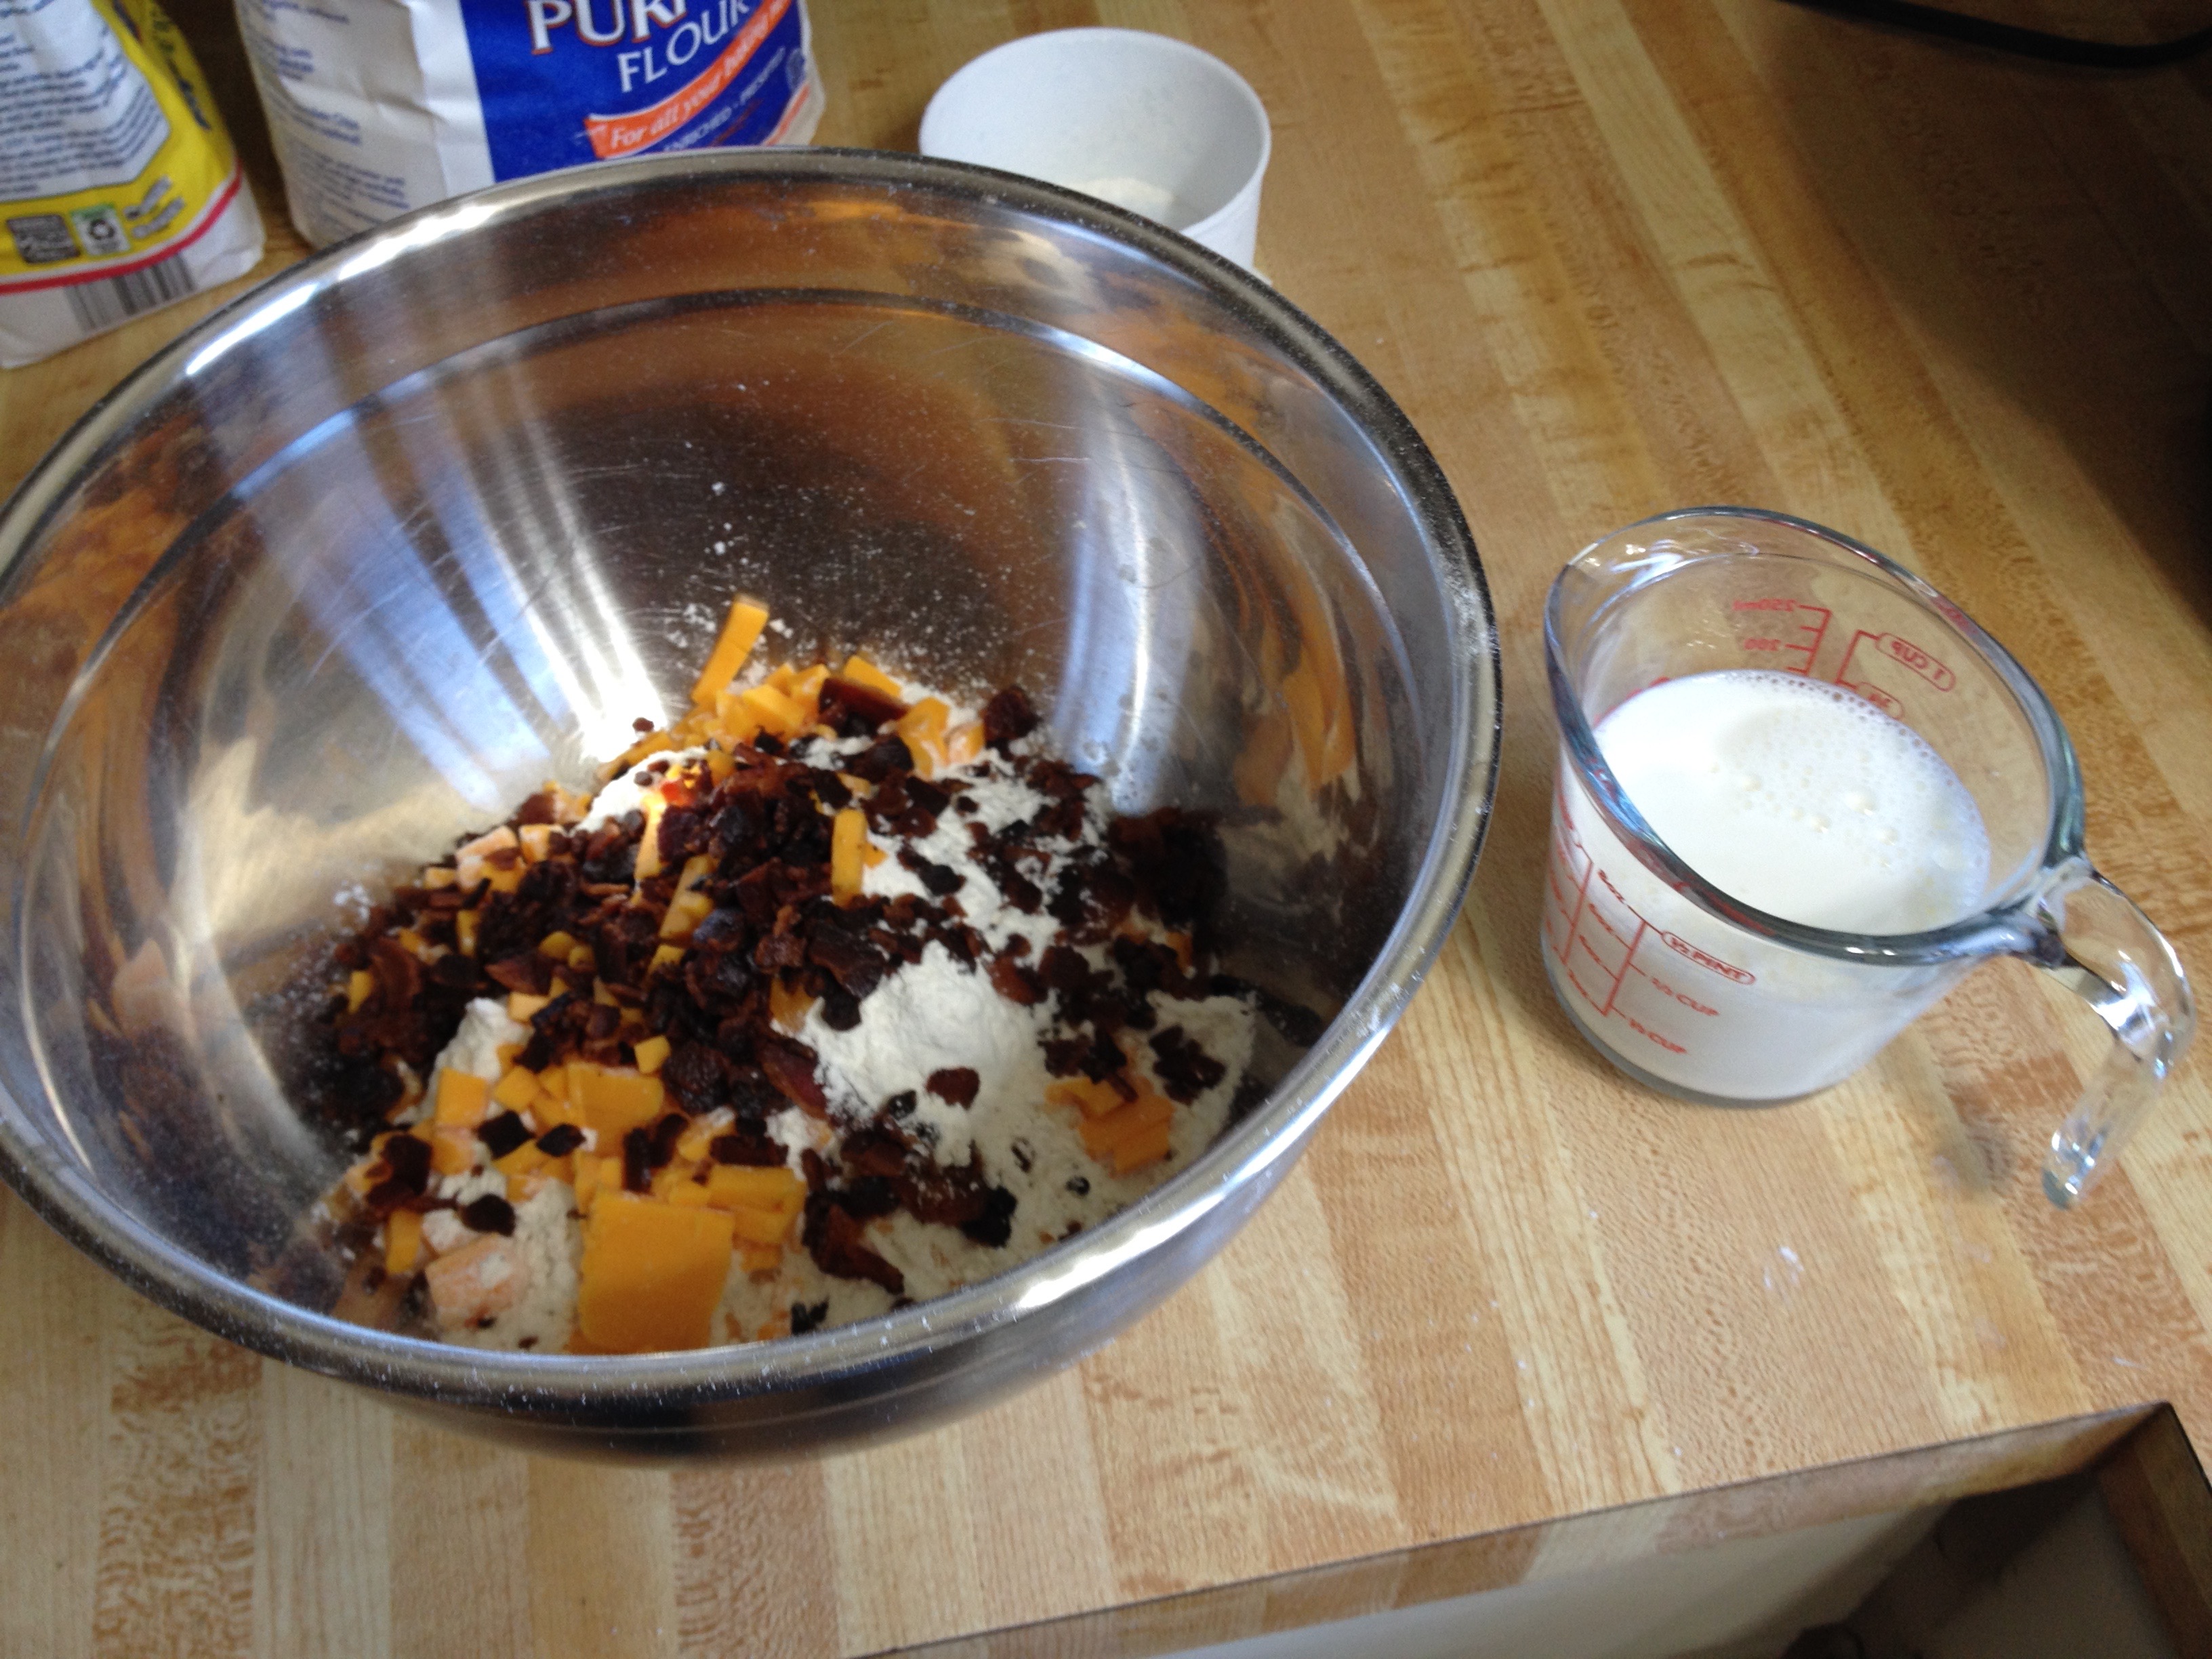
I used flour, sharp cheddar cheese, bacon, baking soda (my base), milk, lemon juice (my acid), a pinch of sugar, a pinch of salt, and dried chives for my mix.
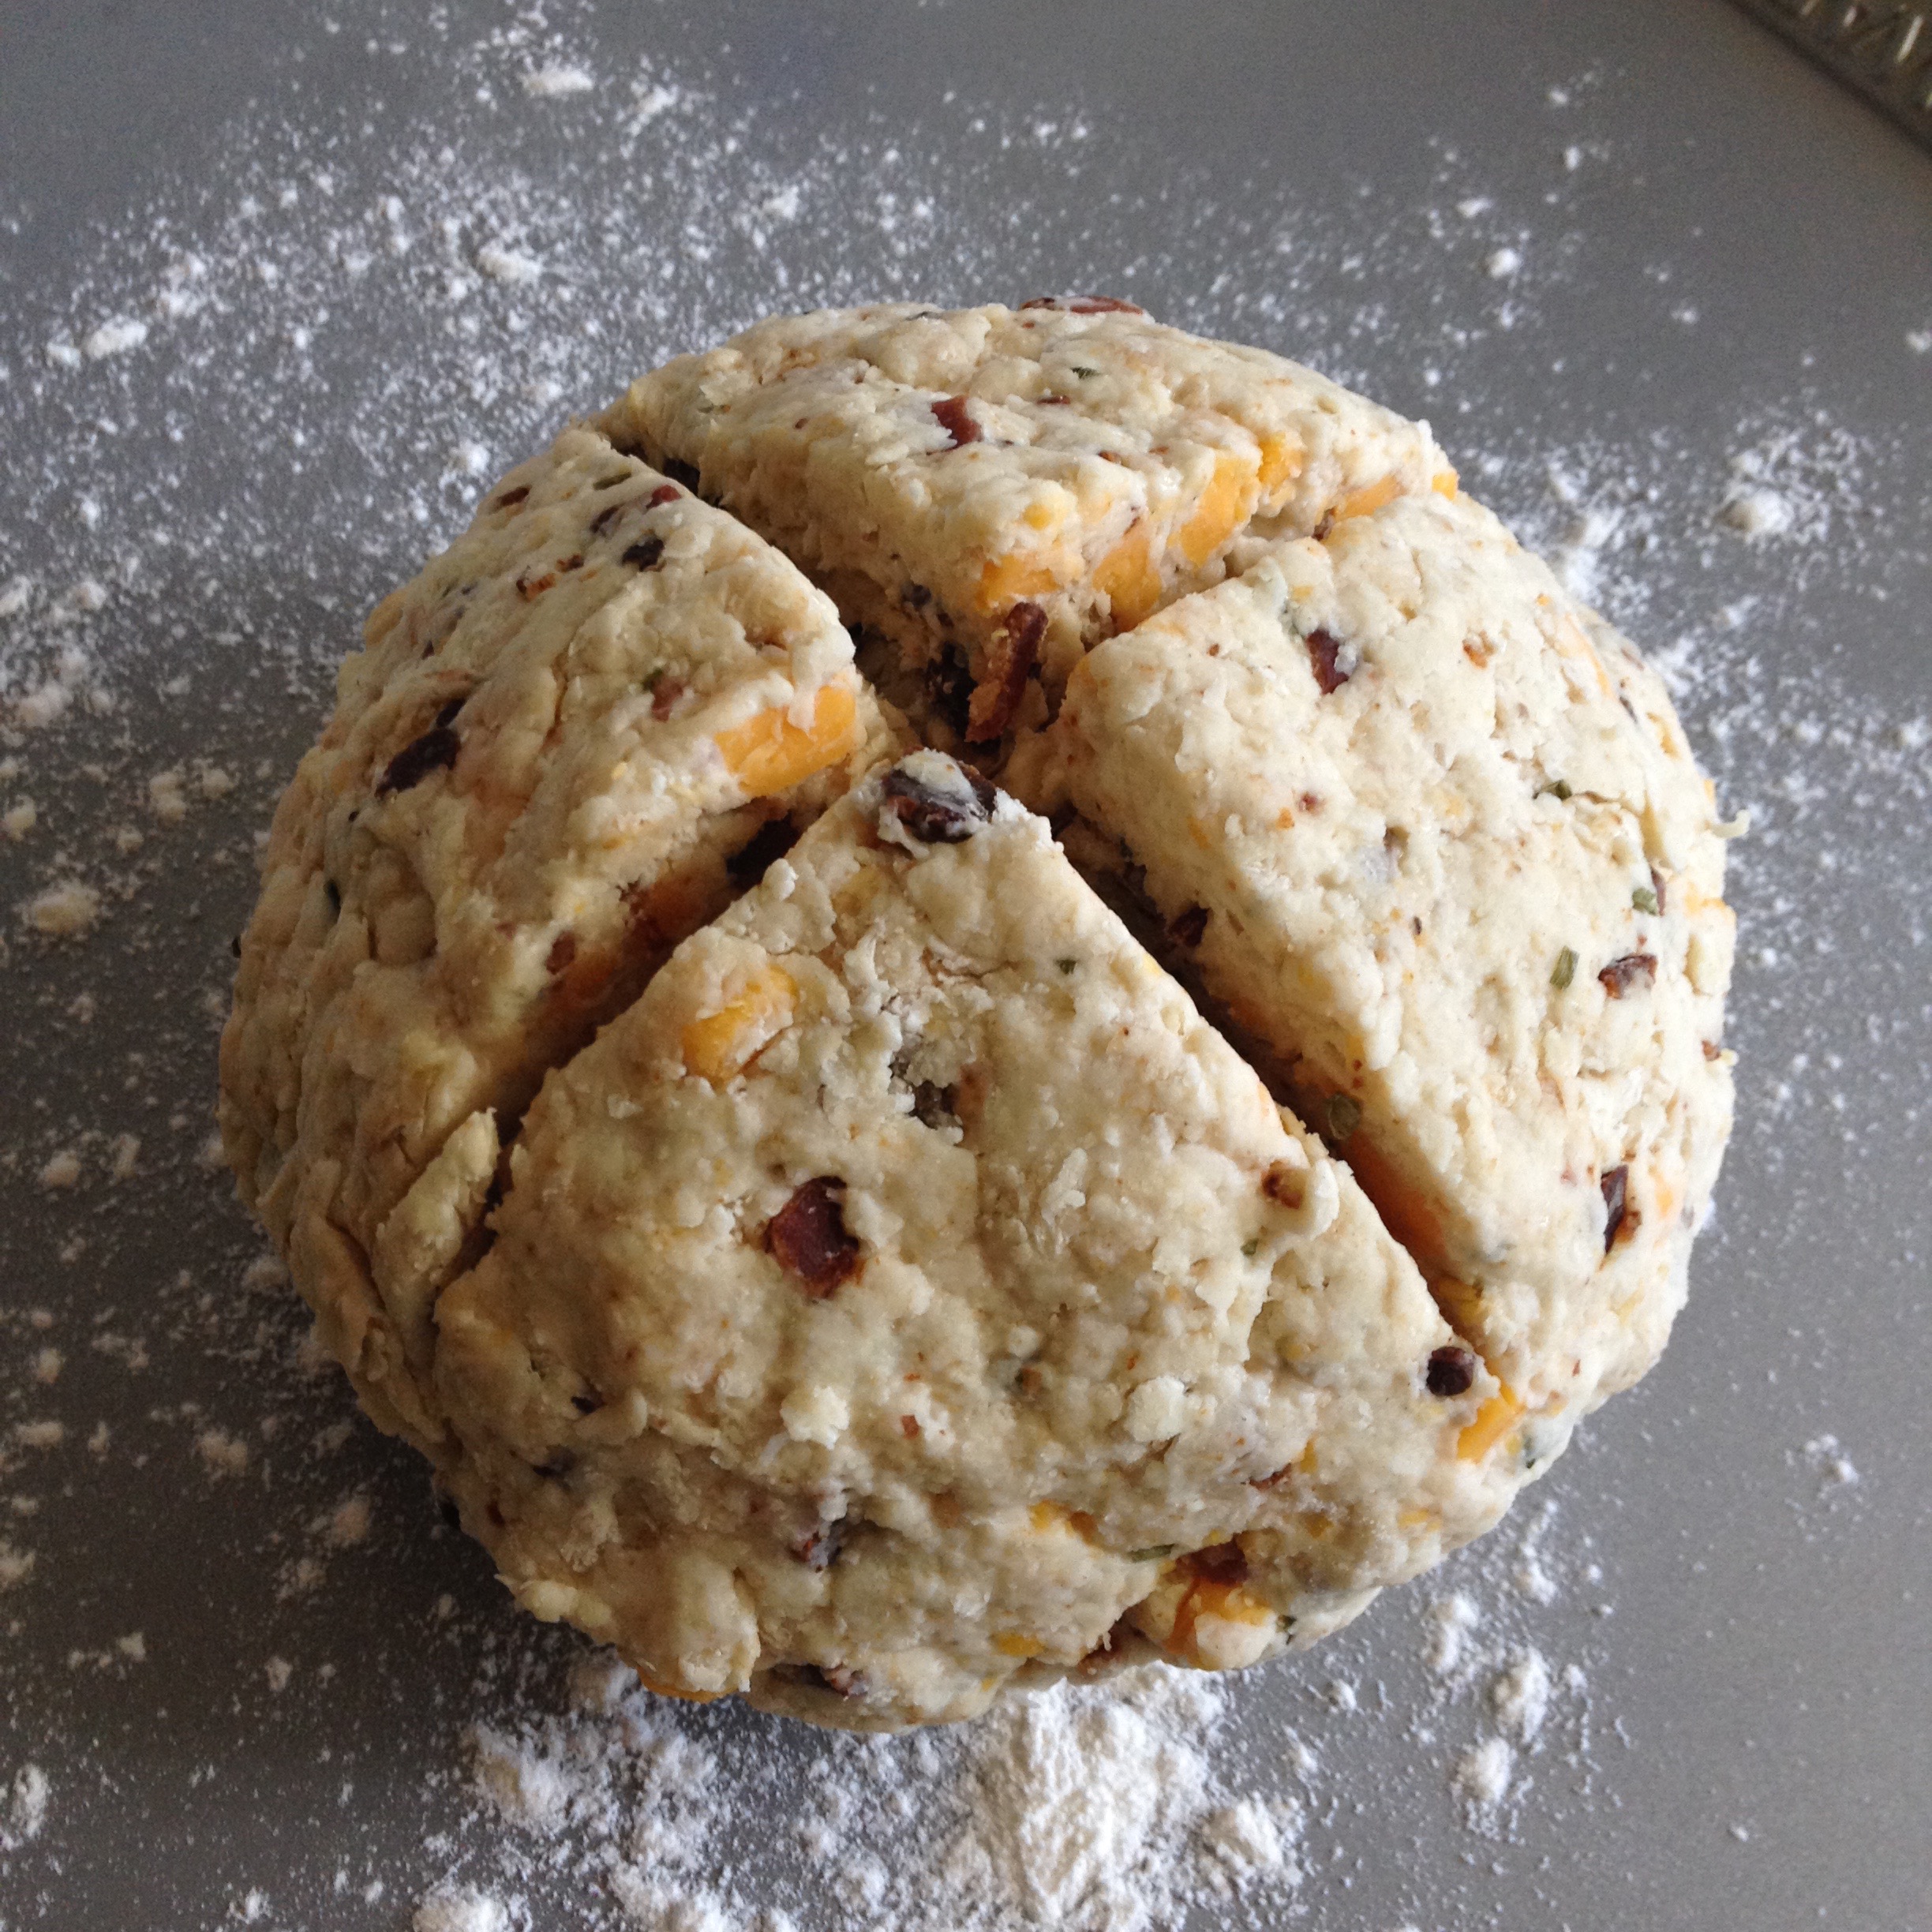
After combining all of the ingredients thoroughly and a little bit of kneading the dough was formed into a ball and a cross was cut into the top to help heat penetrate during baking.
The recipe I was following said to bake it for 22 minutes. After 30 minutes it was starting to look done on the outside.
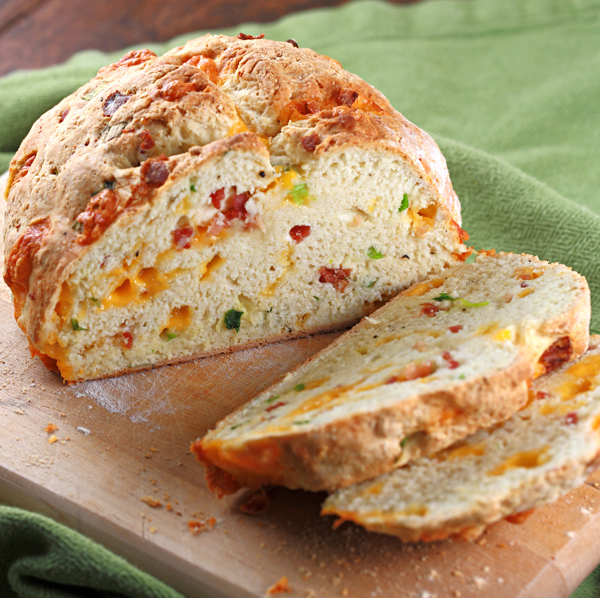
But the inside was a different story. As Paul Hollywood would say, “It’s raw”.
I found the flavor to be quite bland. The bread needed a lot more filling to be interesting and should I attempt another soda bread I would make it flatter to promote more even baking.
What should we try baking for next week? I was thinking of tackling puff pastry.
The extent of my baking knowledge up until now has been to follow the instructions on the back of the ready mix boxes. Come along with Shae and myself as we embark on a six week baking challenge where we push our comfort zones and try baking recipes we have never done before!
Week 2 – Baked Alaska
Think of an ice cream dessert. Now set it on fire. That is the magic of baked alaska! Baked Alaska consists of three main parts, a cake base, an ice cream core, and a meringue shell. The meringue shell helps to insulate the cold ice cream inside so you can do dramatic baking acts such as taking a blow torch to it, pouring flaming alcohol on top of it, or even pulling an ice cream dessert out of the oven!
The recipe that we followed was here, but I wouldn’t recommend it because the cake base was way too sweet. It was basically fudge, so if that is what you like then go for it, but next time we make baked Alaska I will opt for a less sugary base.
So let’s get baking shall we! We spread it out over two days. The ice cream needs time to freeze hard if it has any hope of surviving the heating process.
Shae started by mixing up the cake batter. Frugal Boy was content getting the chocolate mixing bowl leftovers.
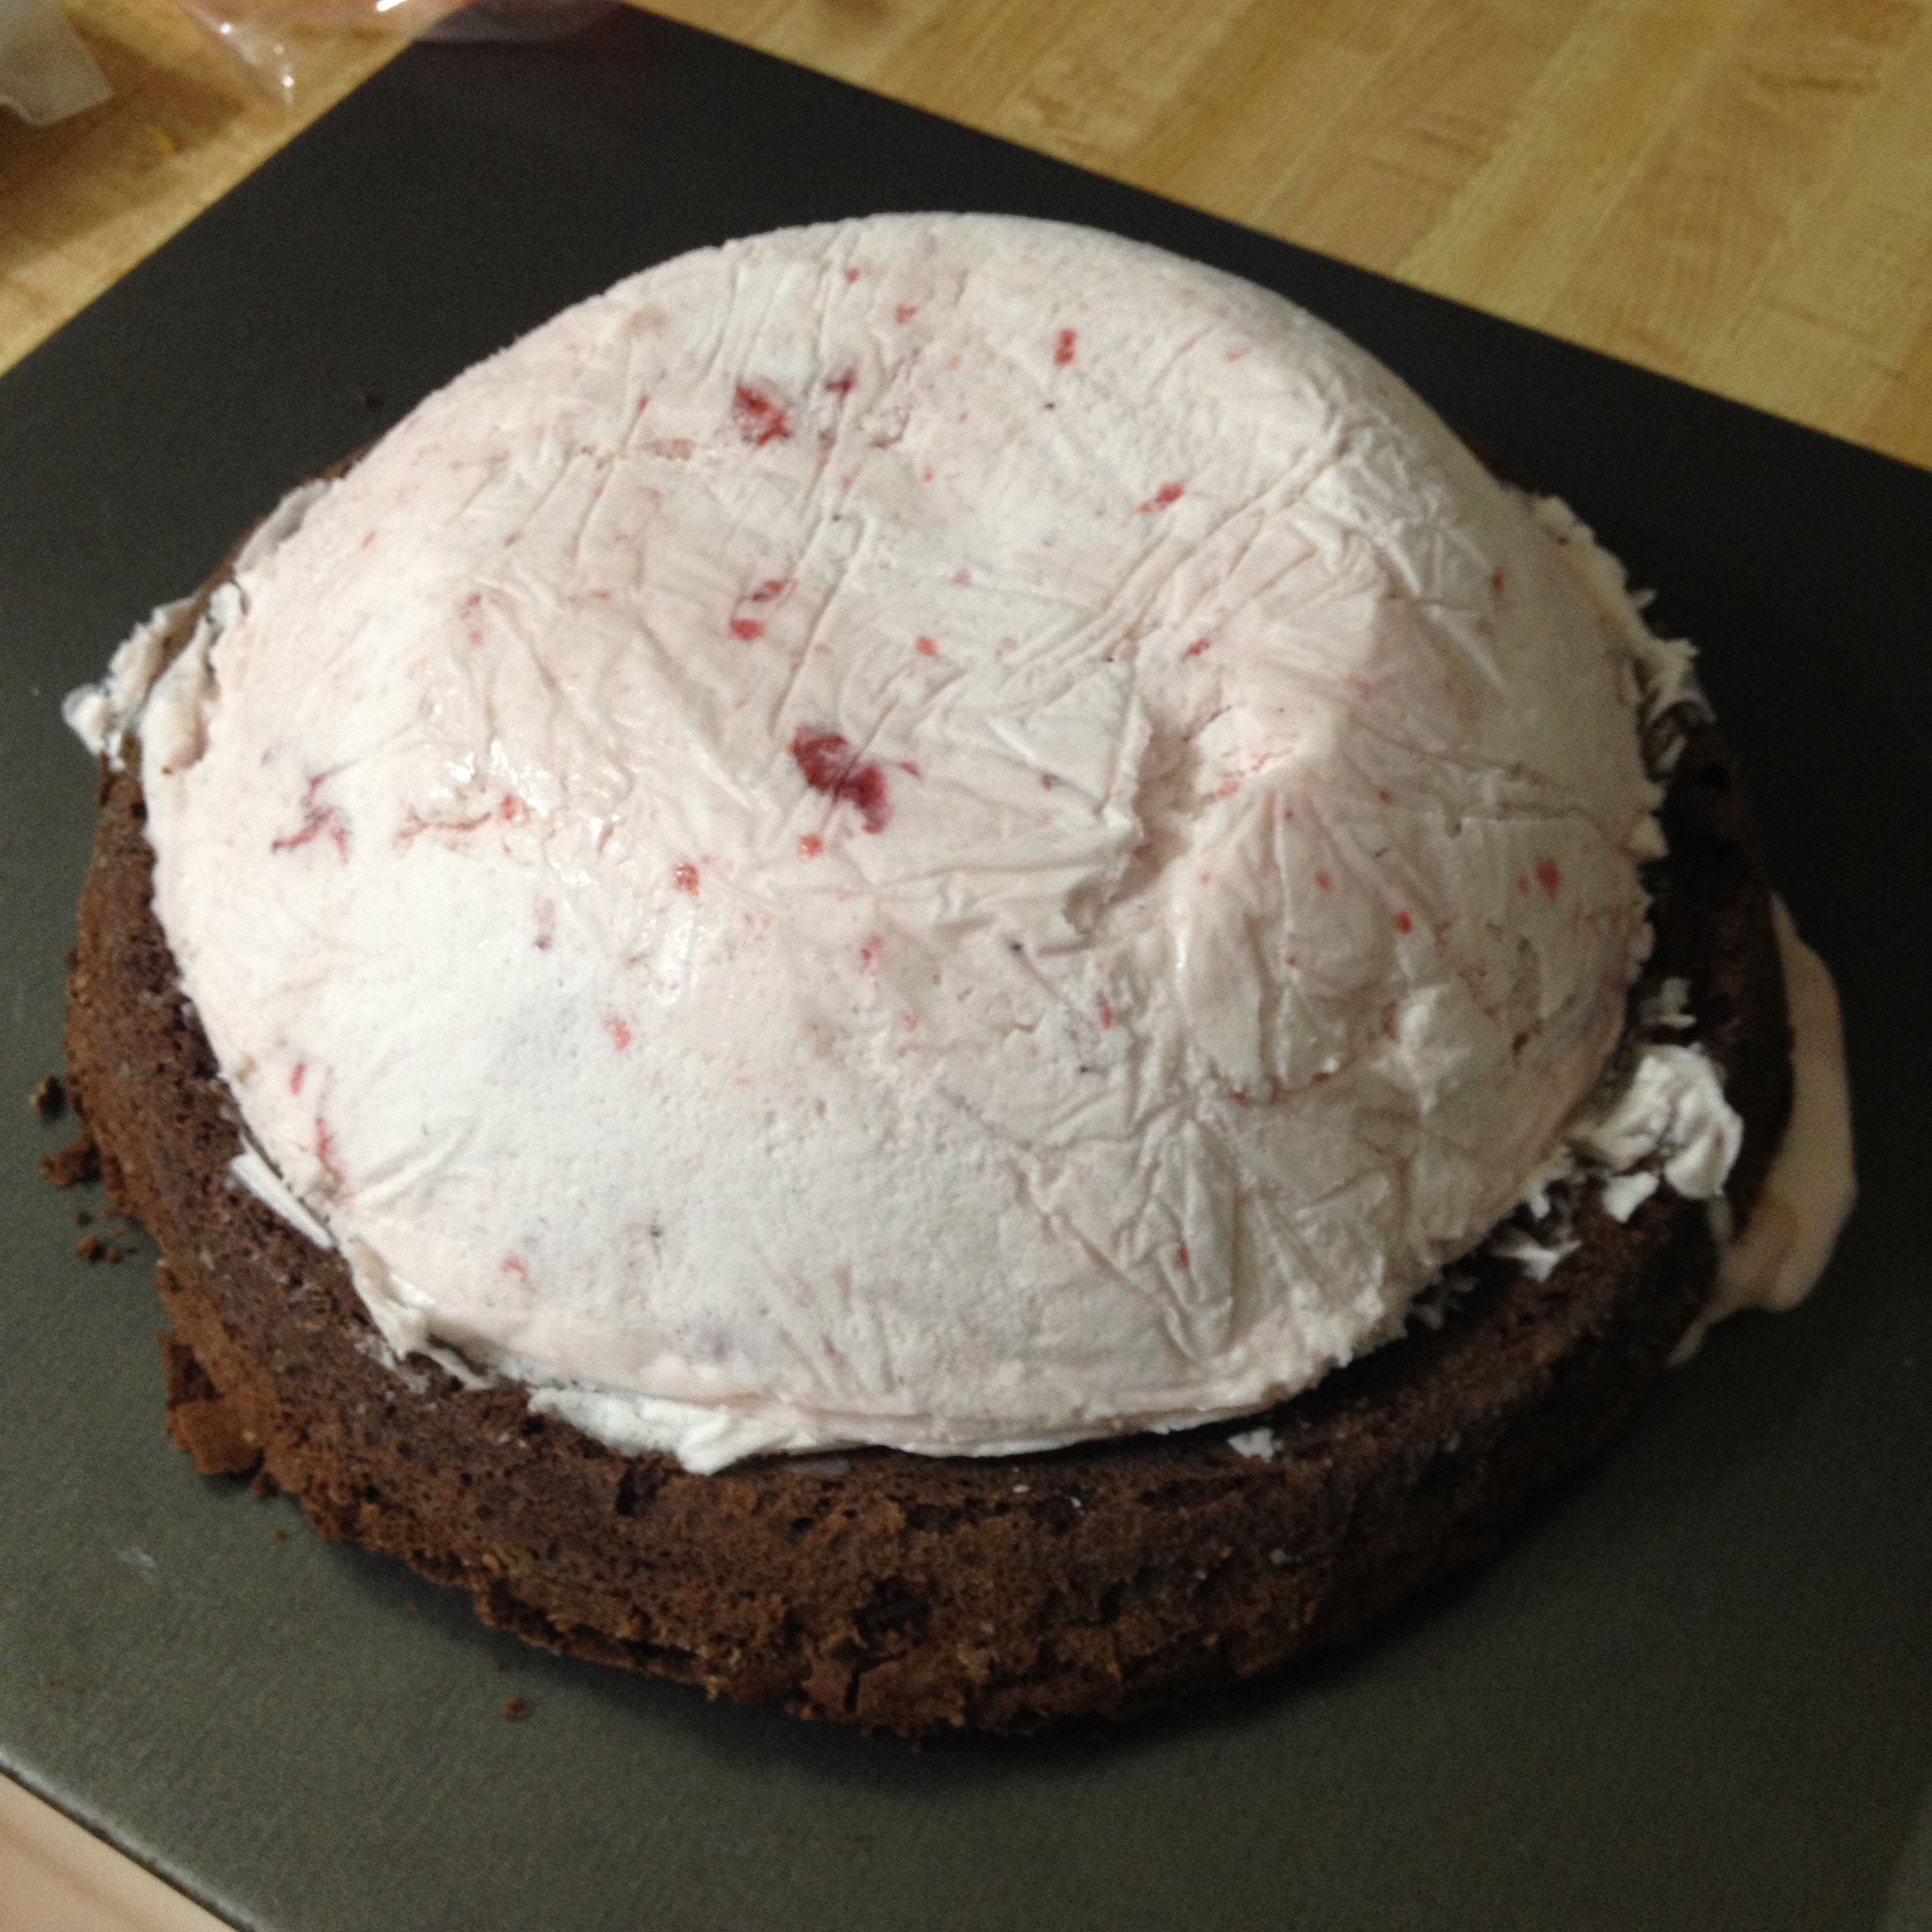
I had the really hard job. I lined a metal mixing bowl with plastic wrap and then dumped a half gallon of store bought strawberry ice cream into it. By pressing the ice cream down into the bowl it made a nice dome shape. Once the cake was finished baking and had cooled, we simply flipped the ice cream on top of it and stuck the whole thing back in the freezer to keep cold.
That night we set about making the meringue. There are different meringues, French, Swiss, Italian, and so forth. Meringues are to my knowledge all made with egg whites and sugar. The difference is how and when you combine those ingredients. We opted to use a Swiss meringue. Swiss meringue is pasteurized, so it is completely safe from salmonella. To make up the meringue, you combine your egg whites and sugar in a mixing bowl over a pot of steaming water. The steam will pasteurize the egg whites, and the sugar in the mixture will keep the eggs from turning into scrambled whites. The next step tricked us up a couple of times. You need to beat the mixture a lot. Beating the mixture adds air and that air gives it a billowy, fluffy, white appearance. The egg whites puff up, and the sugar gives it stability so it doesn’t immediately collapse down. The trick with Swiss meringue is that since the sugar is added from the get go, it is very difficult to beat in air. Our first attempt used a hand mixer and after 10 minutes or so it was still a runny mess. Our second attempt we got out the stand mixer and just let it run on high speed with a whisk attachment. Eventually the meringue will firm up and hold stiff peaks.
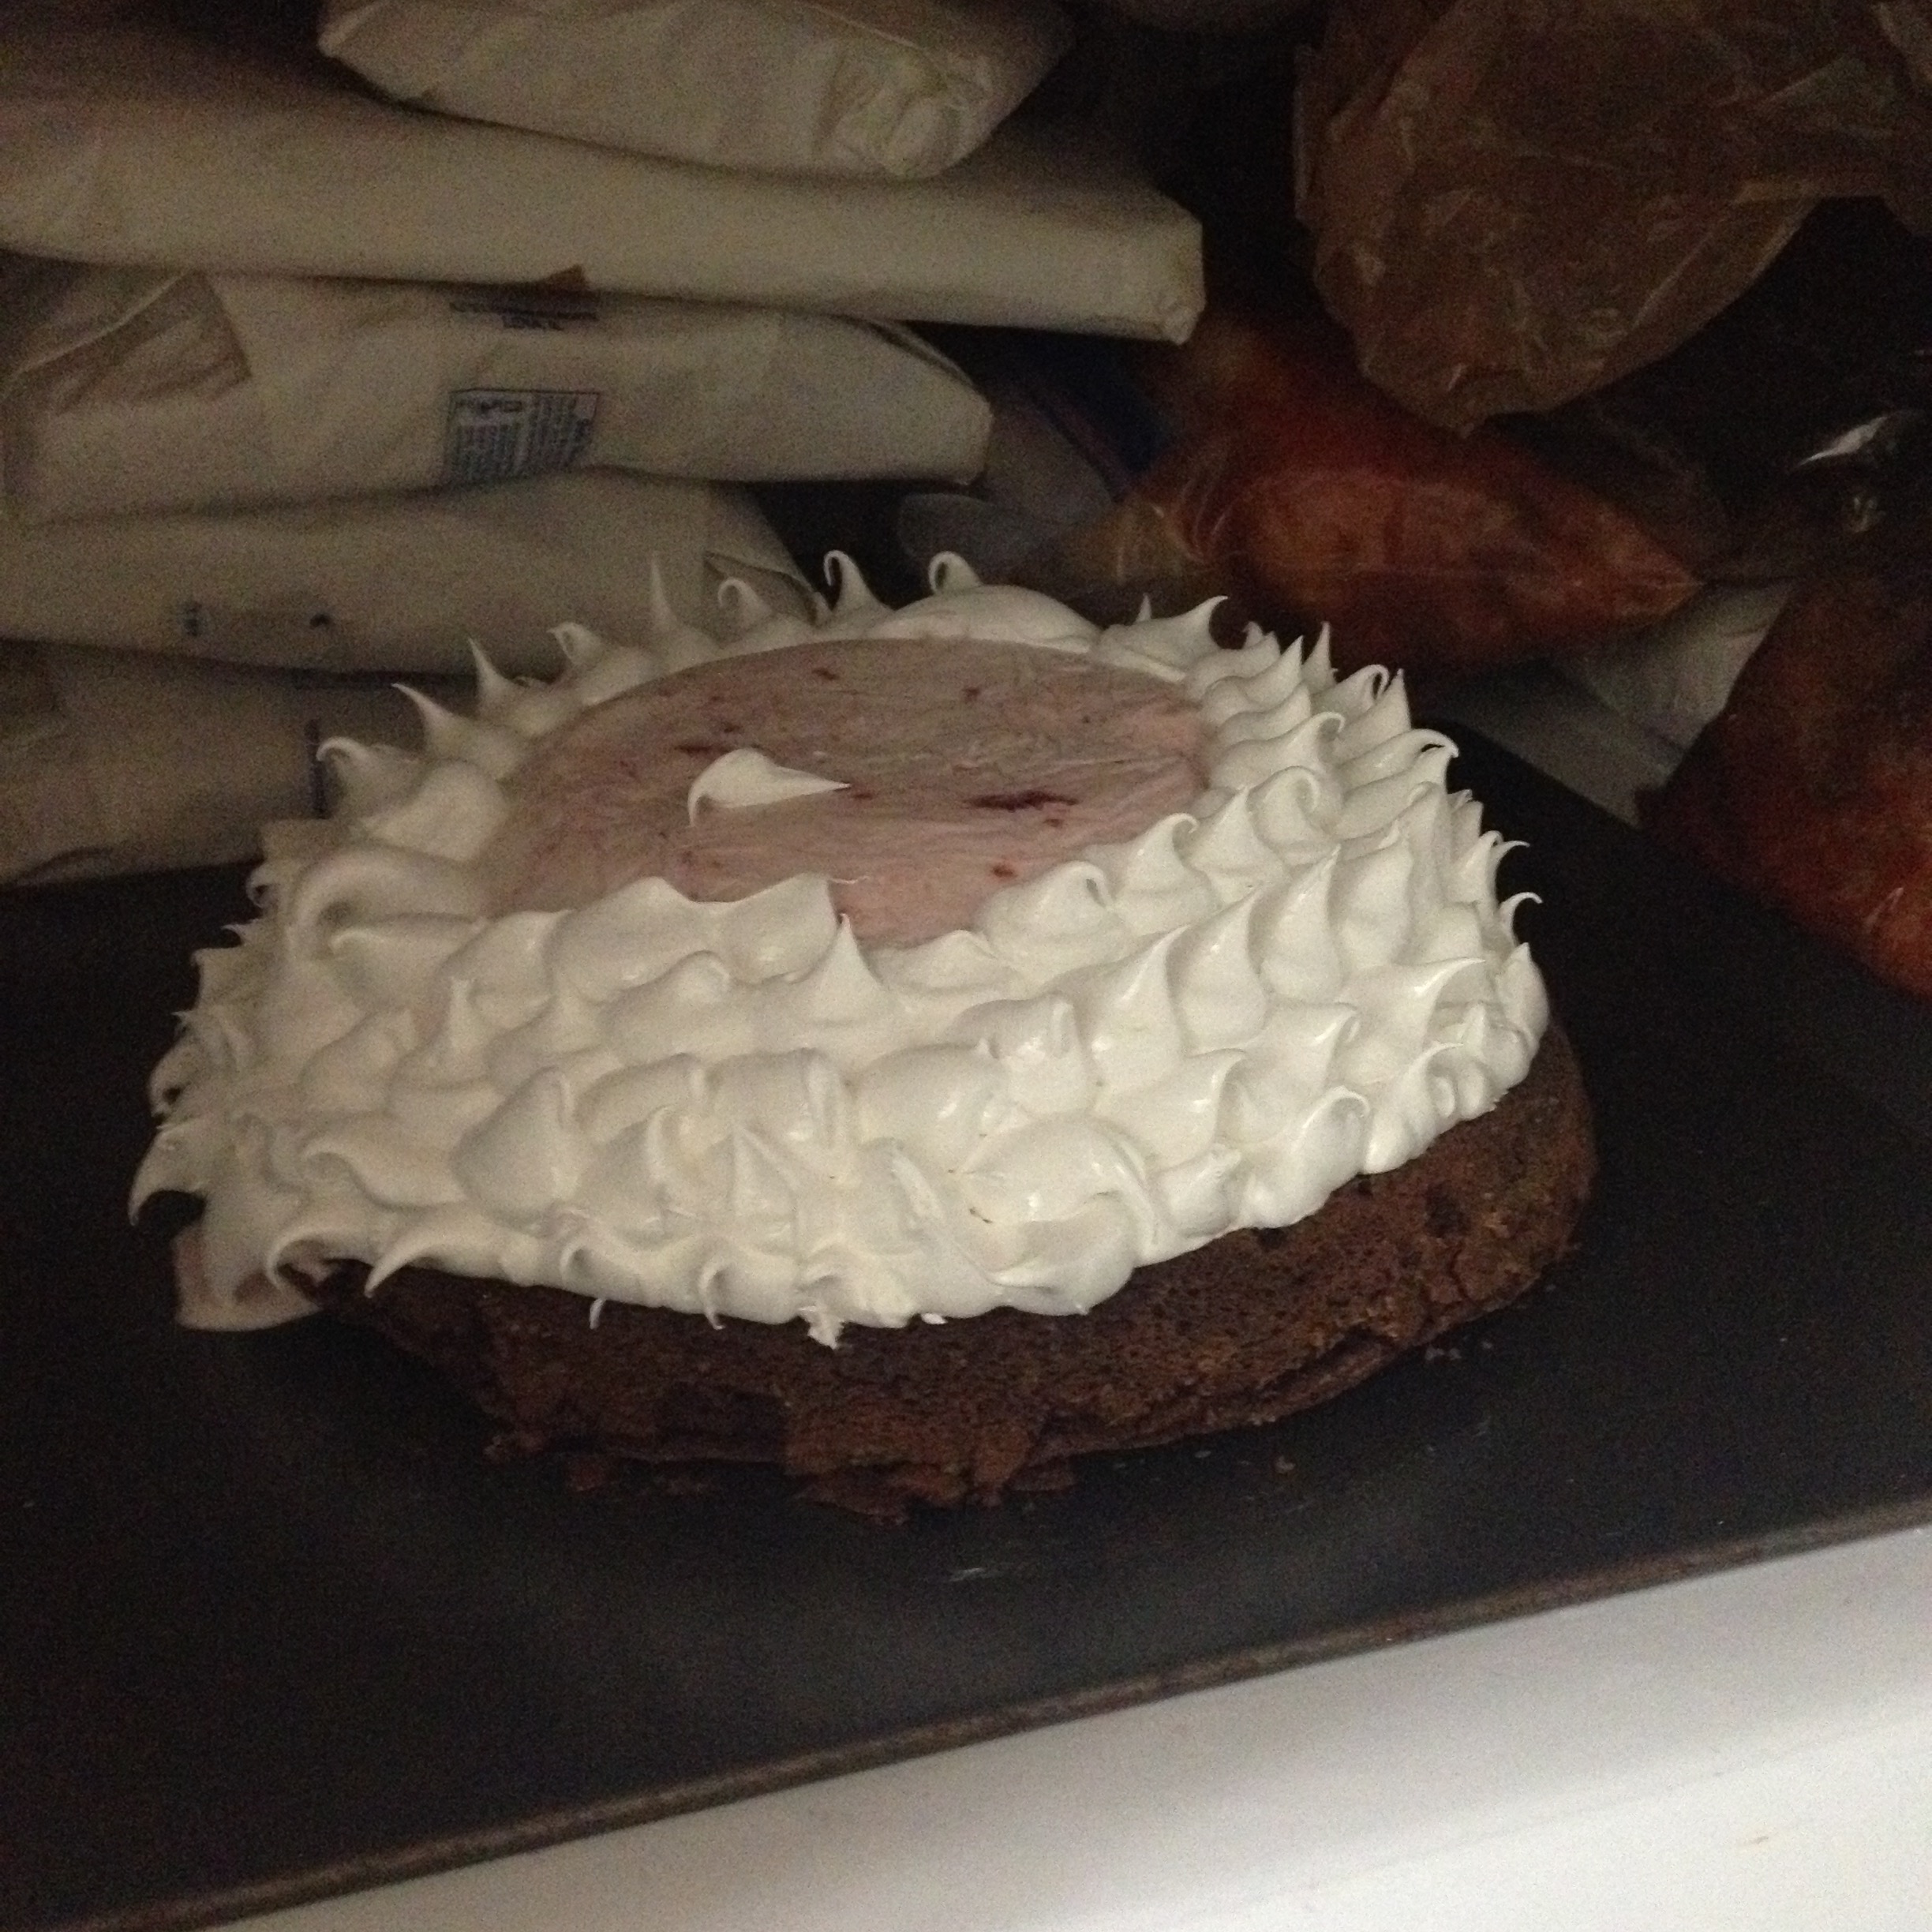
Using a ziplock bag with the corner cut off, I piped on meringue to cover and insulate the ice cream.
Unfortunately, I ran out of meringue before I finished, so I had to stick the cake back in the freezer while I made up a 3rd batch. You can see how the ice cream had already started to melt a bit just from the short time of being out!
The next day we were ready to finish up our baked Alaska. Here it was before the dramatic finale.
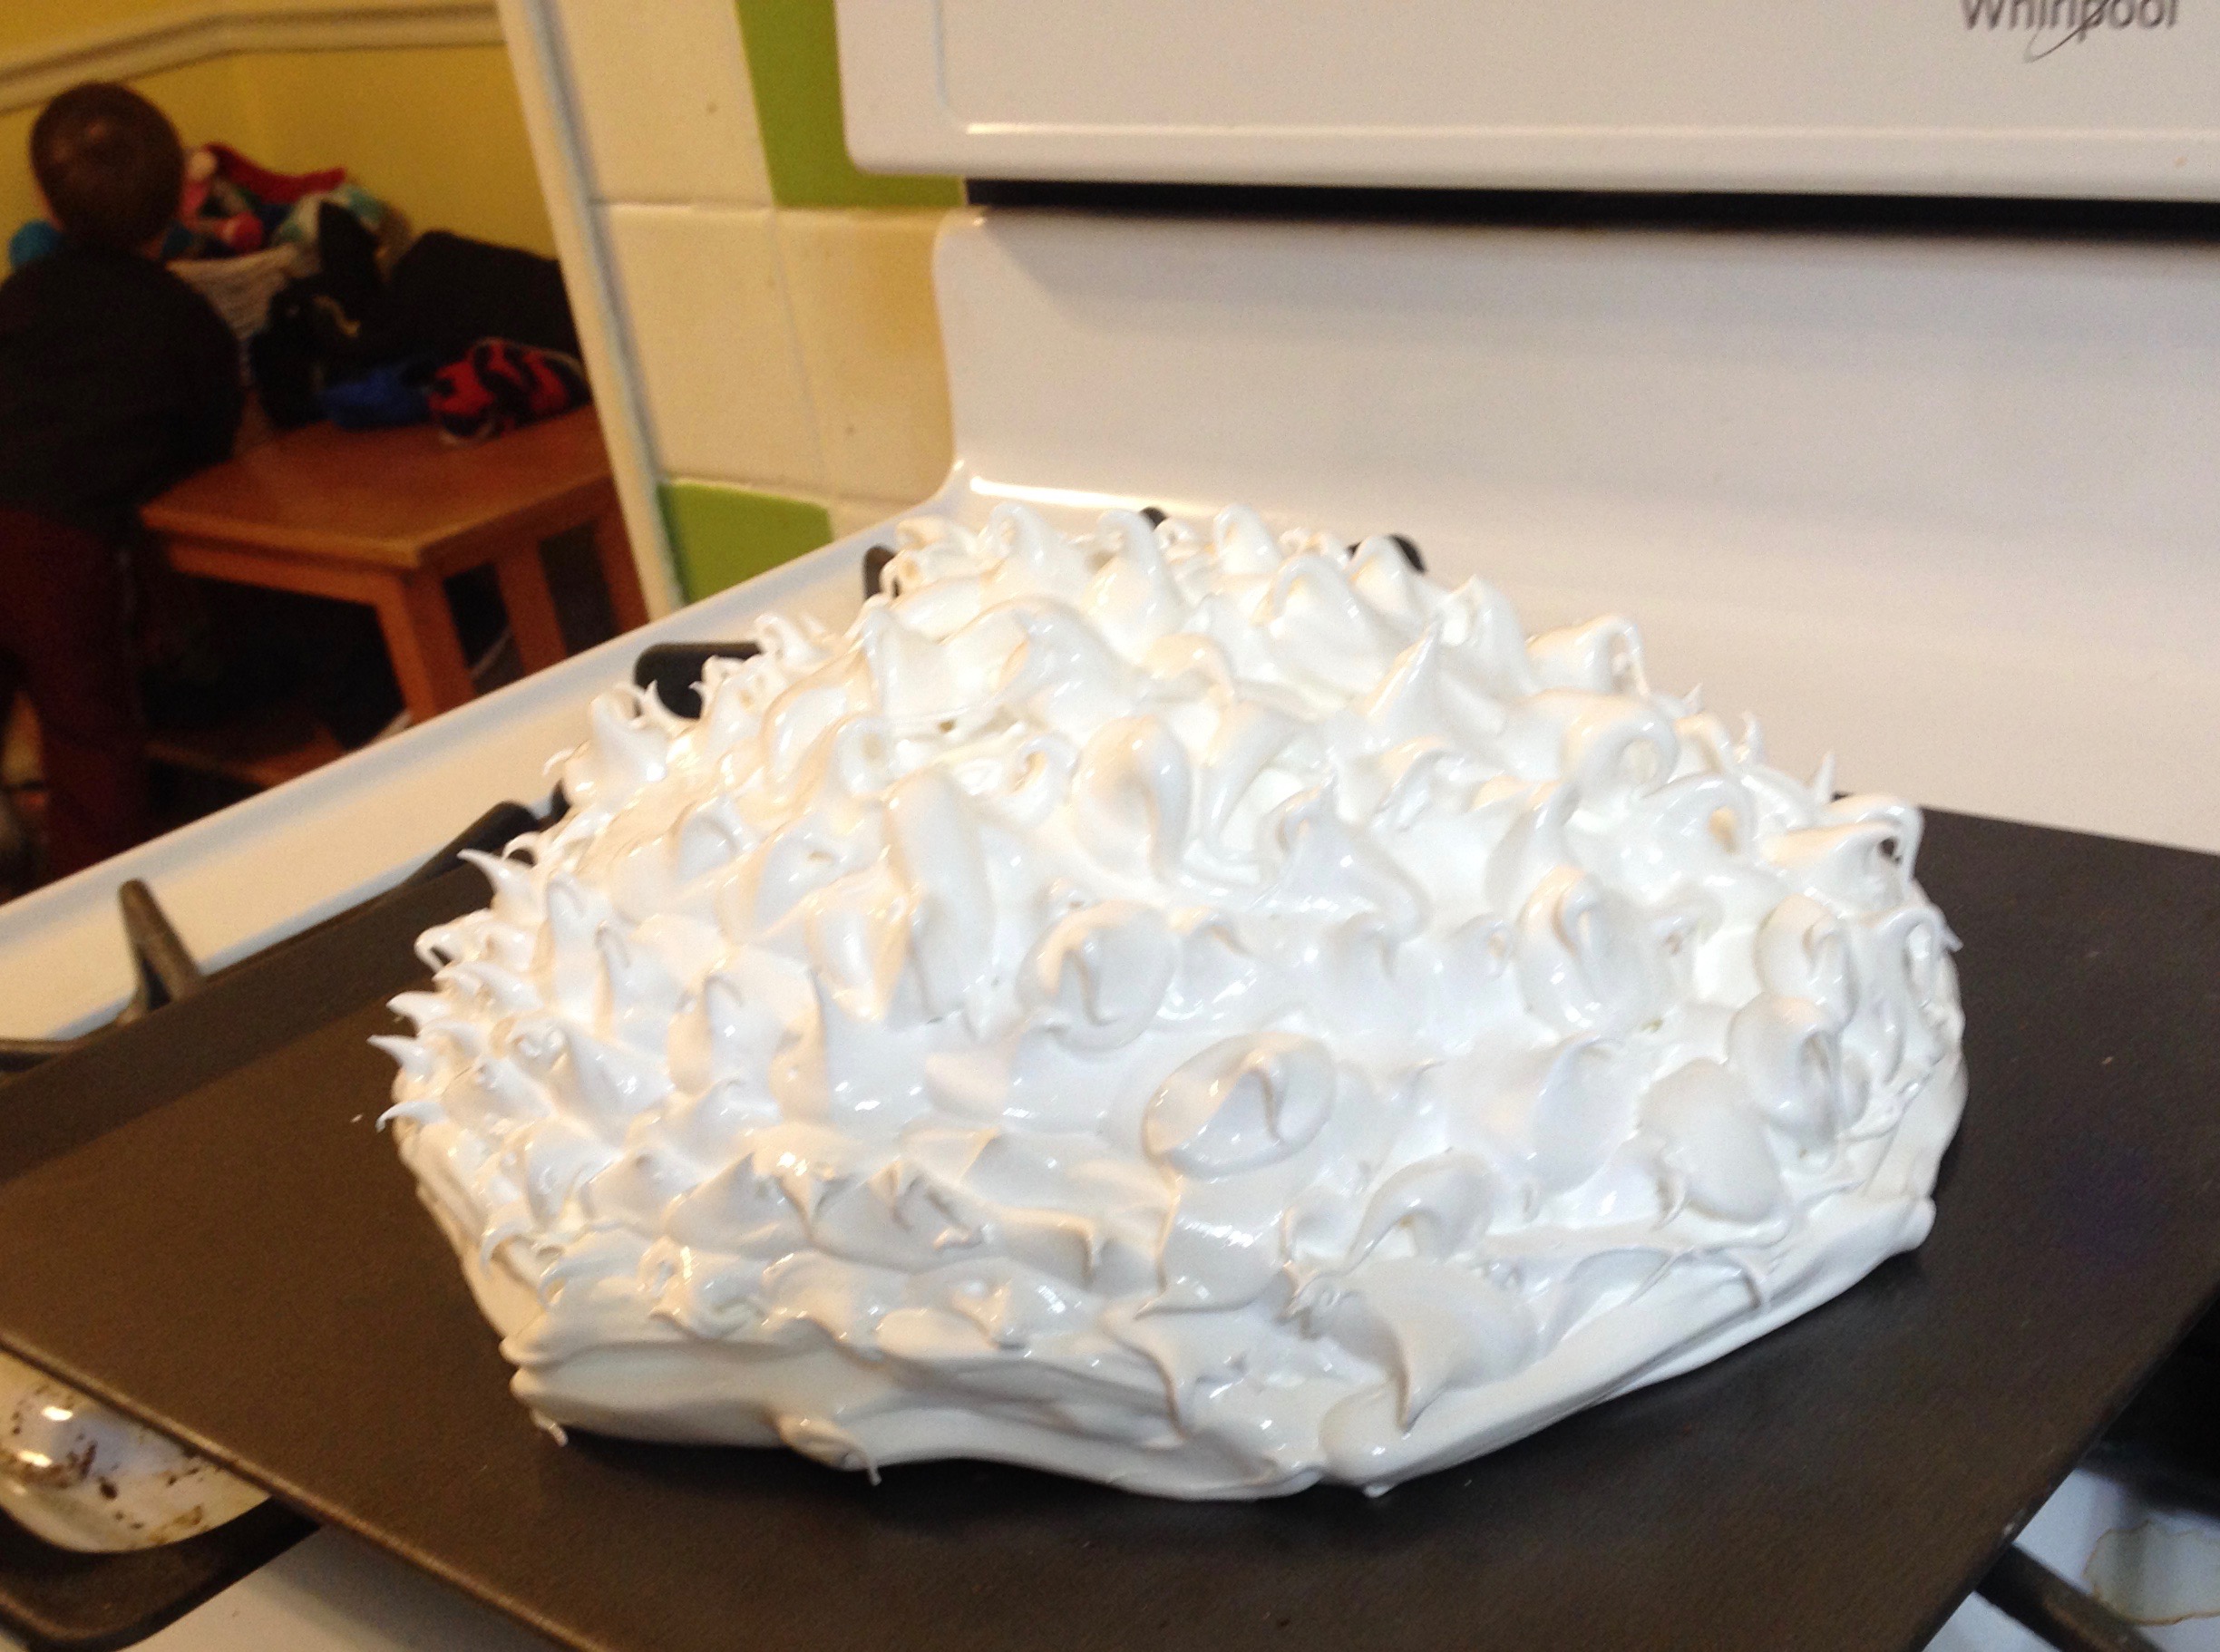
Armed with a propane torch, I caramelized the meringue.
This gives it a nice golden color. The bruleed meringue tastes quite a bit like toasted marshmallow. The consistency is similar as well.
Here is the finished product. The ice cream survived the blow torch!
This dessert is very good, but also very rich. I kind of wish that we had made it when company was around so they could help eat it. Having a flaming alcohol presentation would be very grandiose and perfect for a birthday or other special occasion.
All in all, baked Alaska is a fairly simple dessert to whip up because you can cheat quite a bit with store bought ice cream and even a store bought cake mix. I would like to experiment with a key lime pie styled baked Alaska. Perhaps a graham cracker type crust/base with a lime flavored ice cream.
The extent of my baking knowledge up until now has been to follow the instructions on the back of the ready mix boxes. Come along with Shae and myself as we embark on a six week baking challenge where we push our comfort zones and try baking recipes we have never done before!
Week 1 – Eclairs
photo credit: frostingandasmile.com
Eclairs are a filled pastry dessert topped with icing. I don’t think I had ever even eaten an eclair before trying to make one, but they couldn’t be that hard to make, right?
Armed with a photo tutorial from frostingandasmile.com we set to work making our custard filling the night before. We have been watching a lot of the Great British Bake Off show, a lighthearted amateur baking contest. One of the big advantages of working at home is that we have a lot more time. Anyway, back to the custard. It is all cooked and then needs to be chilled before it is injected into the pastries. Did I mention that it is delicious?
The next day we set about making our choux, pronounced shoo, pastry dough. This very wet dough is piped onto baking sheets and when it bakes the moisture in the dough turns into steam and puffs the dough out. This leaves the inside semi-hollow and that is where you put the custard filling. We used a $1 piping kit from dollar tree to pipe the dough out. You could use a ziploc bag with a corner cut off. I did the first batch with a small tip (too small of a tip in hindsight).
Shae opted for no-tip with her batch and they came out to be just the right size. Here they are after coming out of the oven.
The recipe calls for using parchment paper, but parchment paper is quite expensive. We have ordered reusable silicone baking mats for the future. Some of our eclairs were a little burned from leaving them in too long. Oops!
Once the baked pastry has cooled down you need to inject them full of custard. Using a decorating tip, stab one or both ends and squeeze filling into the choux until it starts oozing out. Our custard was quite thick so this was a good hand workout.
Here comes the fun part, the decorating! We started by making up the chocolate ganache. That is a fancy way of saying heated up cream poured over chocolate chips and then melting and mixing the whole thing up to make a slowly hardening glaze. Working quickly, we dunked the top of each eclair into the ganache to coat it. Eventually the ganache will cool completely and re-solidify.
The last step is to add some white chocolate drizzle. The drizzle is simply white chocolate chips melted and drizzled on. They re-solidify once they cool. This seemingly simple step took me three tries! Argh!! I kept burning the chocolate in the melting process. Eventually I got a batch that was melted enough to decorate with but wasn’t burnt.
Tada! Eclairs are best eaten fresh. Otherwise stick them in the refrigerator. Ours tasted pretty good but wouldn’t win any bake offs. I learned a lot about chocolate and how best to pipe choux pastry onto a baking sheet. We also got to spend some quality time together as a family. Yes, Frugal Boy did plenty of taste testing.
Happy 2016! We had a fun time ringing in the new year and I have a post scheduled about that for next week. Right now, I have something possibly even better. 10 crockpot recipes that you can make up in an afternoon.
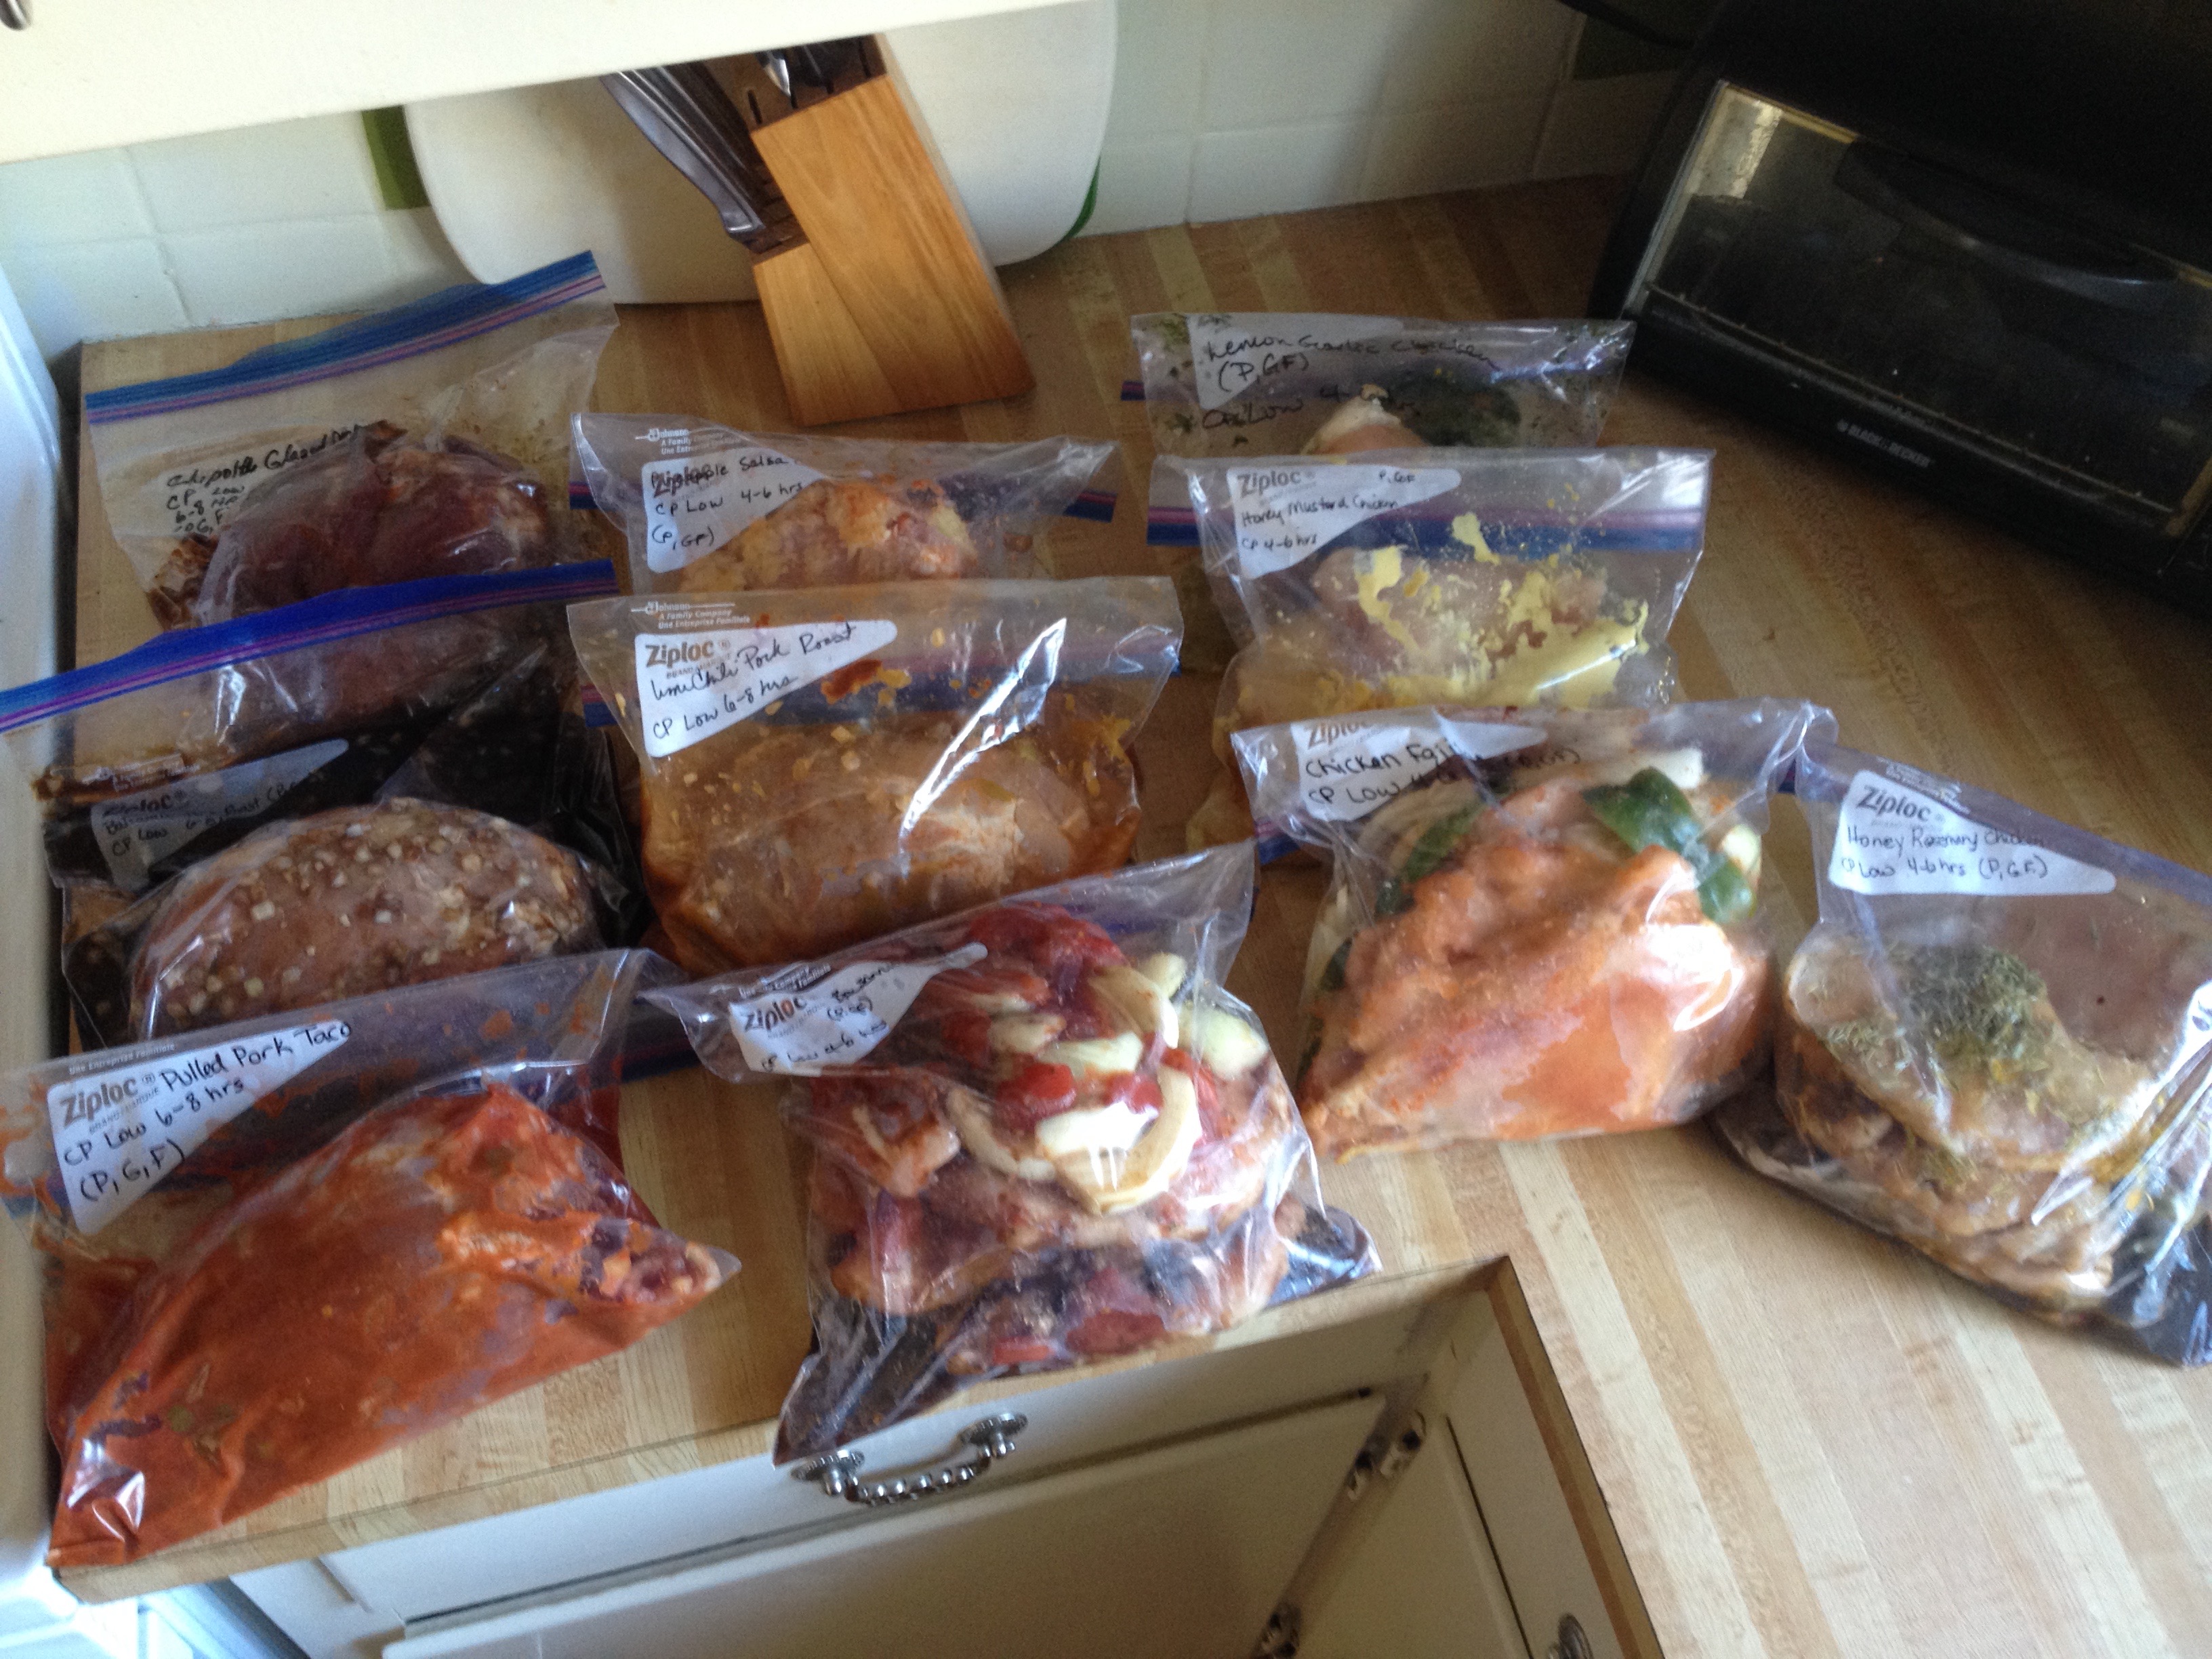
Shae went to a Prep. Freeze. Cook! party sponsored by her employer. The gist of it is that you attend and the host has all of the ingredients ready to go. Everything is chopped, diced, measured, etc etc. All you have to do is assemble the freezer bags with each recipe.
Here is a picture of the finished product.
The meals are:
Balsamic Chicken
Balsamic Pork Roast
Chicken Fajitas
Chipotle Glazed Pork Roast
Honey Rosemary Chicken
Lime Chili Pork Roast
Pulled Pork Taco
Pineapple Salsa Chicken
Lemon Garlic Chicken
Honey Mustard Chicken
The cost of the class/party was $113. The major benefit was the convenience of it all. In just under two hours, Shae had prepped ten meals. She thought that she would be able to assemble each one individually, but due to the overwhelming attendance, 45 people in her session, they split up the group and had each table mass produce a single meal. Thankfully, the organizers also sent home the recipes for each one, so we can make our favorites again.
Balsamic Chicken
Crockpot Low 4-6 hrs
5 chicken breasts
3 cups diced tomatoes
1 onion
1 tsp minced garlic
1/2 cup balsamic vinegar
1 tsp leaf oregano
1 tsp leaf basil
Balsamic Pork Roast
Crockpot Low 6-8 hrs
1 pork roast
1/2 cup diced onion
1/2 Tbsp minced garlic
1 cup chicken broth
1/2 cup balsamic vinegar
Chicken Fajitas
Crockpot Low 4-6 hrs
5 chicken breasts
2 green peppers
1 onion
3/4 cup water
2 Tbsp apple cider vinegar
1 Tbsp lime juice
1 tsp ground cumin seed
1 tsp mild chili powder
1/2 tsp granulated garlic
1/2 tsp ground cayenne pepper
Chipotle Glazed Pork Roast
Crockpot Low 6-8 hrs
1 pork roast
1 Tbsp granulated garlic
1 Tbsp granulated onion
1 tsp salt
1 tsp black pepper
1 Tbsp chipotle puree
3 Tbsp honey
1 Tbsp oil
Honey Rosemary Chicken
Crockpot Low 4-6 hrs
5 chicken breasts
1/3 cup balsamic vinegar
1/3 cup honey
1 Tbsp leaf rosemary
1 cup chicken broth
Lime Chili Pork Roast
Crockpot Low 6-8 hrs
1 pork roast
1/2 cup diced onion
1/2 cup green chilies
1/4 cup lime juice
1 Tbsp mild chili powder
1 tsp granulated garlic
1 tsp ground cumin seed
1 cup chicken broth
Pulled Pork Taco
Crockpot Low 6-8 hrs
1 pork roast
1 cup picante sauce
1/2 cup diced onion
4 tsp taco seasoning
Pineapple Salsa Chicken
Crockpot Low 4-6 hrs
5 chicken breasts
2 cups crushed pineapple
1 cup picante sauce
Lemon Garlic Chicken
Crockpot Low 4-6 hrs
5 chicken breasts
1 tsp minced garlic
3 Tbsp parsley flakes
1/2 cup lemon juice
2 tsp lemon pepper seasoning
1 cup chicken broth
Honey Mustard Chicken
Crockpot Low 4-6 hrs
5 chicken breasts
1/4 cup honey
1/2 cup dijon mustard
1/2 cup chicken broth
So hit up your local GFS store and get 30 chicken breasts, 4 pork roasts, and misc seasonings and get prepping!
and not a creature was stirring, not even a mouse because I just bought eight more mouse traps. If you recall, we have a bit of a mouse problem in our house as they have set up shop in the drop ceiling above our bed. Ewwww. Anyway, while I was at the store I perused their selection of 50% off Christmas decorations. This year our various strands of decorative lights had all given up the ghost and I am way to frugal to pay retail. At 50% off though I caved and bought a few strands of Christmas lights to do some last minute decorating. I figure in two days everything will be at 75% off so that would be the ideal time to stock up for next year.
Today, with Shae’s help I also finished making our homemade ravioli that we are giving away to friends and neighbors.
So far we have made a basic spinach & ricotta, butternut squash & gorgonzola, butternut squash & goat cheese cranberry, and our final most refined one was sweet potato & gorgonzola ravioli. We experimented with different dough recipes, rest times, rolling thickness, and cut out diameters before finding what we considered to be a tasty ravioli. I’ve made over 250 ravioli and at 2 minutes a piece it has definitely been a gift from the heart. Next year it may be back to easy and quick sugar cookie cutouts. Now that’s a sentence I’d never thought I would hear!
Here is one last frugal tip before I sign off and enjoy our traditional Christmas duck. If you are driving, make sure that your car tires are fully inflated. Under inflated tires reduces gas mileage and prematurely wears the tire. I checked all four tires on our car and found that they all needed some topping off.
Merry Christmas to all and to all a good night (except for those damn mice).